> ## Documentation Index
> Fetch the complete documentation index at: https://moengage-user-guide.mintlify.site/llms.txt
> Use this file to discover all available pages before exploring further.
# Personalize Content Using Content APIs
# Overview
Content APIs allow you to create personalized campaigns by fetching data dynamically at the time of sending the campaign based on recommendations, coupons, or other Personalization APIs. Such targeted, relevant, and timely communication has [much better engagement and conversion rates](https://www.moengage.com/blog/power-of-push-notifications/ "https://www.moengage.com/blog/power-of-push-notifications/") than generic email campaigns.
Before starting your journey with content APIs, you must add a content API to MoEngage. For more information, refer to [Content APIs](/user-guide/campaigns-and-channels/getting-started/campaign-content/content-apis).
After adding the API to MoEngage, you can create campaigns using any existing content templates with API calls embedded in the content. These campaigns can contain placeholders for different SKUs, with the required formatting, segmentation, and triggering schedules.
# Channels That Support Personalization Using Content APIs
You can add Content APIs to the campaigns sent using the following channels:
| Channel | Supports Personalization? |
| -------------------------------------------------------------------------------------------------------------- | ------------------------- |
| [Push (Mobile and Web Push)](/user-guide/campaigns-and-channels/mobile-push/create/personalize-push-campaigns) | Yes |
| [Email](/user-guide/campaigns-and-channels/email/create/personalize-email-content) | Yes |
| [SMS](/user-guide/campaigns-and-channels/sms-mms-and-rcs/sms/personalize-sms-campaign) | Yes |
| [In-app Messaging](/user-guide/campaigns-and-channels/in-app-message/create/create-in-app-campaign) | Yes |
| [On-Site Messaging](/user-guide/campaigns-and-channels/on-site-message/create/personalization-of-osm-content) | Yes |
| Cards | No |
| [WhatsApp](/user-guide/campaigns-and-channels/whatsapp/create/personalize-whatsapp-campaign) | Yes |
| [Connectors](/user-guide/campaigns-and-channels/connectors/create/create-a-connector-campaign) | Yes |
| Facebook Audience | No |
| Google Ads Audience | No |
You can personalize Content APIs using user attributes. Personalization is also possible for event attributes when the event is linked to the same campaign.
# Personalize Using Content APIs
You need to perform the following steps to personalize content using Content APIs:
1. [Add Content API to MoEngage](/user-guide/campaigns-and-channels/getting-started/message-personalization/personalize-content-using-content-apis#add-content-api-to-moengage)
2. [Use Content API to create personalized campaigns](/user-guide/campaigns-and-channels/getting-started/message-personalization/personalize-content-using-content-apis#create-a-personalized-campaign)
## Add Content API to MoEngage
To set up Content API for your MoEngage campaigns, perform the following steps:
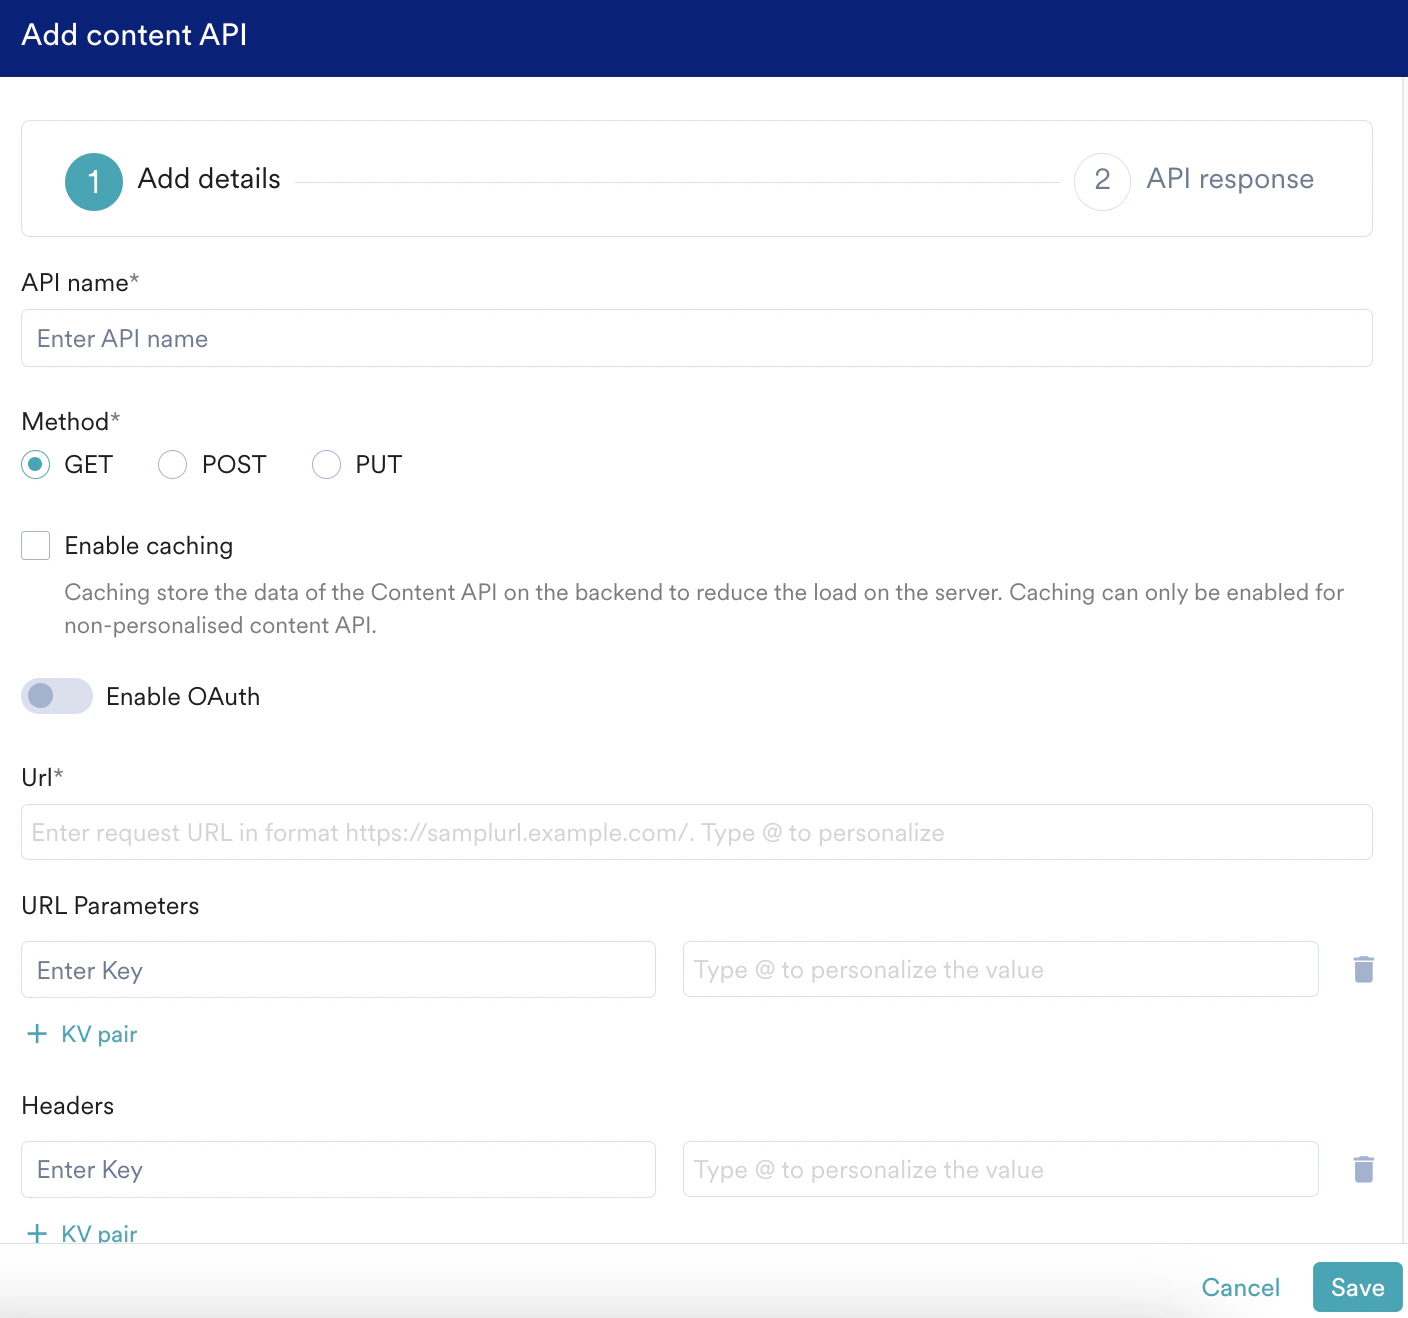 1. In MoEngage, go to **Dashboard** > **Settings** > **APIs**, and then click the **Content API** tab.
2. Click **Add**.
3. On the **Add Content API** page, enter the following details:
| Field | Description |
| ------------------------ | ---------------------------------------------------------------------------------------------------------------------------------------------------------------------------------------------------------------------------------------------------- |
| **API Name** | Type the Content API name |
| **API Type** | Select the type as *Single*. |
| **API URL** | Type the complete URL of the Content API. |
| **Header** | Click the plus sign and type the key value for the headers used in the Content API |
| **Key Value Parameters** | Click the plus sign to add key value for the parameters used in the Content API. Use “@” in the value field to choose from the list of pre-defined user attributes. The parameters cannot be personalized using Event attributes in the value field. |
4. Click **Save**.
## Create a Personalized Campaign
After you add Content API to MoEngage, you can create personalized campaigns with Content APIs.
In step 2, "Content," of the campaign creation, use the *ContentApi* variable to access all the configured Content API sources. You can use the Content API by directly calling the *ContentApi* variable in the code or by choosing the required content API from the Personalization editor:
1. Type *@* in the content editor of your campaign.
2. On the Personalization dialog box, click the **Data personalization** tab.
3. In the **Select attribute** list, click the Content API created.
1. In MoEngage, go to **Dashboard** > **Settings** > **APIs**, and then click the **Content API** tab.
2. Click **Add**.
3. On the **Add Content API** page, enter the following details:
| Field | Description |
| ------------------------ | ---------------------------------------------------------------------------------------------------------------------------------------------------------------------------------------------------------------------------------------------------- |
| **API Name** | Type the Content API name |
| **API Type** | Select the type as *Single*. |
| **API URL** | Type the complete URL of the Content API. |
| **Header** | Click the plus sign and type the key value for the headers used in the Content API |
| **Key Value Parameters** | Click the plus sign to add key value for the parameters used in the Content API. Use “@” in the value field to choose from the list of pre-defined user attributes. The parameters cannot be personalized using Event attributes in the value field. |
4. Click **Save**.
## Create a Personalized Campaign
After you add Content API to MoEngage, you can create personalized campaigns with Content APIs.
In step 2, "Content," of the campaign creation, use the *ContentApi* variable to access all the configured Content API sources. You can use the Content API by directly calling the *ContentApi* variable in the code or by choosing the required content API from the Personalization editor:
1. Type *@* in the content editor of your campaign.
2. On the Personalization dialog box, click the **Data personalization** tab.
3. In the **Select attribute** list, click the Content API created.
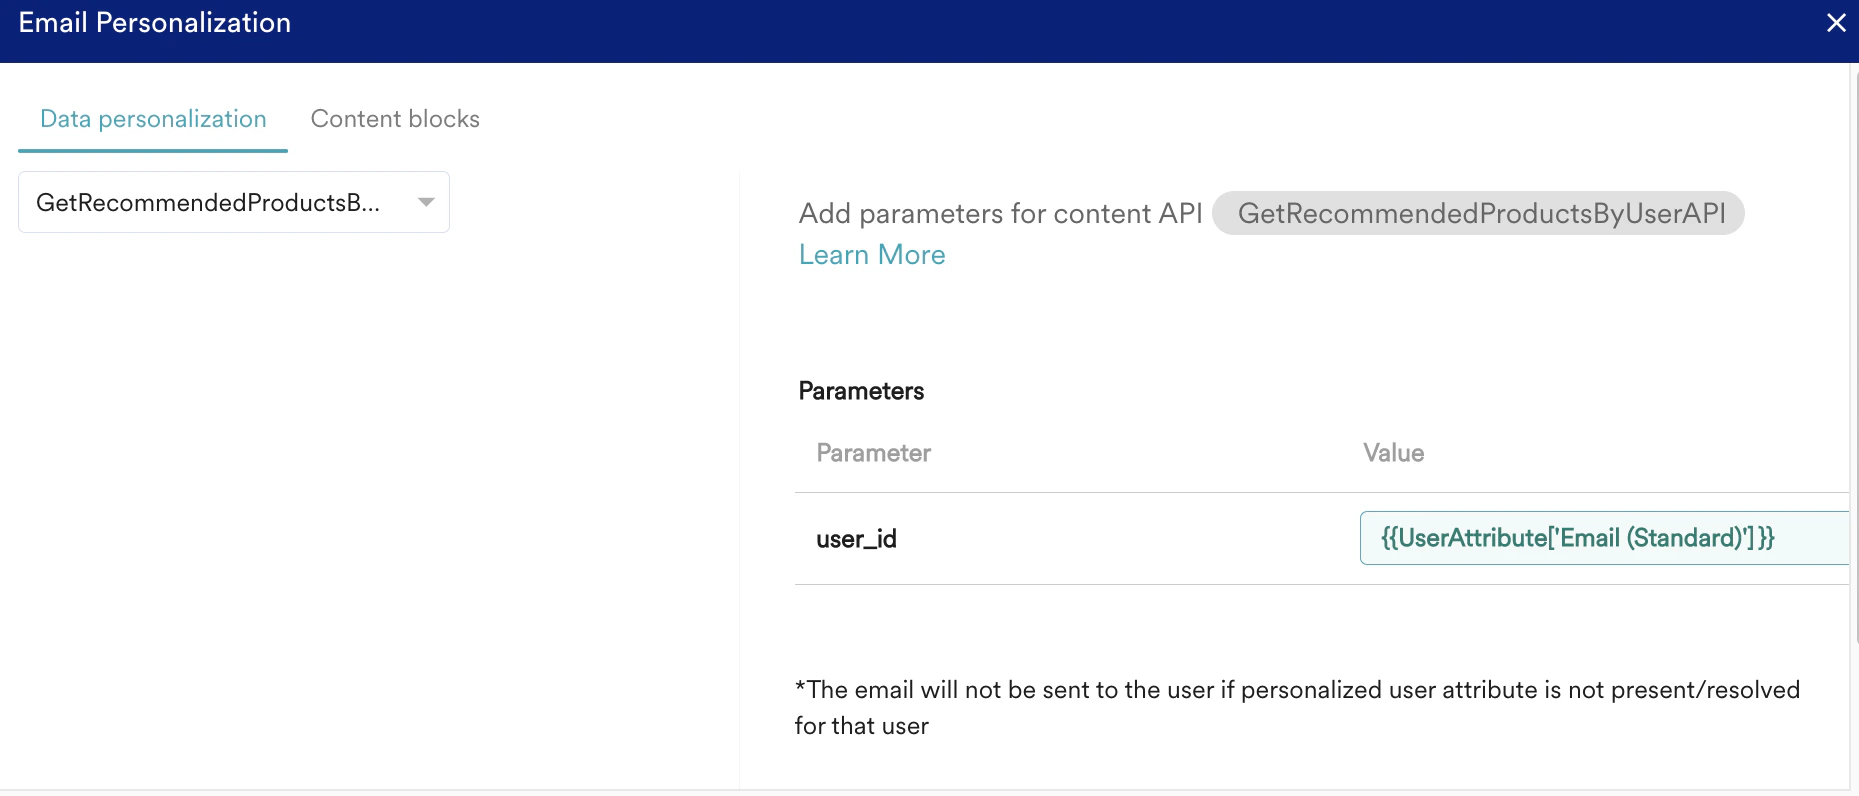
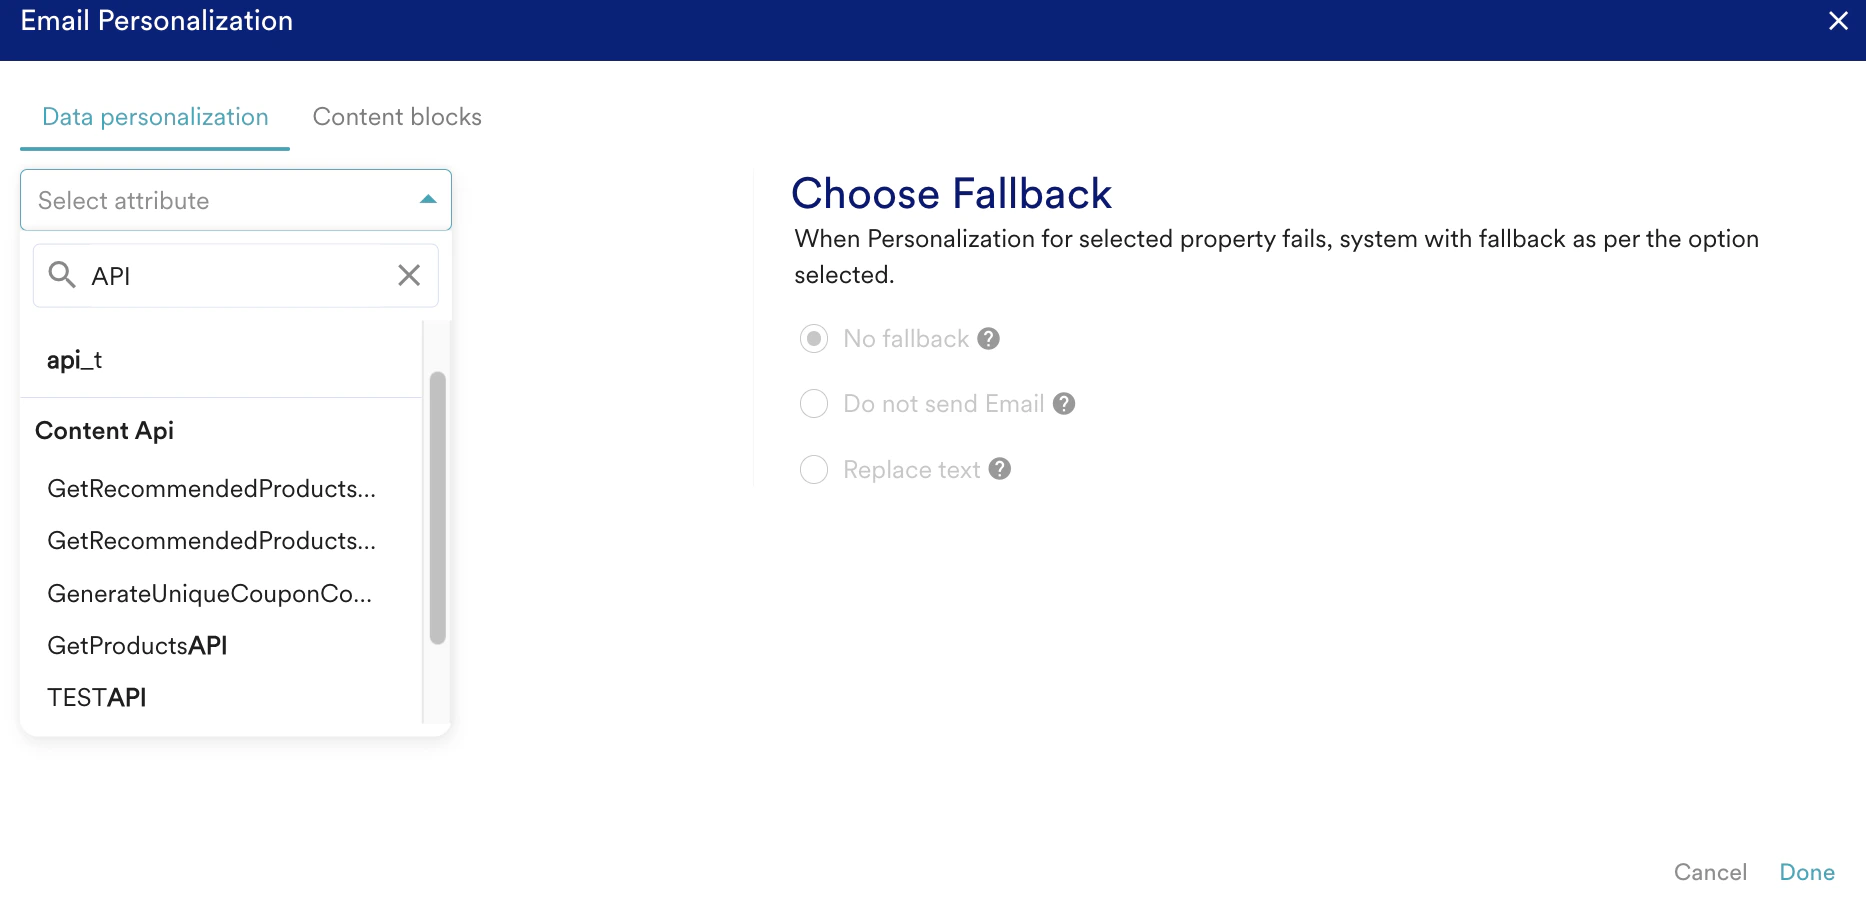 4. Click **Done**. The Content API gets added to the message.\
For example, the Content API dynamically fetches the recommended products for a given user ID in the following screenshot. You can use this feature to engage users with product recommendations and nudge them toward making a purchase. The value parameter can be a dynamic parameter (type @ to add a user attribute to be passed to the Content API) or a static parameter that can be keyed in the value section.
4. Click **Done**. The Content API gets added to the message.\
For example, the Content API dynamically fetches the recommended products for a given user ID in the following screenshot. You can use this feature to engage users with product recommendations and nudge them toward making a purchase. The value parameter can be a dynamic parameter (type @ to add a user attribute to be passed to the Content API) or a static parameter that can be keyed in the value section.
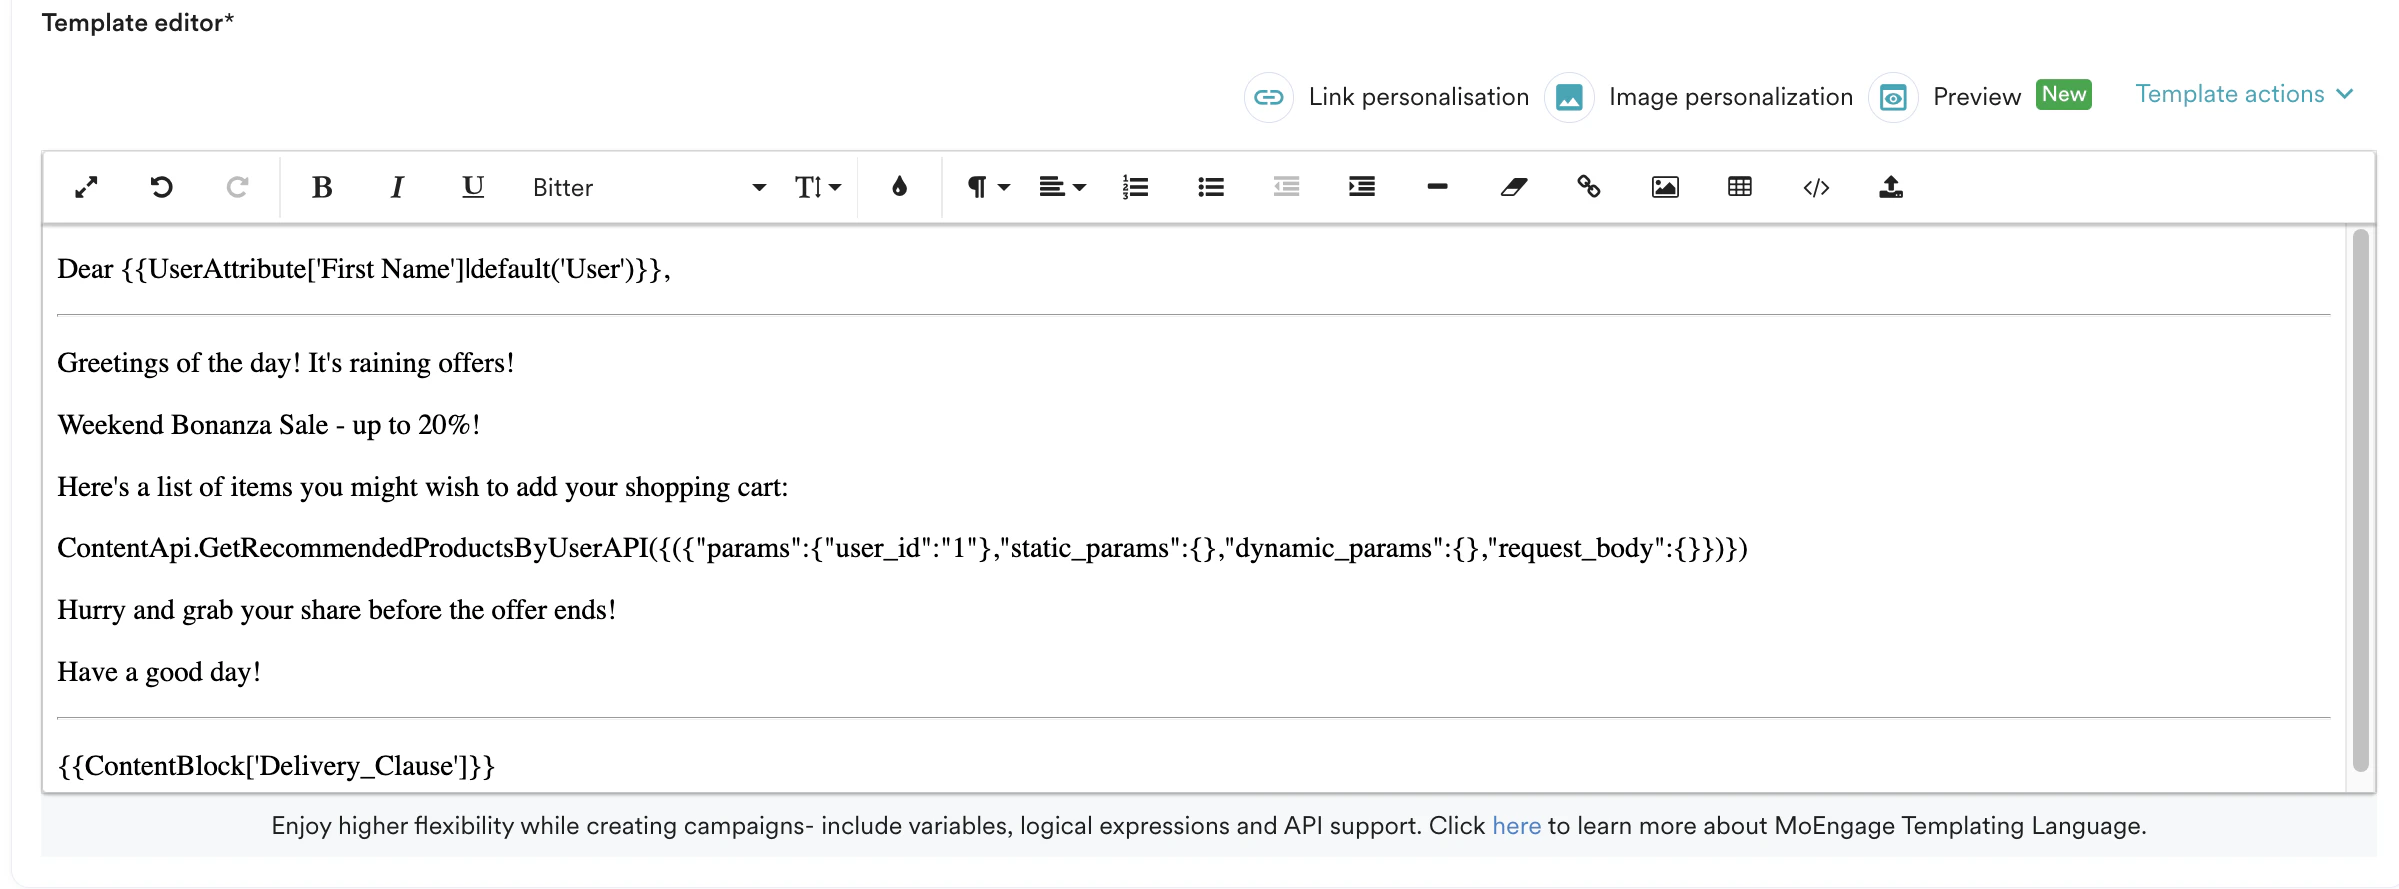
 When added, this appears as follows in the Template editor:
 5. Click **Preview** to see how the user will see it in their inbox.
### Example 1
You may have a *cart* data source with the following JSON:
```json JSON wrap theme={null}
{
"date": "March 10, 2016",
"items": [
{
"name": "belt",
"image": "http://mydomain.com/images/1001.jpg",
"price": 11
}, {
"name": "shoes",
"image": "http://mydomain.com/images/1002.jpg",
"price": 12
}, {
"name": "hat",
"image": "http://mydomain.com/images/1003.jpg",
"price": 10
}
]
}
```
In the content creation, use the following code:
```text Code wrap theme={null}
{% for cart\_item in ContentApi.cart().items %}
## {{ cart\_item.name }}: ${{ cart\_item.price|round(2) }}
__PROTECTED_6__
{% endfor %}
```
### Example 2
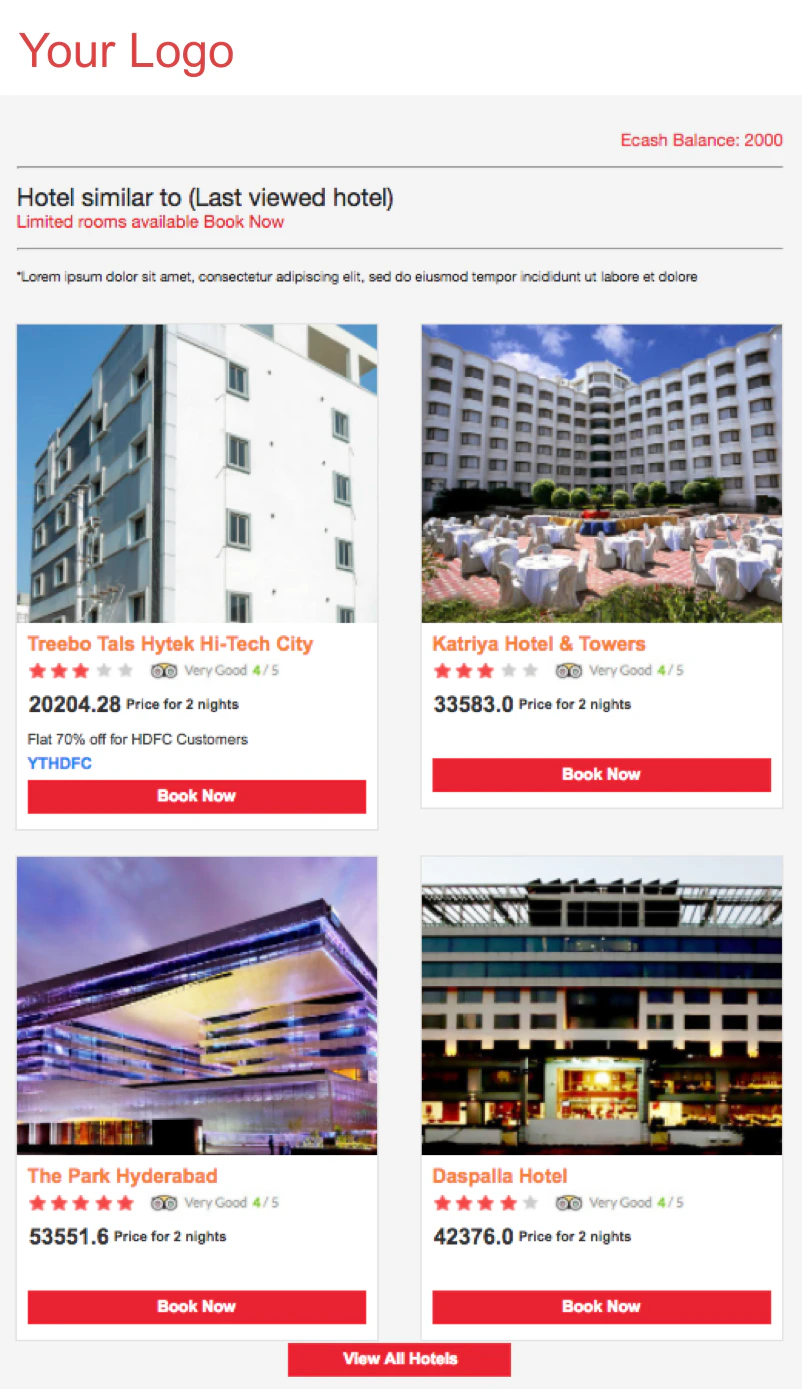
The campaigns contain placeholders for different SKUs (in this case, hotels), along with the required formatting, segmentation, and triggering schedules.
5. Click **Preview** to see how the user will see it in their inbox.
### Example 1
You may have a *cart* data source with the following JSON:
```json JSON wrap theme={null}
{
"date": "March 10, 2016",
"items": [
{
"name": "belt",
"image": "http://mydomain.com/images/1001.jpg",
"price": 11
}, {
"name": "shoes",
"image": "http://mydomain.com/images/1002.jpg",
"price": 12
}, {
"name": "hat",
"image": "http://mydomain.com/images/1003.jpg",
"price": 10
}
]
}
```
In the content creation, use the following code:
```text Code wrap theme={null}
{% for cart\_item in ContentApi.cart().items %}
## {{ cart\_item.name }}: ${{ cart\_item.price|round(2) }}
__PROTECTED_6__
{% endfor %}
```
### Example 2
The campaigns contain placeholders for different SKUs (in this case, hotels), along with the required formatting, segmentation, and triggering schedules.
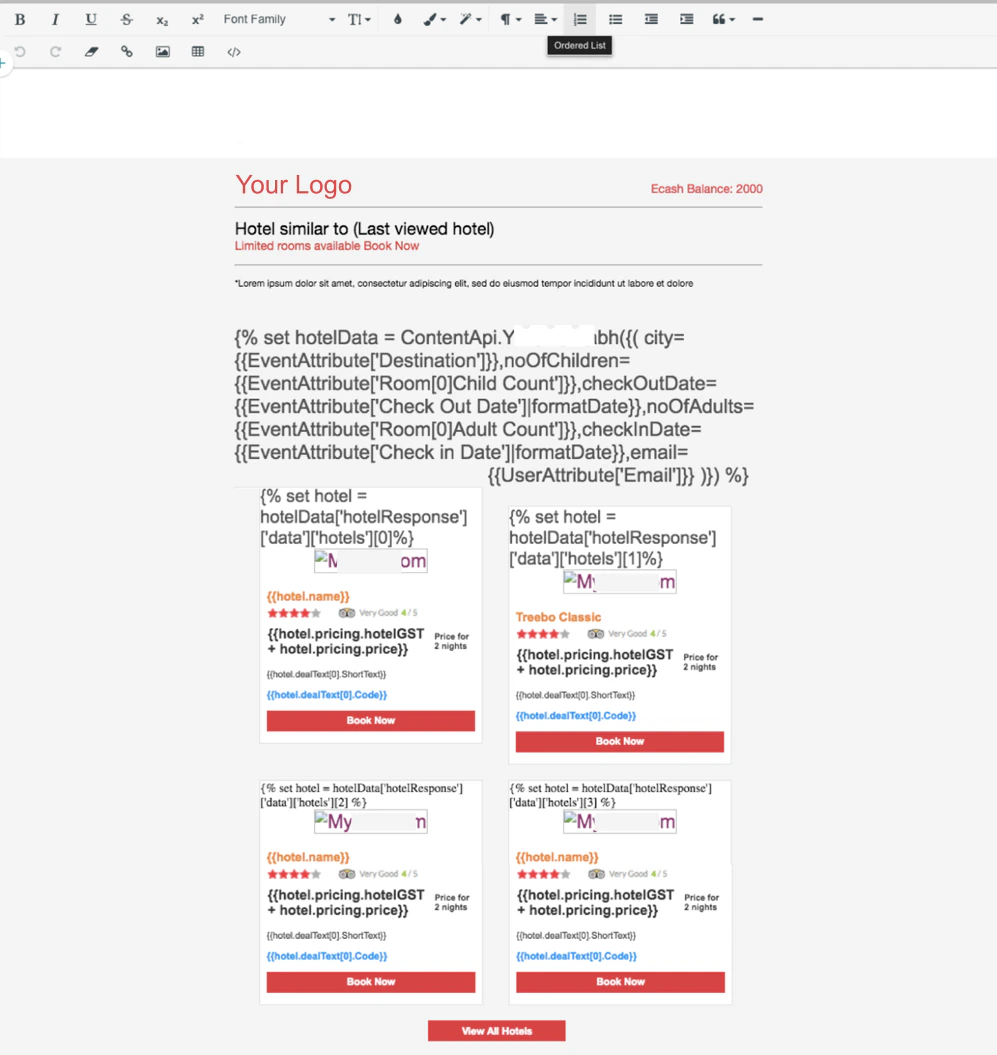 At the time of sending the campaign, the system would:
* Invoke the Content API to fetch hotels recommended for the user based on the search parameters like destination, check-in, and check-out dates, number of adults and children, and so on.
* Populate the campaign with details of the recommended hotels like the name, rating, price, image, and ranking in an HTML-formatted, personalized email.
* Do this for every user belonging to the specified segment dynamically without any manual input.
At the time of sending the campaign, the system would:
* Invoke the Content API to fetch hotels recommended for the user based on the search parameters like destination, check-in, and check-out dates, number of adults and children, and so on.
* Populate the campaign with details of the recommended hotels like the name, rating, price, image, and ranking in an HTML-formatted, personalized email.
* Do this for every user belonging to the specified segment dynamically without any manual input.
 For more information on personalization language, refer to [Templating Language Documentation](/user-guide/campaigns-and-channels/getting-started/message-personalization/jinja-templating-language "/user-guide/campaigns-and-channels/getting-started/message-personalization/jinja-templating-language").