> ## Documentation Index
> Fetch the complete documentation index at: https://moengage-user-guide.mintlify.site/llms.txt
> Use this file to discover all available pages before exploring further.
# Create a Web Personalization Campaign
Ensure that the following configurations are complete:
* [Configure and Integrate Web Personalization](/developer-guide/web-sdk/web-personalization/configure-and-integrate-web-personalization)
* [Web SDK Integration](/developer-guide/web-sdk/web-sdk-integration/basic-integration/web-sdk-integration)
* Contact your customer success manager or the MoEngage Support team with your account name to enable Web Personalization on your MoEngage account.
To create a Web Personalization campaign:
1. On the sidebar menu in MoEngage, hover over the **Engage** menu item  . The **Engage** menu appears.
2. Click **+ New Campaign**.
. The **Engage** menu appears.
2. Click **+ New Campaign**.
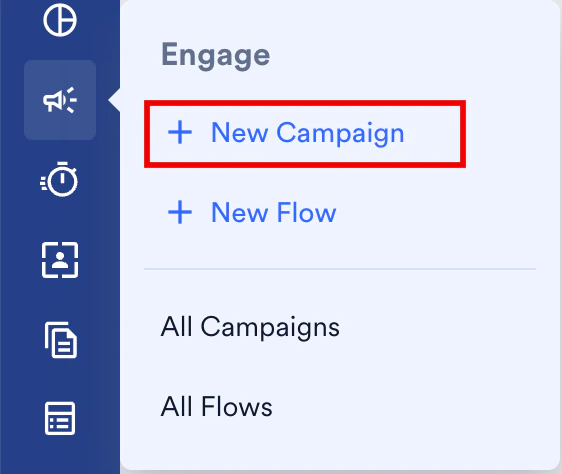 You can also click **All Campaigns** on the **Engage** menu and then click **+ Create campaign** on the All campaigns page.
3. On the **New Campaign** dialog box, under **Personalization**, click **Web**.
You can also click **All Campaigns** on the **Engage** menu and then click **+ Create campaign** on the All campaigns page.
3. On the **New Campaign** dialog box, under **Personalization**, click **Web**.
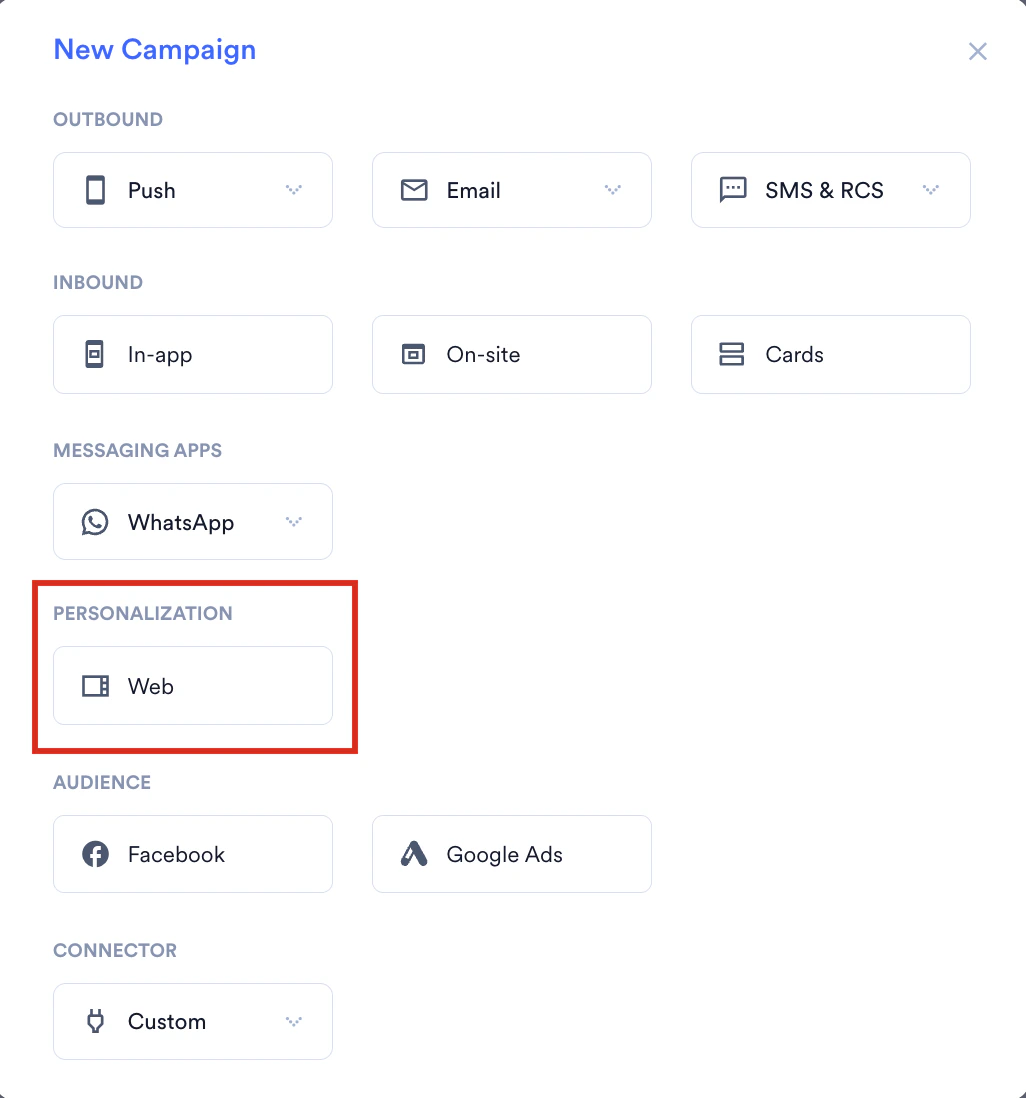 The Web Personalization campaign creation page is displayed.
# Steps to Create a Web Personalization Campaign
The following are the steps to create a Web Personalization campaign:
1. [Segmentation](#step-1:-segmentation): Define the target audience for the campaign.
2. [Campaign Data](#step-2:-campaign-data): Define the content of the campaign to be sent.
3. [Scheduling](#step-3:-scheduling): Define the campaign's delivery schedule and goals.
## Step 1: Segmentation
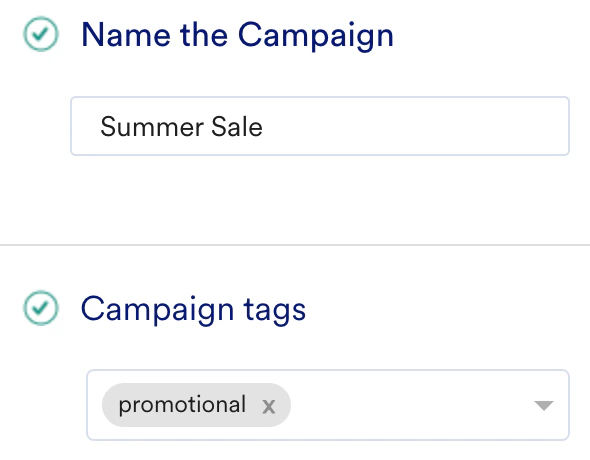
1. Enter the campaign details which consist of the following fields:
* **Campaign name**: Enter the name of the campaign to manage and identify the campaign. The campaign name must have at least five characters, and the limit is 5 to 50 characters.
* **Campaign tags**: Select campaign tags from the drop-down list. You can select a maximum of five tags. For more information, refer to [Campaign Tags](/user-guide/campaigns-and-channels/getting-started/introduction/campaign-tags).
The Web Personalization campaign creation page is displayed.
# Steps to Create a Web Personalization Campaign
The following are the steps to create a Web Personalization campaign:
1. [Segmentation](#step-1:-segmentation): Define the target audience for the campaign.
2. [Campaign Data](#step-2:-campaign-data): Define the content of the campaign to be sent.
3. [Scheduling](#step-3:-scheduling): Define the campaign's delivery schedule and goals.
## Step 1: Segmentation
1. Enter the campaign details which consist of the following fields:
* **Campaign name**: Enter the name of the campaign to manage and identify the campaign. The campaign name must have at least five characters, and the limit is 5 to 50 characters.
* **Campaign tags**: Select campaign tags from the drop-down list. You can select a maximum of five tags. For more information, refer to [Campaign Tags](/user-guide/campaigns-and-channels/getting-started/introduction/campaign-tags).
 2. Check the boxes of the platform that you want to target:
* **Web**
* **Mobile web**
3. Based on how you want the campaign to be triggered, you can select one of the following criteria:
Select this option, if you want to trigger the campaign when the webpage loads.
2. Check the boxes of the platform that you want to target:
* **Web**
* **Mobile web**
3. Based on how you want the campaign to be triggered, you can select one of the following criteria:
Select this option, if you want to trigger the campaign when the webpage loads.  You can select one of the following trigger times for displaying the campaign on your webpage:
* **Immediately**\
The campaign will be displayed immediately after the page load is complete.
You can select one of the following trigger times for displaying the campaign on your webpage:
* **Immediately**\
The campaign will be displayed immediately after the page load is complete.  * **After Delay**The campaign will be displayed after the specified time once the page load is complete.
 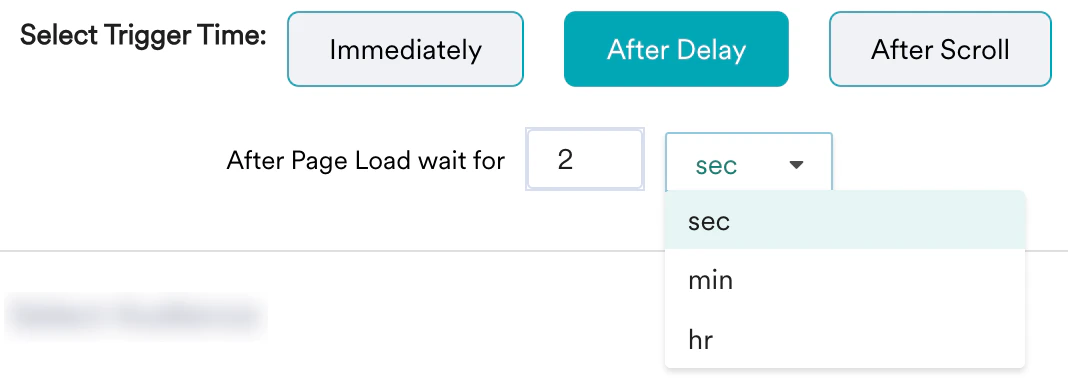 * **After Scroll**The campaign will be displayed as soon as the user scrolls the page by a specified percentage once the page load is complete.
  Select this option, if you want to trigger the campaign on a custom event and its associated event attributes.
  For example, you want to display the campaign only when the user updates the app. In such a case, select the event as *App Update* from the dropdown.\
You can also click **+ Add Attribute** to add attributes to the filter.
For example, you want to display the campaign only when the user updates the app. In such a case, select the event as *App Update* from the dropdown.\
You can also click **+ Add Attribute** to add attributes to the filter.  Events sent via Data API or any other server-side source are not supported as trigger actions.
Select this option, if you want to explicitly fetch the campaign when required.
Events sent via Data API or any other server-side source are not supported as trigger actions.
Select this option, if you want to explicitly fetch the campaign when required.  See [Configure and Integrate Web Personalization](https://developers.moengage.com/hc/en-us/articles/360062008891-Configure-and-Integrate-Web-Personalization#h_01H9KJ4PQZSEPHF3VA6PMK63WZ) to use this method.
4. Select the required audience as shown below:
* **All Users**
* **Customers that satisfy the filters** as mentioned below: \\
This filter option allows you to target the users based on user properties such as first seen, last seen, city, and so on. Follow the steps below to use the **User Properties** filter:
1. Click the **User Properties** tab and then select the desired attribute in the drop-down list.
See [Configure and Integrate Web Personalization](https://developers.moengage.com/hc/en-us/articles/360062008891-Configure-and-Integrate-Web-Personalization#h_01H9KJ4PQZSEPHF3VA6PMK63WZ) to use this method.
4. Select the required audience as shown below:
* **All Users**
* **Customers that satisfy the filters** as mentioned below: \\
This filter option allows you to target the users based on user properties such as first seen, last seen, city, and so on. Follow the steps below to use the **User Properties** filter:
1. Click the **User Properties** tab and then select the desired attribute in the drop-down list.  For example, numeric attributes can have filter conditions such as 'is equal to', 'is not equal to', 'is between', and so on, while string attributes have different filters.\
To learn more, see [Filters in Segmentation](/user-guide/segment/advanced-concepts/filters-in-segmentation).
2. Enter the filter value(s) to create the desired user segment.
You can add more than one filter by clicking the **Add Filters** button and using either AND or OR conditions.
This filter option allows you to target the users based on user action, such as app/site opened, viewed product, and so on. Follow the steps below to use the **User Behavior** filter:
1. Click the **User behavior** tab.
For example, numeric attributes can have filter conditions such as 'is equal to', 'is not equal to', 'is between', and so on, while string attributes have different filters.\
To learn more, see [Filters in Segmentation](/user-guide/segment/advanced-concepts/filters-in-segmentation).
2. Enter the filter value(s) to create the desired user segment.
You can add more than one filter by clicking the **Add Filters** button and using either AND or OR conditions.
This filter option allows you to target the users based on user action, such as app/site opened, viewed product, and so on. Follow the steps below to use the **User Behavior** filter:
1. Click the **User behavior** tab. 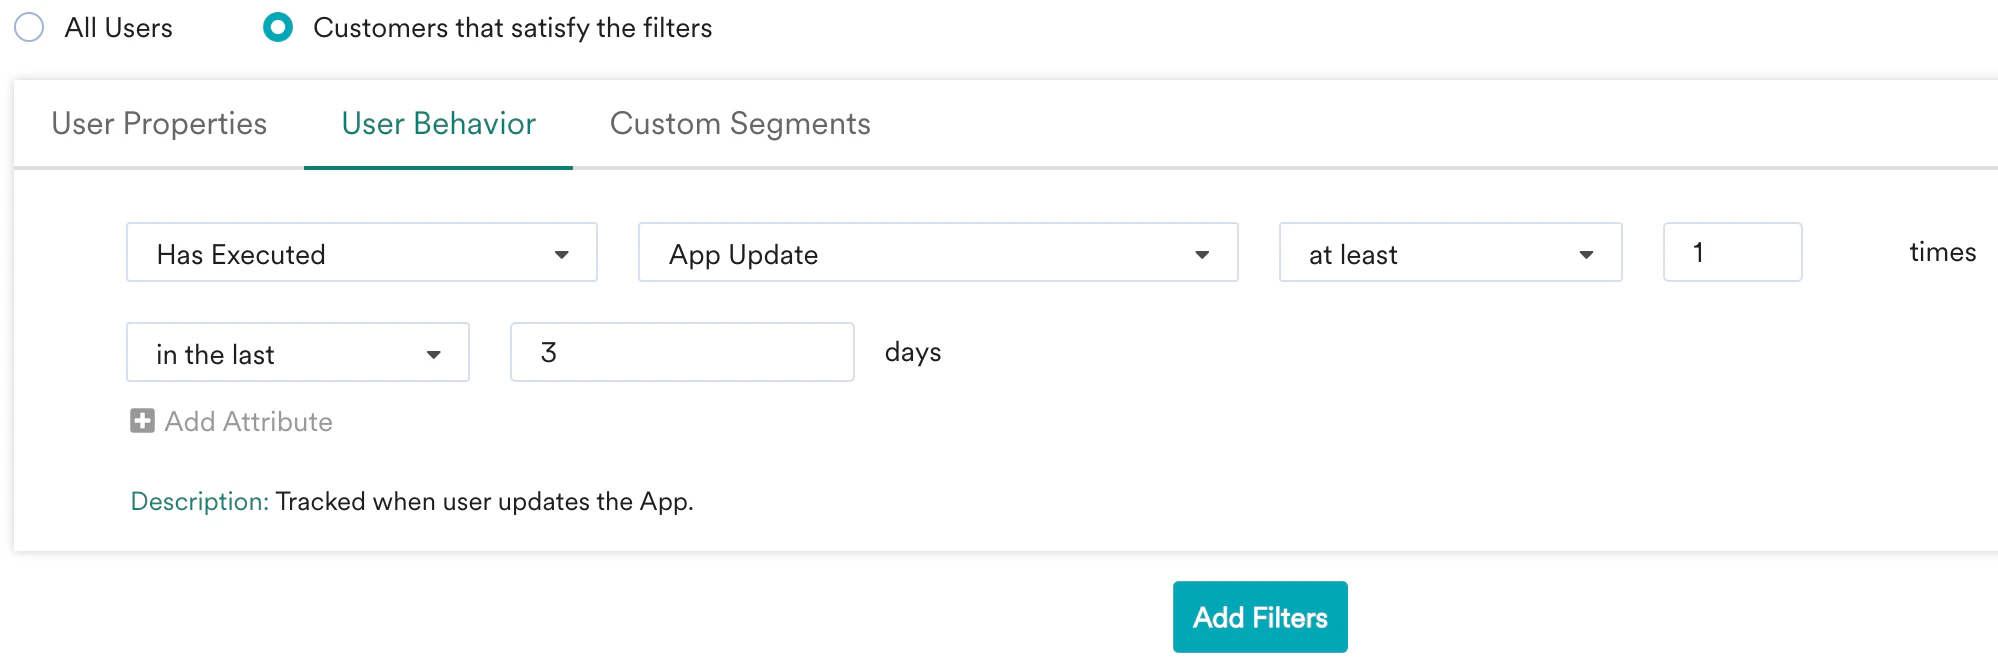 2. Select the execution condition and the desired user activity (event).
3. Enter the event frequency and time duration for the event execution.
4. Click **+ Attributes** and add an event attribute with a filter condition.
5. Enter the filter value(s) to create a rule.
You can add more than one filter by clicking the **+ Add Filters** and using either AND or OR conditions.
This filter option allows you to select a custom segment as the target audience. Follow the steps below to use the **Custom Segments** filter:
1. Click the **Custom Segments** tab and then select the desired custom segment from the dropdown.
2. Select the execution condition and the desired user activity (event).
3. Enter the event frequency and time duration for the event execution.
4. Click **+ Attributes** and add an event attribute with a filter condition.
5. Enter the filter value(s) to create a rule.
You can add more than one filter by clicking the **+ Add Filters** and using either AND or OR conditions.
This filter option allows you to select a custom segment as the target audience. Follow the steps below to use the **Custom Segments** filter:
1. Click the **Custom Segments** tab and then select the desired custom segment from the dropdown.  You can add more than one filter by clicking the **+ Add Filters** and using either AND or OR conditions.
* Additionally, you can also perform the following actions:
* **Exclude Users**: Select this checkbox to exclude users from the campaign based on the following condition:
* User Properties
* User Behavior
* Custom Segments
* **Show Count**: Click the Show Count button to display the total number of users present in the configured segment.
* **Gobal control group**: The Global control group toggle is enabled by default to exclude the users in the global control group from receiving the campaign so that the campaign is accessible to the configured target audience. For more information, see [Control Groups](/user-guide/campaigns-and-channels/getting-started/introduction/control-groups).
* **Campaign control group**: You can enable this toggle if you don't want to send the campaign to the users added in campaign control group. For more information, see [Control Groups](/user-guide/campaigns-and-channels/getting-started/introduction/control-groups).
5. Click **Next**.
If you have the [*Portfolio*](/user-guide/settings/account/portfolio/portfolio) feature enabled, you can create user segments by combining user data and behavior from different apps and websites (Projects) within your workspace. For more information, refer to [Segmentation in a Multi-Project Portfolio](/user-guide/segment/advanced-concepts/segmentation-in-a-multi-project-portfolio).
## Step 2: Campaign Data
This section describes how to add content to the campaign as described below:
1. Enter the ****Campaign Tag****.
A Campaign Tag is used to fetch the correct campaign data from a list of active campaigns for your account in MoEngage.\
For example, say you have 3 active campaigns for your website -\
Campaign 1: For Home Page Banner\
Campaign 2: For Best Selling Products on Home Page\
Campaign 3: For Recommended Products on Home Page To help deliver the appropriate campaign data to the relevant field on your Home Page, you need to set a campaign tag which will help fetch correct data. When a user opens your website's homepage, MoEngage SDK will fetch the above 3 campaigns associated with the same Campaign Tag and deliver the personalized data to the website.
2. Enter your personalized **Campaign Data**.\
The campaign data is the message that will be delivered to your users when they open your webpage. This data should be in a JSON format and can contain Image URL, Text or any other key value pairs that will be consumed by your website.
You can add more than one filter by clicking the **+ Add Filters** and using either AND or OR conditions.
* Additionally, you can also perform the following actions:
* **Exclude Users**: Select this checkbox to exclude users from the campaign based on the following condition:
* User Properties
* User Behavior
* Custom Segments
* **Show Count**: Click the Show Count button to display the total number of users present in the configured segment.
* **Gobal control group**: The Global control group toggle is enabled by default to exclude the users in the global control group from receiving the campaign so that the campaign is accessible to the configured target audience. For more information, see [Control Groups](/user-guide/campaigns-and-channels/getting-started/introduction/control-groups).
* **Campaign control group**: You can enable this toggle if you don't want to send the campaign to the users added in campaign control group. For more information, see [Control Groups](/user-guide/campaigns-and-channels/getting-started/introduction/control-groups).
5. Click **Next**.
If you have the [*Portfolio*](/user-guide/settings/account/portfolio/portfolio) feature enabled, you can create user segments by combining user data and behavior from different apps and websites (Projects) within your workspace. For more information, refer to [Segmentation in a Multi-Project Portfolio](/user-guide/segment/advanced-concepts/segmentation-in-a-multi-project-portfolio).
## Step 2: Campaign Data
This section describes how to add content to the campaign as described below:
1. Enter the ****Campaign Tag****.
A Campaign Tag is used to fetch the correct campaign data from a list of active campaigns for your account in MoEngage.\
For example, say you have 3 active campaigns for your website -\
Campaign 1: For Home Page Banner\
Campaign 2: For Best Selling Products on Home Page\
Campaign 3: For Recommended Products on Home Page To help deliver the appropriate campaign data to the relevant field on your Home Page, you need to set a campaign tag which will help fetch correct data. When a user opens your website's homepage, MoEngage SDK will fetch the above 3 campaigns associated with the same Campaign Tag and deliver the personalized data to the website.
2. Enter your personalized **Campaign Data**.\
The campaign data is the message that will be delivered to your users when they open your webpage. This data should be in a JSON format and can contain Image URL, Text or any other key value pairs that will be consumed by your website.  Test campaigns enable previewing the campaign on a test device to ensure that your notification is conveyed in the manner that you desire. You can test the campaign you created by selecting any of the following options and providing the value for the attribute chosen for your test user:
* Unique ID
* Email ID
* Mobile Number (Registered With MoEngage)
* Mobile Number (External/Not Registered with MoEngage)
* Google Advertising identifier
* iOS Identifier For Advertising
* Device Push Token
* Custom Segment
Test campaigns enable previewing the campaign on a test device to ensure that your notification is conveyed in the manner that you desire. You can test the campaign you created by selecting any of the following options and providing the value for the attribute chosen for your test user:
* Unique ID
* Email ID
* Mobile Number (Registered With MoEngage)
* Mobile Number (External/Not Registered with MoEngage)
* Google Advertising identifier
* iOS Identifier For Advertising
* Device Push Token
* Custom Segment 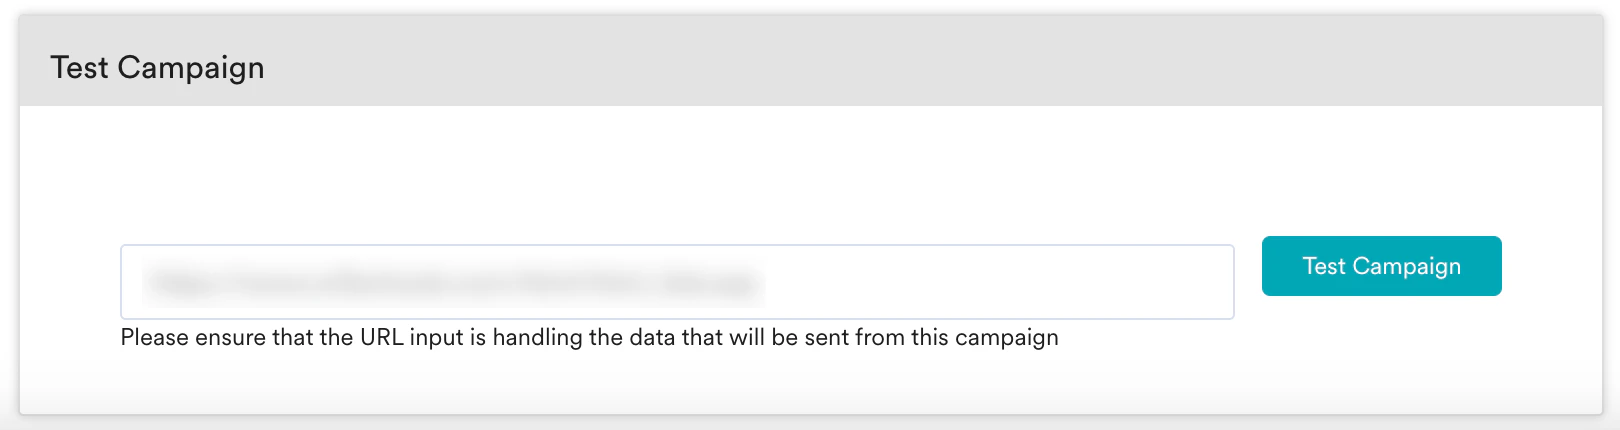 3. Click **Next**.
## Step 3: Scheduling
This section contains the following:
1. [Campaign Timing](#WP-Campaign-Timing): Choose when the campaign should be delivered to your users and the periodicity of delivery.
2. [Conversion Goals](#WP-Conversion-Goals): Choose the conversion goals and revenue metrics to be tracked for the campaign.
3. [Campaign Priority](#WP-Campaign-Priority): Select the campaign's priority value for display.
### Campaign Timing
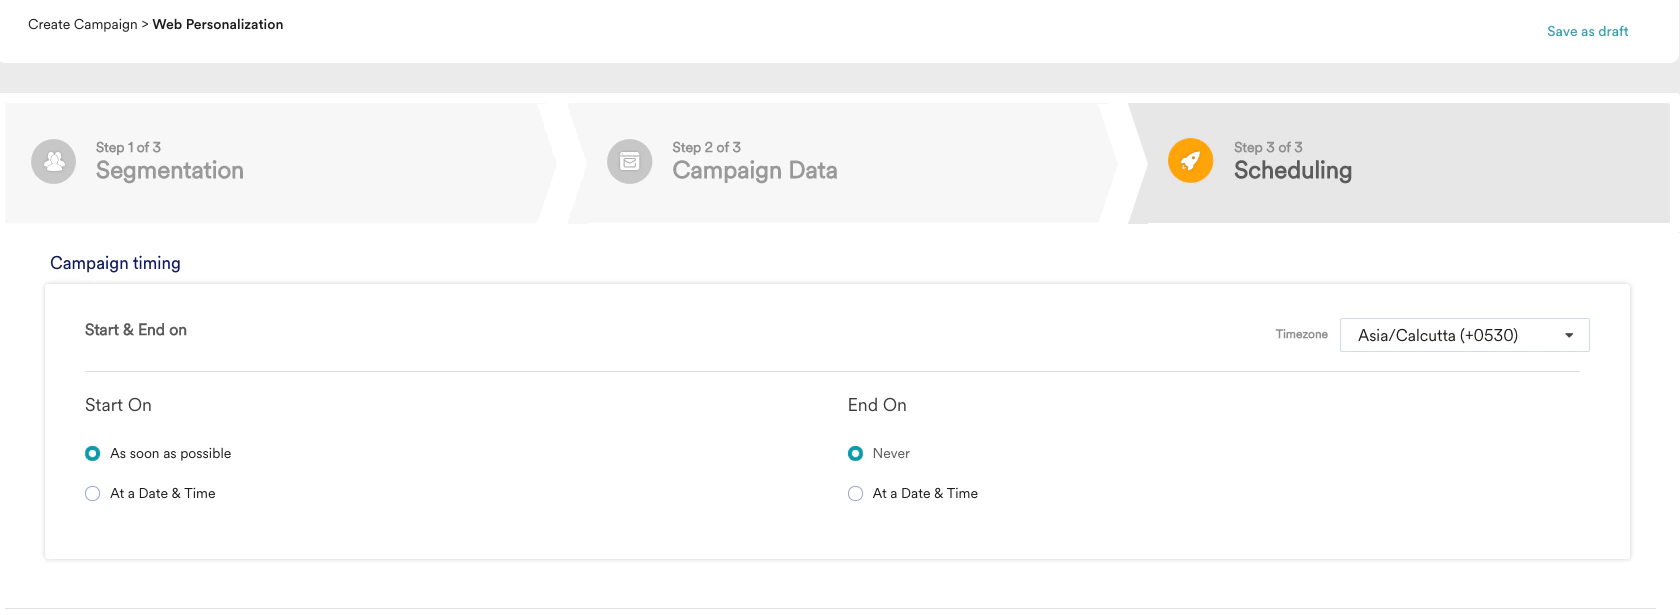
Define the campaign's Start and End period for display.
3. Click **Next**.
## Step 3: Scheduling
This section contains the following:
1. [Campaign Timing](#WP-Campaign-Timing): Choose when the campaign should be delivered to your users and the periodicity of delivery.
2. [Conversion Goals](#WP-Conversion-Goals): Choose the conversion goals and revenue metrics to be tracked for the campaign.
3. [Campaign Priority](#WP-Campaign-Priority): Select the campaign's priority value for display.
### Campaign Timing
Define the campaign's Start and End period for display.
 ### Conversion Goals
Define the conversion goal for your campaigns which will help evaluate the performance of your campaigns. Conversion Tracking works in the same way as other campaign types on MoEngage dashboard.\
You can define up to 5 different conversion goals for a single campaign.
### Campaign Priority
Select the campaign's priority value for display. This priority will be used in case there are multiple campaigns eligible for the same user.
Campaign priority can be useful when you want to overwrite existing campaigns with higher priority campaigns (during sale time or for important announcements).
### Conversion Goals
Define the conversion goal for your campaigns which will help evaluate the performance of your campaigns. Conversion Tracking works in the same way as other campaign types on MoEngage dashboard.\
You can define up to 5 different conversion goals for a single campaign.
### Campaign Priority
Select the campaign's priority value for display. This priority will be used in case there are multiple campaigns eligible for the same user.
Campaign priority can be useful when you want to overwrite existing campaigns with higher priority campaigns (during sale time or for important announcements).
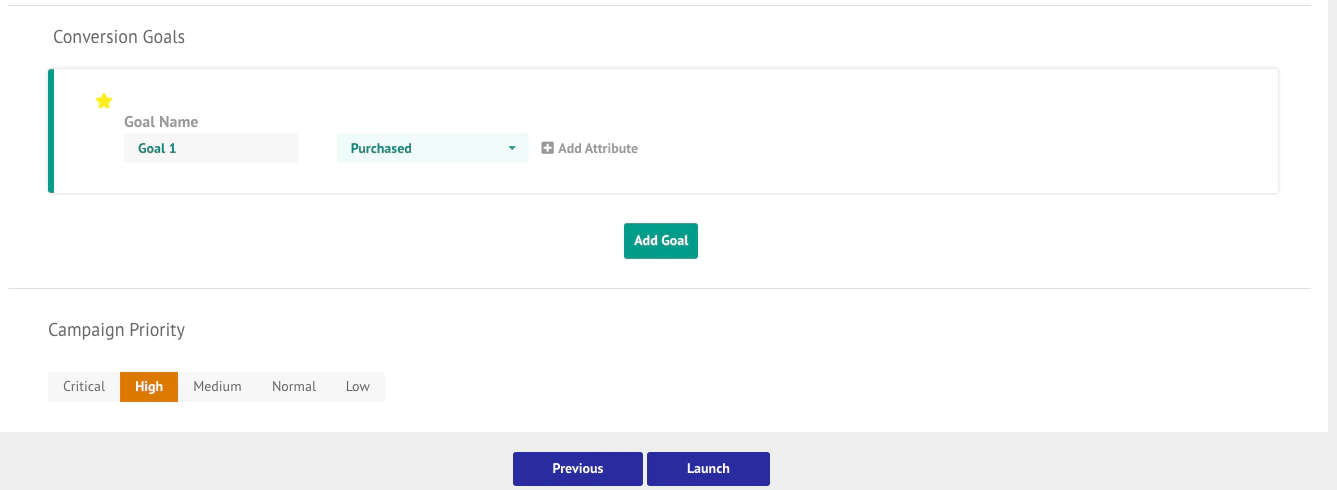 Click the **Launch** button to finish creating the campaign.
# Next Steps
After successful campaign creation, the campaign info page is displayed and you can view the campaign performance stats such as sent and delivered as described in [Campaign Analytics for Web Personalization](/user-guide/campaigns-and-channels/web-personalization/analyze/analyze-web-personalization-campaign).
Click the **Launch** button to finish creating the campaign.
# Next Steps
After successful campaign creation, the campaign info page is displayed and you can view the campaign performance stats such as sent and delivered as described in [Campaign Analytics for Web Personalization](/user-guide/campaigns-and-channels/web-personalization/analyze/analyze-web-personalization-campaign).