> ## Documentation Index
> Fetch the complete documentation index at: https://moengage-user-guide.mintlify.site/llms.txt
> Use this file to discover all available pages before exploring further.
# Using Recommendations in Push
This help doc article demonstrates how personalized recommendations can be integrated into your Push campaigns to deliver dynamic recommendations. In the Push channel, the content personalization is done using the [Jinja templating language.](/user-guide/campaigns-and-channels/getting-started/message-personalization/jinja-templating-language)
At MoEngage, creating a Push campaign is a three-step process.
1. Target users
2. Content
3. Schedule and Goals
You can personalize the campaign with recommendations in the second step 'Content'. Let us create a personalized campaign with recommendations.
Ensure that you have created the desired recommendations. You can use only active recommendations for campaign personalization. Learn how to [create and manage recommendations.](/user-guide/content/recommendations)
# Create Push Campaigns with Recommendations
To create a push campaign with recommendations, perform the following steps:
1. On the sidebar menu in MoEngage, hover over the Engage menu item  . The **Engage** menu appears.
2. Click **+ New Campaign**.
. The **Engage** menu appears.
2. Click **+ New Campaign**.  You can also click **All Campaigns** on the **Engage** menu and then click **+ Create campaign** on the All campaigns page.
3. On the **New Campaign** dialog box, under **OUTBOUND**, click **Email**.
4. Click **Periodic** campaign, and you can follow the same steps for any other email campaign type. For more information about delivery types, refer to [Delivery Types](/user-guide/campaigns-and-channels/getting-started/introduction/delivery-types-moengage-channels).
You can also click **All Campaigns** on the **Engage** menu and then click **+ Create campaign** on the All campaigns page.
3. On the **New Campaign** dialog box, under **OUTBOUND**, click **Email**.
4. Click **Periodic** campaign, and you can follow the same steps for any other email campaign type. For more information about delivery types, refer to [Delivery Types](/user-guide/campaigns-and-channels/getting-started/introduction/delivery-types-moengage-channels). 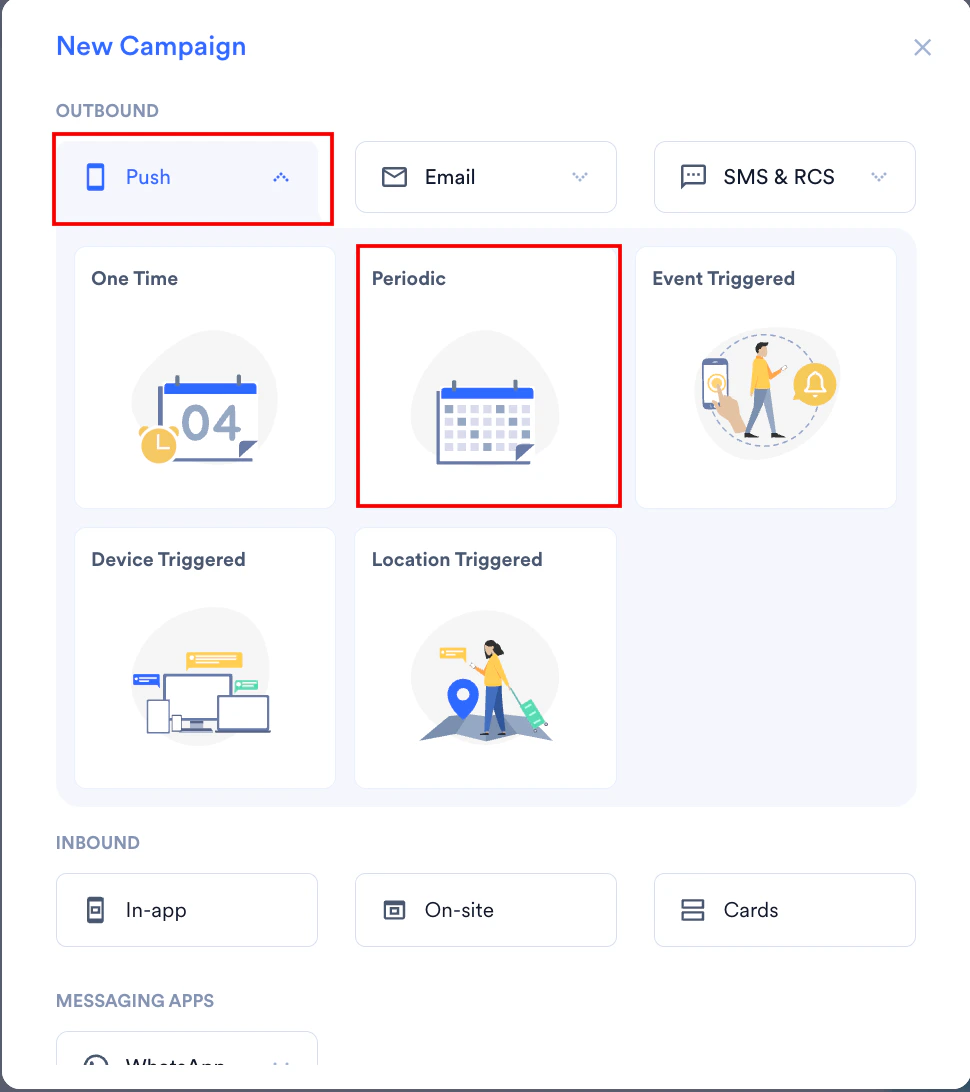 5. Enter the basic campaign details and define the audience in step 1 'Target users' and click **Next**.
6. In step 2, on the **Content** tab, select a template from the available options.
7. On entering '@' in any text block, a personalization pop-up opens. Search the recommendation name under data personalization drop-down and click **Done**.
5. Enter the basic campaign details and define the audience in step 1 'Target users' and click **Next**.
6. In step 2, on the **Content** tab, select a template from the available options.
7. On entering '@' in any text block, a personalization pop-up opens. Search the recommendation name under data personalization drop-down and click **Done**. 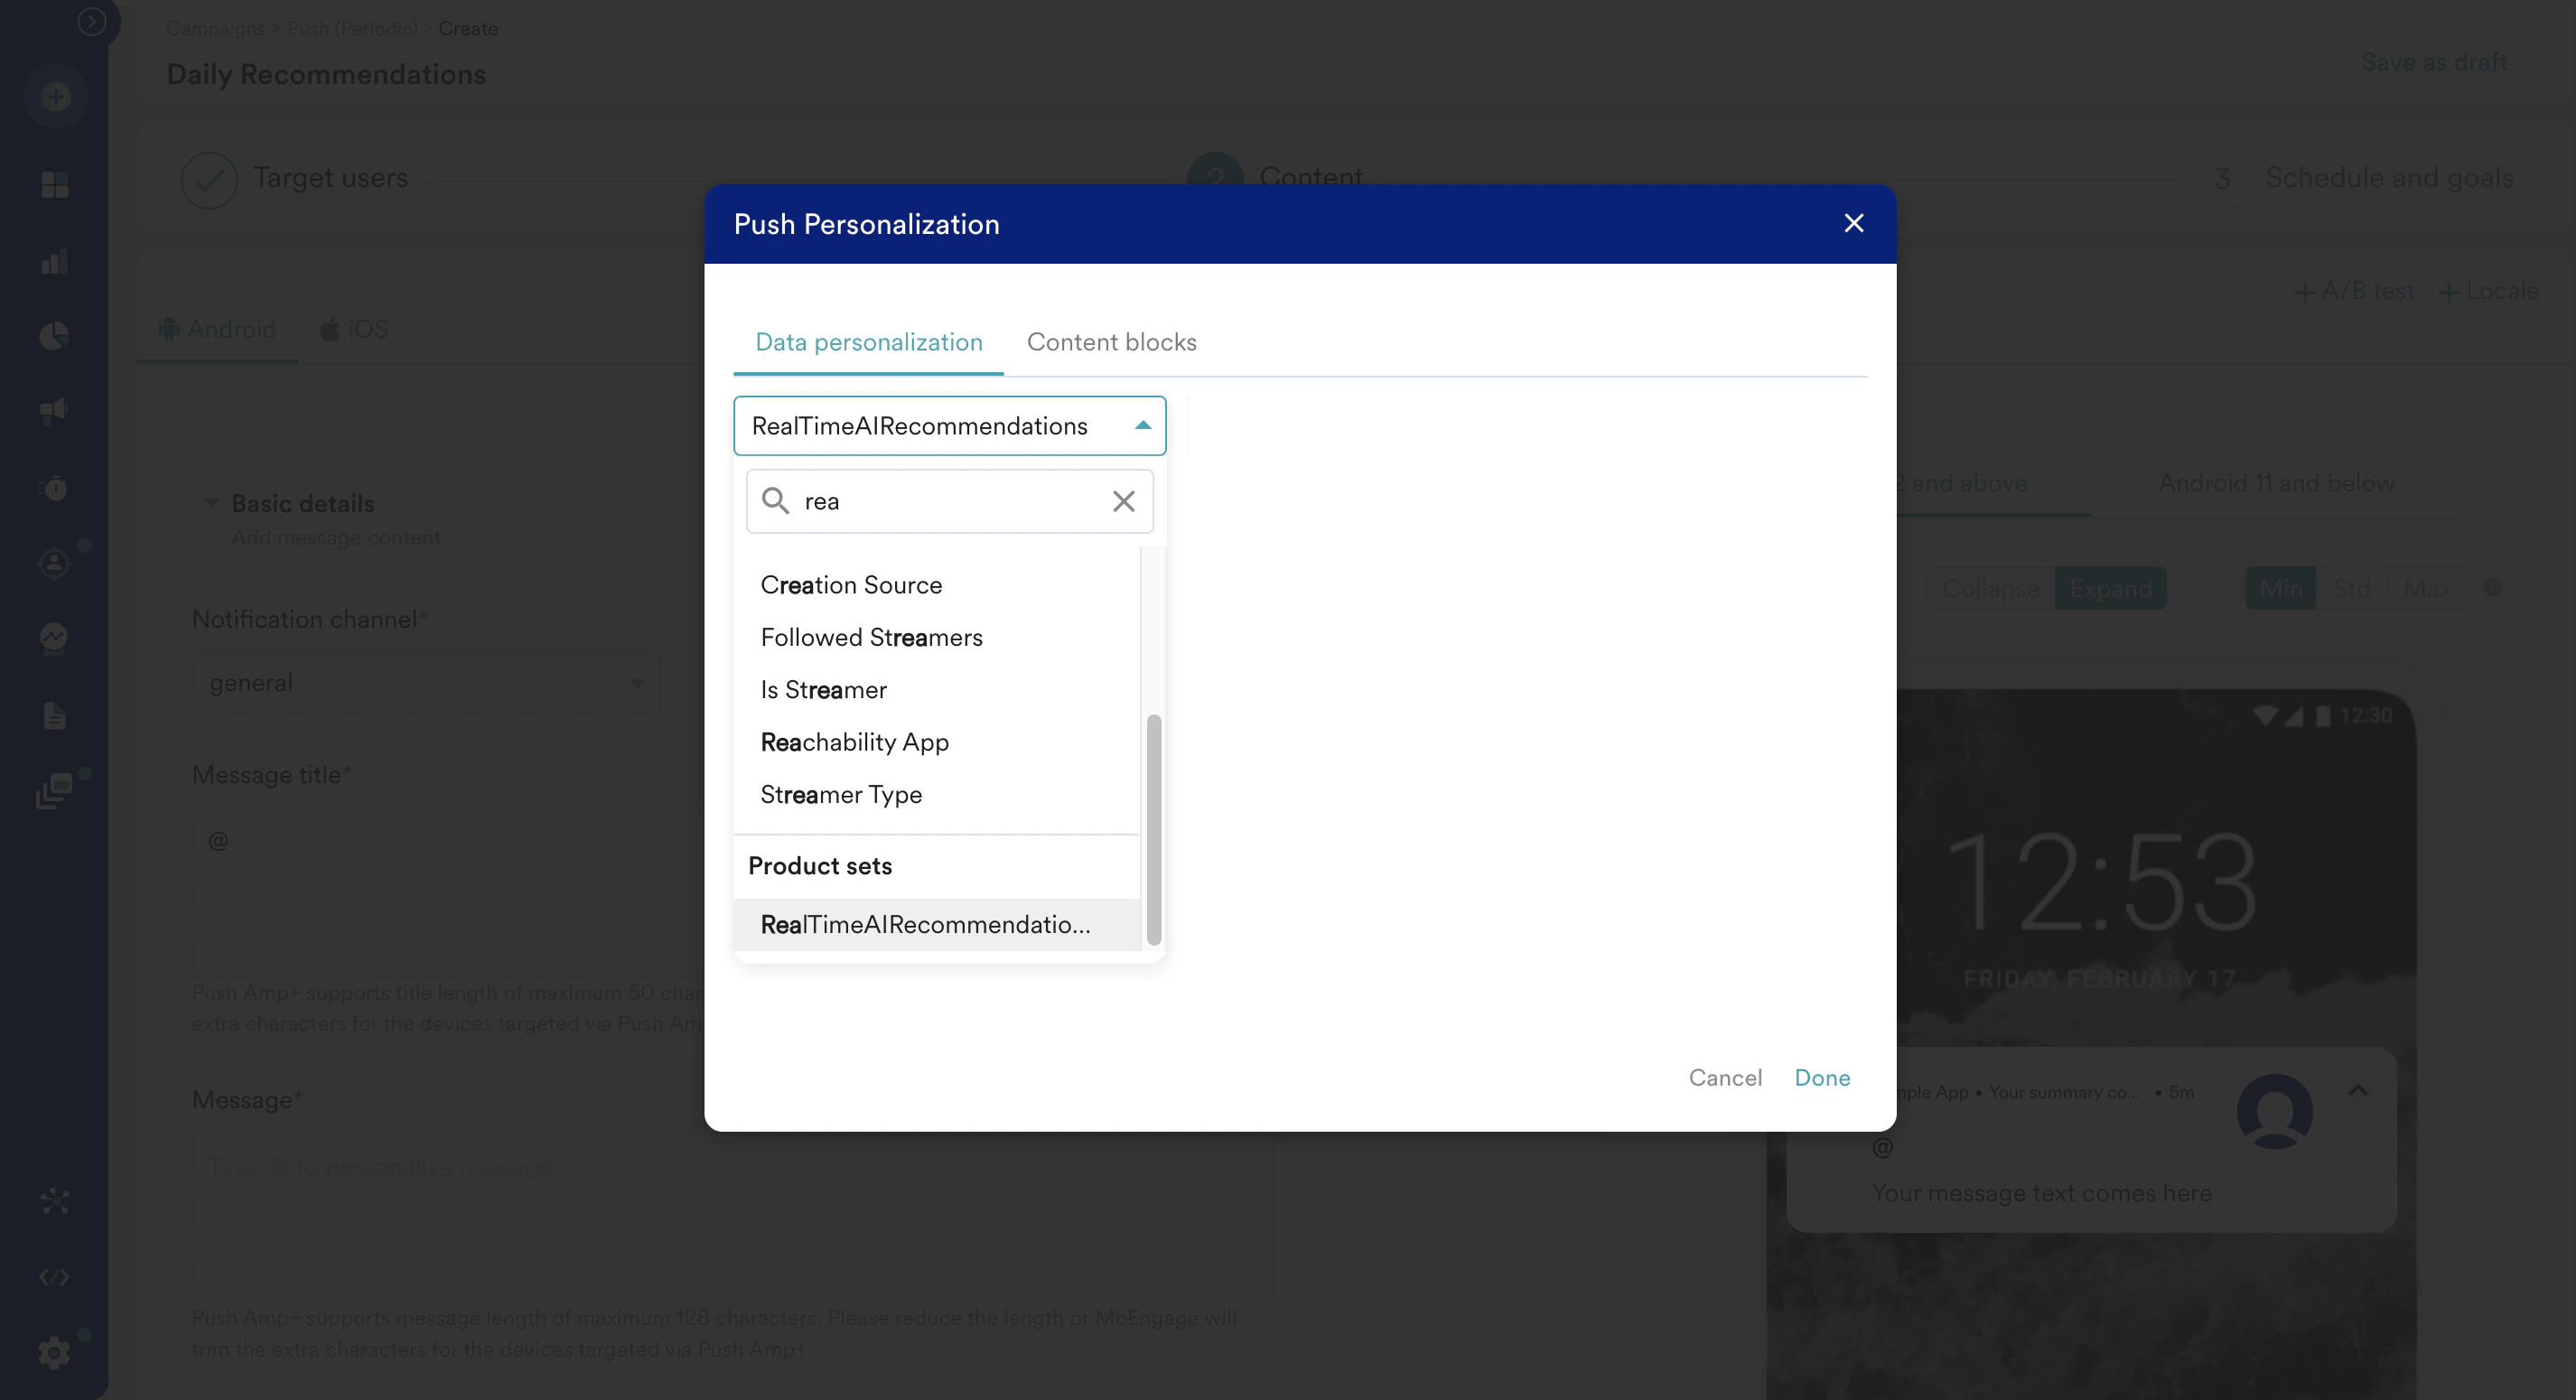 8. It auto-populates some Jinja code retrieving all available items list from recommendations. You can modify the code for your use case. For example, the following is the modified code to display one item:
```jinja JINJA theme={null}
{% if ProductSet.RealTimeAIRecommendations%}
{% for product in ProductSet.RealTimeAIRecommendations[0:1]%}
{{product.title}}
{% endfor %}
{% else %}
MOE_NOT_SEND
{% endif %}
```
8. It auto-populates some Jinja code retrieving all available items list from recommendations. You can modify the code for your use case. For example, the following is the modified code to display one item:
```jinja JINJA theme={null}
{% if ProductSet.RealTimeAIRecommendations%}
{% for product in ProductSet.RealTimeAIRecommendations[0:1]%}
{{product.title}}
{% endfor %}
{% else %}
MOE_NOT_SEND
{% endif %}
```
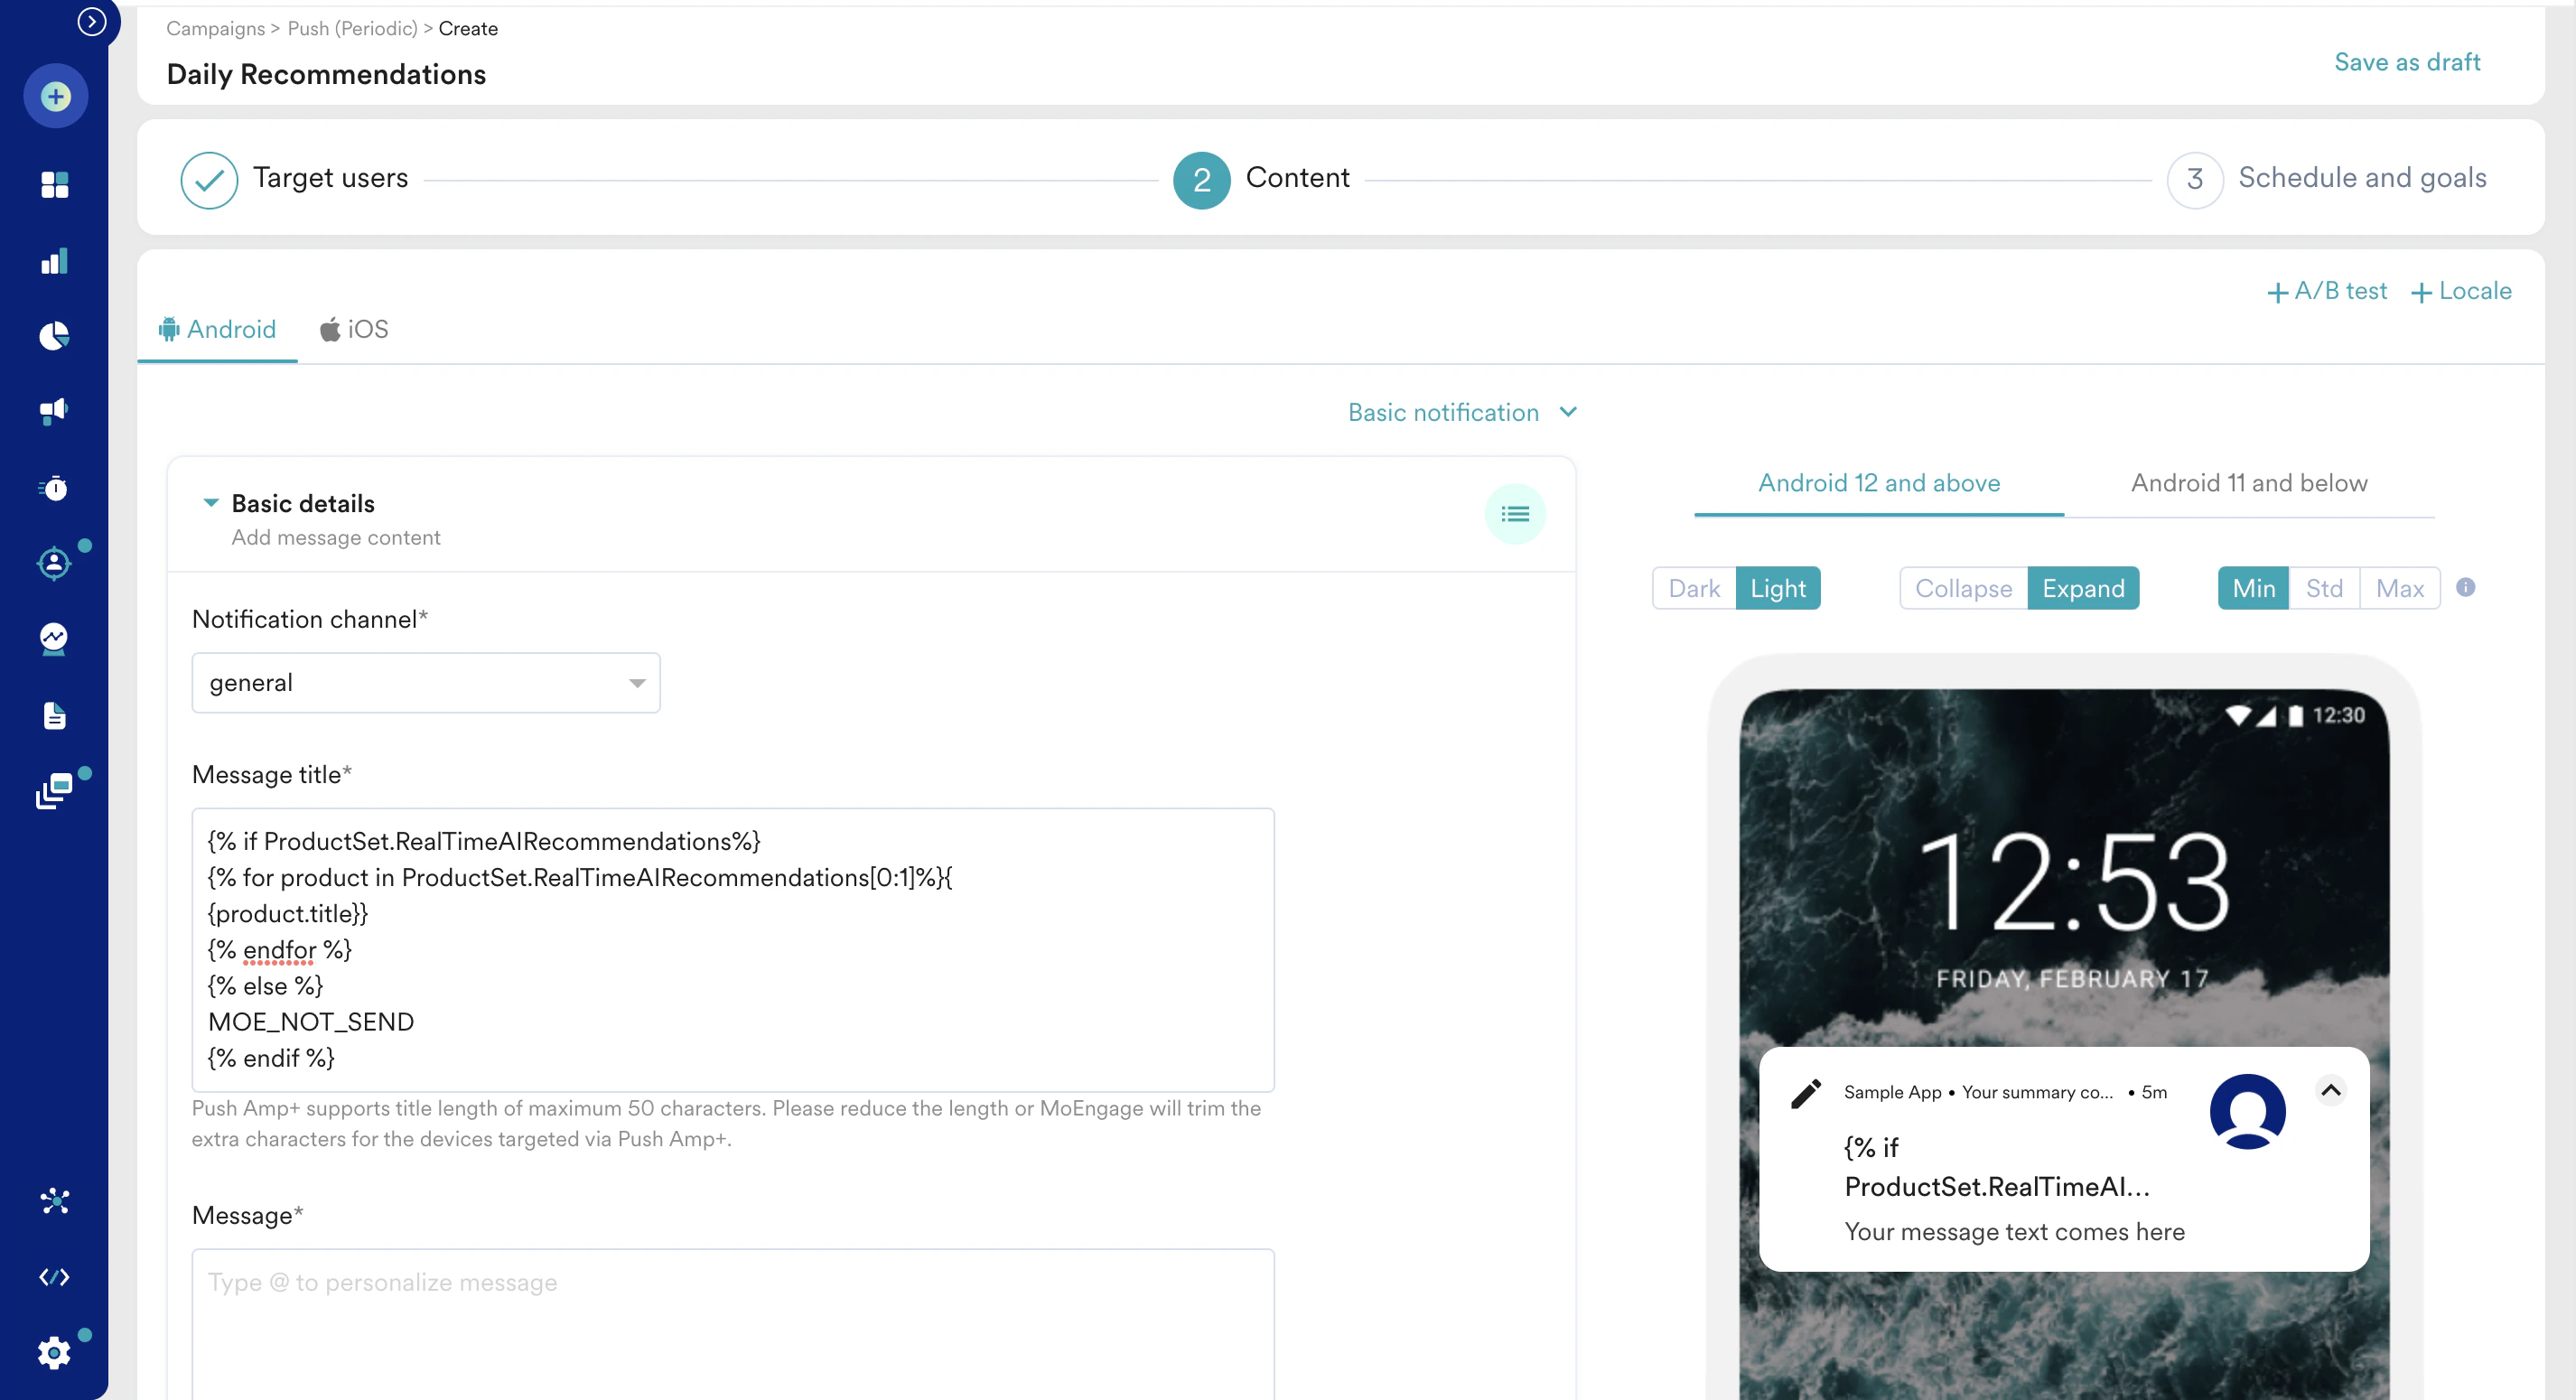 9. Enter the title, message, and summary as per the requirement. You can choose recommendations personalization or static textual content for different blocks.
10. Similarly, define the image URL to personalize notification with the recommended product image.
9. Enter the title, message, and summary as per the requirement. You can choose recommendations personalization or static textual content for different blocks.
10. Similarly, define the image URL to personalize notification with the recommended product image. 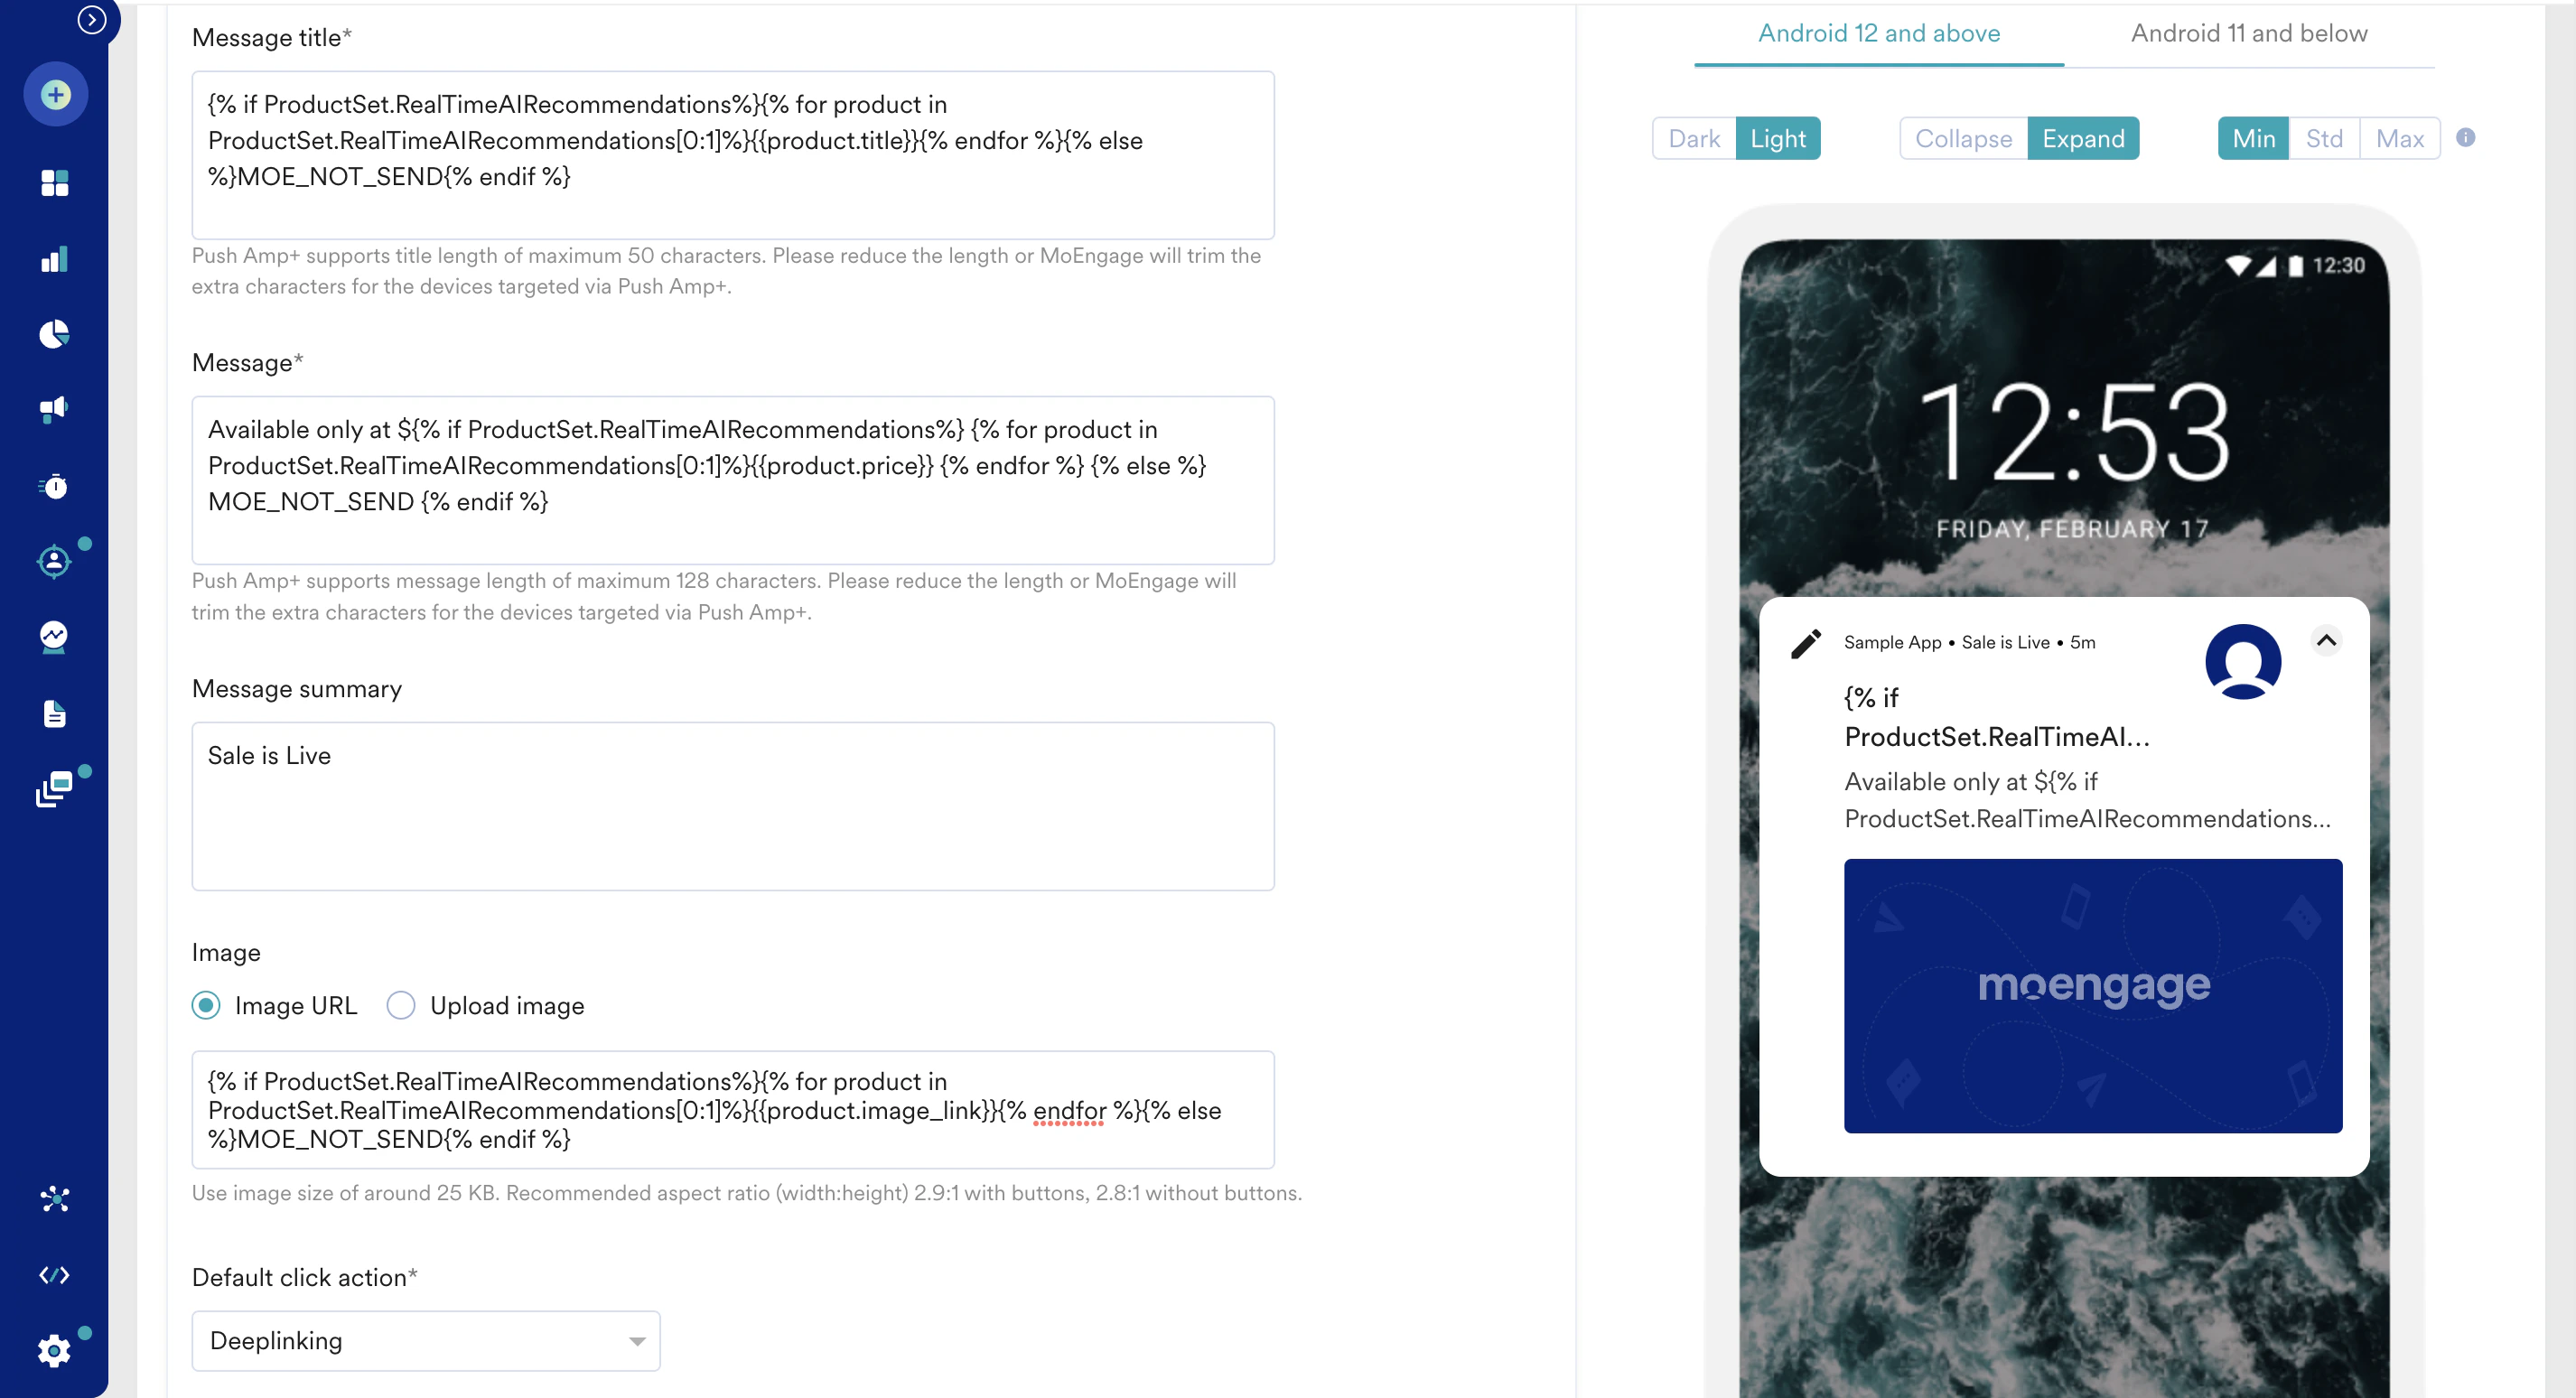 11. After you complete the setup, click **Preview** to ensure it appears as intended.
 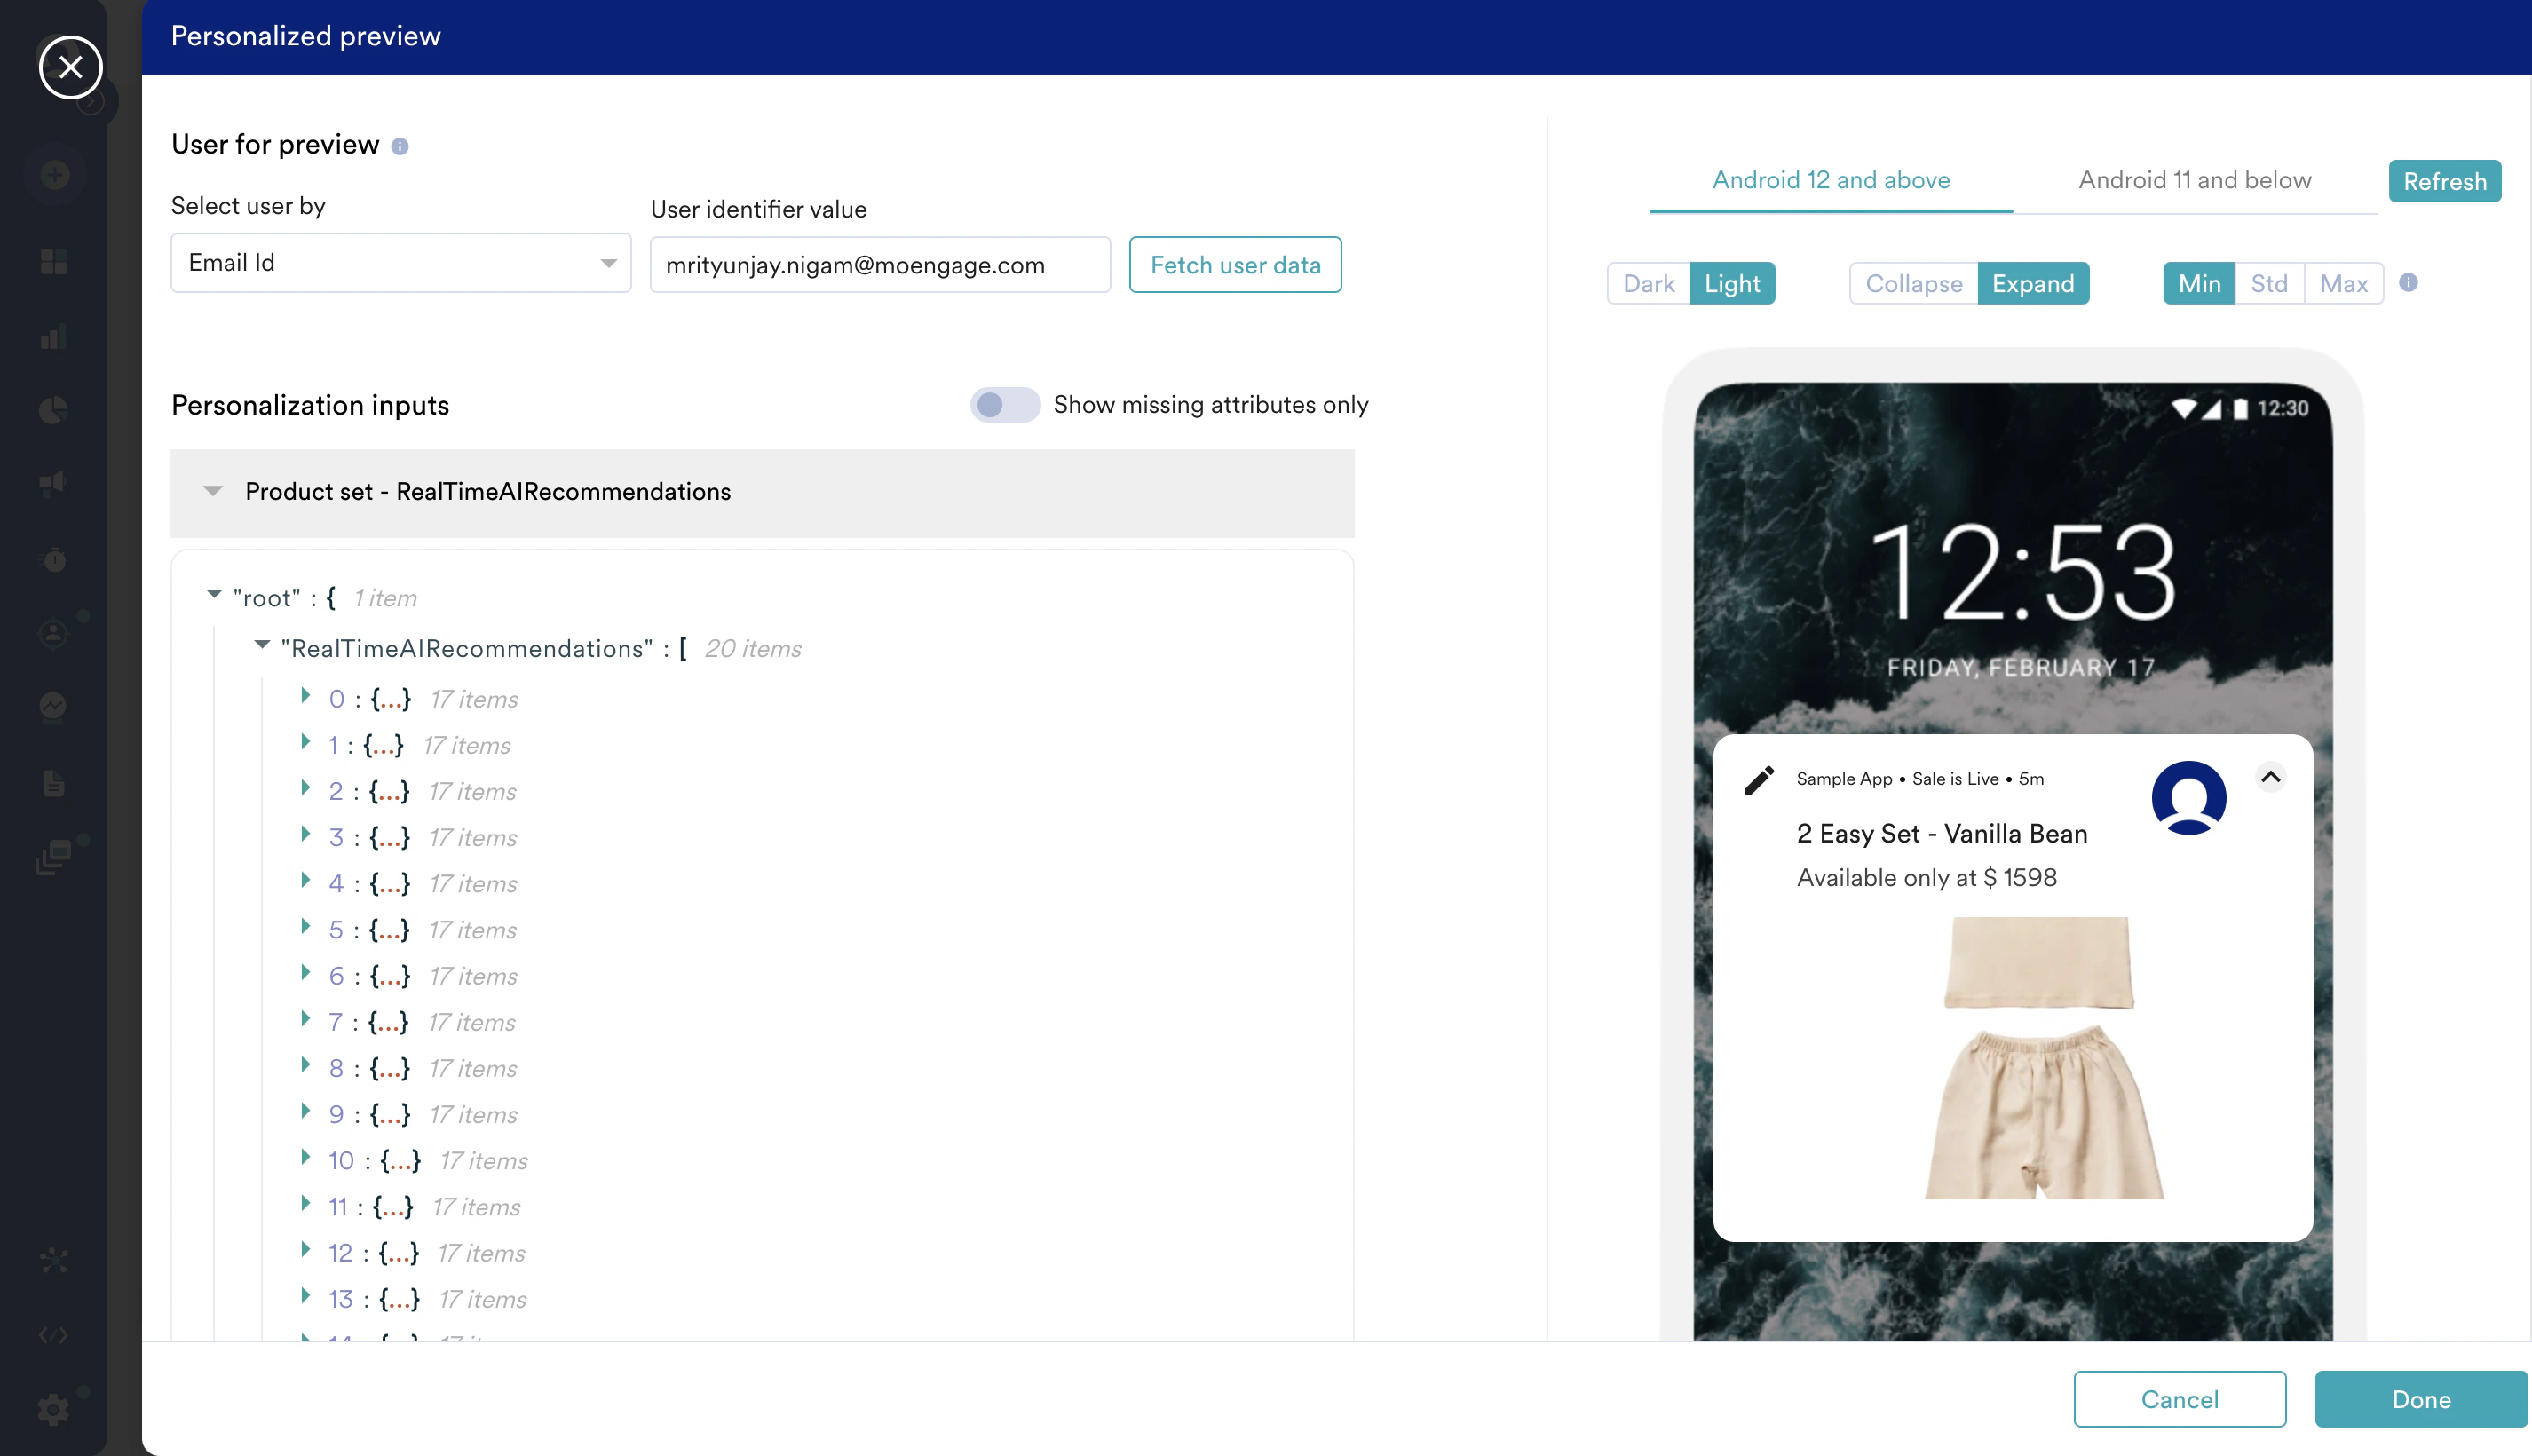 12. You can also deliver a test campaign to ensure end-to-end delivery before scheduling it for all users.
  13. After you complete the content setup with recommendations, click **Next** at the bottom and move to 'Schedule and Goals', which is the step 3 of campaign setup.
14. Set up the appropriate settings in **Schedule and Goals** and publish the campaign.
13. After you complete the content setup with recommendations, click **Next** at the bottom and move to 'Schedule and Goals', which is the step 3 of campaign setup.
14. Set up the appropriate settings in **Schedule and Goals** and publish the campaign.