> ## Documentation Index
> Fetch the complete documentation index at: https://moengage-user-guide.mintlify.site/llms.txt
> Use this file to discover all available pages before exploring further.
# Firewall
This feature limits and controls the MoEngage dashboard access to only approved IP addresses or ranges with an additional authentication measure. This ensures increased security and a lower risk of compromised accounts.
You must be an Admin for your MoEngage workspace to add a firewall. For more information, refer to [Access Roles](/user-guide/settings/account/team-management/access-roles?_gl=1*m6oahe*_gcl_aw*R0NMLjE3MDI0NDM1MTEuQ2p3S0NBaUFwdUNyQmhBdUVpd0E4Vko2SnBmNmZDWnZaSUdSSXJEWFBNRTFlUloyWDZYSXEzSzRWblJ3alZBYzAyQ21LelJhanV4VWpSb0Nmc0FRQXZEX0J3RQ..*_gcl_au*OTAxMTgzNzIxLjE3MDI0NDM1MTE.*_ga*MjgyMTc5NTk1LjE3MDI0NDM1MTE.*_ga_SEBHW7YTZ7*MTcwNjY4NTQ4OS4zLjEuMTcwNjY5NDY5Mi41NC4wLjA.*_ga_161P72P6V0*MTcwNjY4NTQ4OS4zLjEuMTcwNjY5NDY4Ni4wLjAuMA..#01G37YHTDFGHEPY83QHH1GZDPC).
# Add a Firewall
Perform the following steps to add a firewall:
1. On the left navigation menu in the MoEngage dashboard, click **Settings** > **Account** > **Security**.
2. On the Security page, click the **Firewall** tab.
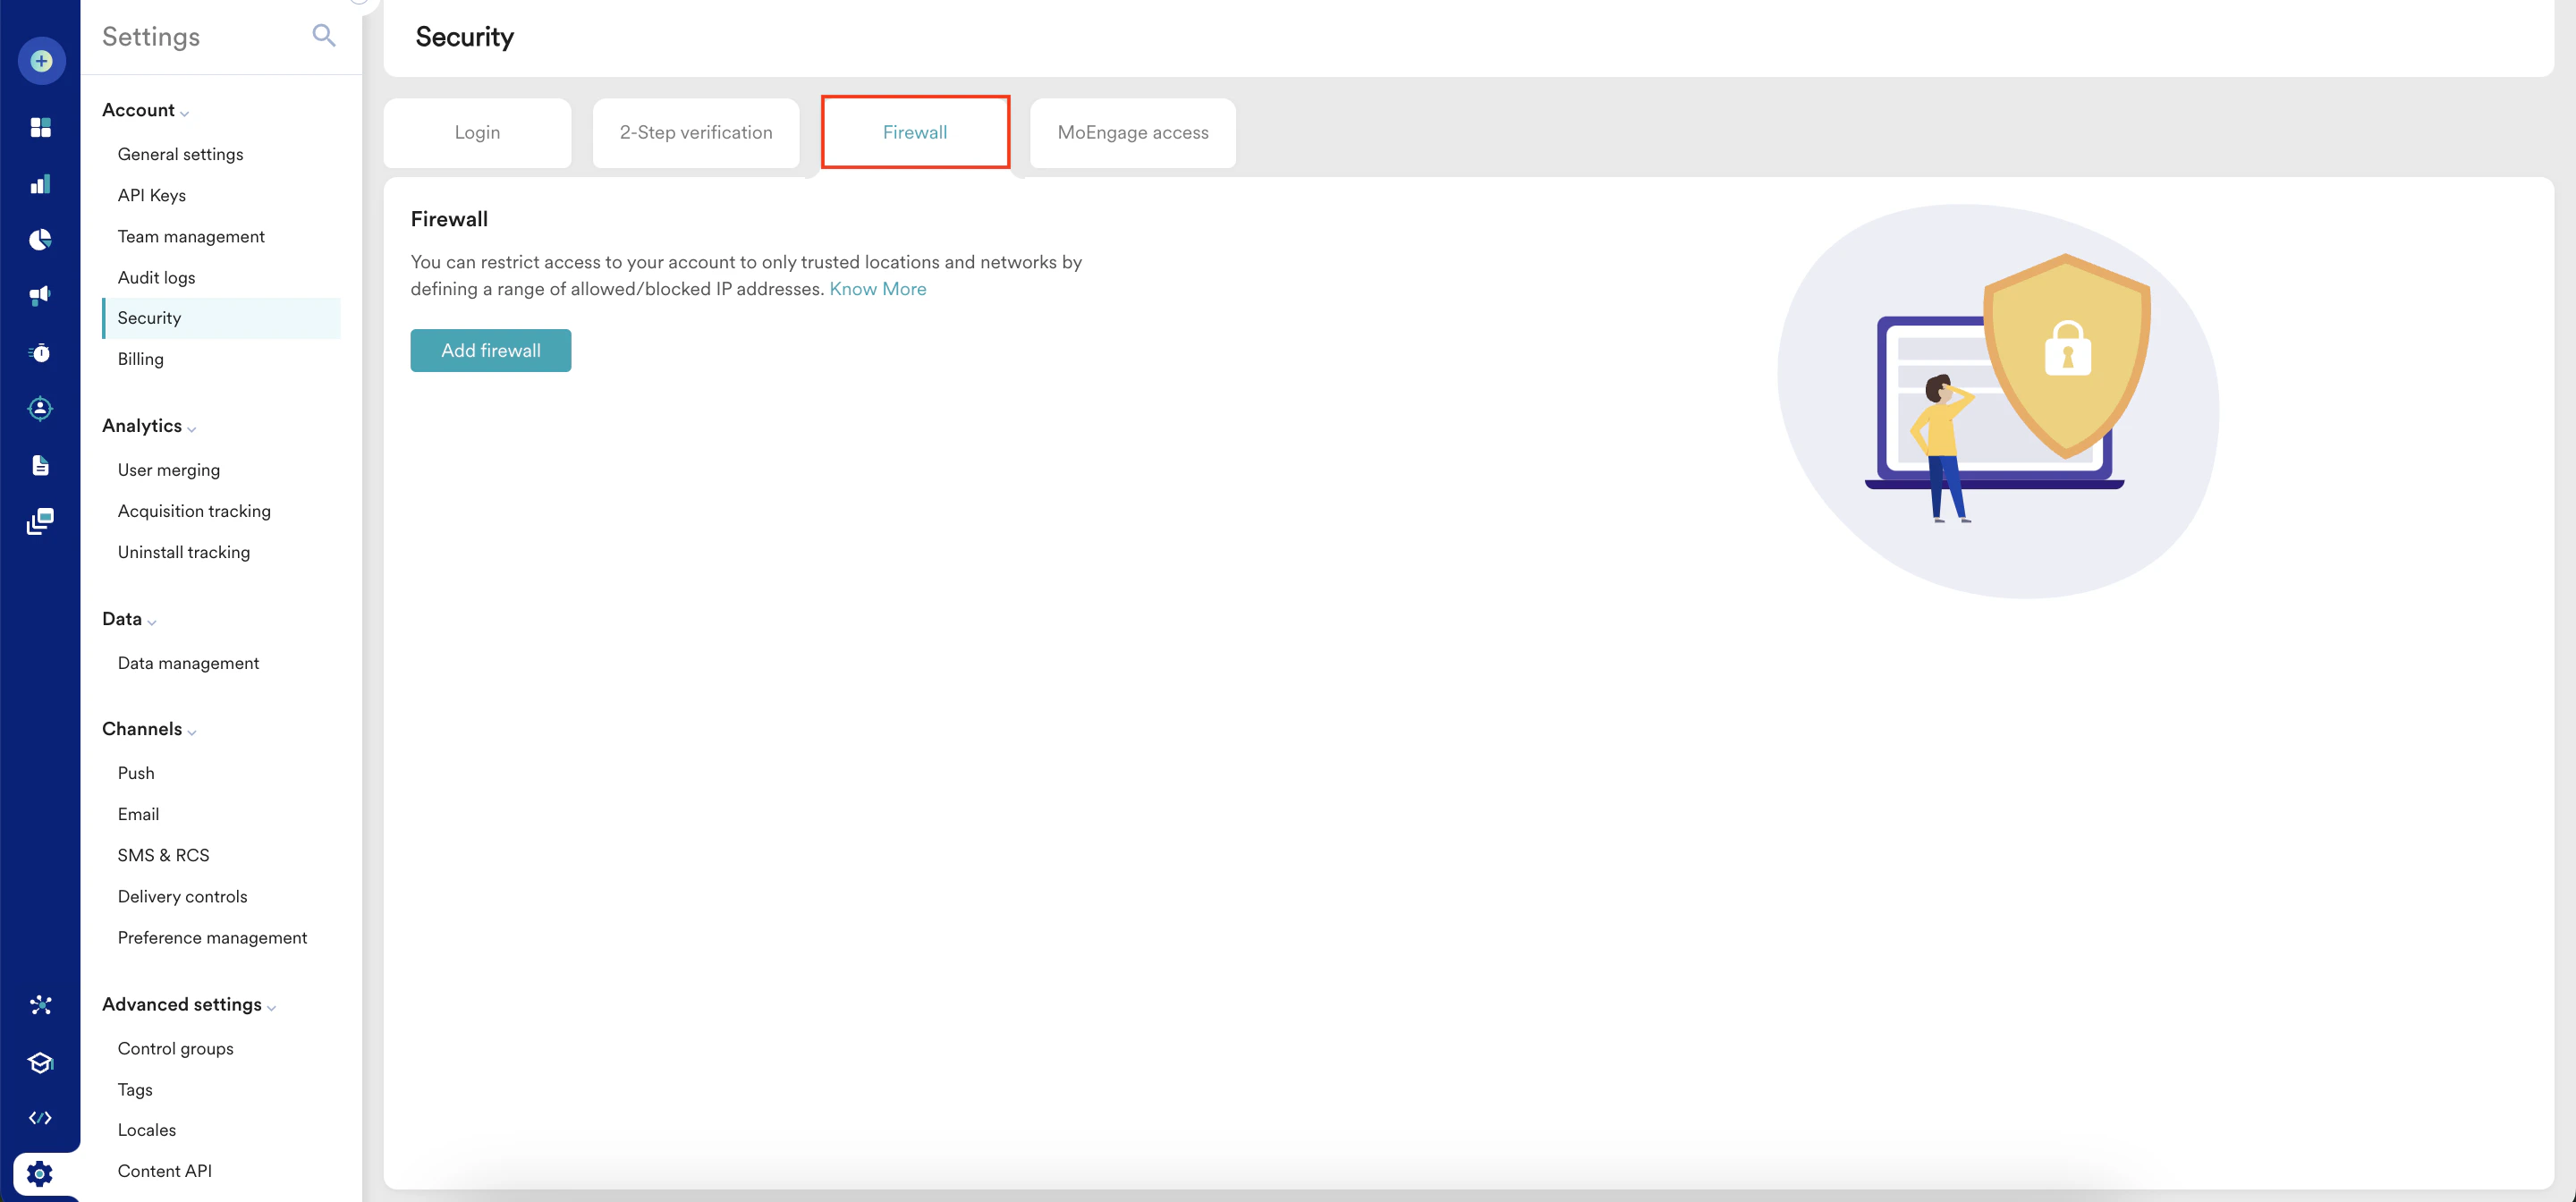 3. Click **Add** **firewall**.
  4. On the **Add firewall**dialog box, enter the following details:
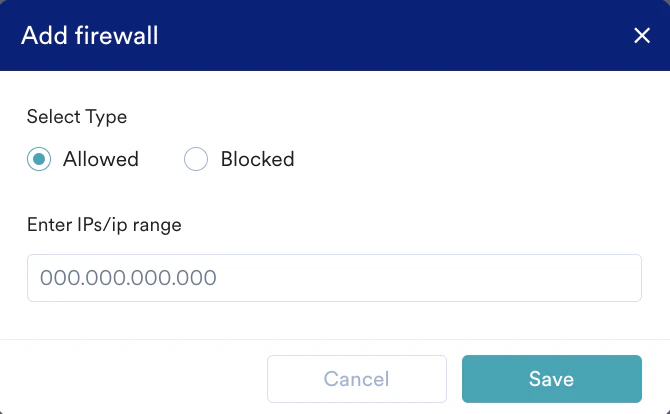 5. Under **Select Type**, select an option:
* **Allowed**: Select this option to whitelist any IP. You can add specific IP addresses or ranges and grant permission to access the MoEngage dashboard. Only connections originating from these IPs will be successful. This is a security measure to restrict access to authorized users and networks, such as your office or a designated VPN.
* **Blocked**: Select this option to blacklist any IP. You can add specific IP addresses or ranges and block their access to the MoEngage dashboard. Connections originating from these IPs are effectively blocked from accessing the MoEngage dashboard. If users attempt to log in from a blocked IP address, their login will fail.
6. In the **Enter IPs/ip range** box, type the IP addresses and subnets you want to allow or block as Classless Inter-Domain Routing (CIDR) ranges.
**Critical**
Do not block IP addresses with a /0 or /32 subnet mask.
* Blocking IP addresses with a /0 subnet mask will block all possible IPv4 addresses, and your workspace will be inaccessible.
5. Under **Select Type**, select an option:
* **Allowed**: Select this option to whitelist any IP. You can add specific IP addresses or ranges and grant permission to access the MoEngage dashboard. Only connections originating from these IPs will be successful. This is a security measure to restrict access to authorized users and networks, such as your office or a designated VPN.
* **Blocked**: Select this option to blacklist any IP. You can add specific IP addresses or ranges and block their access to the MoEngage dashboard. Connections originating from these IPs are effectively blocked from accessing the MoEngage dashboard. If users attempt to log in from a blocked IP address, their login will fail.
6. In the **Enter IPs/ip range** box, type the IP addresses and subnets you want to allow or block as Classless Inter-Domain Routing (CIDR) ranges.
**Critical**
Do not block IP addresses with a /0 or /32 subnet mask.
* Blocking IP addresses with a /0 subnet mask will block all possible IPv4 addresses, and your workspace will be inaccessible.
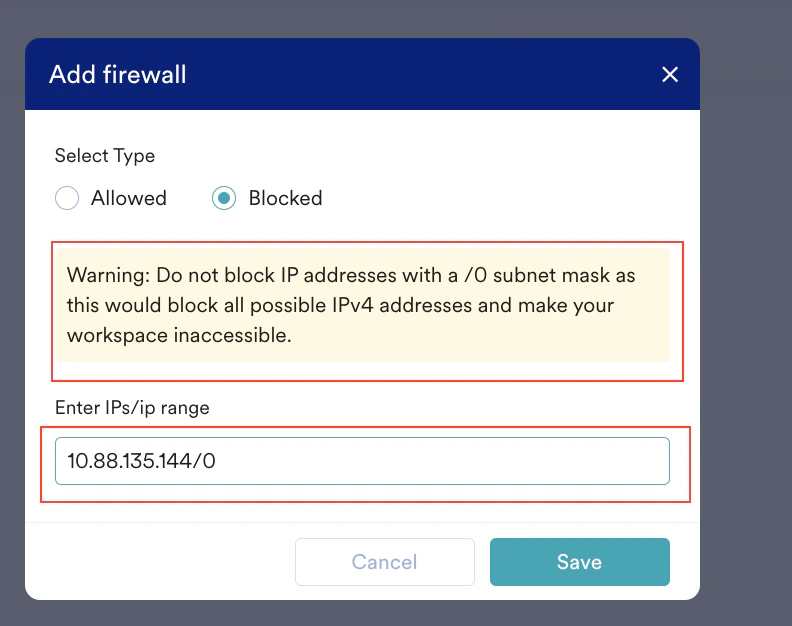 * Blocking IP addresses with a /32 subnet mask can lead to unintended workspace inaccessibility issues for individual IP addresses.
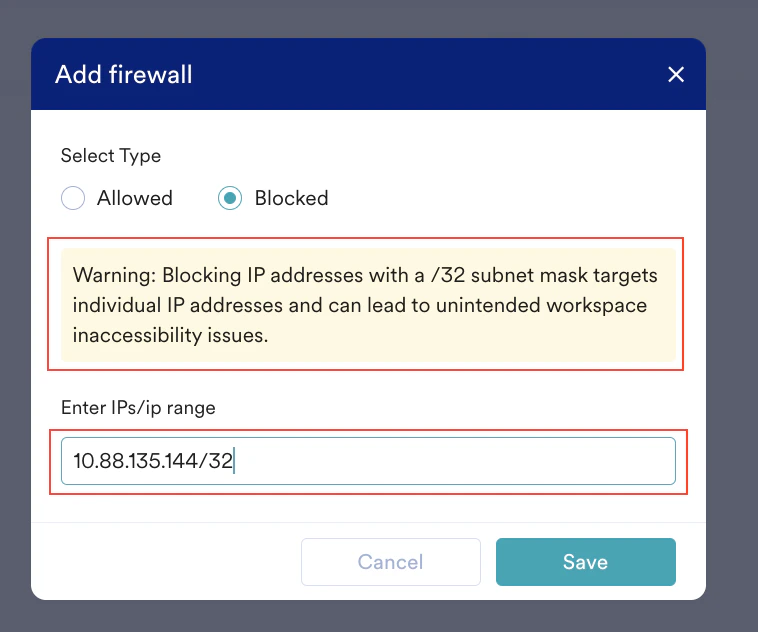 7. Click **Save**.
* If your current IP fails to meet the firewall criteria, you will receive the following error message:
7. Click **Save**.
* If your current IP fails to meet the firewall criteria, you will receive the following error message:
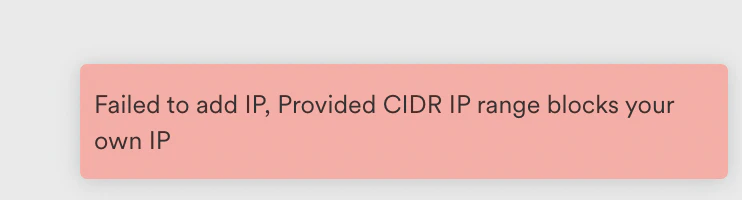 This prevents you from adding the firewall to your workspace.
* After you add the firewall successfully, any logged-in users not connected to the registered networks will be automatically logged out.
# Edit IPs or IP Ranges
To edit IPs or IP ranges, perform the following steps:
1. On the Security page, click the **Firewall** tab.
2. Click the ellipsis icon adjacent to the IP/IP range under **Actions**.
3. Click **Edit**.
This prevents you from adding the firewall to your workspace.
* After you add the firewall successfully, any logged-in users not connected to the registered networks will be automatically logged out.
# Edit IPs or IP Ranges
To edit IPs or IP ranges, perform the following steps:
1. On the Security page, click the **Firewall** tab.
2. Click the ellipsis icon adjacent to the IP/IP range under **Actions**.
3. Click **Edit**.
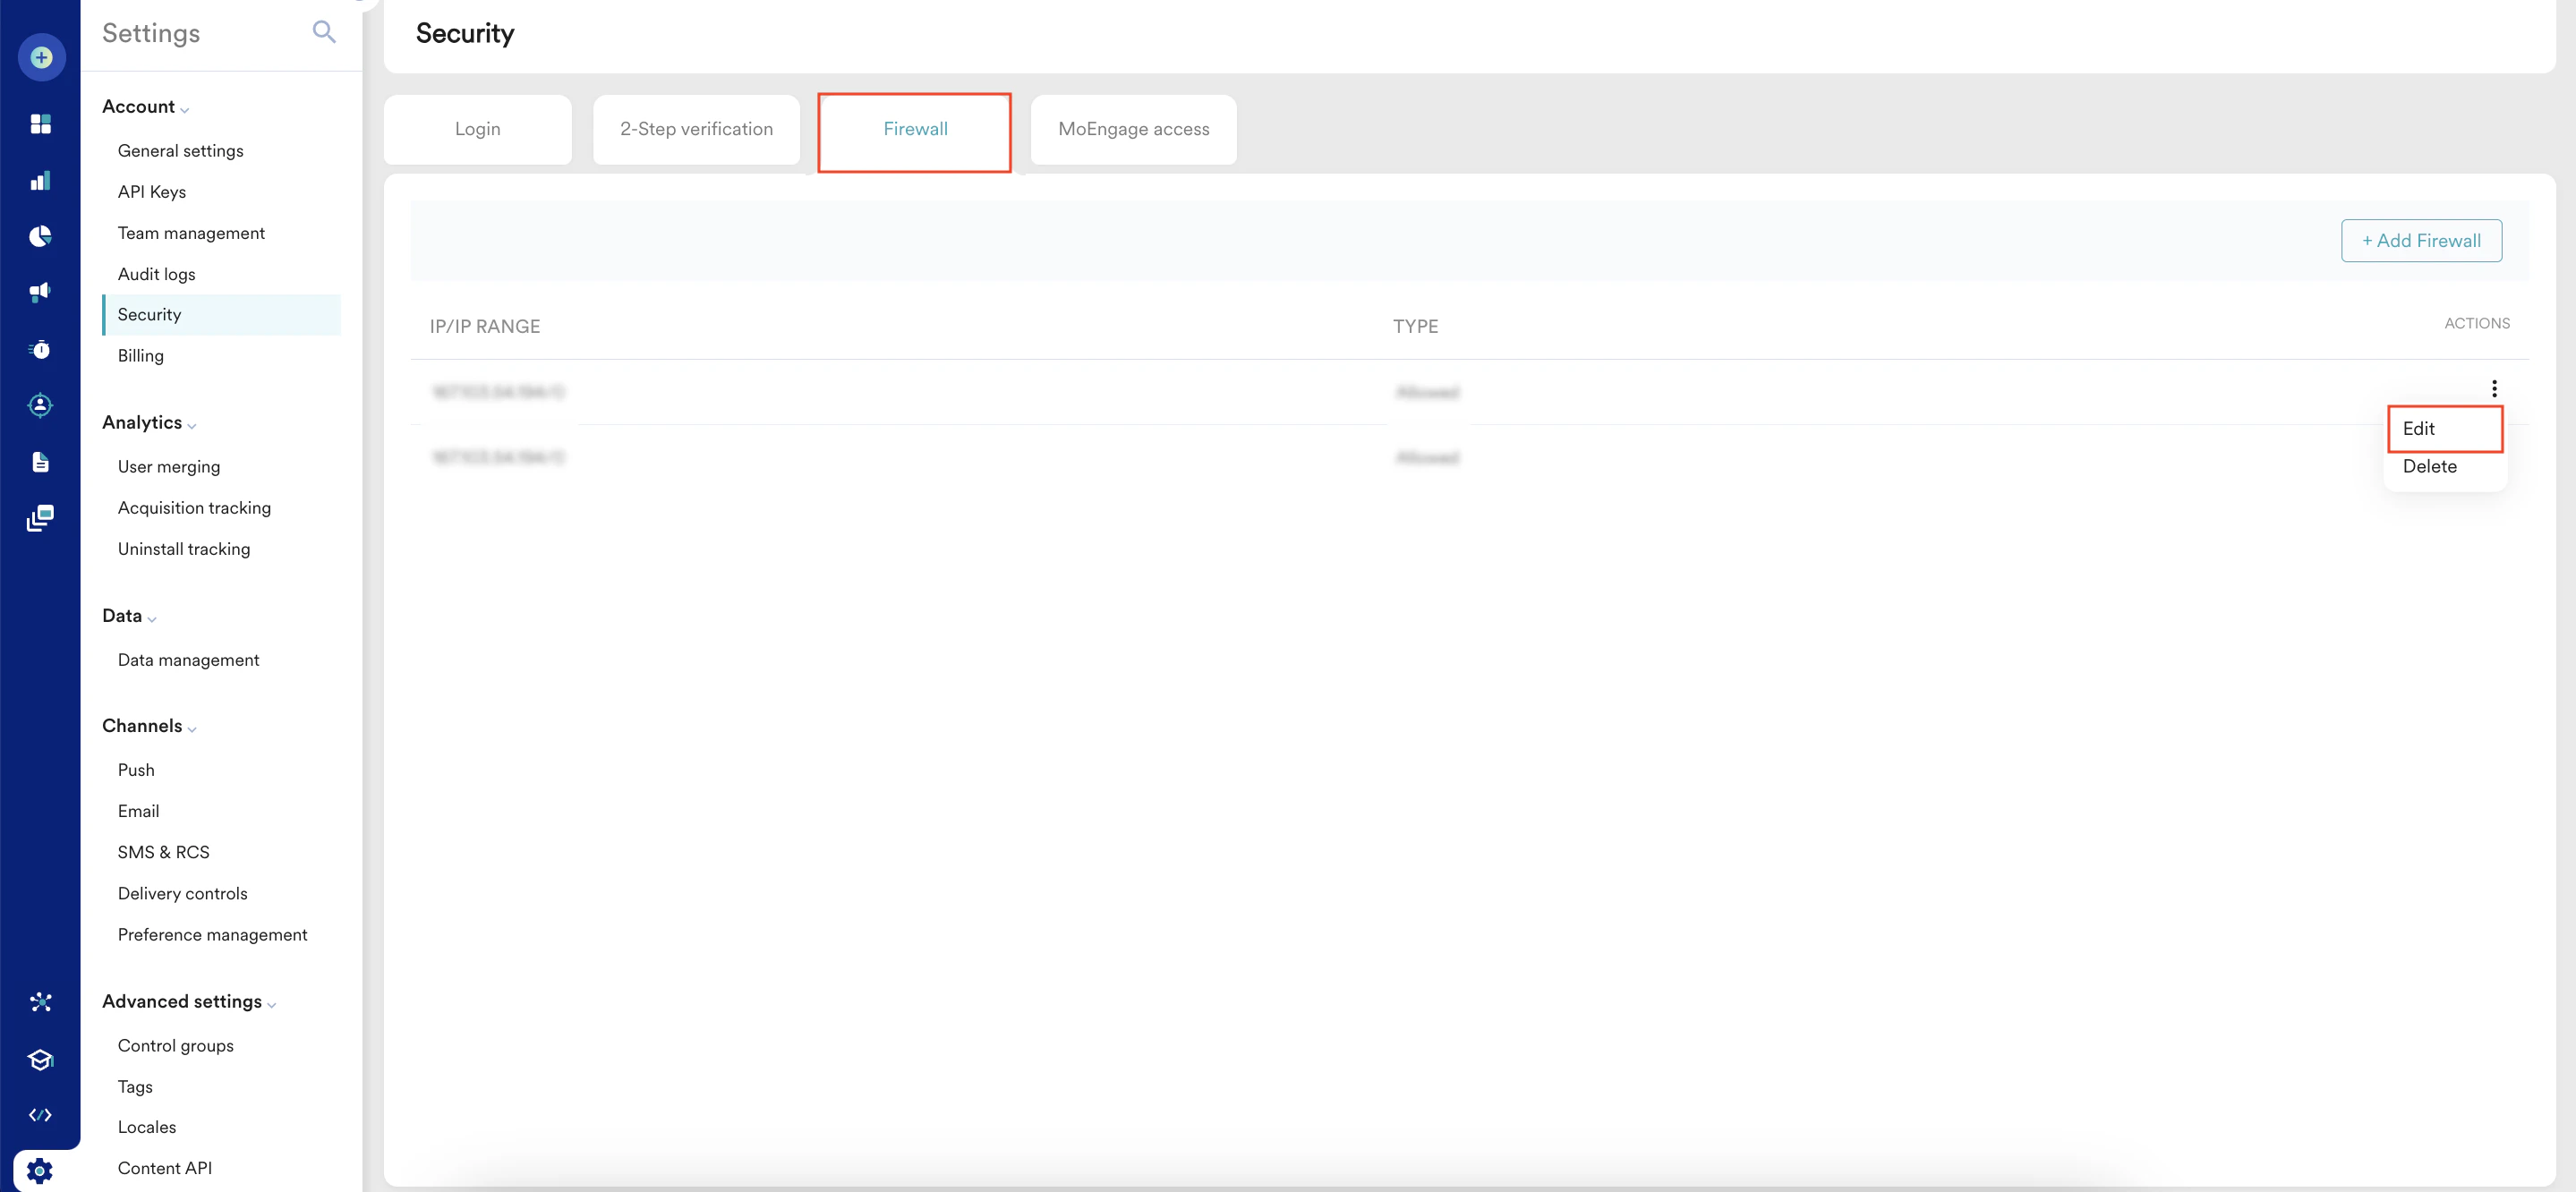 4. On the **Edit firewall** dialog box, make the necessary edits. For more information, refer [here](/user-guide/settings/account/security/firewall).
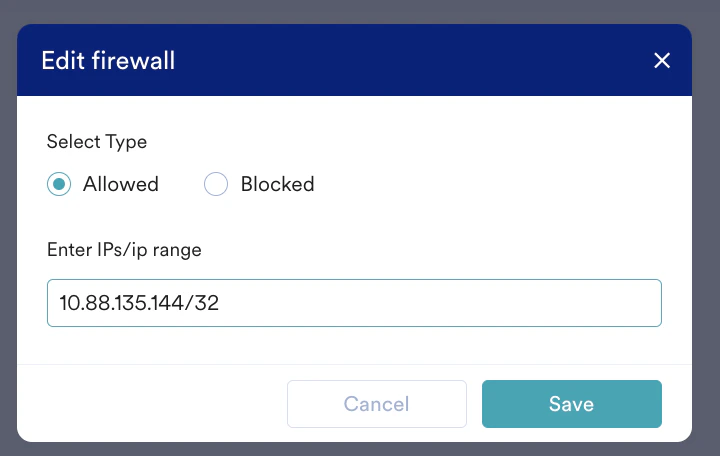 5. Click **Save**.
Your IP status is now updated successfully.
# Delete IPs or IP Ranges
To delete IPs or IP ranges, perform the following steps:
1. On the Security page, click the **Firewall** tab.
2. Click the ellipsis icon adjacent to the IP/IP range under **Actions**.
3. Click **Delete**.
5. Click **Save**.
Your IP status is now updated successfully.
# Delete IPs or IP Ranges
To delete IPs or IP ranges, perform the following steps:
1. On the Security page, click the **Firewall** tab.
2. Click the ellipsis icon adjacent to the IP/IP range under **Actions**.
3. Click **Delete**.
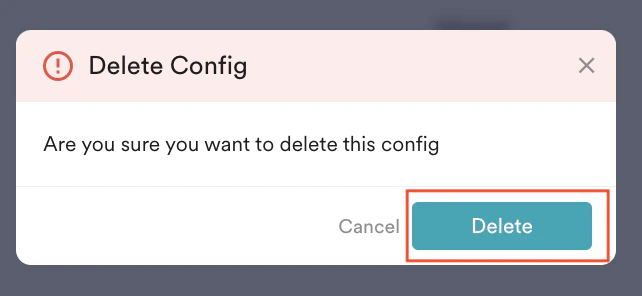
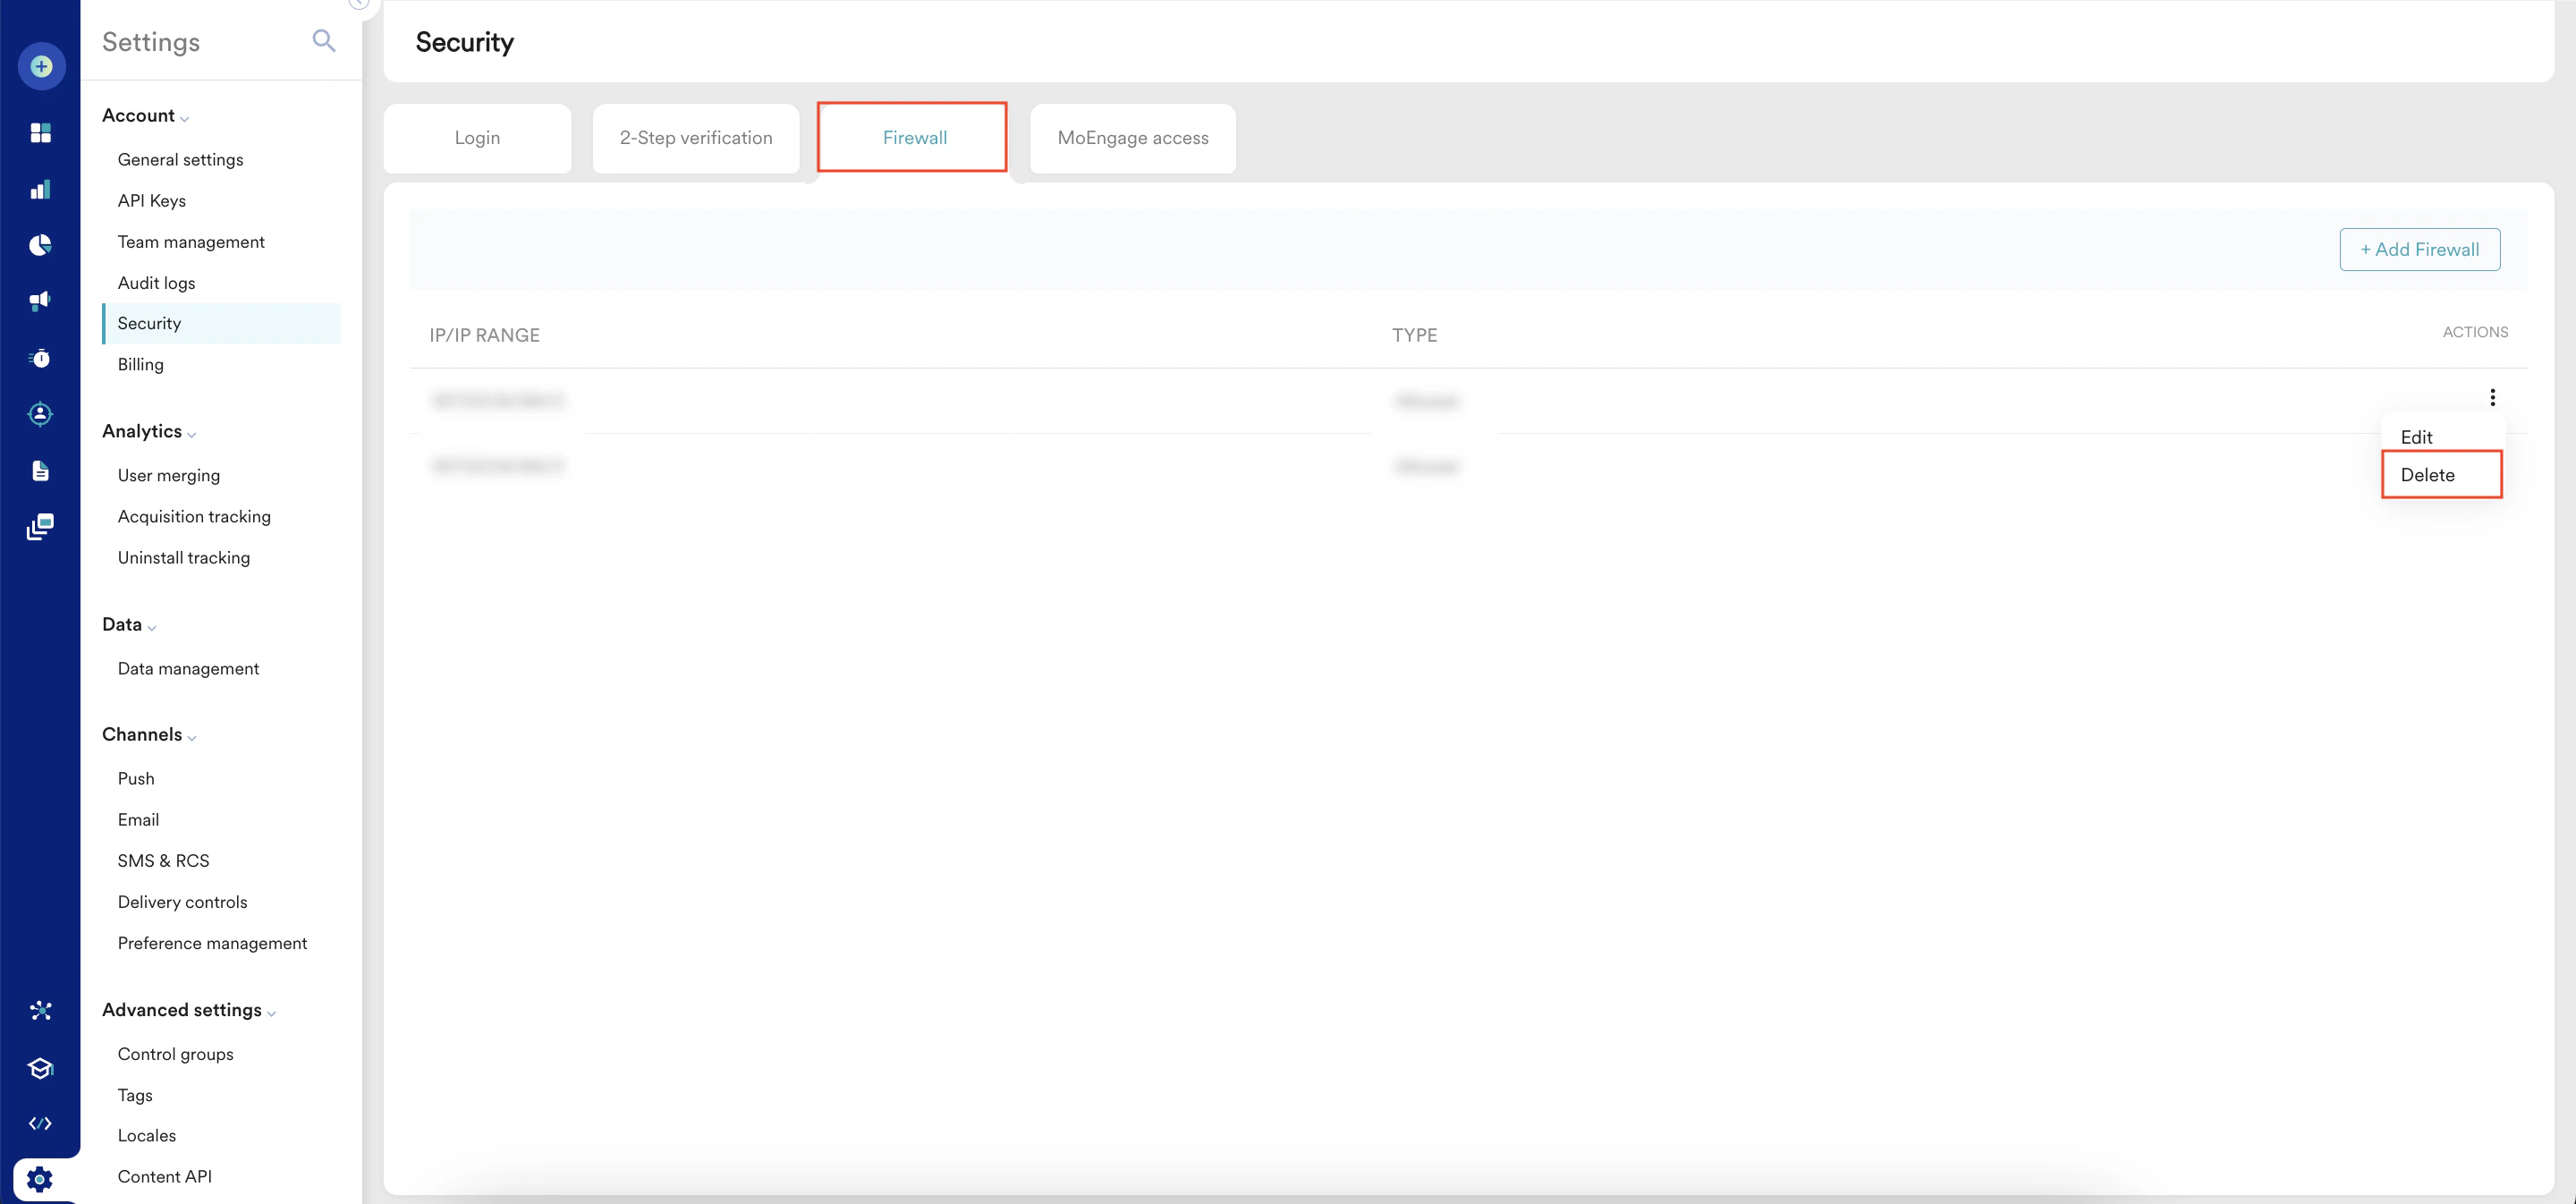 The Delete Config pop-up window will appear, prompting for confirmation to delete the config.
4. Click **Delete**.
The Delete Config pop-up window will appear, prompting for confirmation to delete the config.
4. Click **Delete**.
 Your IPs or IP ranges are removed successfully.
# FAQ
* ****Why is my access to the MoEngage dashboard denied?****
MoEngage access may be restricted to specific IP addresses configured by your administrator.
For example, the IP address of your office VPN is whitelisted, whereas the network to which your personal device is connected to may not be. When you try to access the MoEngage dashboard from outside the office VPN, MoEngage will deny you access. In that case, you need to connect to your office VPN and access the MoEngage dashboard.
If you cannot access the MoEngage dashboard, contact your MoEngage administrator to verify that you are using a whitelisted IP address. To check your current IP address, use a website such as [What is My IP Address](https://whatismyipaddress.com/).
Your IPs or IP ranges are removed successfully.
# FAQ
* ****Why is my access to the MoEngage dashboard denied?****
MoEngage access may be restricted to specific IP addresses configured by your administrator.
For example, the IP address of your office VPN is whitelisted, whereas the network to which your personal device is connected to may not be. When you try to access the MoEngage dashboard from outside the office VPN, MoEngage will deny you access. In that case, you need to connect to your office VPN and access the MoEngage dashboard.
If you cannot access the MoEngage dashboard, contact your MoEngage administrator to verify that you are using a whitelisted IP address. To check your current IP address, use a website such as [What is My IP Address](https://whatismyipaddress.com/).