> ## Documentation Index
> Fetch the complete documentation index at: https://moengage-user-guide.mintlify.site/llms.txt
> Use this file to discover all available pages before exploring further.
# How to Personalize Website Based on User Affinity
# Introduction
As marketers, we want to personalize the website according to user’s affinity and display products that are relevant to the user. This helps improve two key metrics: conversion rate and user satisfaction.
In this article, we will use User Affinity and Web Personalization features of MoEngage to personalize an e-commerce website home page for fitness enthusiasts.
# Expected Result
Users will see the personalized web page according to their affinity.
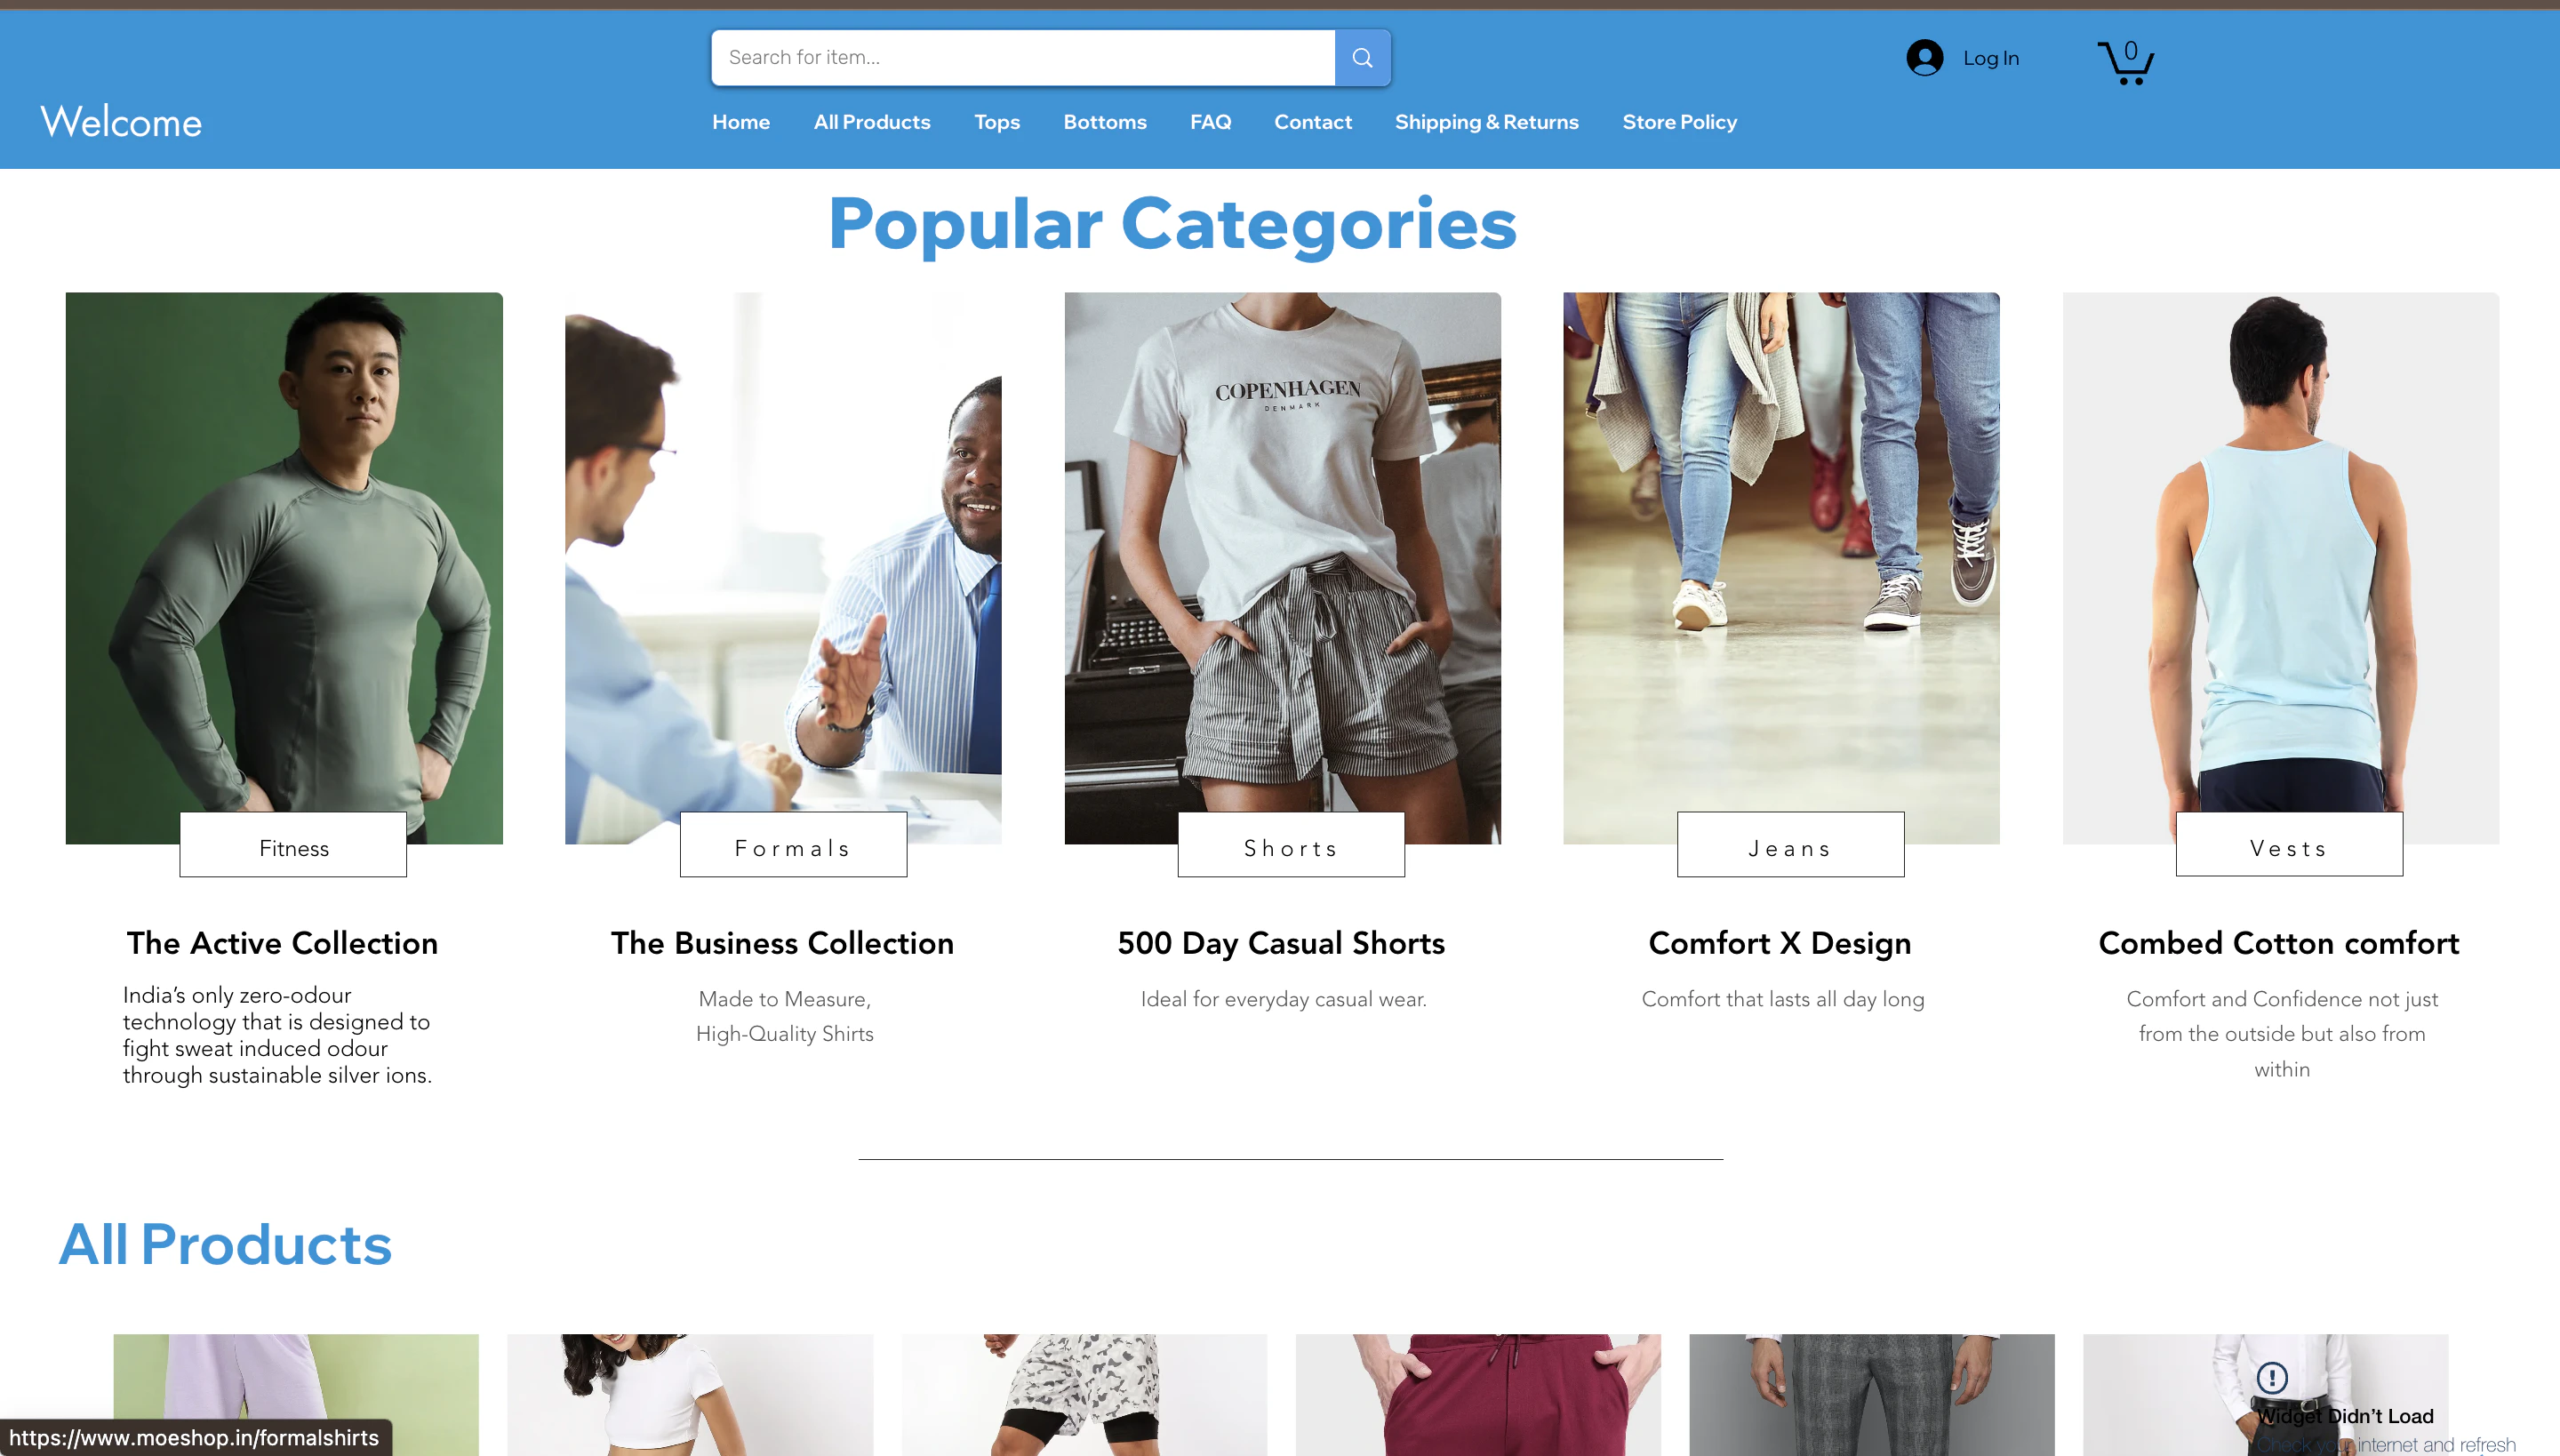 .
* Events to track the action of a user searching for products, adding a product to cart or adding a product to wishlist, completing the purchase and each action’s related information such as the platform, product name, category, brand, price. To understand how to track events, refer to the [Developer Guide](/developer-guide/introduction).
* Integration of the MoEngage Web SDK with your website to create a personalized web experience. For more information, refer to [Web Personalization](/developer-guide/personalize-sdk/sdk-integration/web-personalization-v2).
* Ad blockers disabled in the browser. The personalization editor will not load if ad blockers are enabled.
# Create a Personalized Experience
In this section, let us create a personalized experience that you would like your users to have have in your website.
## Step 1: Target Users
1. Navigate to the sidebar on the left and click **Personalize** **>** **All Experiences** and click **+ Experience**, or click **+ Create new** > **Experience** > **Web**.
.
* Events to track the action of a user searching for products, adding a product to cart or adding a product to wishlist, completing the purchase and each action’s related information such as the platform, product name, category, brand, price. To understand how to track events, refer to the [Developer Guide](/developer-guide/introduction).
* Integration of the MoEngage Web SDK with your website to create a personalized web experience. For more information, refer to [Web Personalization](/developer-guide/personalize-sdk/sdk-integration/web-personalization-v2).
* Ad blockers disabled in the browser. The personalization editor will not load if ad blockers are enabled.
# Create a Personalized Experience
In this section, let us create a personalized experience that you would like your users to have have in your website.
## Step 1: Target Users
1. Navigate to the sidebar on the left and click **Personalize** **>** **All Experiences** and click **+ Experience**, or click **+ Create new** > **Experience** > **Web**.
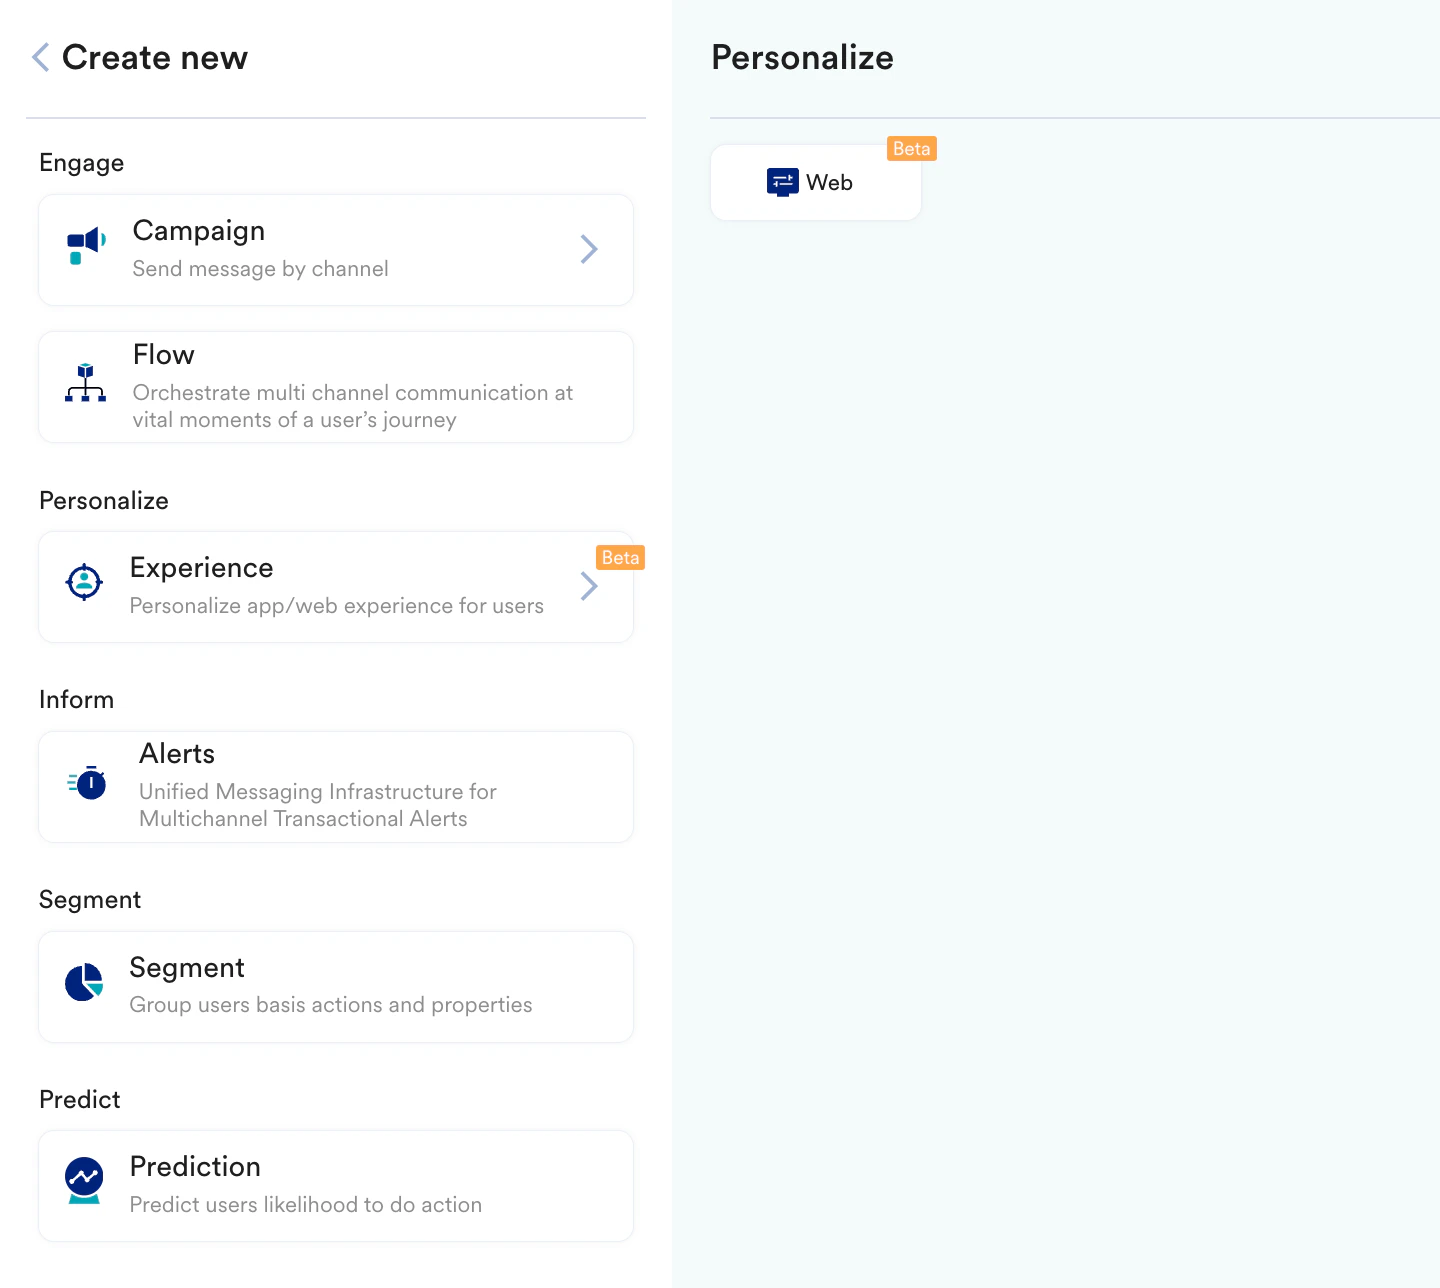 You are taken to the first step "Target users" of defining a personalized experience.
2. Enter the following details:
* **Experience name**: A name for the personalisation you are building. For example, "Dynamic Category Ordering".
* **Experience Tags**: Add tags here to later identify this among the other personalized experiences you will be having.
You are taken to the first step "Target users" of defining a personalized experience.
2. Enter the following details:
* **Experience name**: A name for the personalisation you are building. For example, "Dynamic Category Ordering".
* **Experience Tags**: Add tags here to later identify this among the other personalized experiences you will be having.
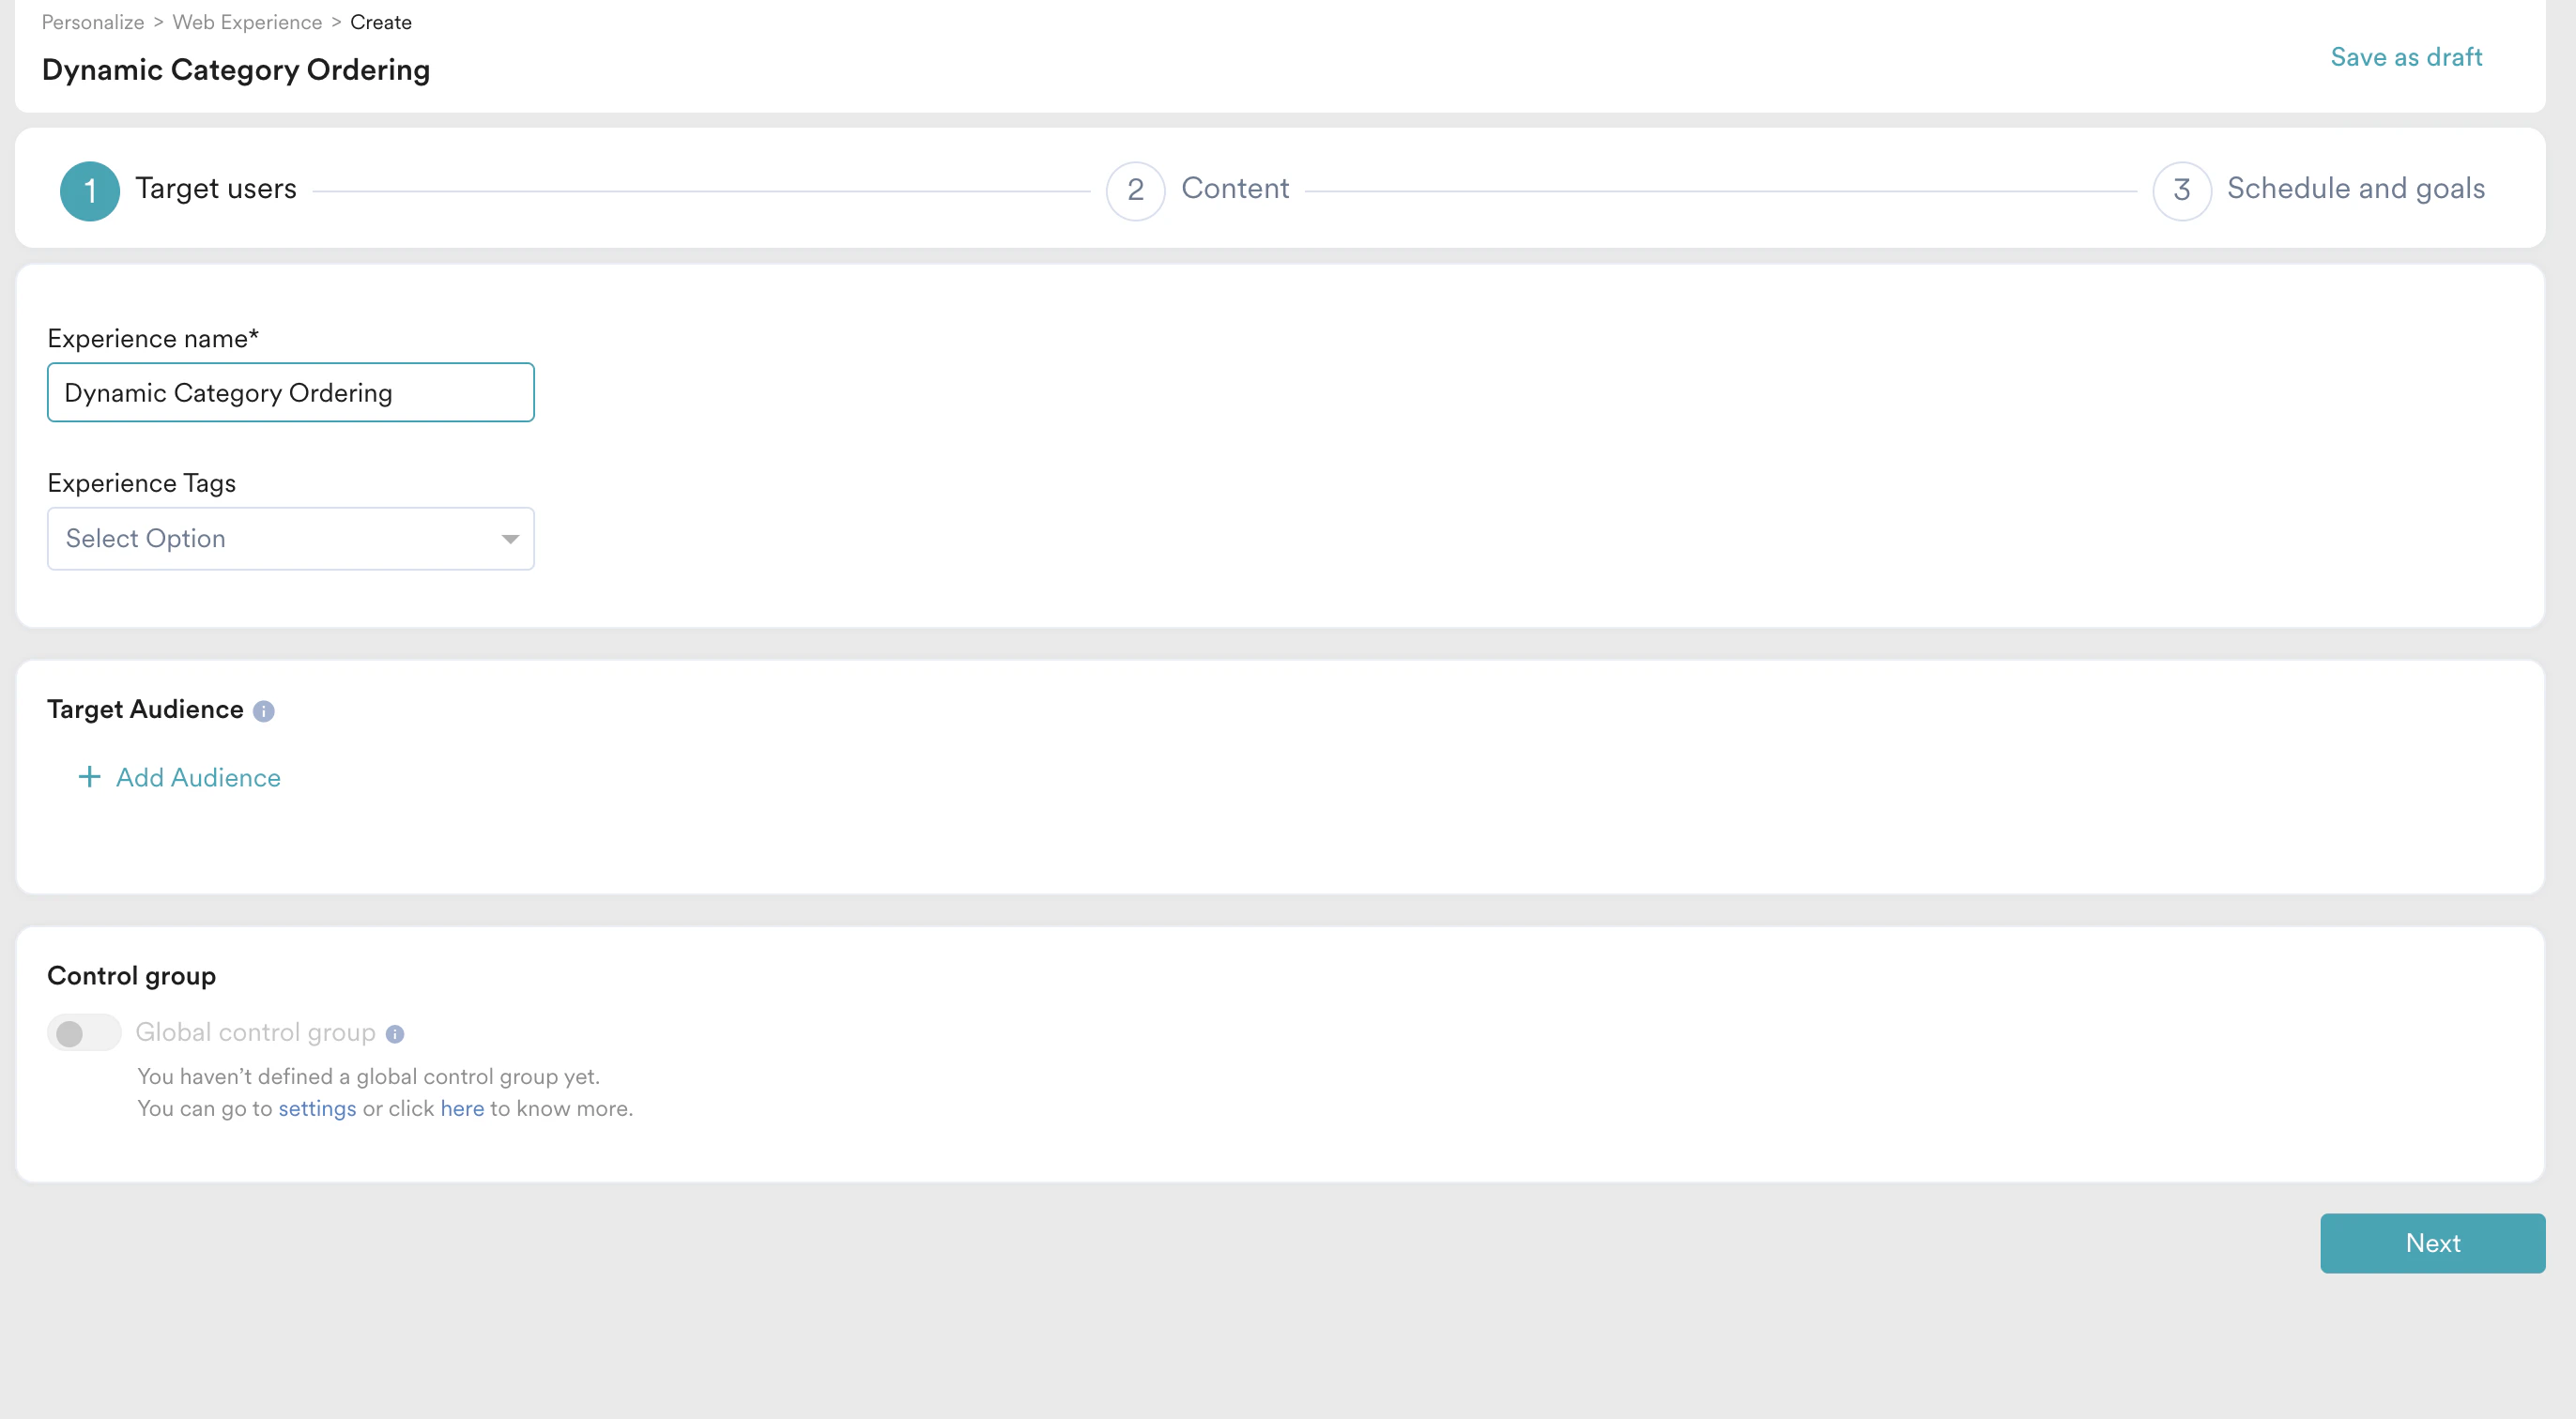 3. Under **Target Audience**, click **+ Add Audience** and then click **+ New Audience** to define the target audience.
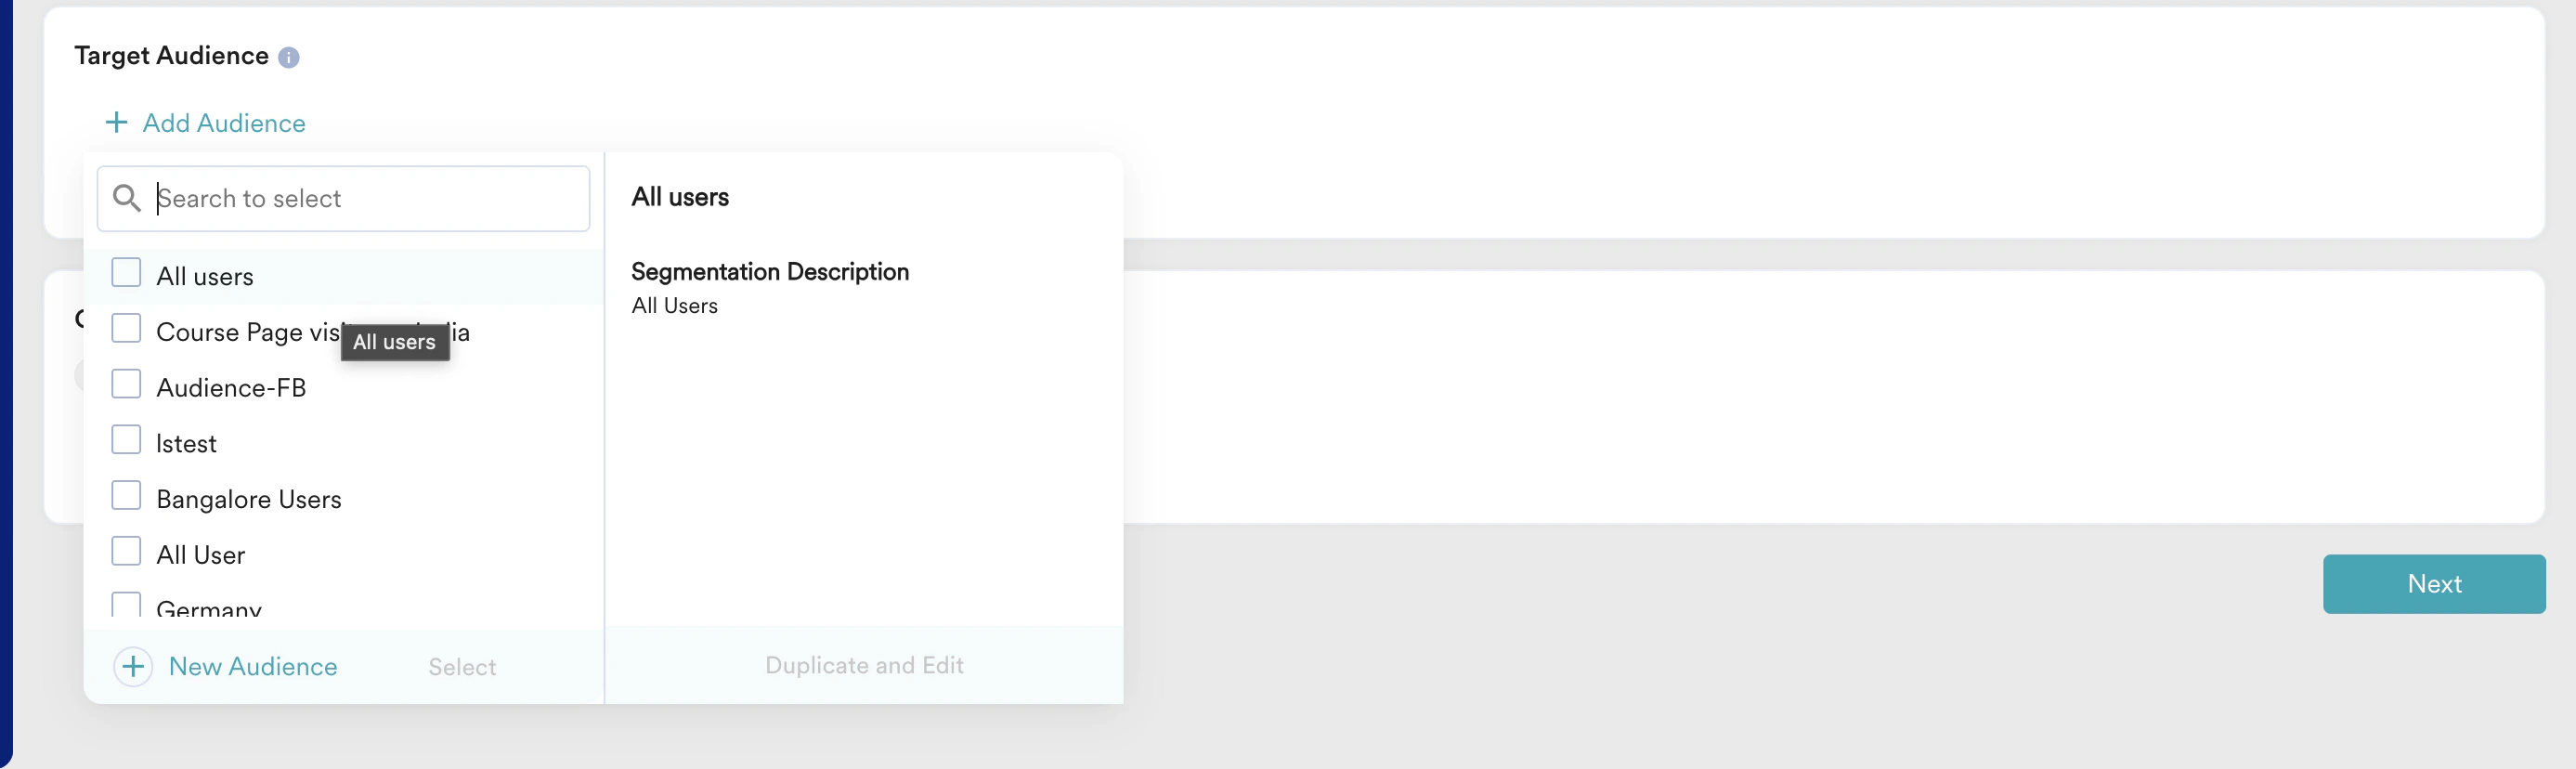 4. The Add new audience pop-up is displayed. In the **Audience name** field, enter a name. For example, "Fitness Freaks".
5. Select the **Filter users by** option and click **User Affinity** tab to define audience based on users affinity.\
**
4. The Add new audience pop-up is displayed. In the **Audience name** field, enter a name. For example, "Fitness Freaks".
5. Select the **Filter users by** option and click **User Affinity** tab to define audience based on users affinity.\
**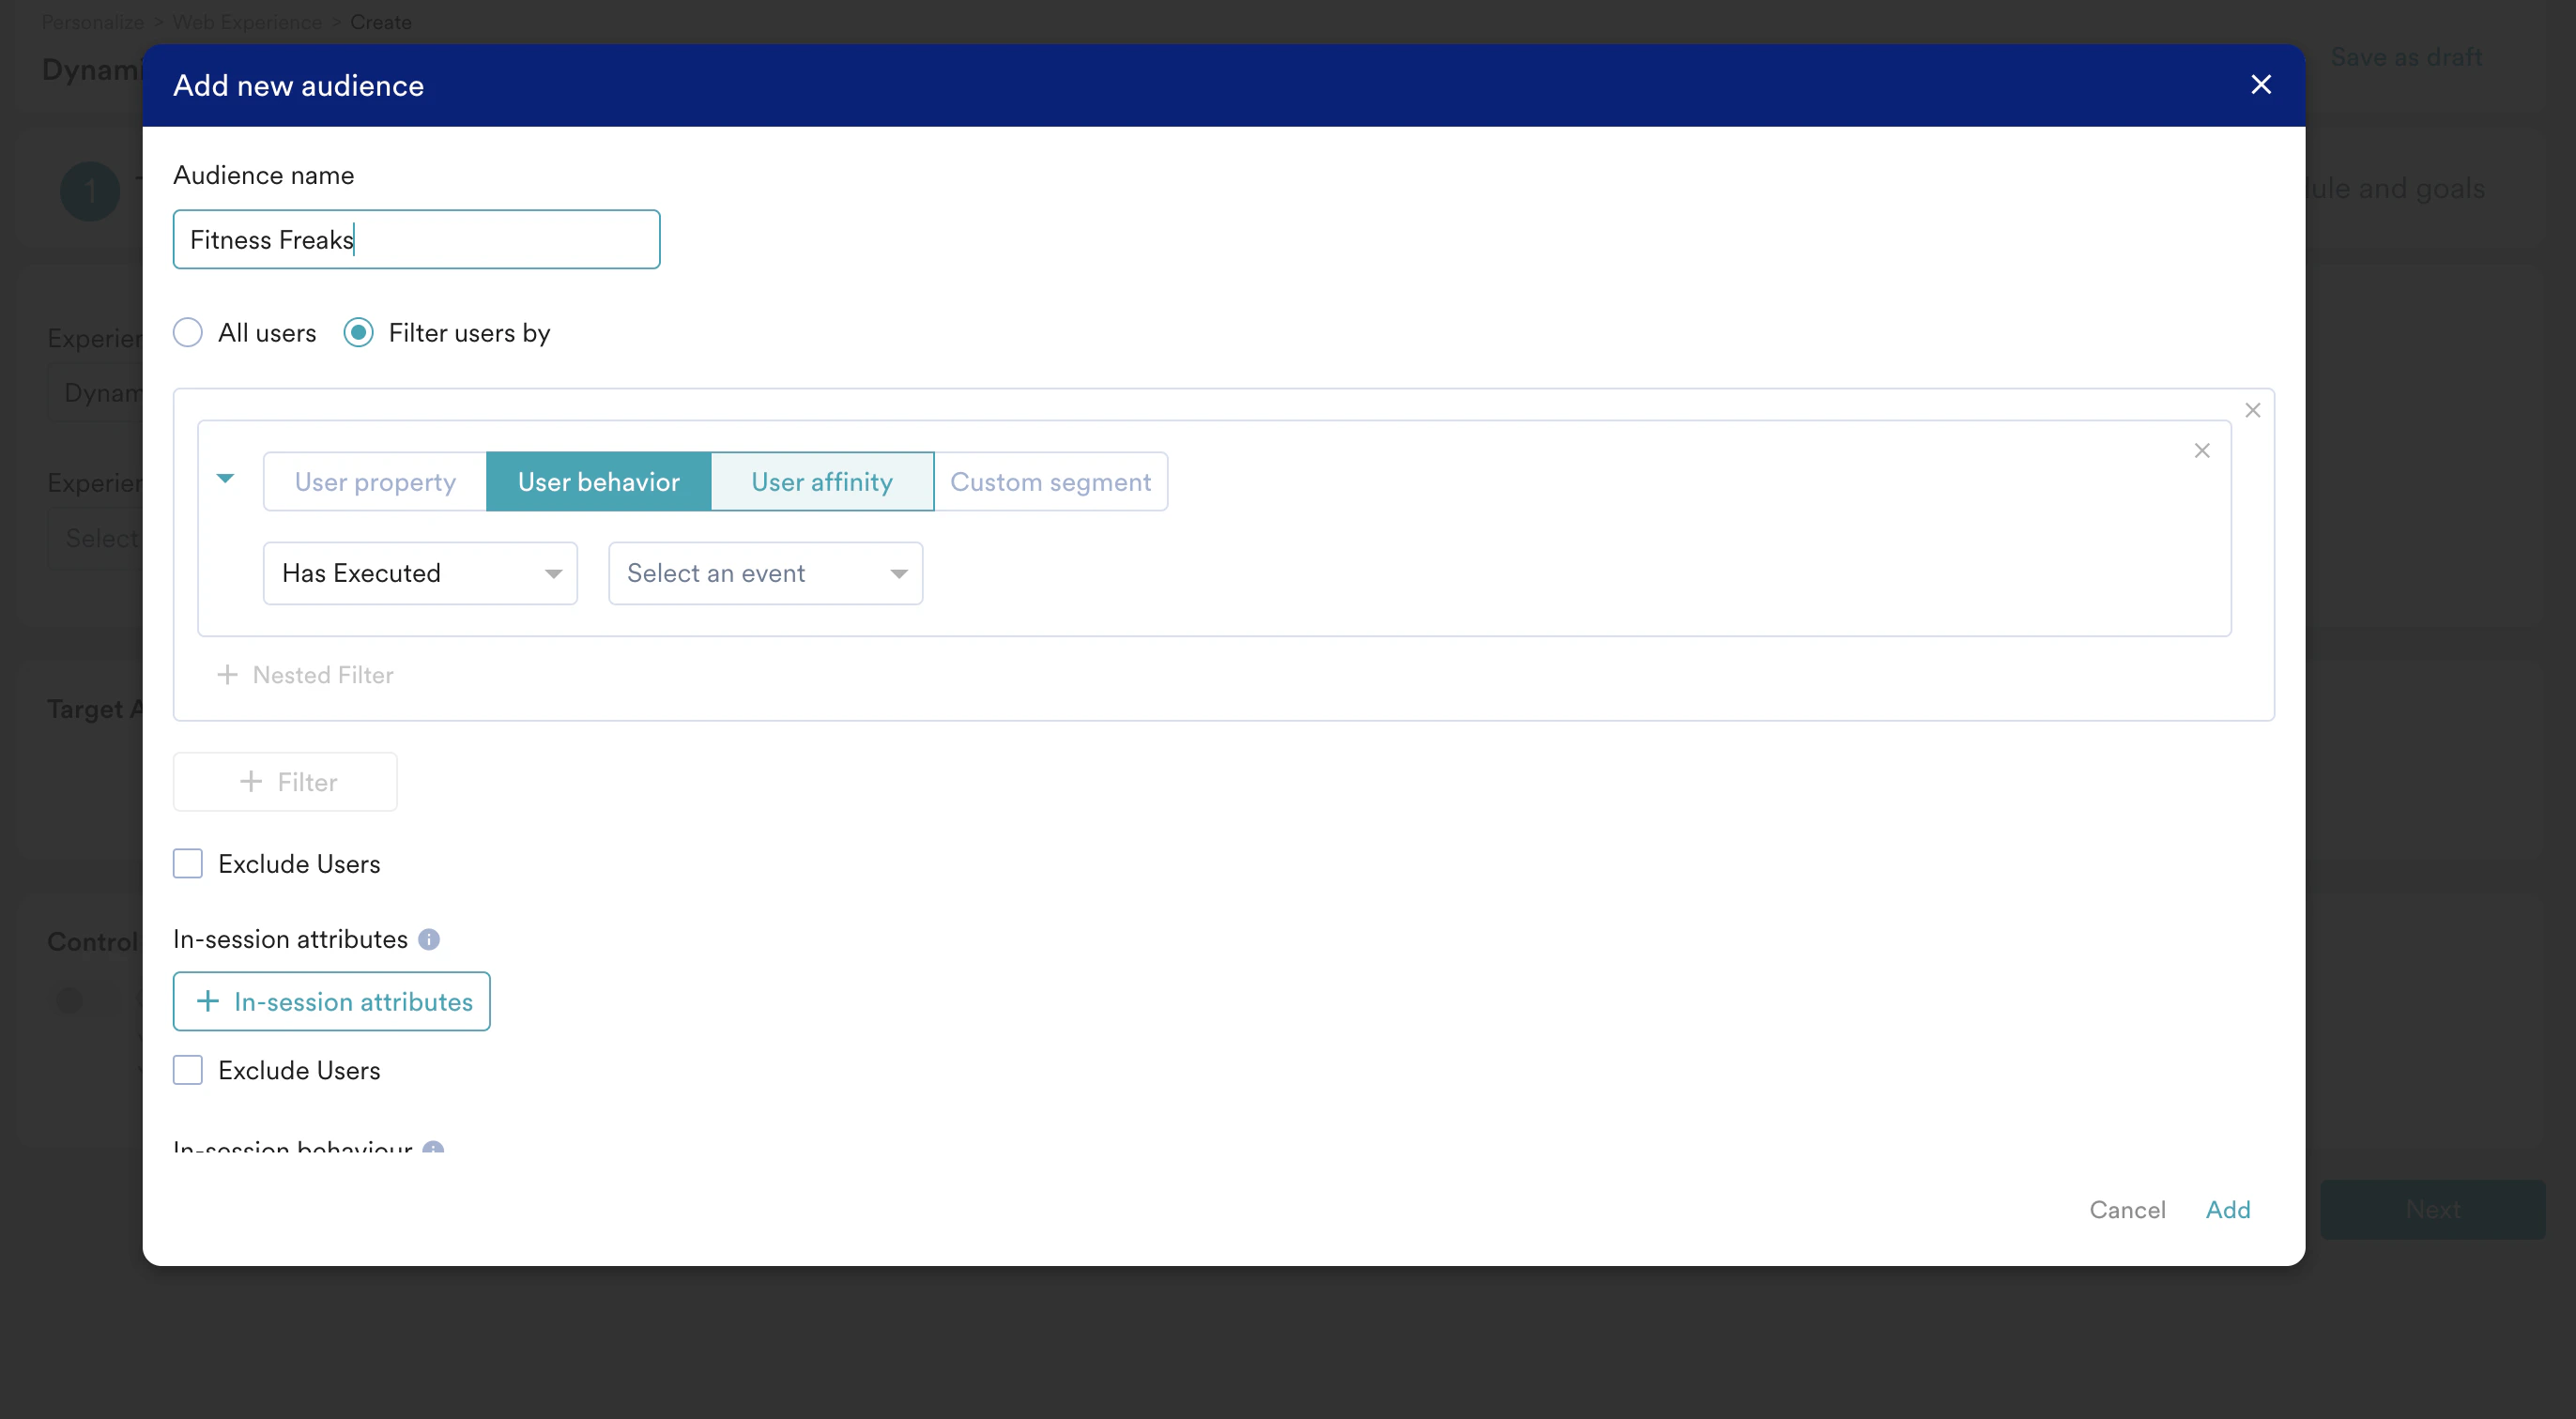 **
6. For this example, we will define our affinity segments as the following:
* Users who have searched predominantly in Fitness Category
* Users who have searched predominantly in Formals
* Users who have searched predominantly in Shorts
7. Search for the event "Product Searched" and then select **Predominantly** with Category as Fitness and then click **Add**. To know more about users affinity segments and the filters, refer [here](/user-guide/segment/segment-operations/affinity-segments). **
**
6. For this example, we will define our affinity segments as the following:
* Users who have searched predominantly in Fitness Category
* Users who have searched predominantly in Formals
* Users who have searched predominantly in Shorts
7. Search for the event "Product Searched" and then select **Predominantly** with Category as Fitness and then click **Add**. To know more about users affinity segments and the filters, refer [here](/user-guide/segment/segment-operations/affinity-segments). **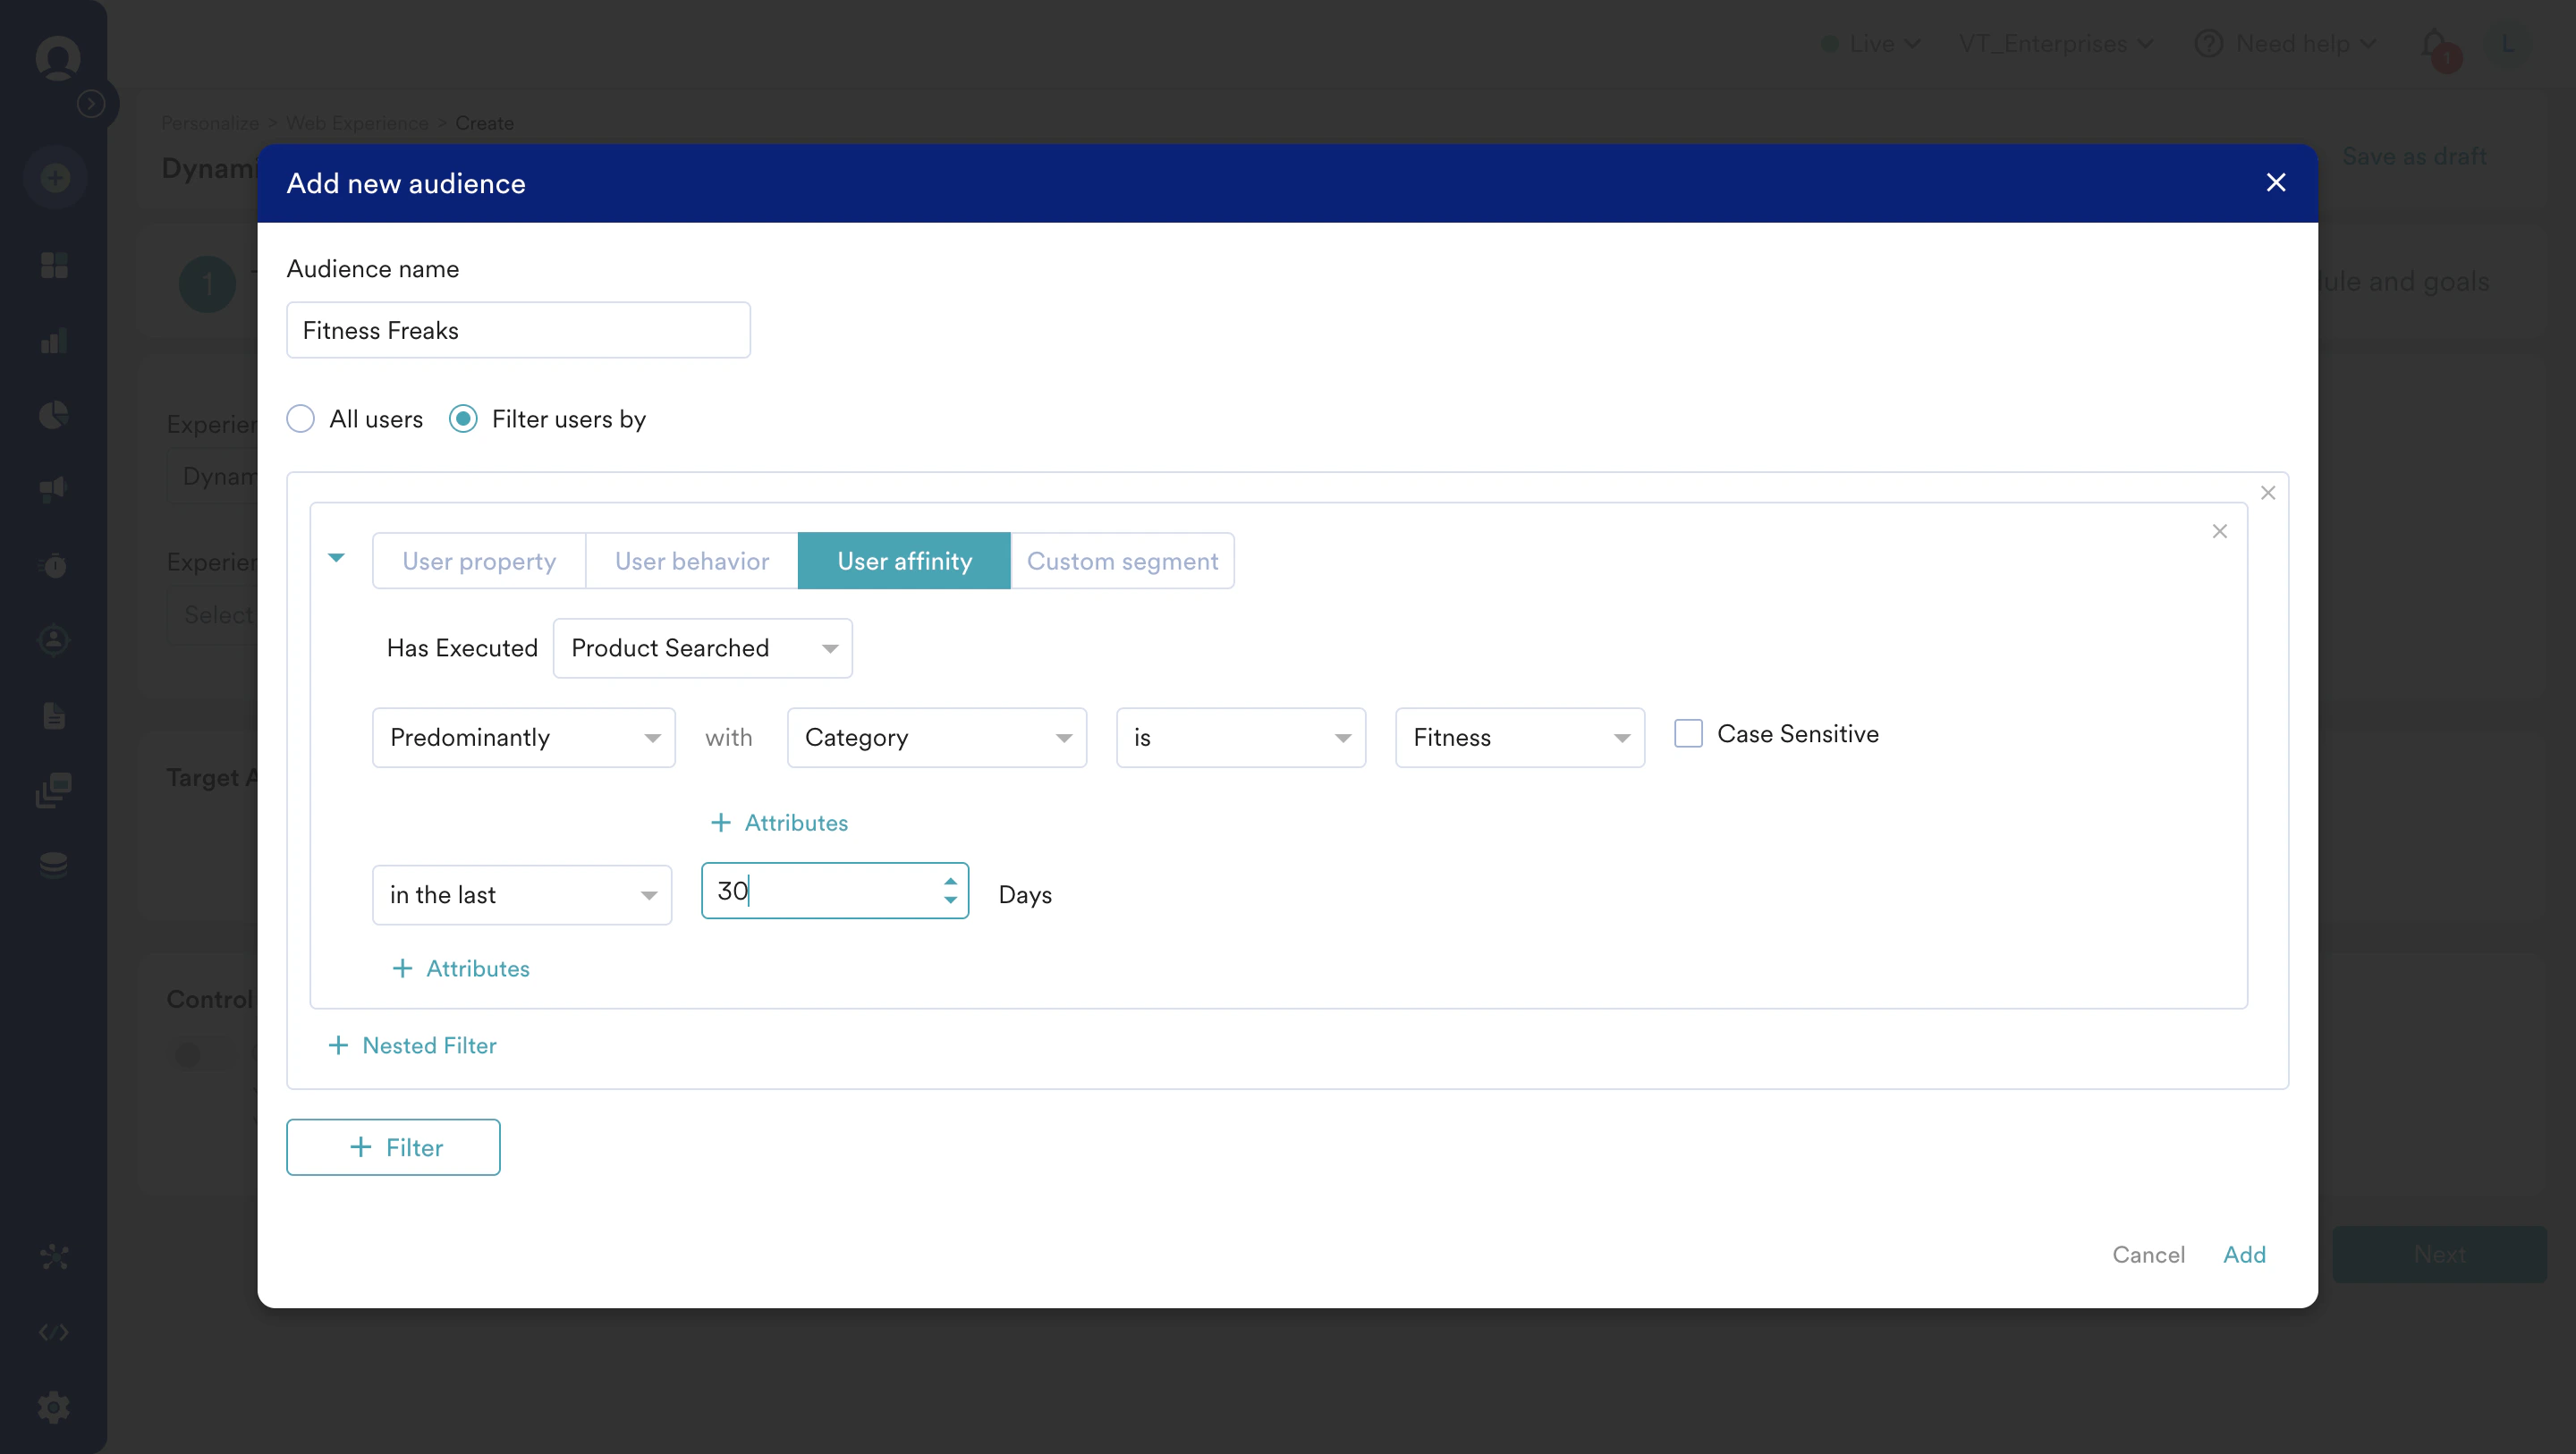 **
8. Follow steps 3 to 7 to define the other two possible categories "Formals" and "Shorts". **
**
8. Follow steps 3 to 7 to define the other two possible categories "Formals" and "Shorts". **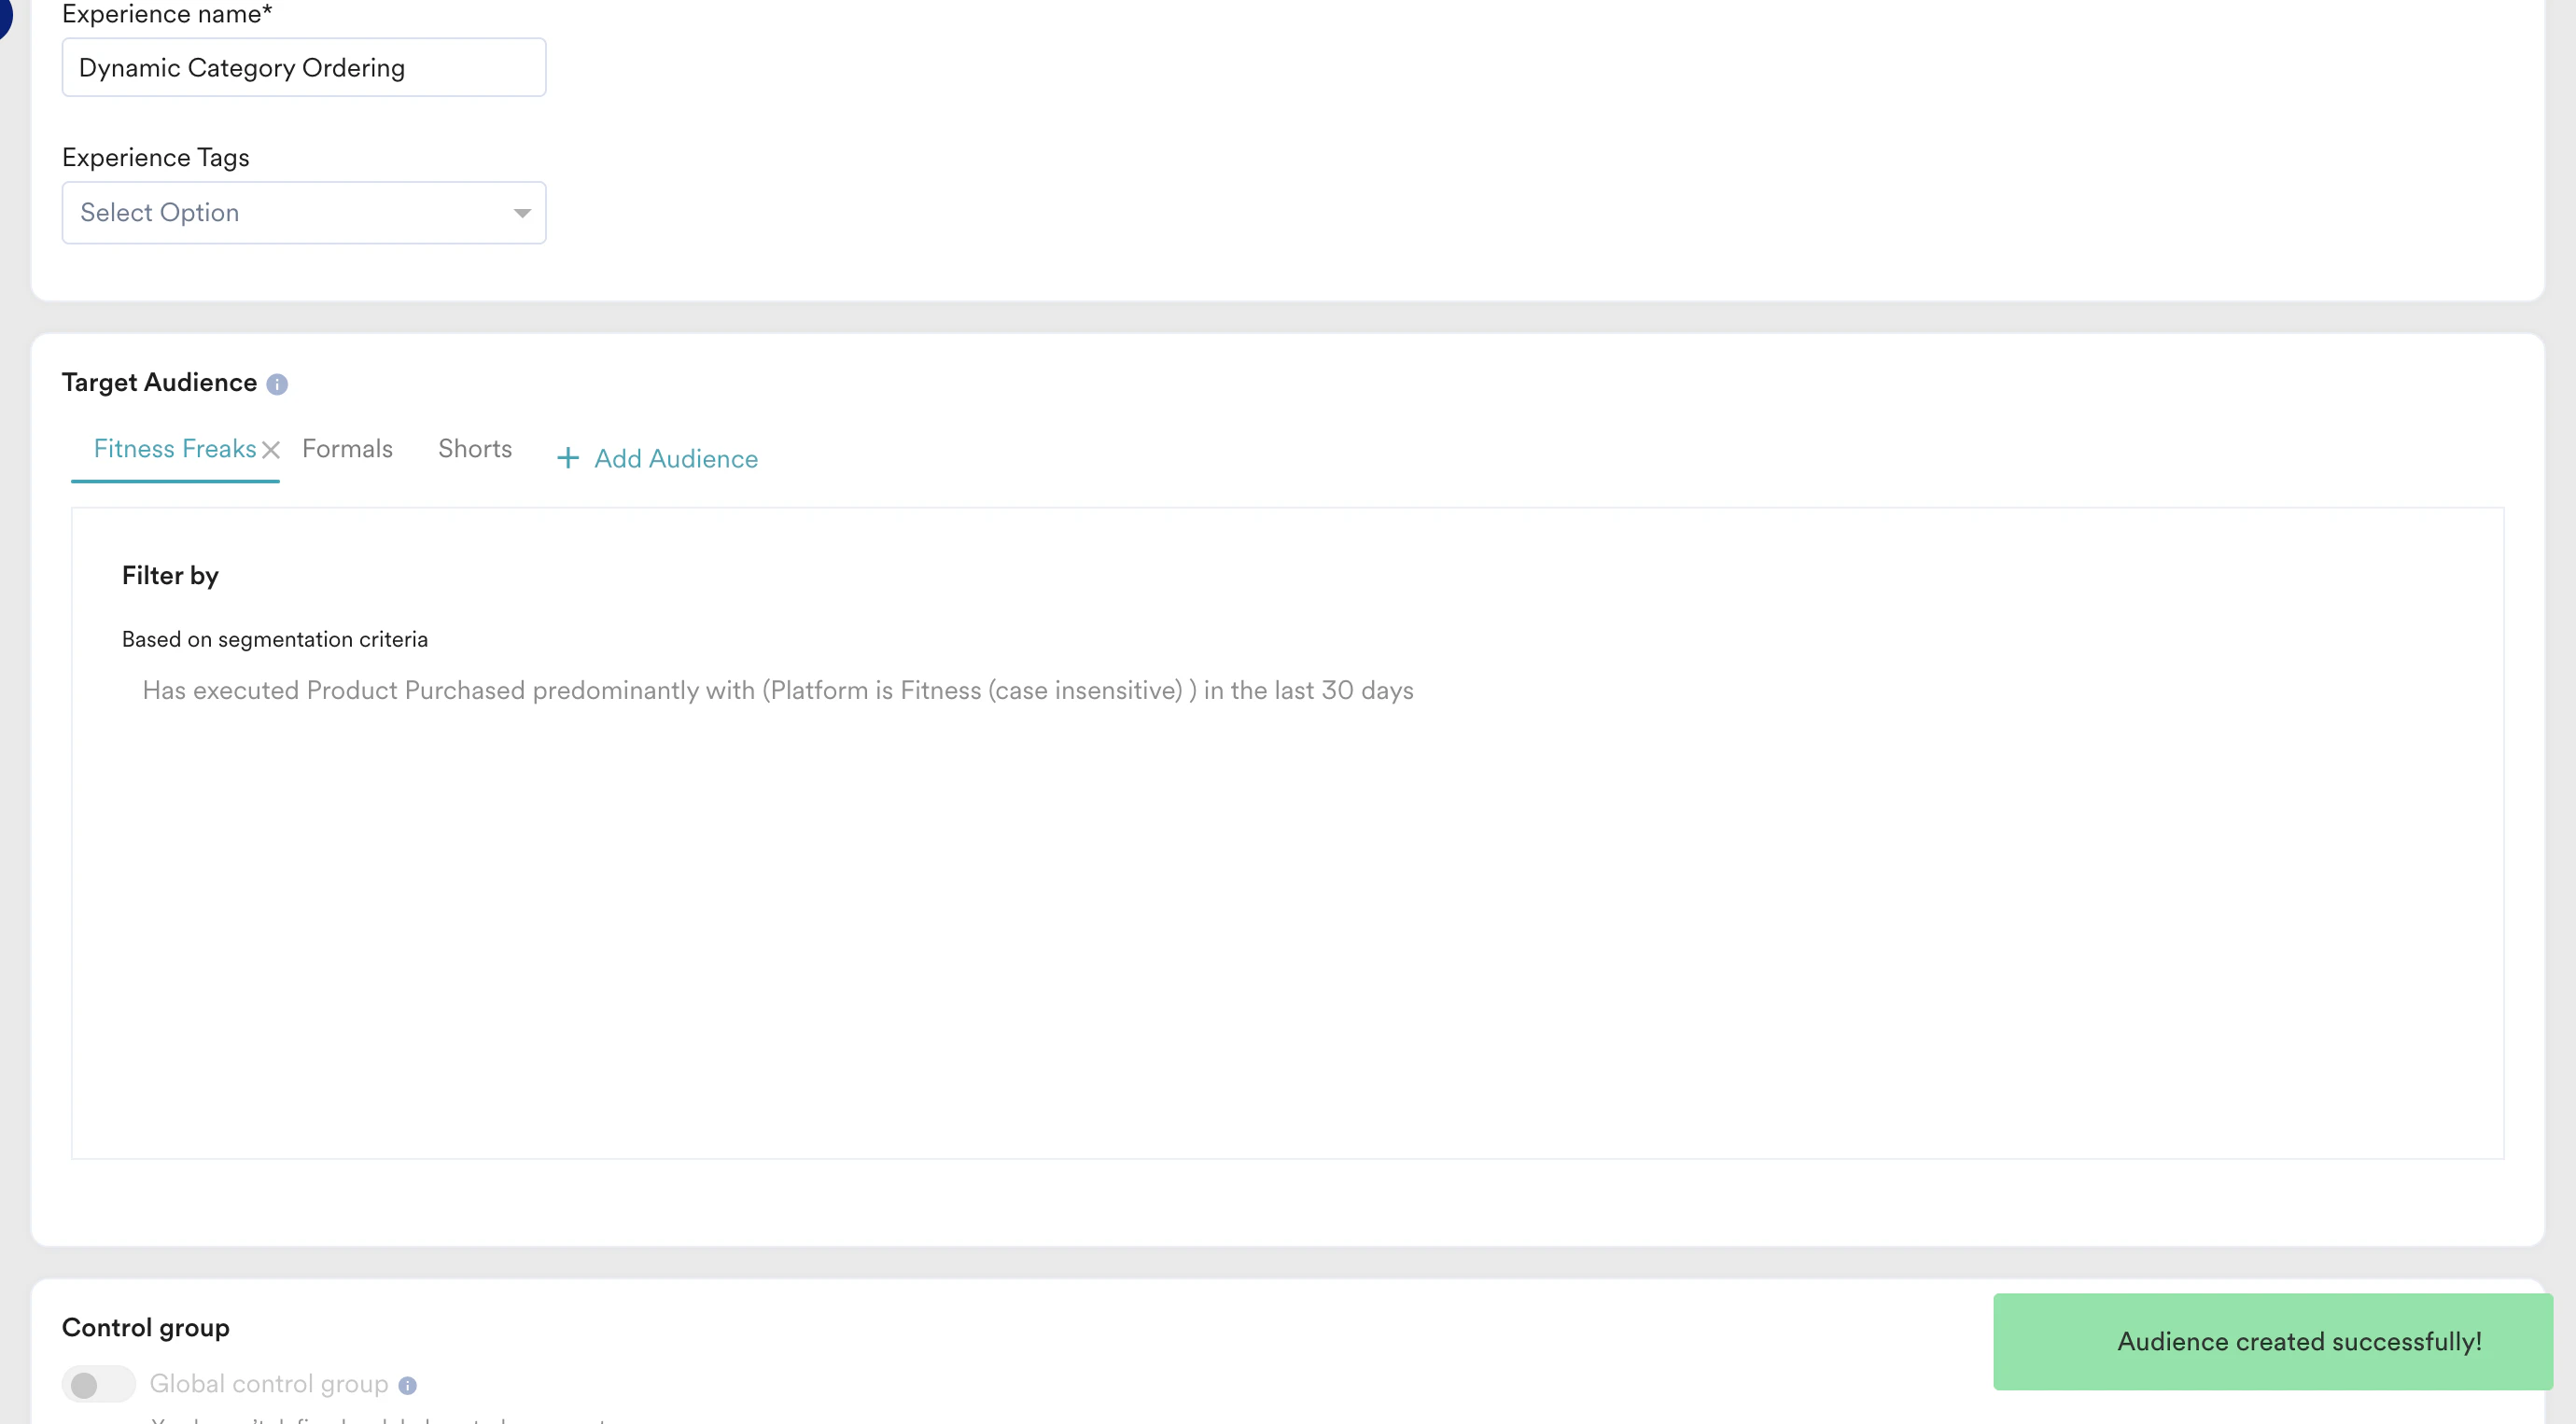 **
9. Click **Next** to move to the second step "Content" where you can define the content that will go into your campaign.
## Step 2: Content
1. Clicking **Next** in the first step "Target users" will display the URL(s) to personalize pop-up. We can use this to define where we would like to show the defined personalization in our website.\
**
**
9. Click **Next** to move to the second step "Content" where you can define the content that will go into your campaign.
## Step 2: Content
1. Clicking **Next** in the first step "Target users" will display the URL(s) to personalize pop-up. We can use this to define where we would like to show the defined personalization in our website.\
**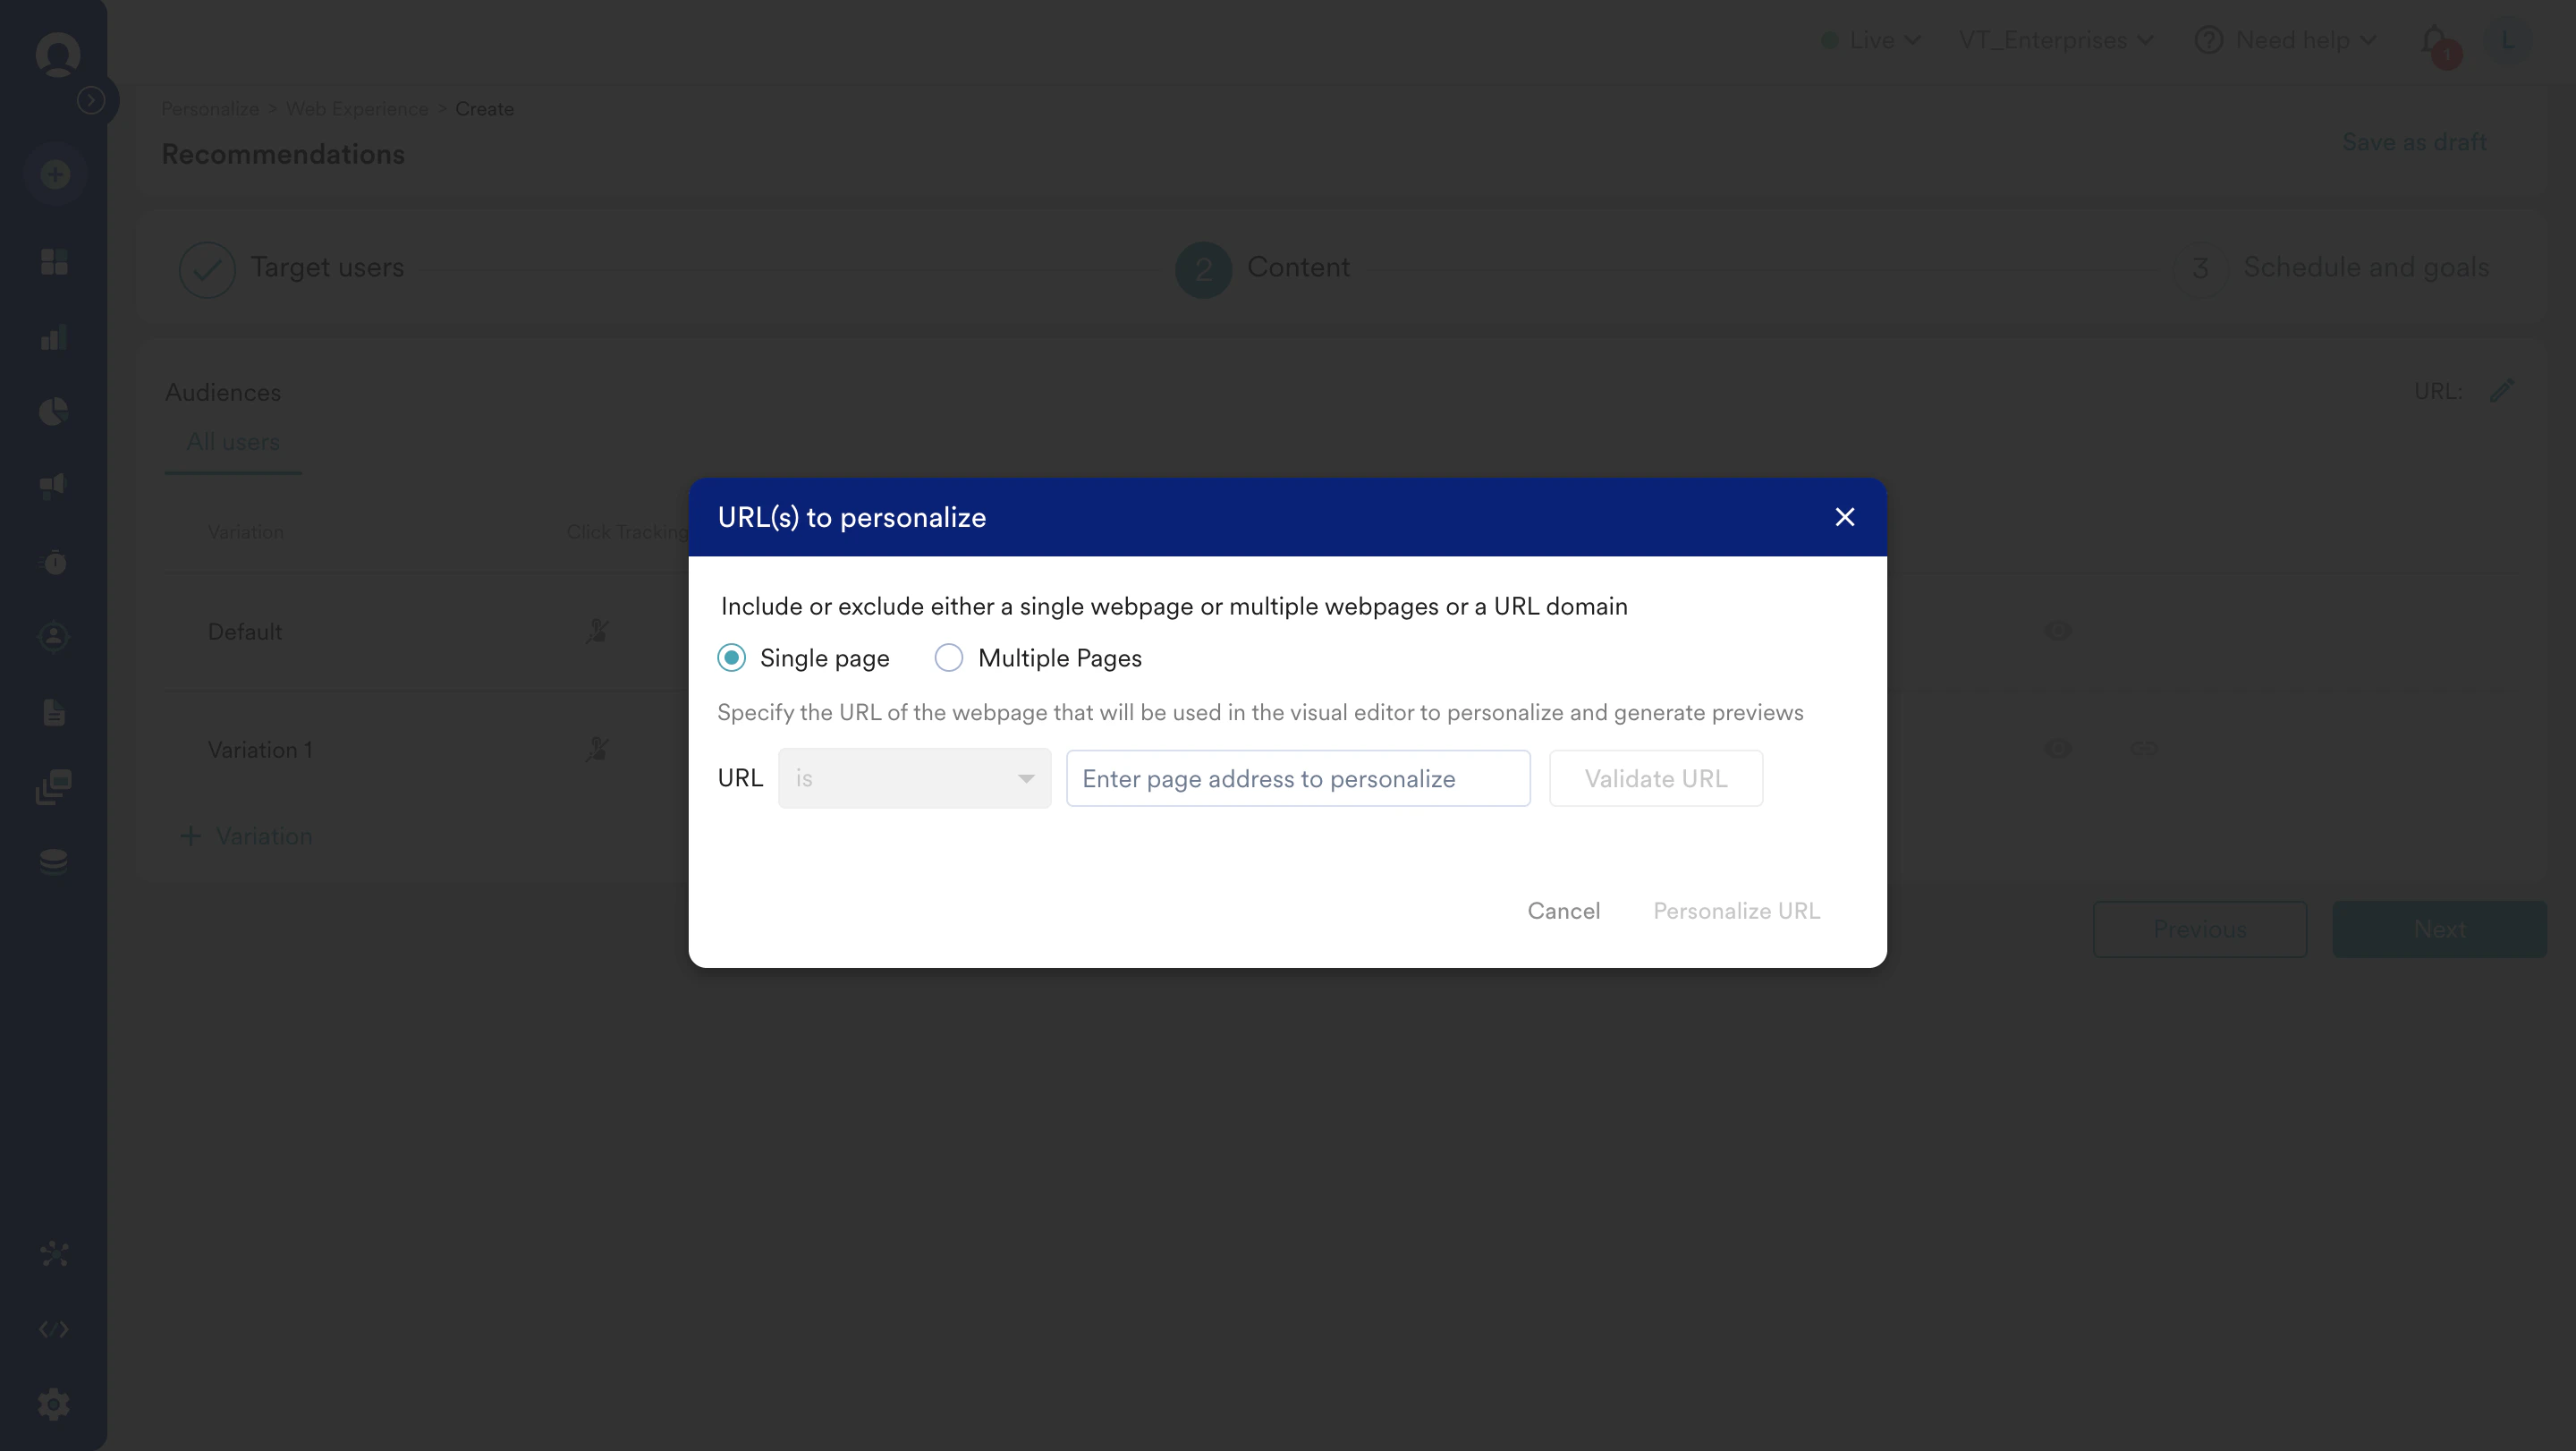 **
2. Select the **Single page** option because the Category menu would most likely be in the Home page alone.
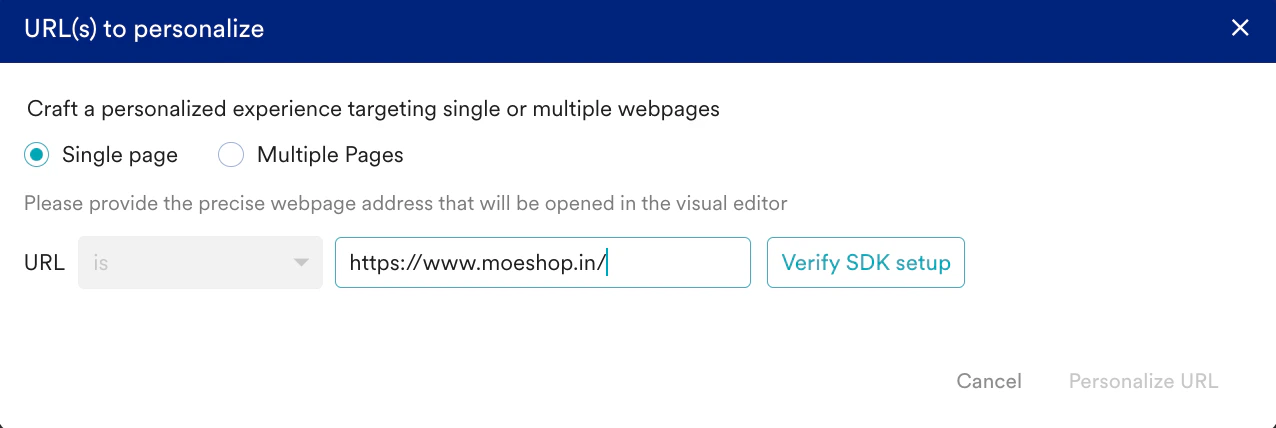
3. In the **URL** field, enter the URL on which we will do the setup and click **Verify SDK setup**. This will check if the SDK is installed in the pages.
**
2. Select the **Single page** option because the Category menu would most likely be in the Home page alone.
3. In the **URL** field, enter the URL on which we will do the setup and click **Verify SDK setup**. This will check if the SDK is installed in the pages.
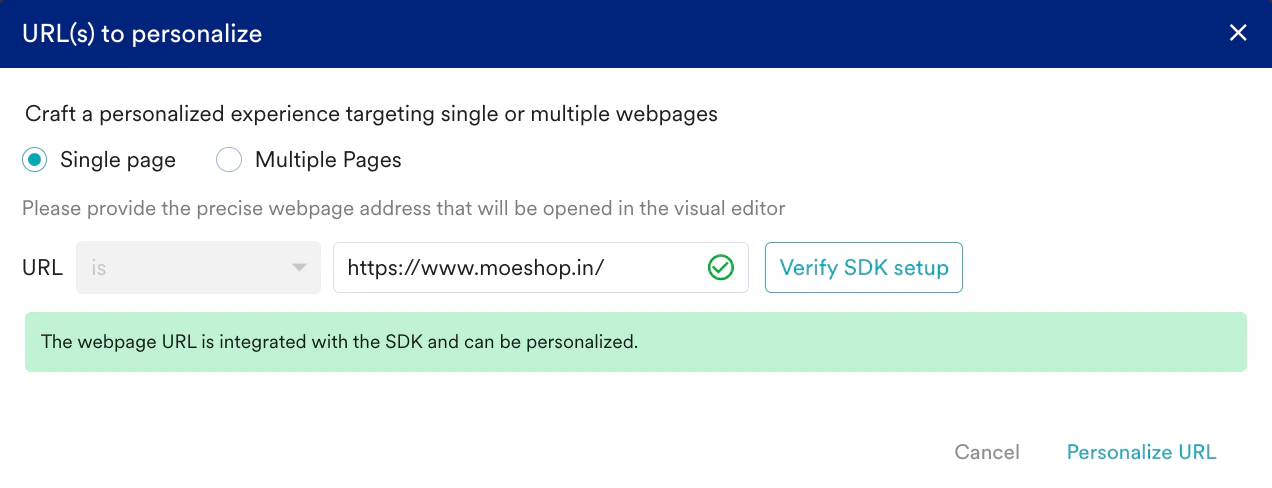
 4. Click **Personalize URL** to open our website in the editor.
 5. You are prompted to define the split of users—how many should see the personalized view of this experience.
6. Click **+ Variation** to add multiple variations if required and define the same. **
5. You are prompted to define the split of users—how many should see the personalized view of this experience.
6. Click **+ Variation** to add multiple variations if required and define the same. **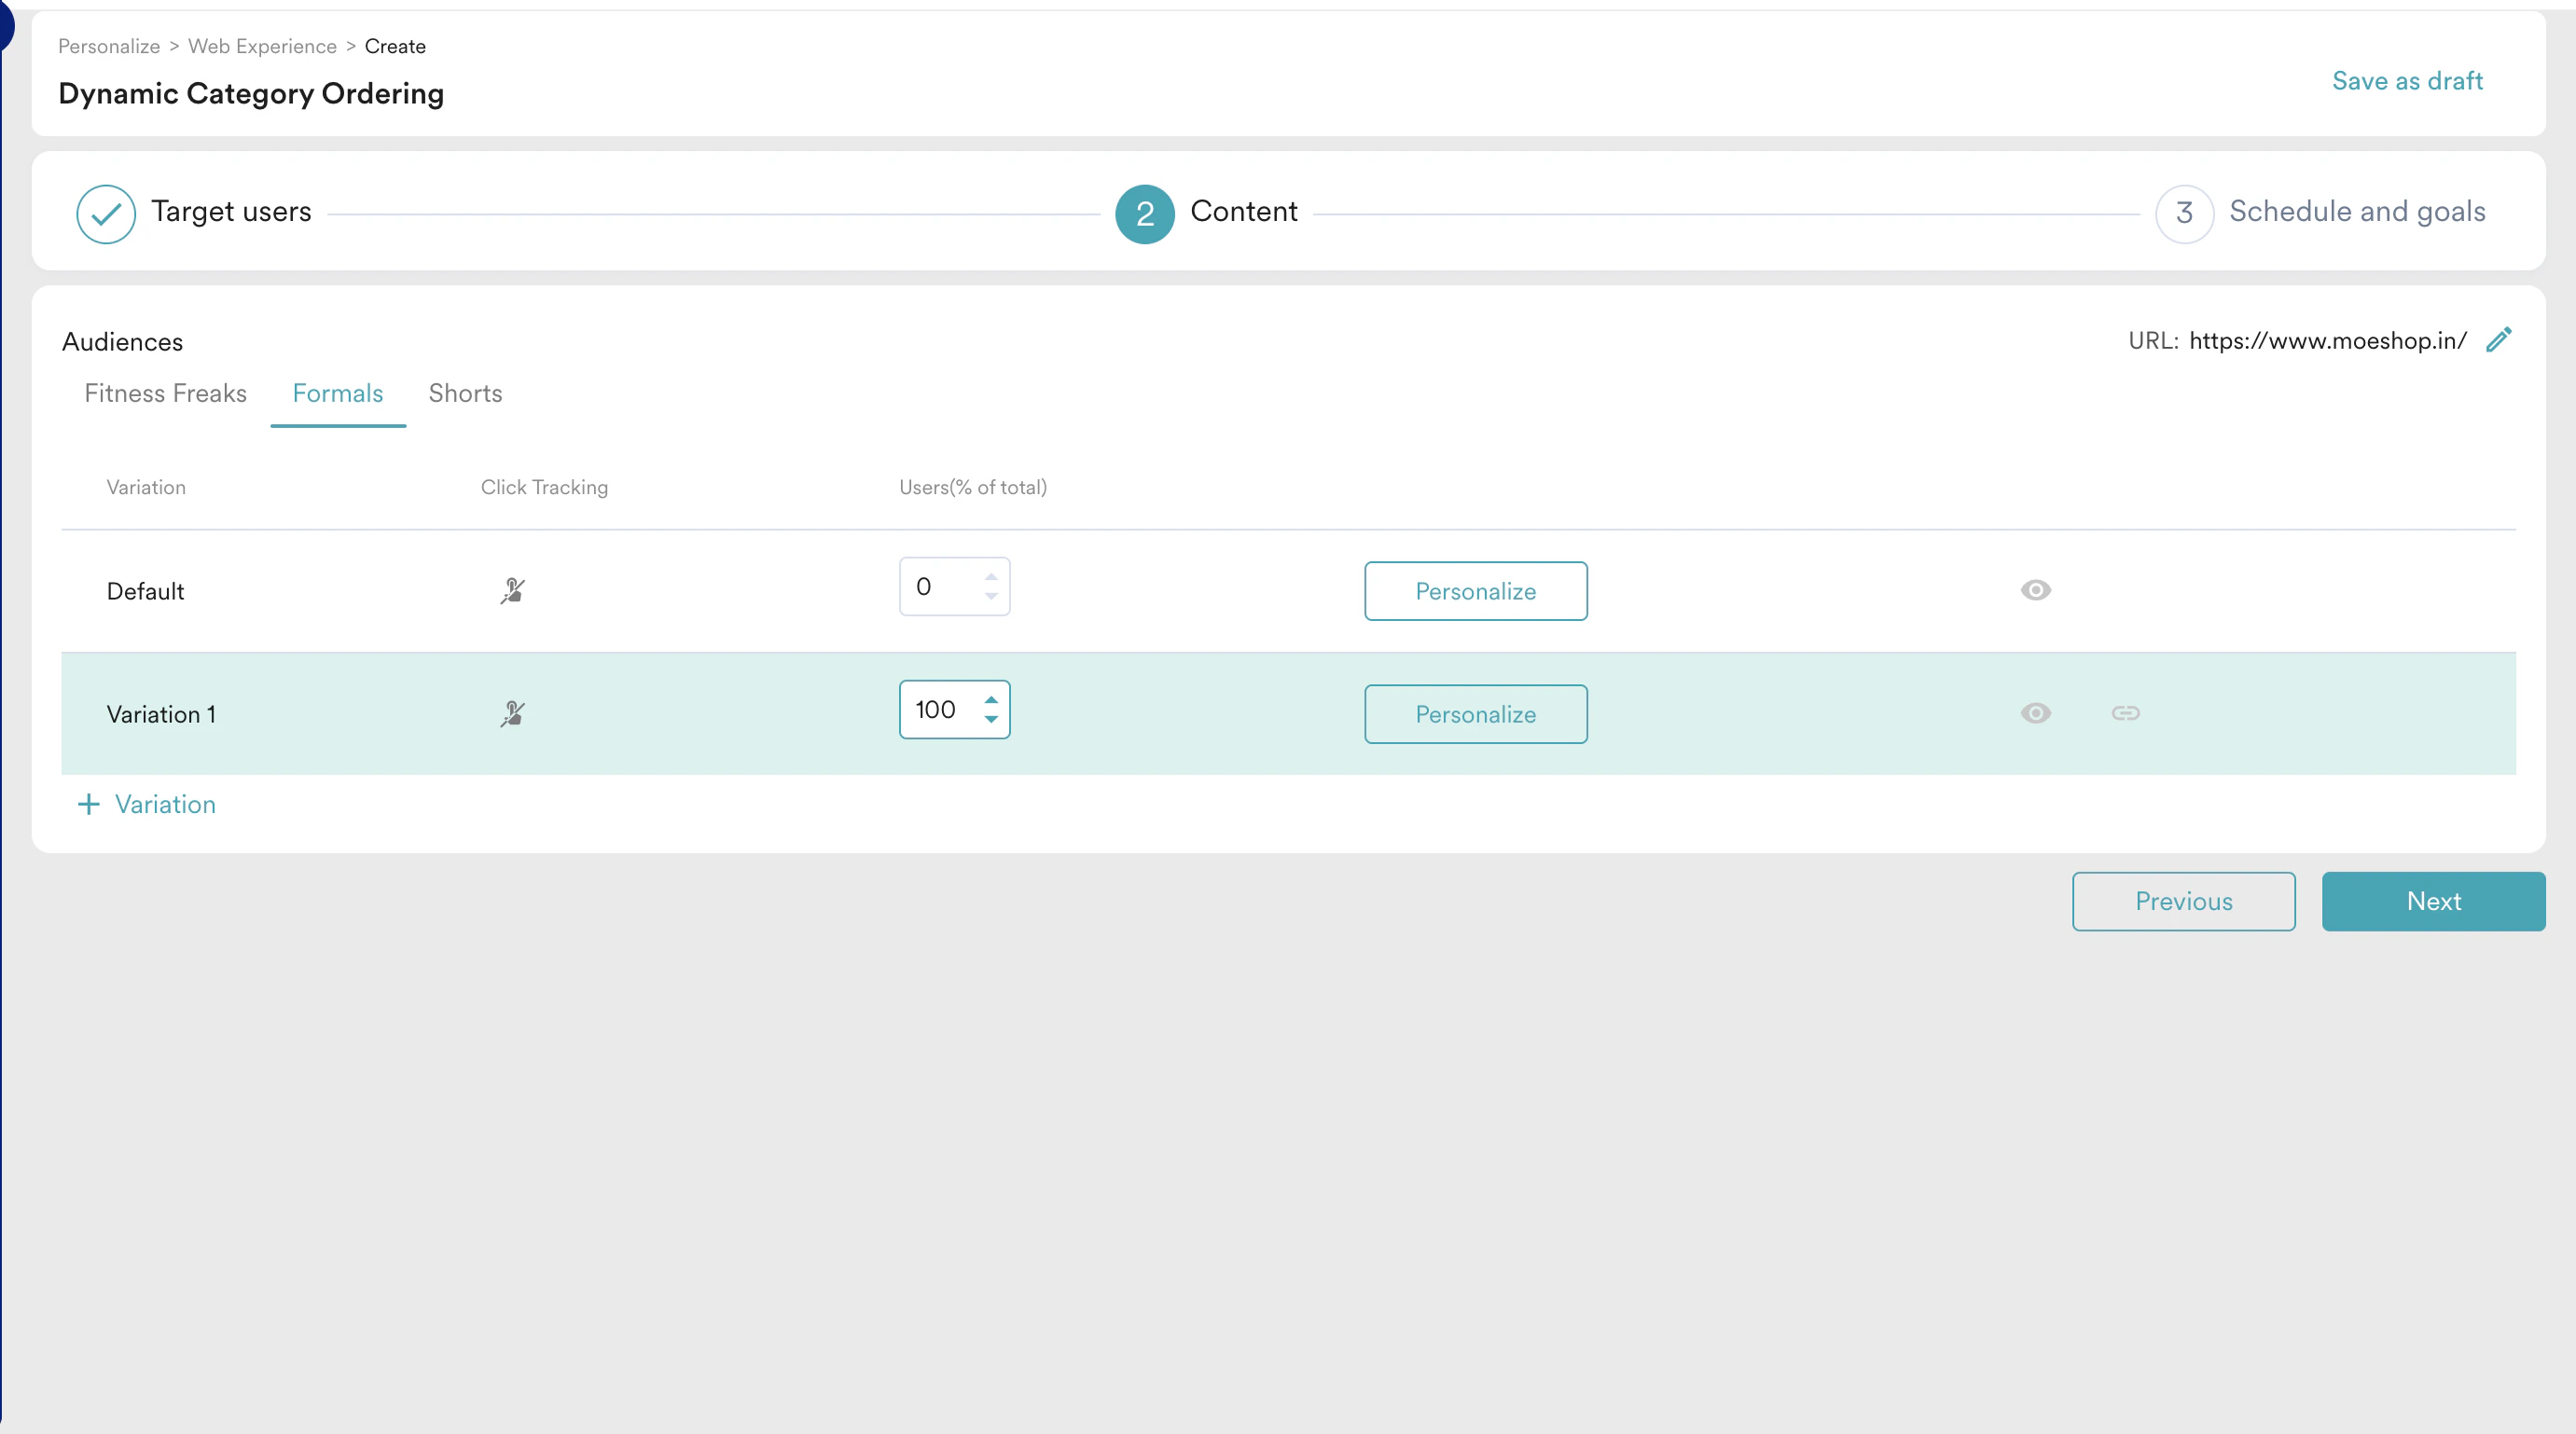 **
7. Click **Personalize** for the required variation to open the website in the editor in a new tab.\
**Note:** You can personalize the content for all variations except the **Default** variation.\
**
**
7. Click **Personalize** for the required variation to open the website in the editor in a new tab.\
**Note:** You can personalize the content for all variations except the **Default** variation.\
**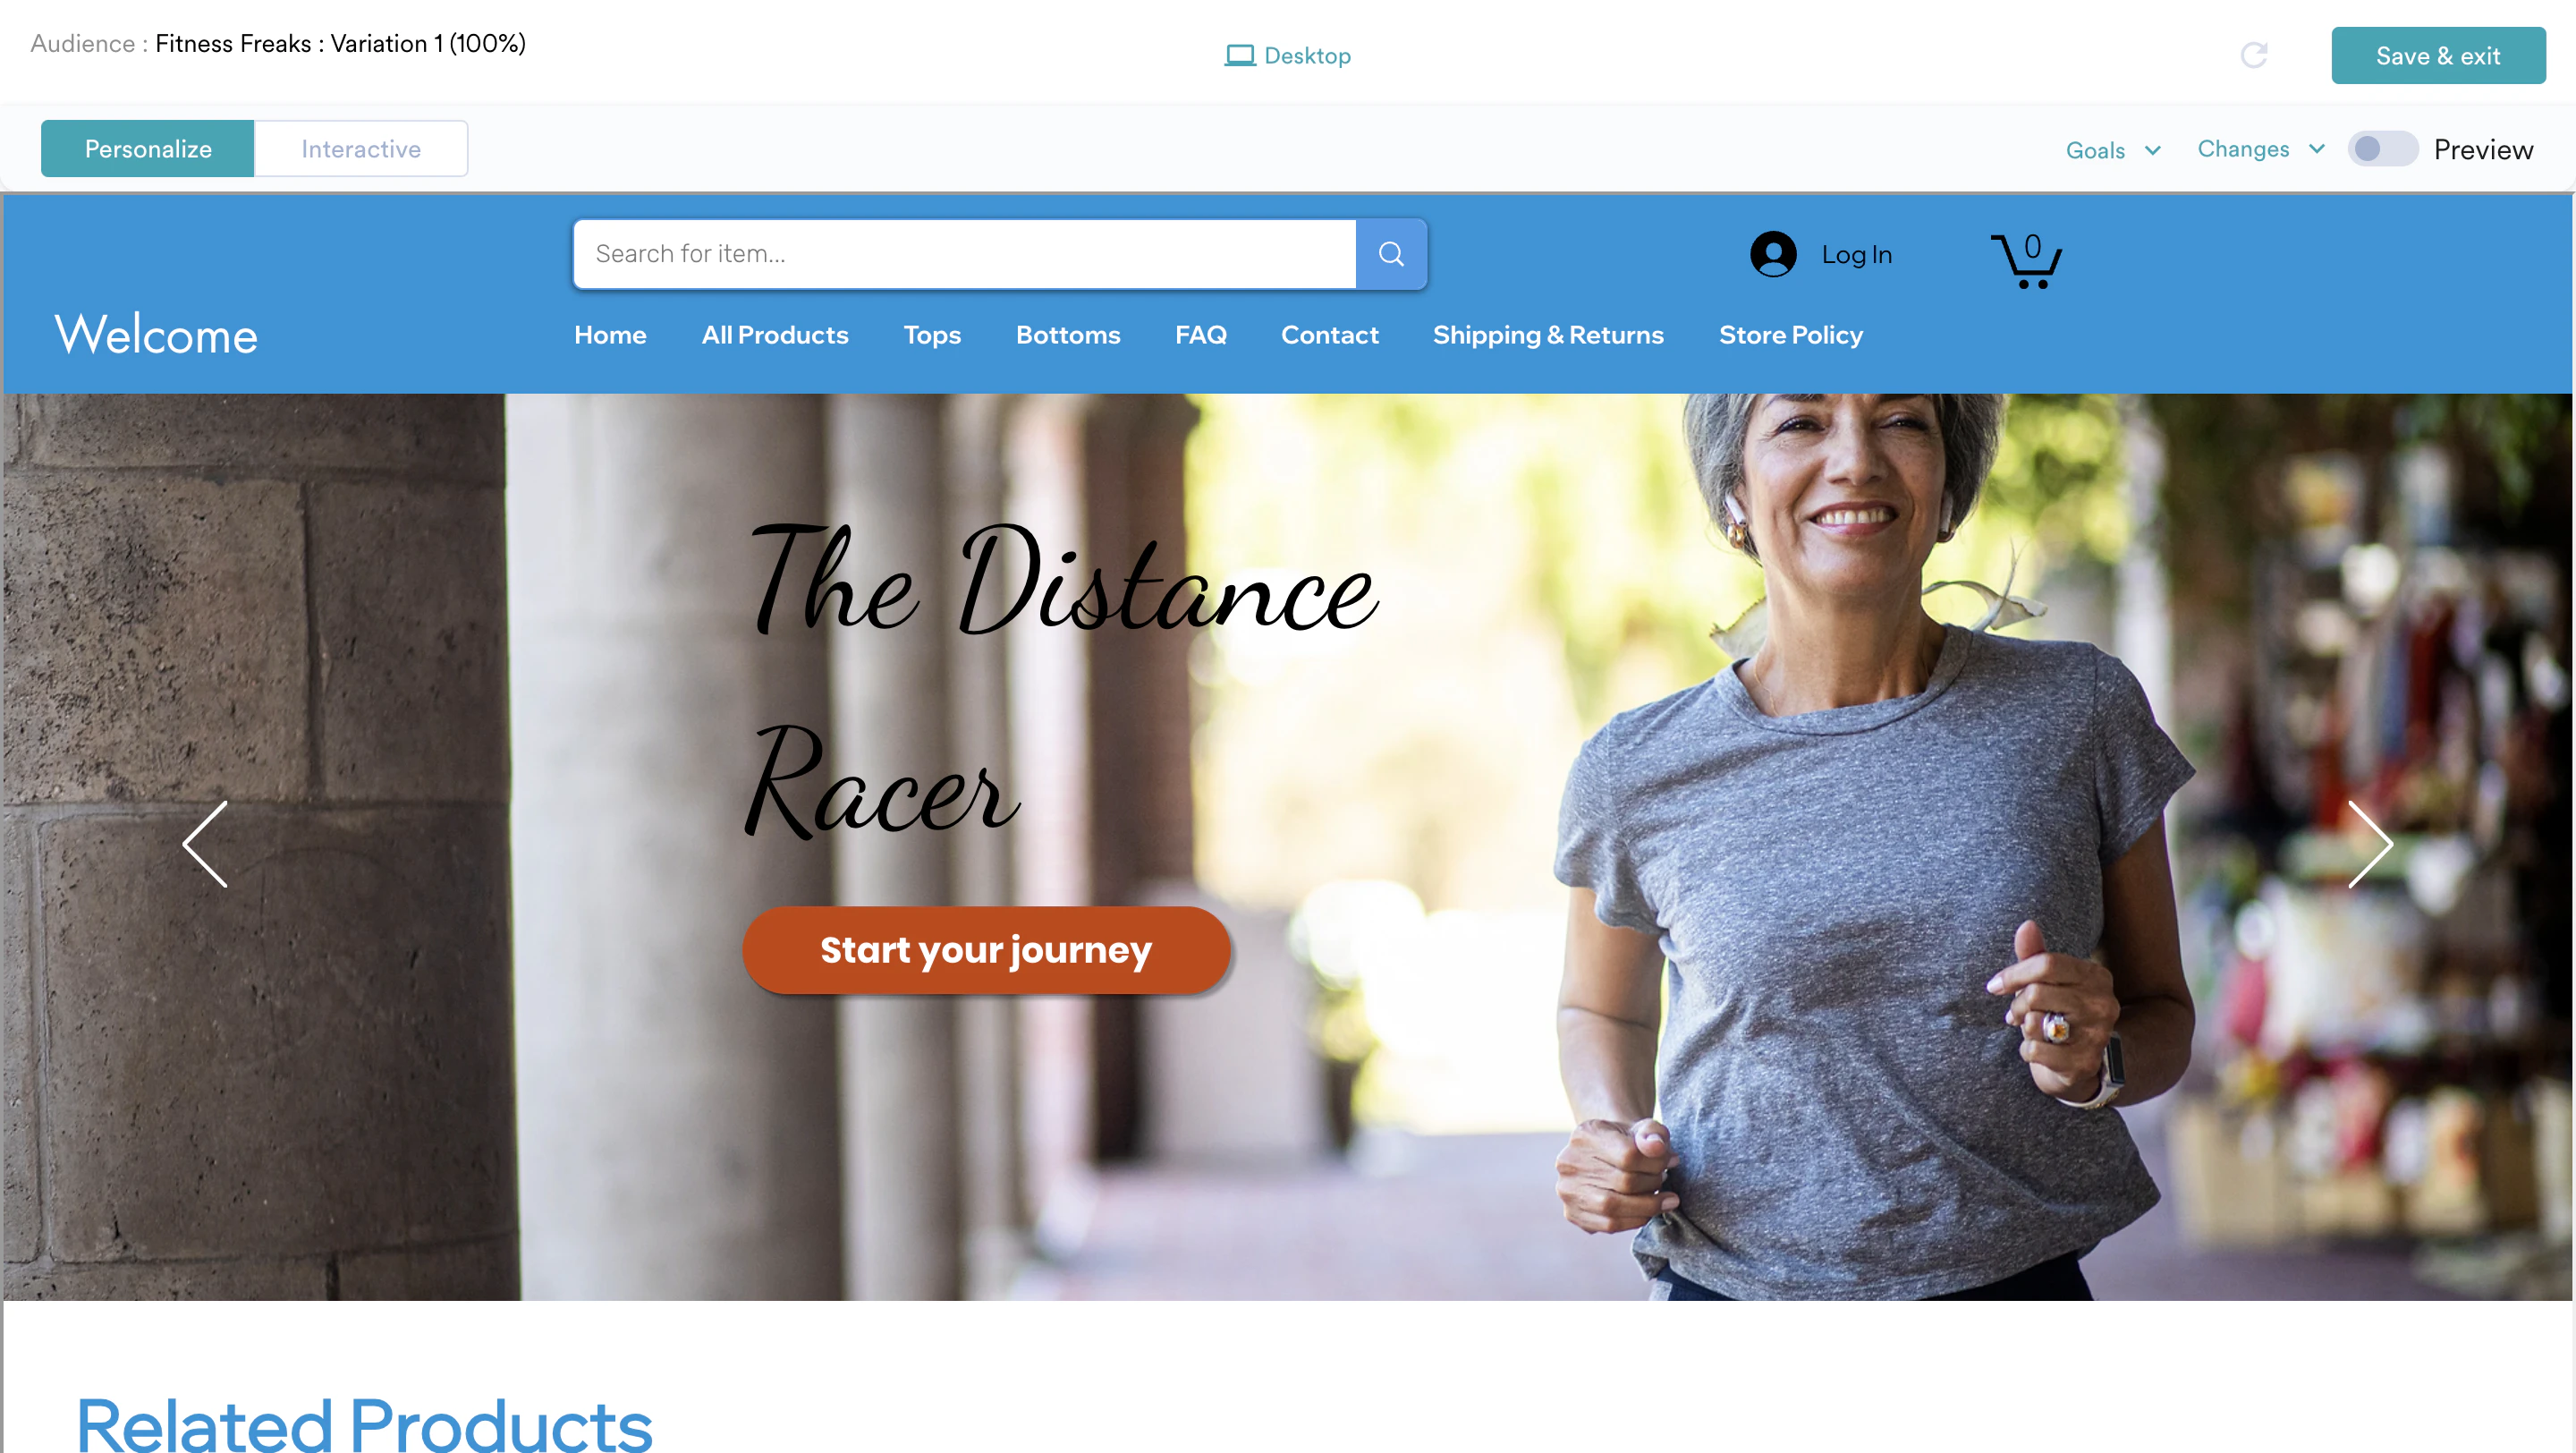 **
8. Select any element in the loaded page to edit it. With this, you can perform changes from editing a name to introducing new elements.
9. After you select the element, the following buttons are displayed:
**
8. Select any element in the loaded page to edit it. With this, you can perform changes from editing a name to introducing new elements.
9. After you select the element, the following buttons are displayed:
 **Note:** This option is available for all variations except the default variation and lets you personalize the content for each variation.
10. For our case, select the second option to edit the selected element. This will help us edit the HTML and thereby change the order of the list of categories using the HTML code.\
**
**Note:** This option is available for all variations except the default variation and lets you personalize the content for each variation.
10. For our case, select the second option to edit the selected element. This will help us edit the HTML and thereby change the order of the list of categories using the HTML code.\
**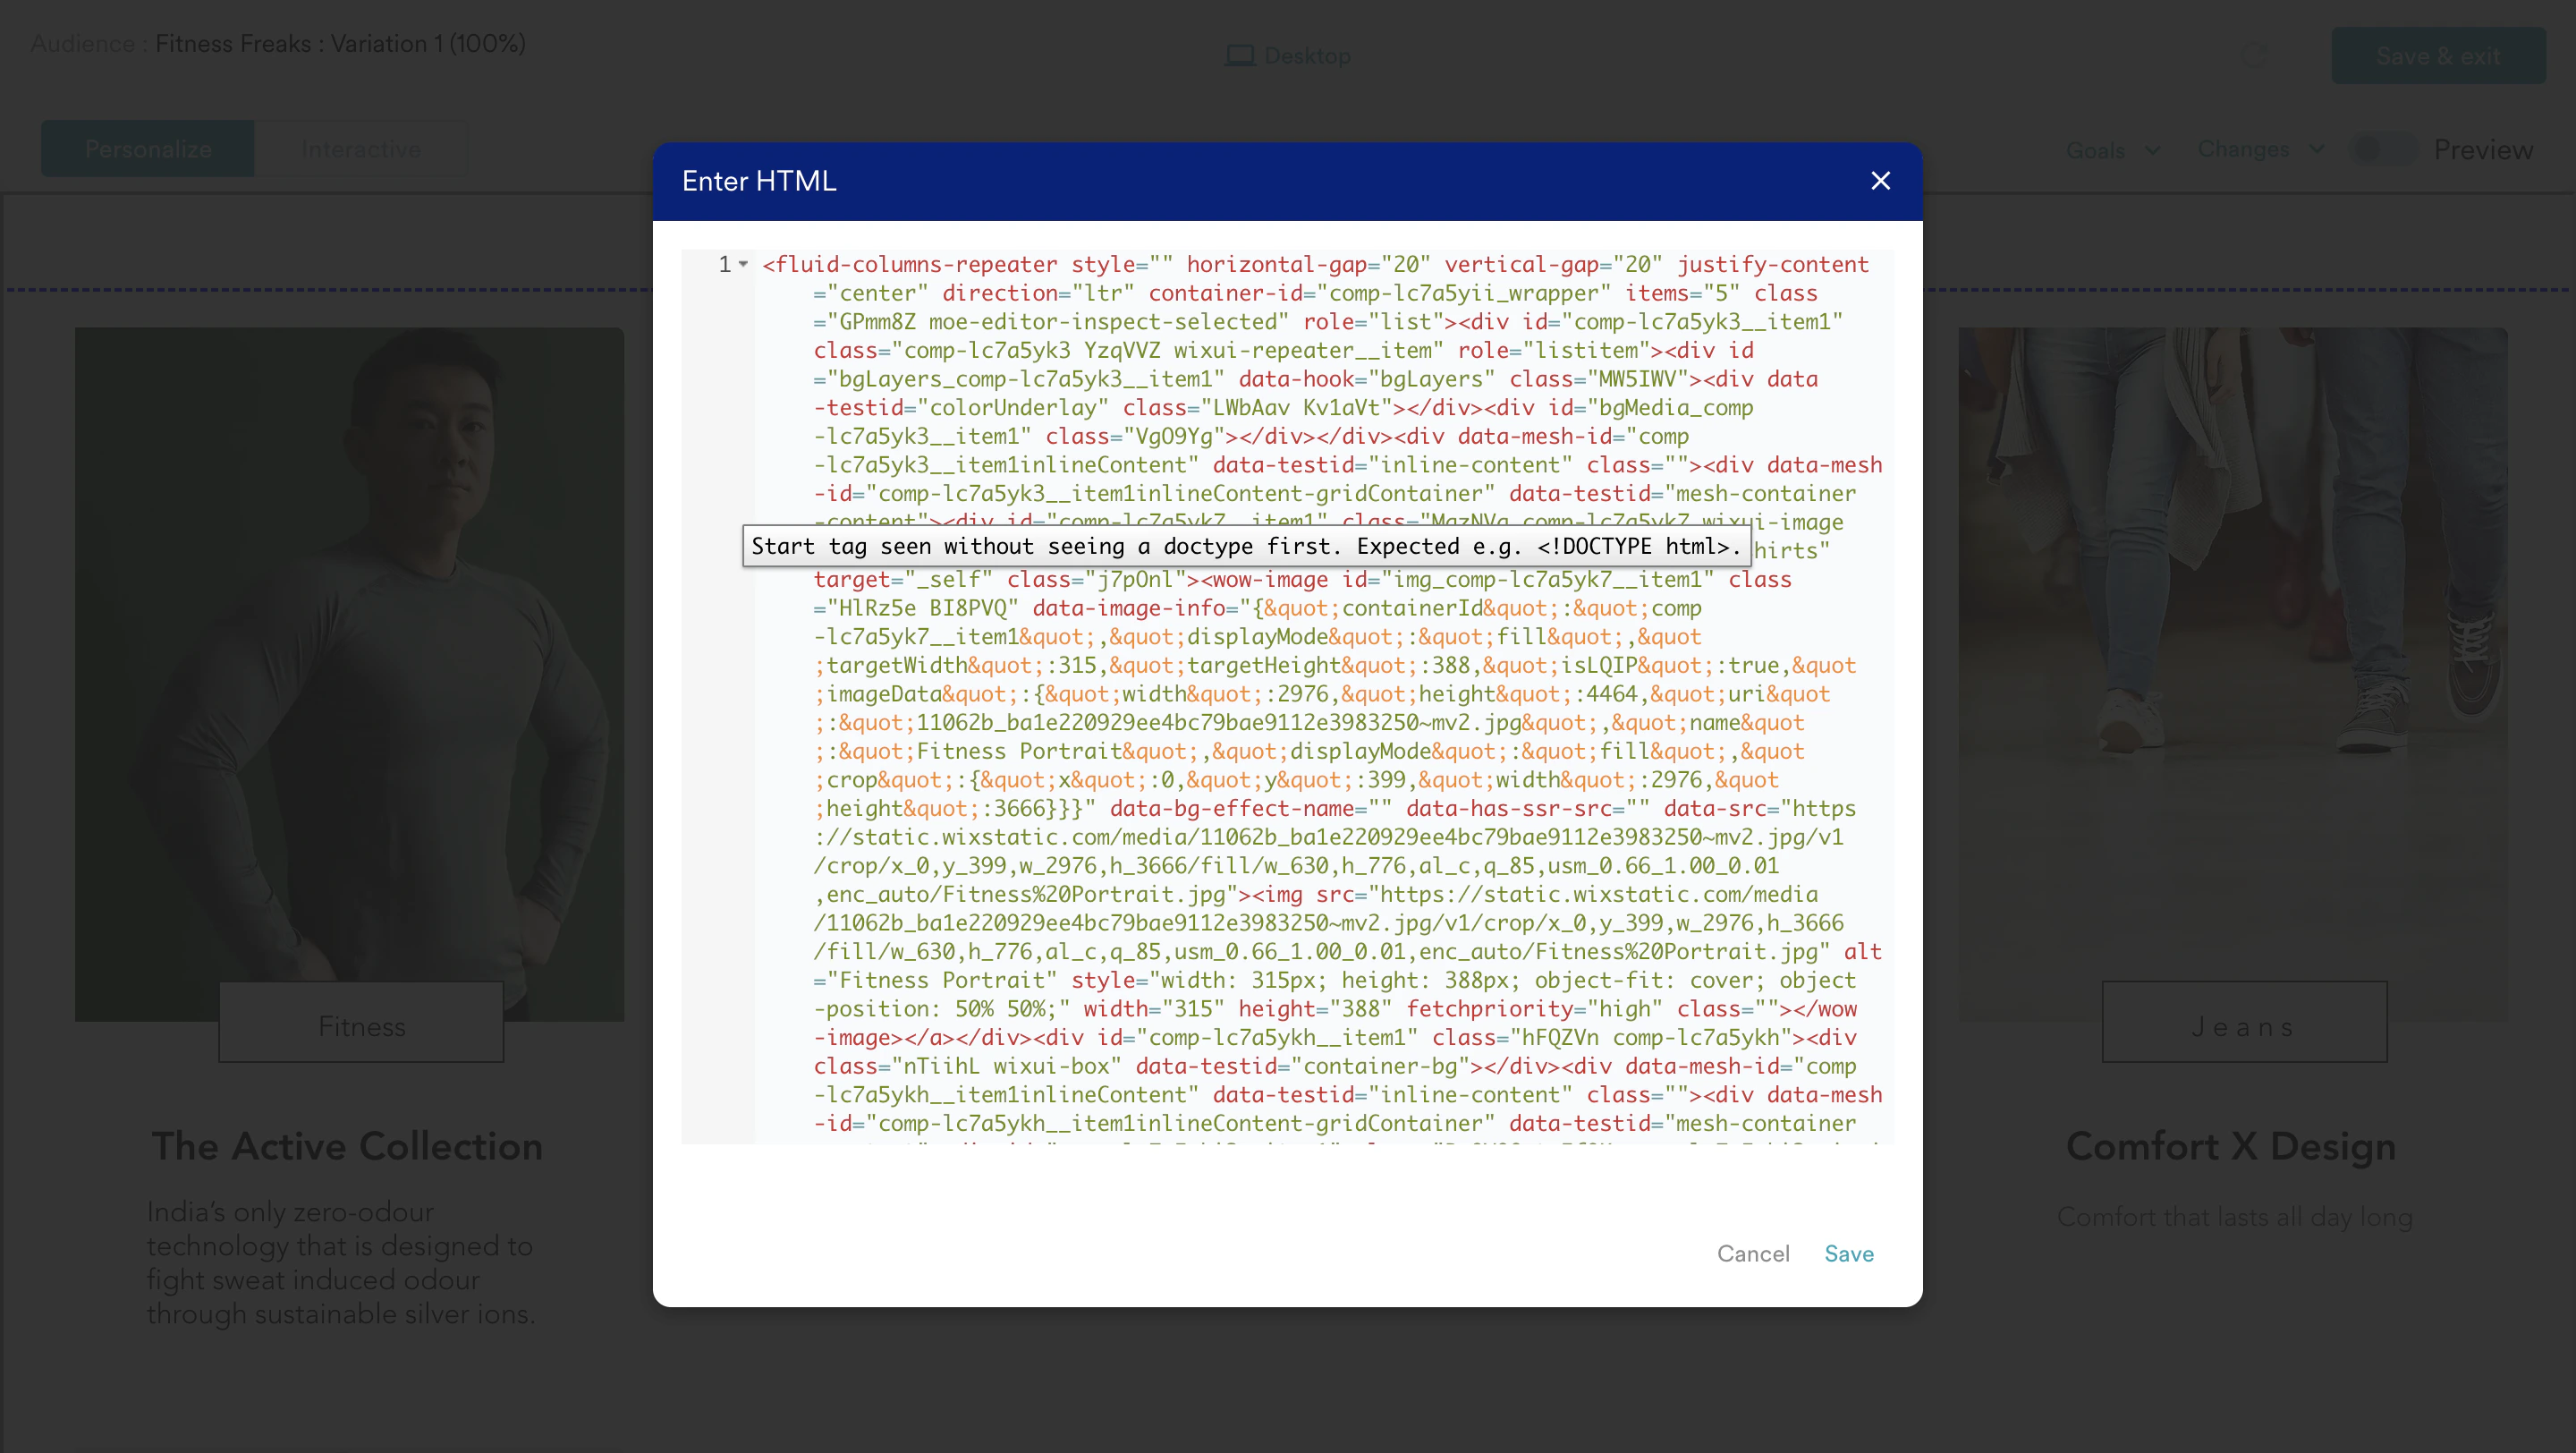 **\
After you are done with editing the HTML code, the list will be something like this:\
**
**\
After you are done with editing the HTML code, the list will be something like this:\
**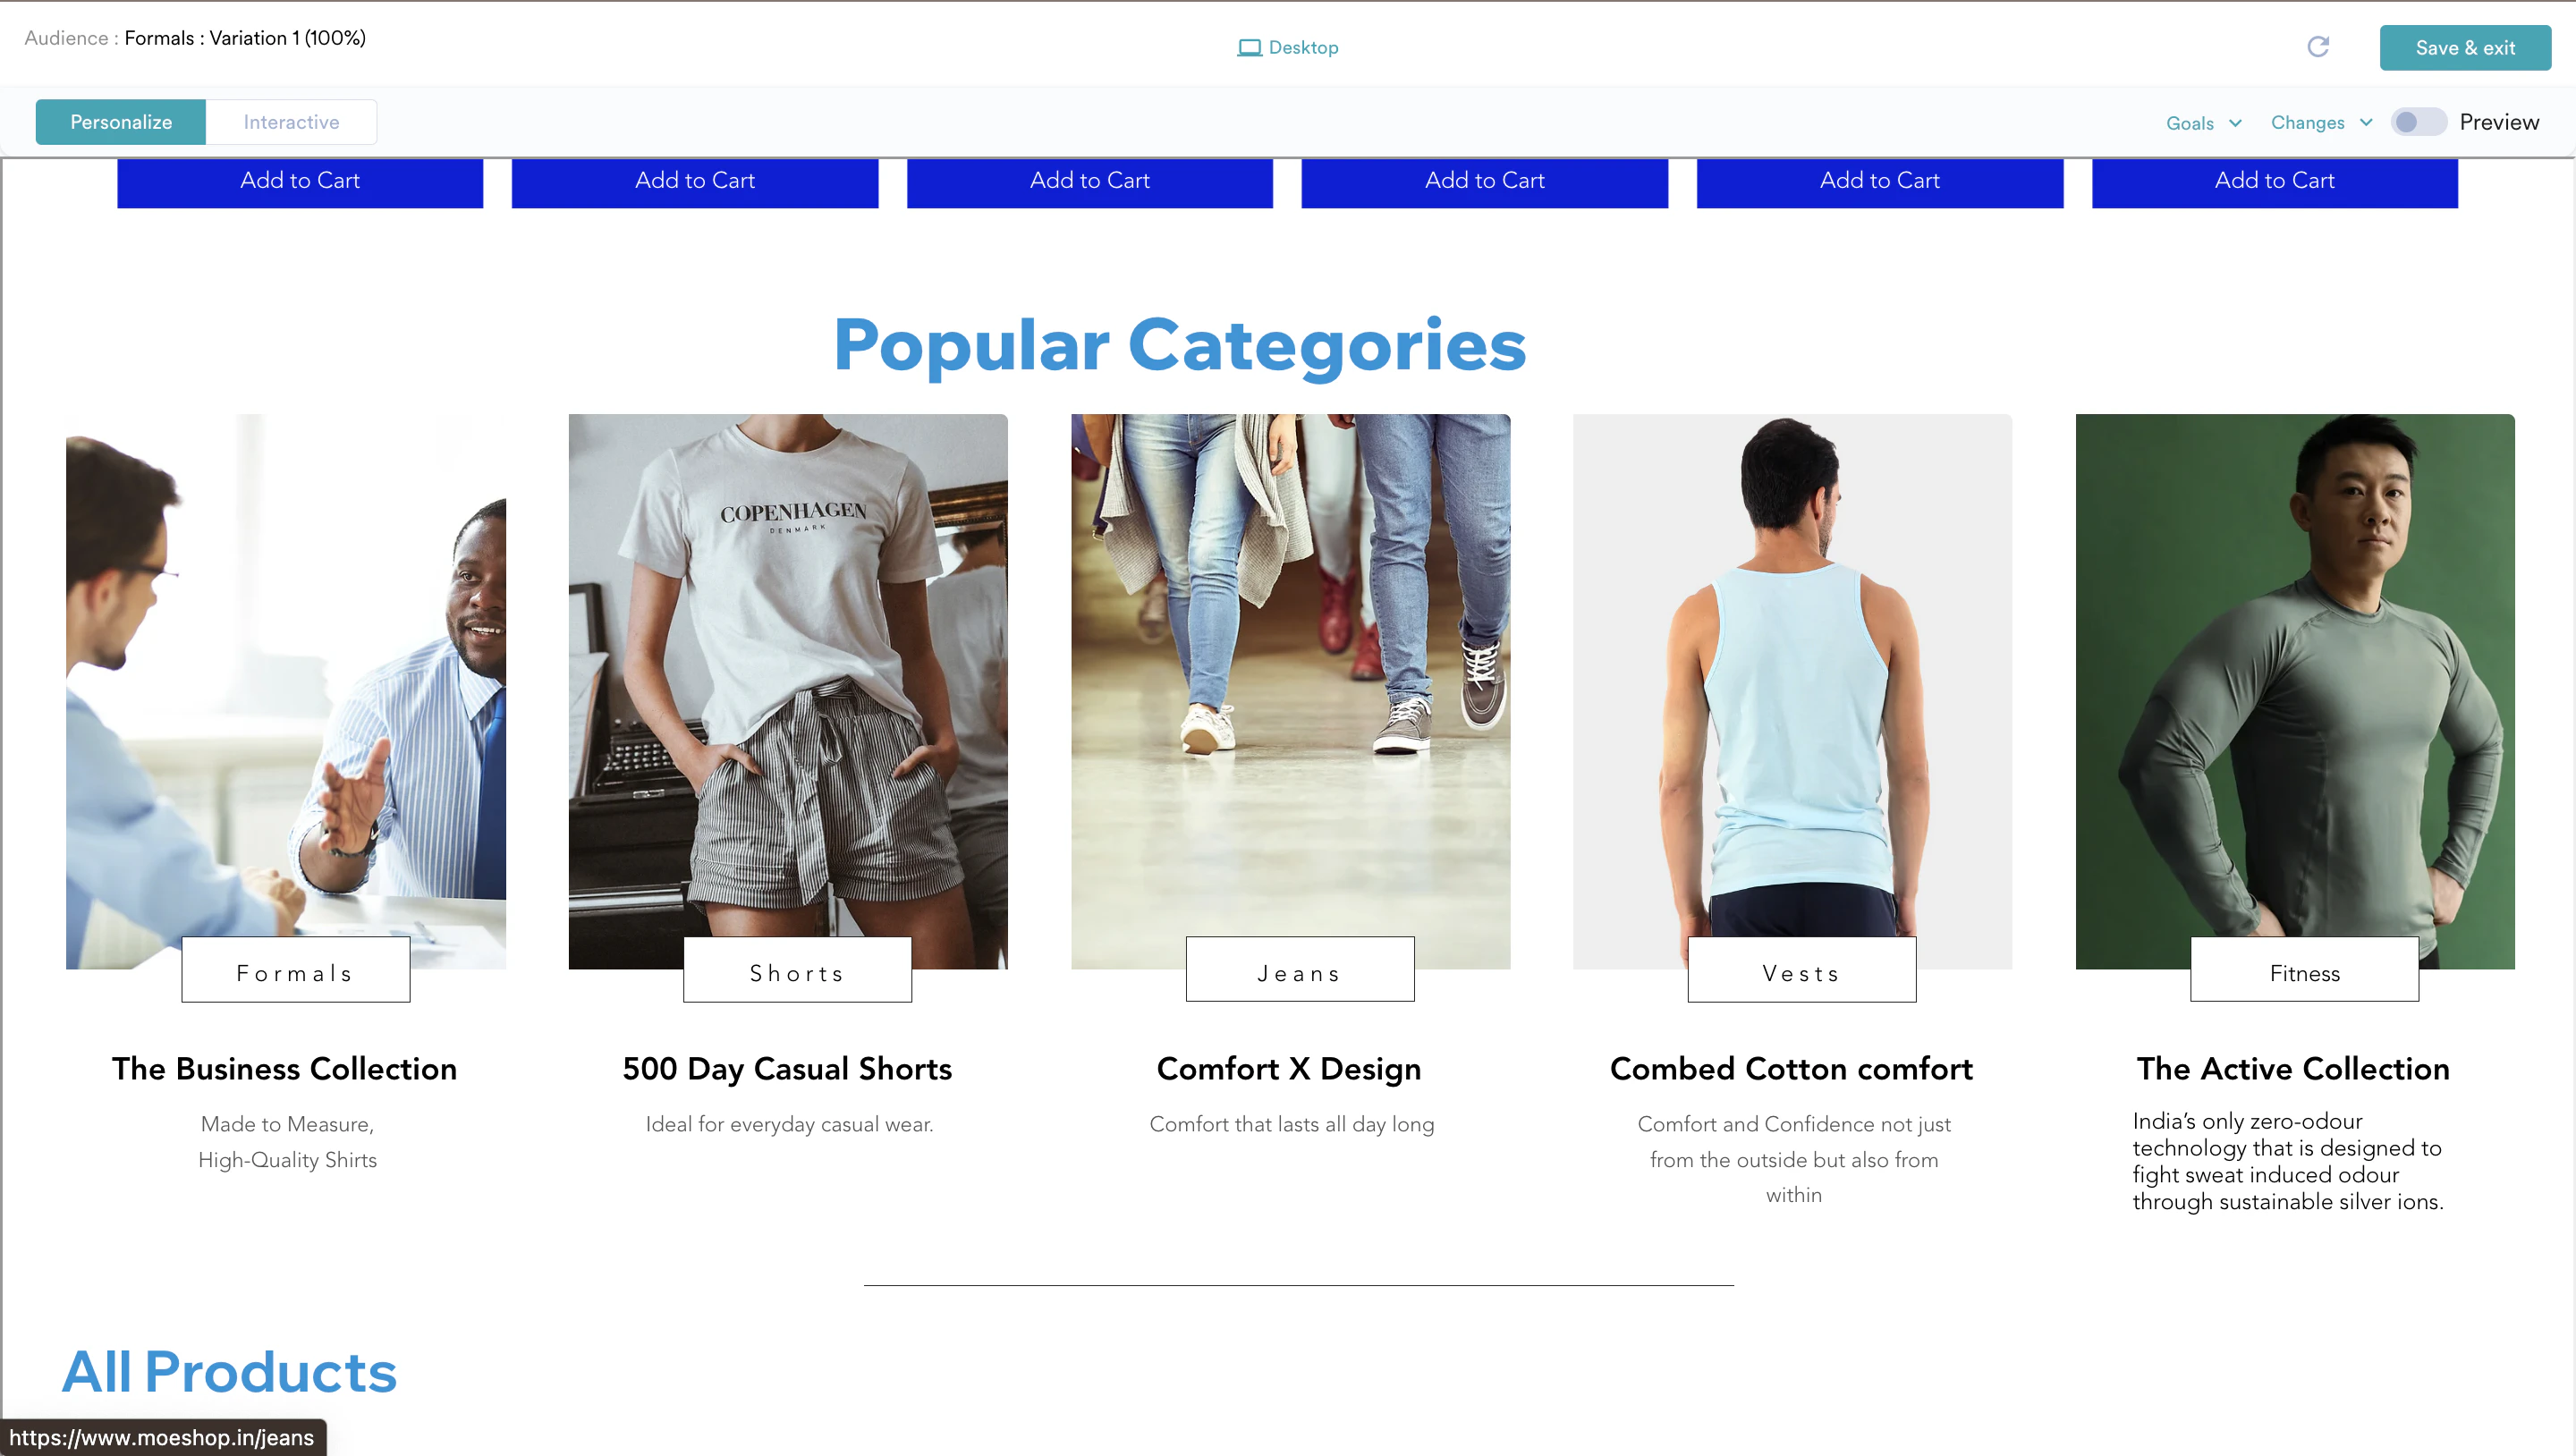 **
11. Click **Save & exit** at the top right.\
**
**
11. Click **Save & exit** at the top right.\
**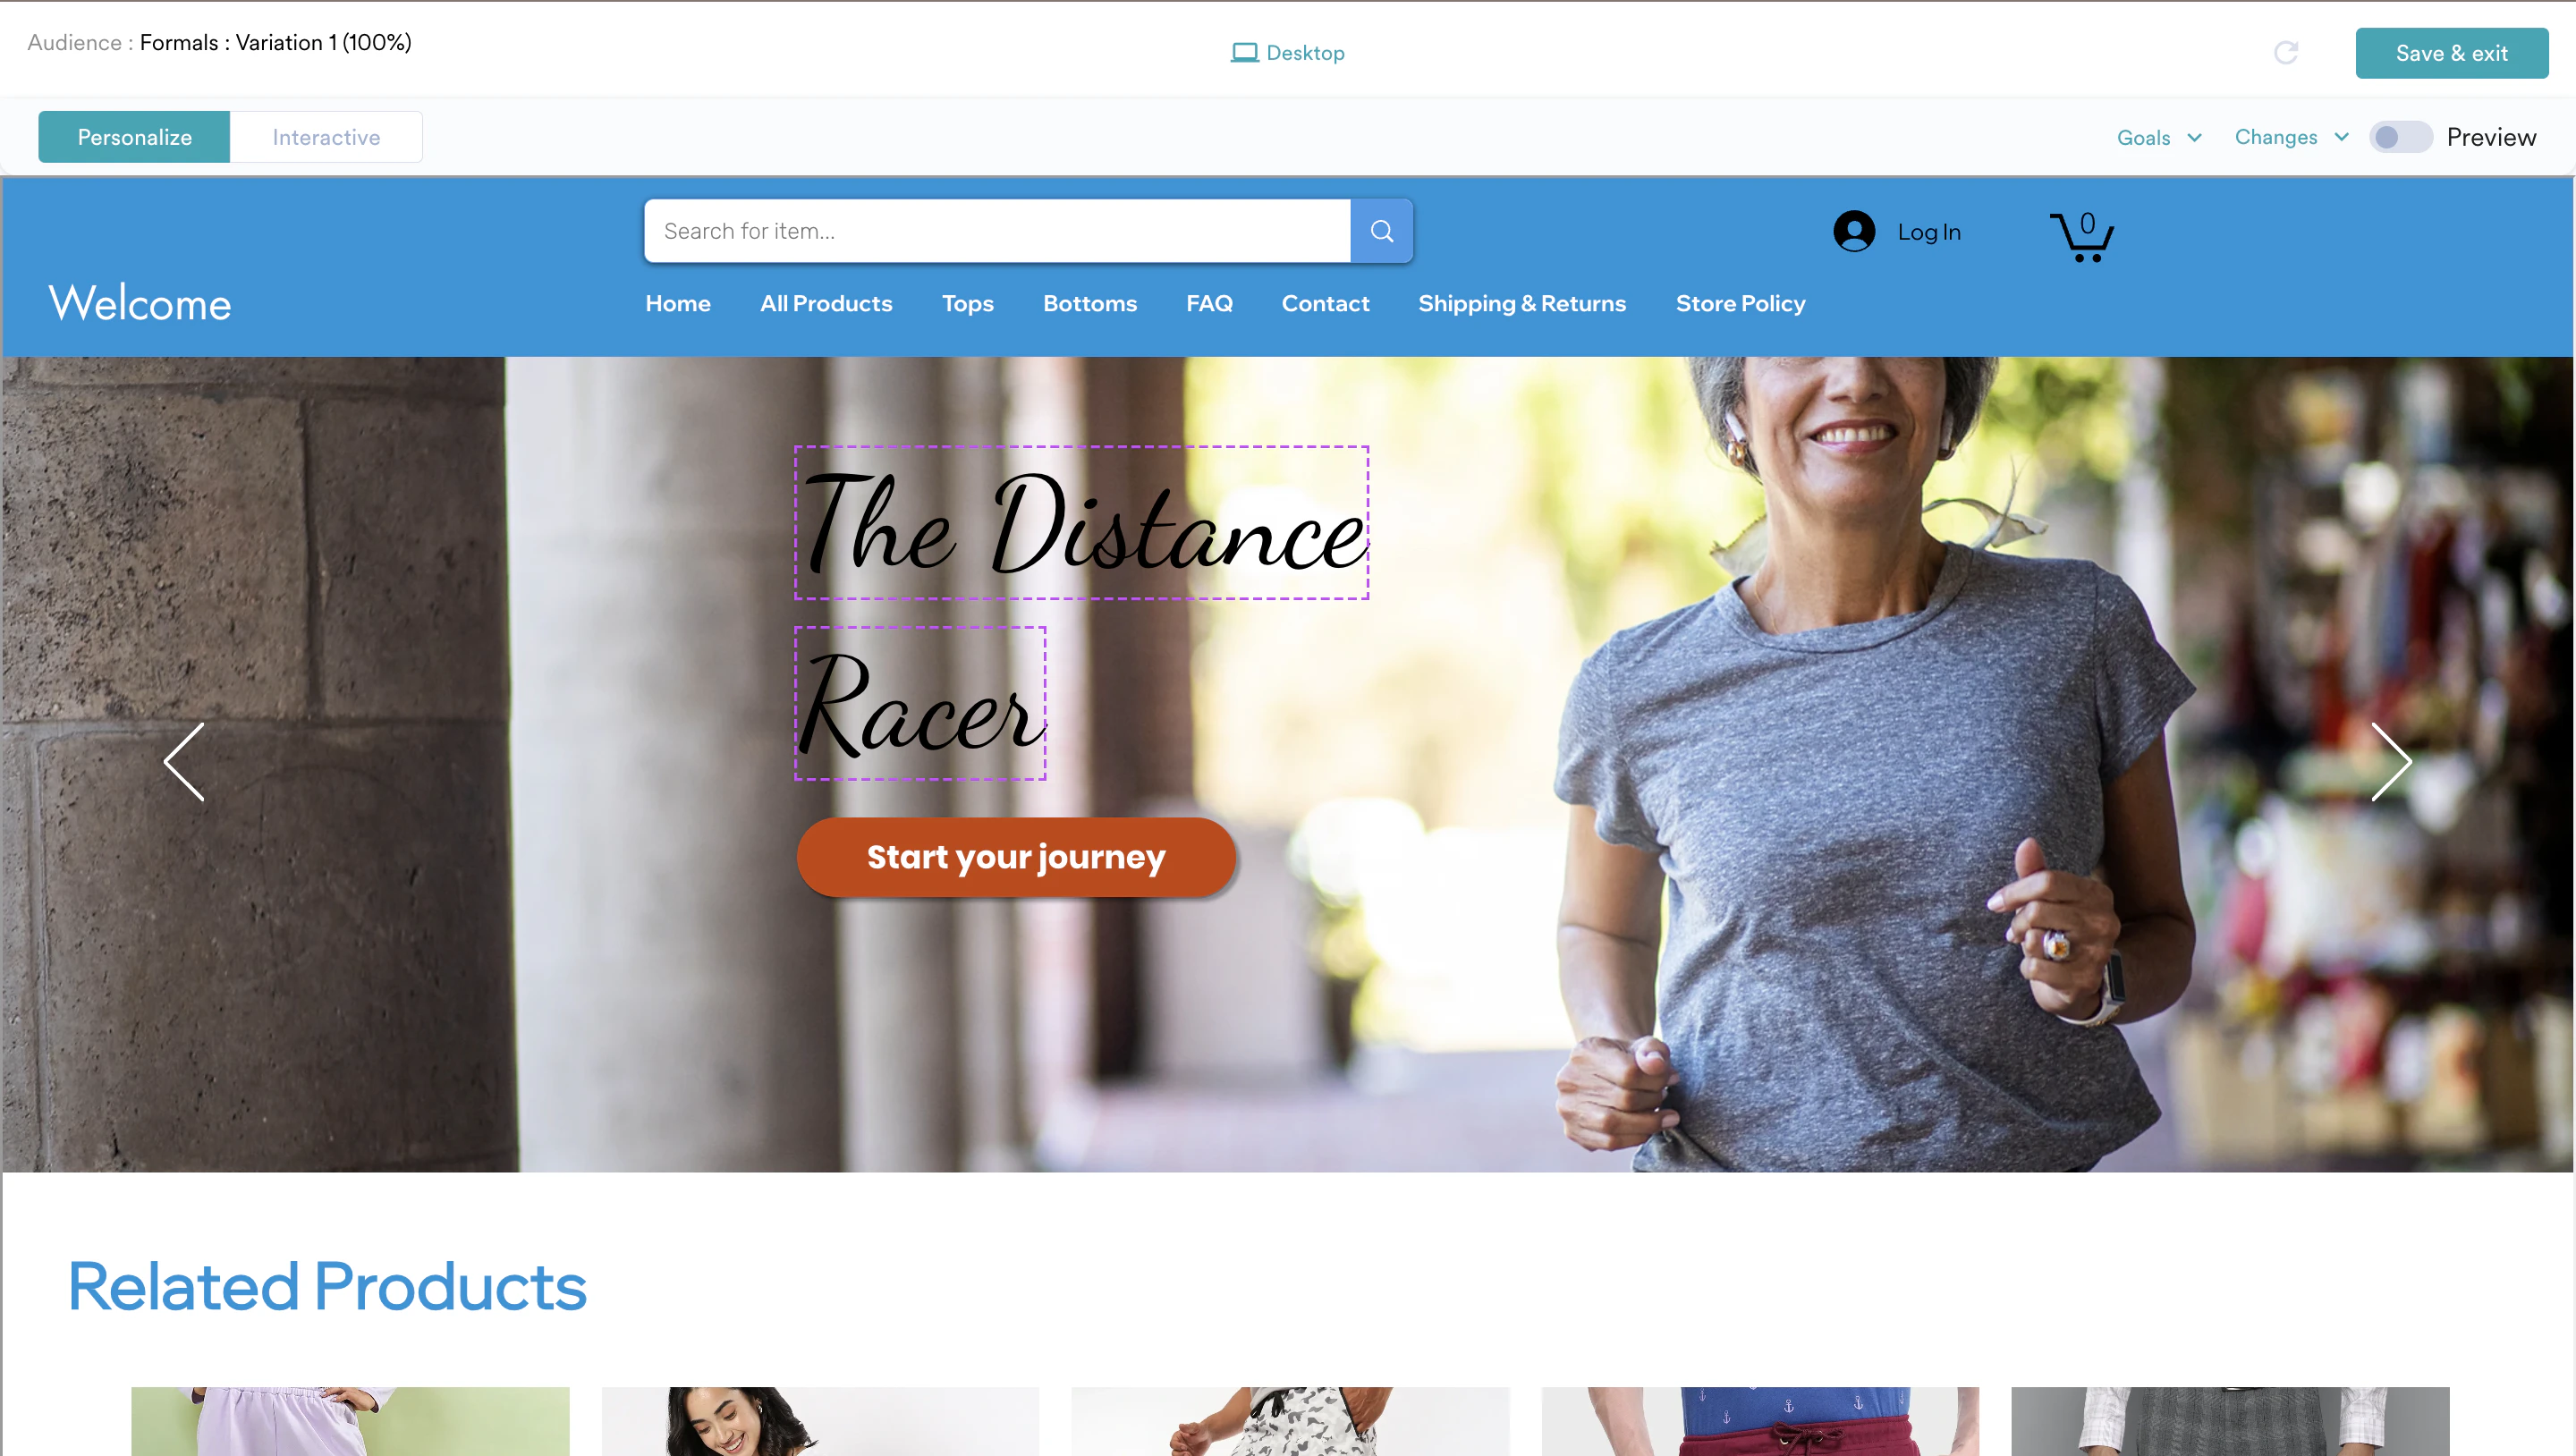 **\
This will close this tab and take you back to the Experience definition page in the MoEngage dashboard.\
**
**\
This will close this tab and take you back to the Experience definition page in the MoEngage dashboard.\
**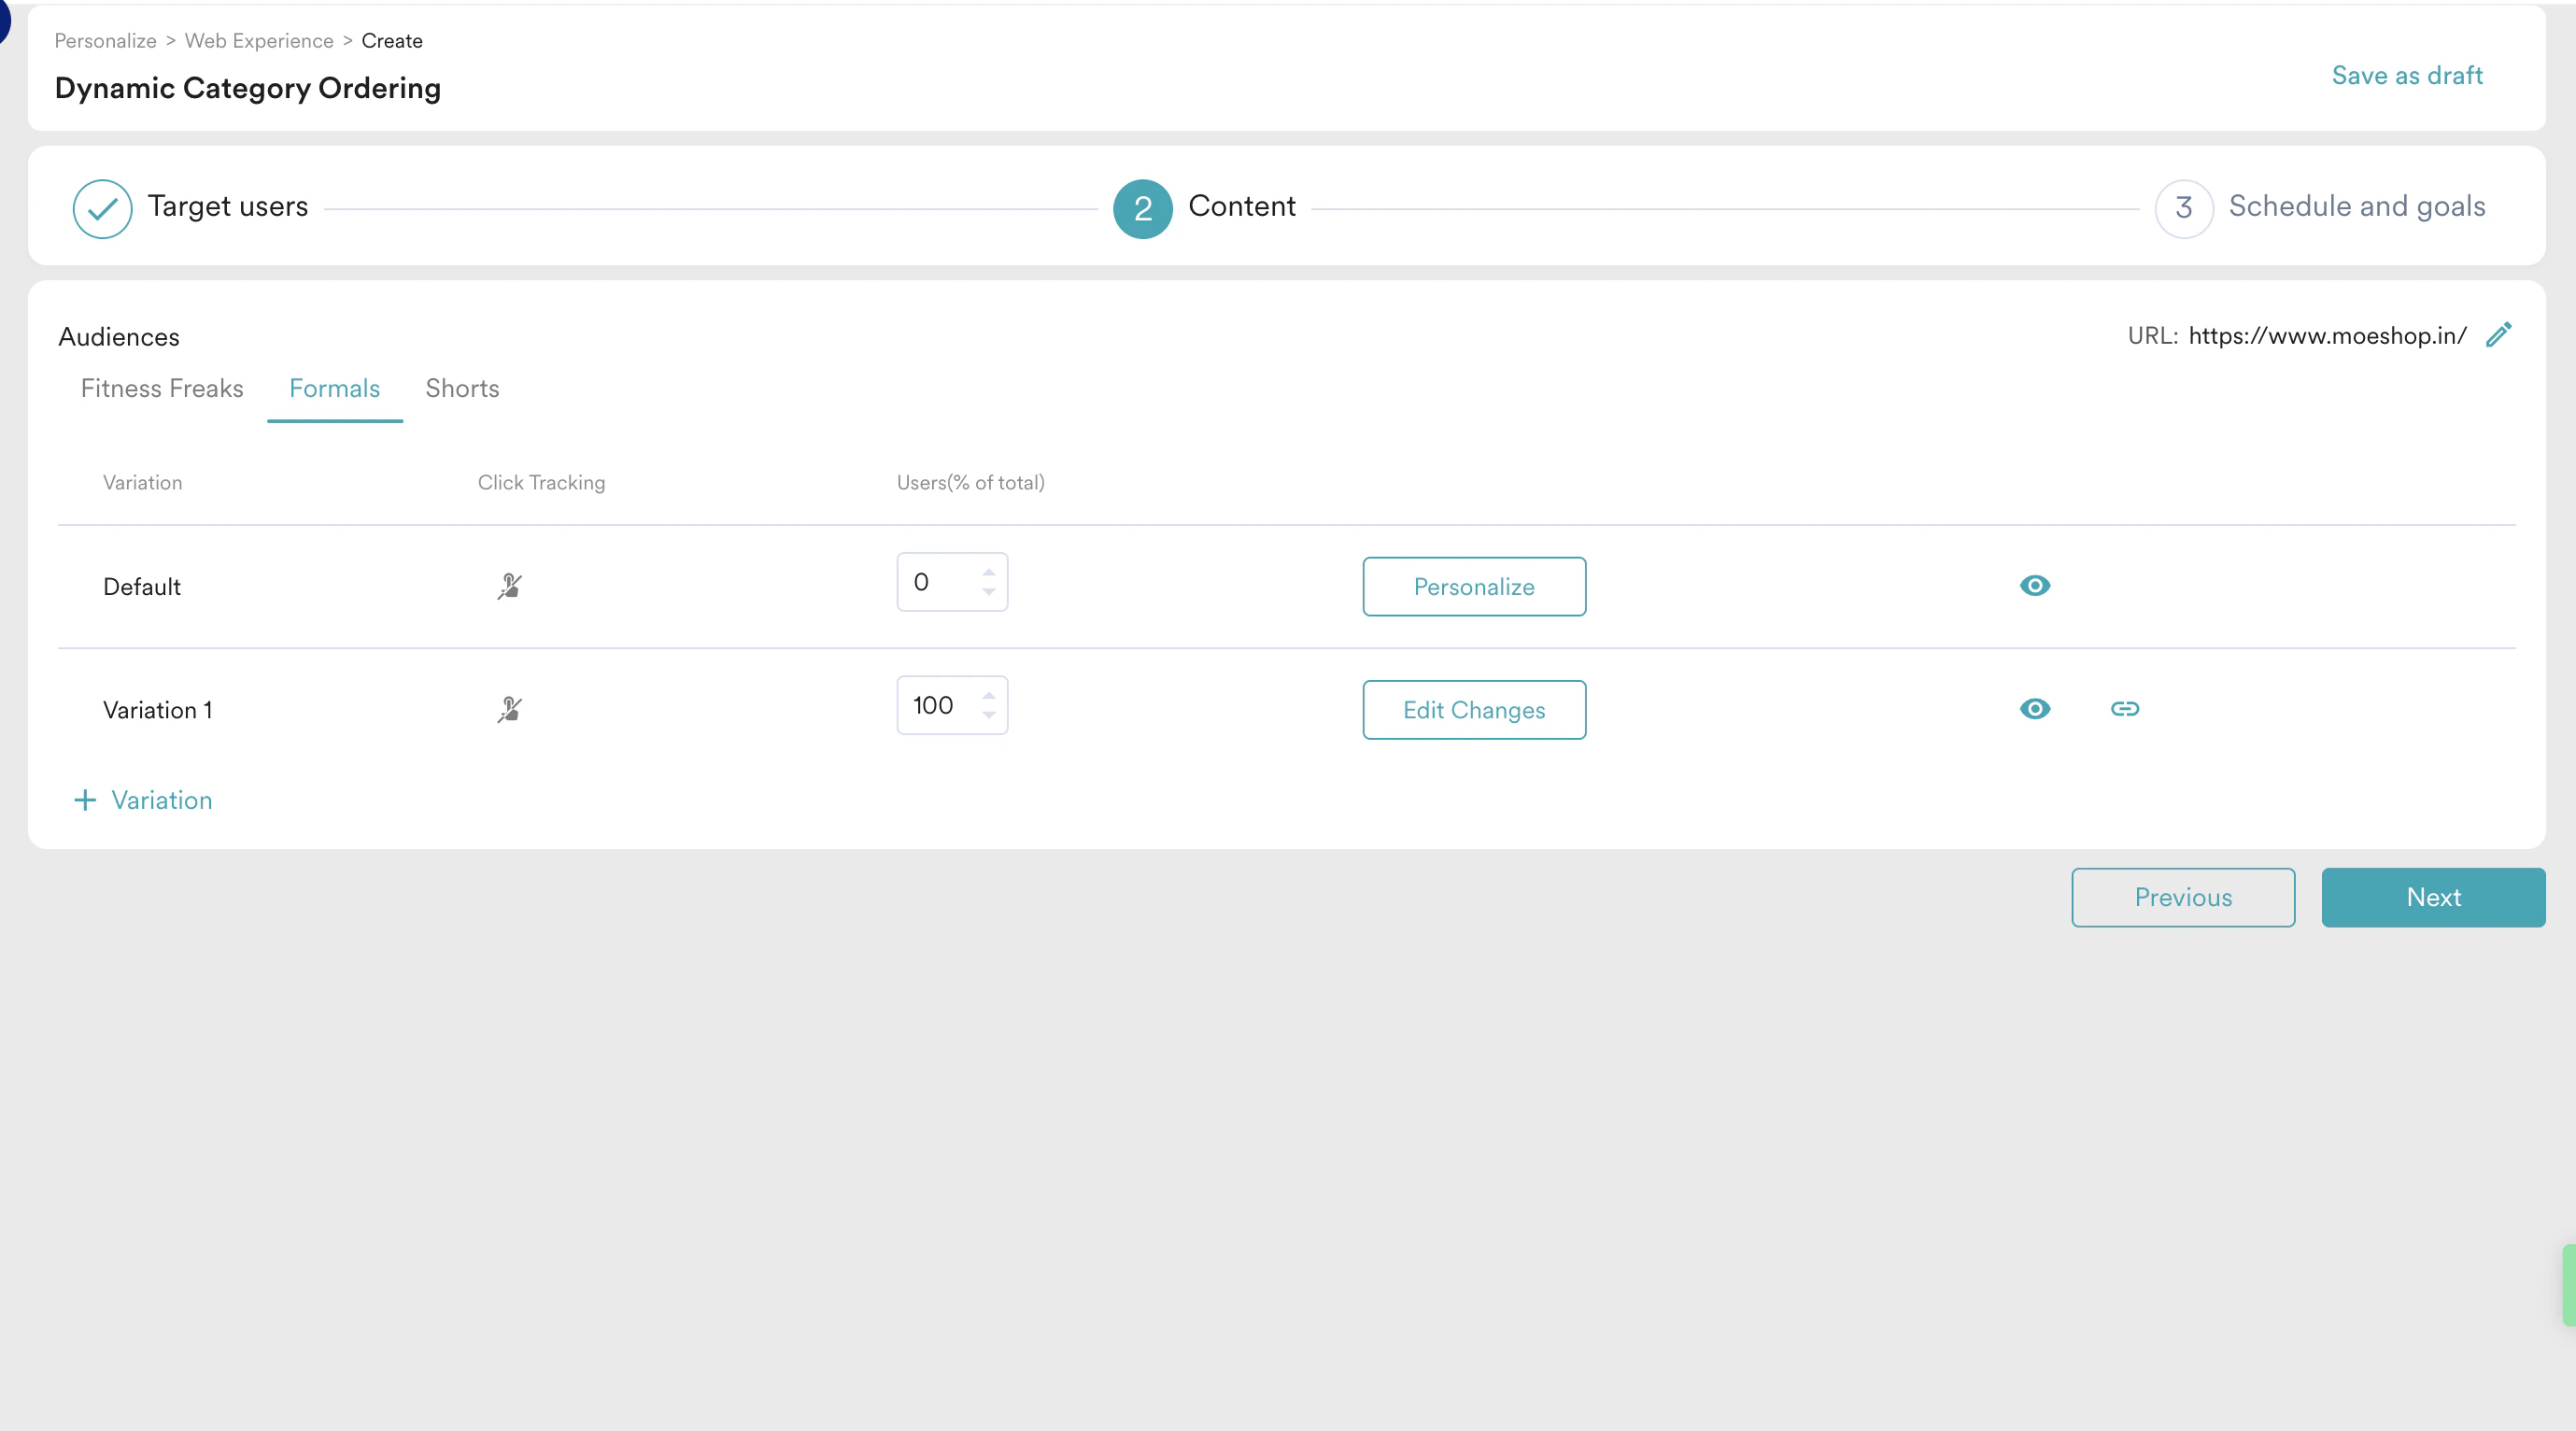 **
12. Do the same for the other audiences as well for two more times.
13. Click **Next** to move to the third step "Schedule and goals" where you can define the schedule and goal of your experience.
## Step 3: Schedule and Goals
1. In the **Send experience** section, select **Active continuously** and define when to start and end this experience.
**
12. Do the same for the other audiences as well for two more times.
13. Click **Next** to move to the third step "Schedule and goals" where you can define the schedule and goal of your experience.
## Step 3: Schedule and Goals
1. In the **Send experience** section, select **Active continuously** and define when to start and end this experience.
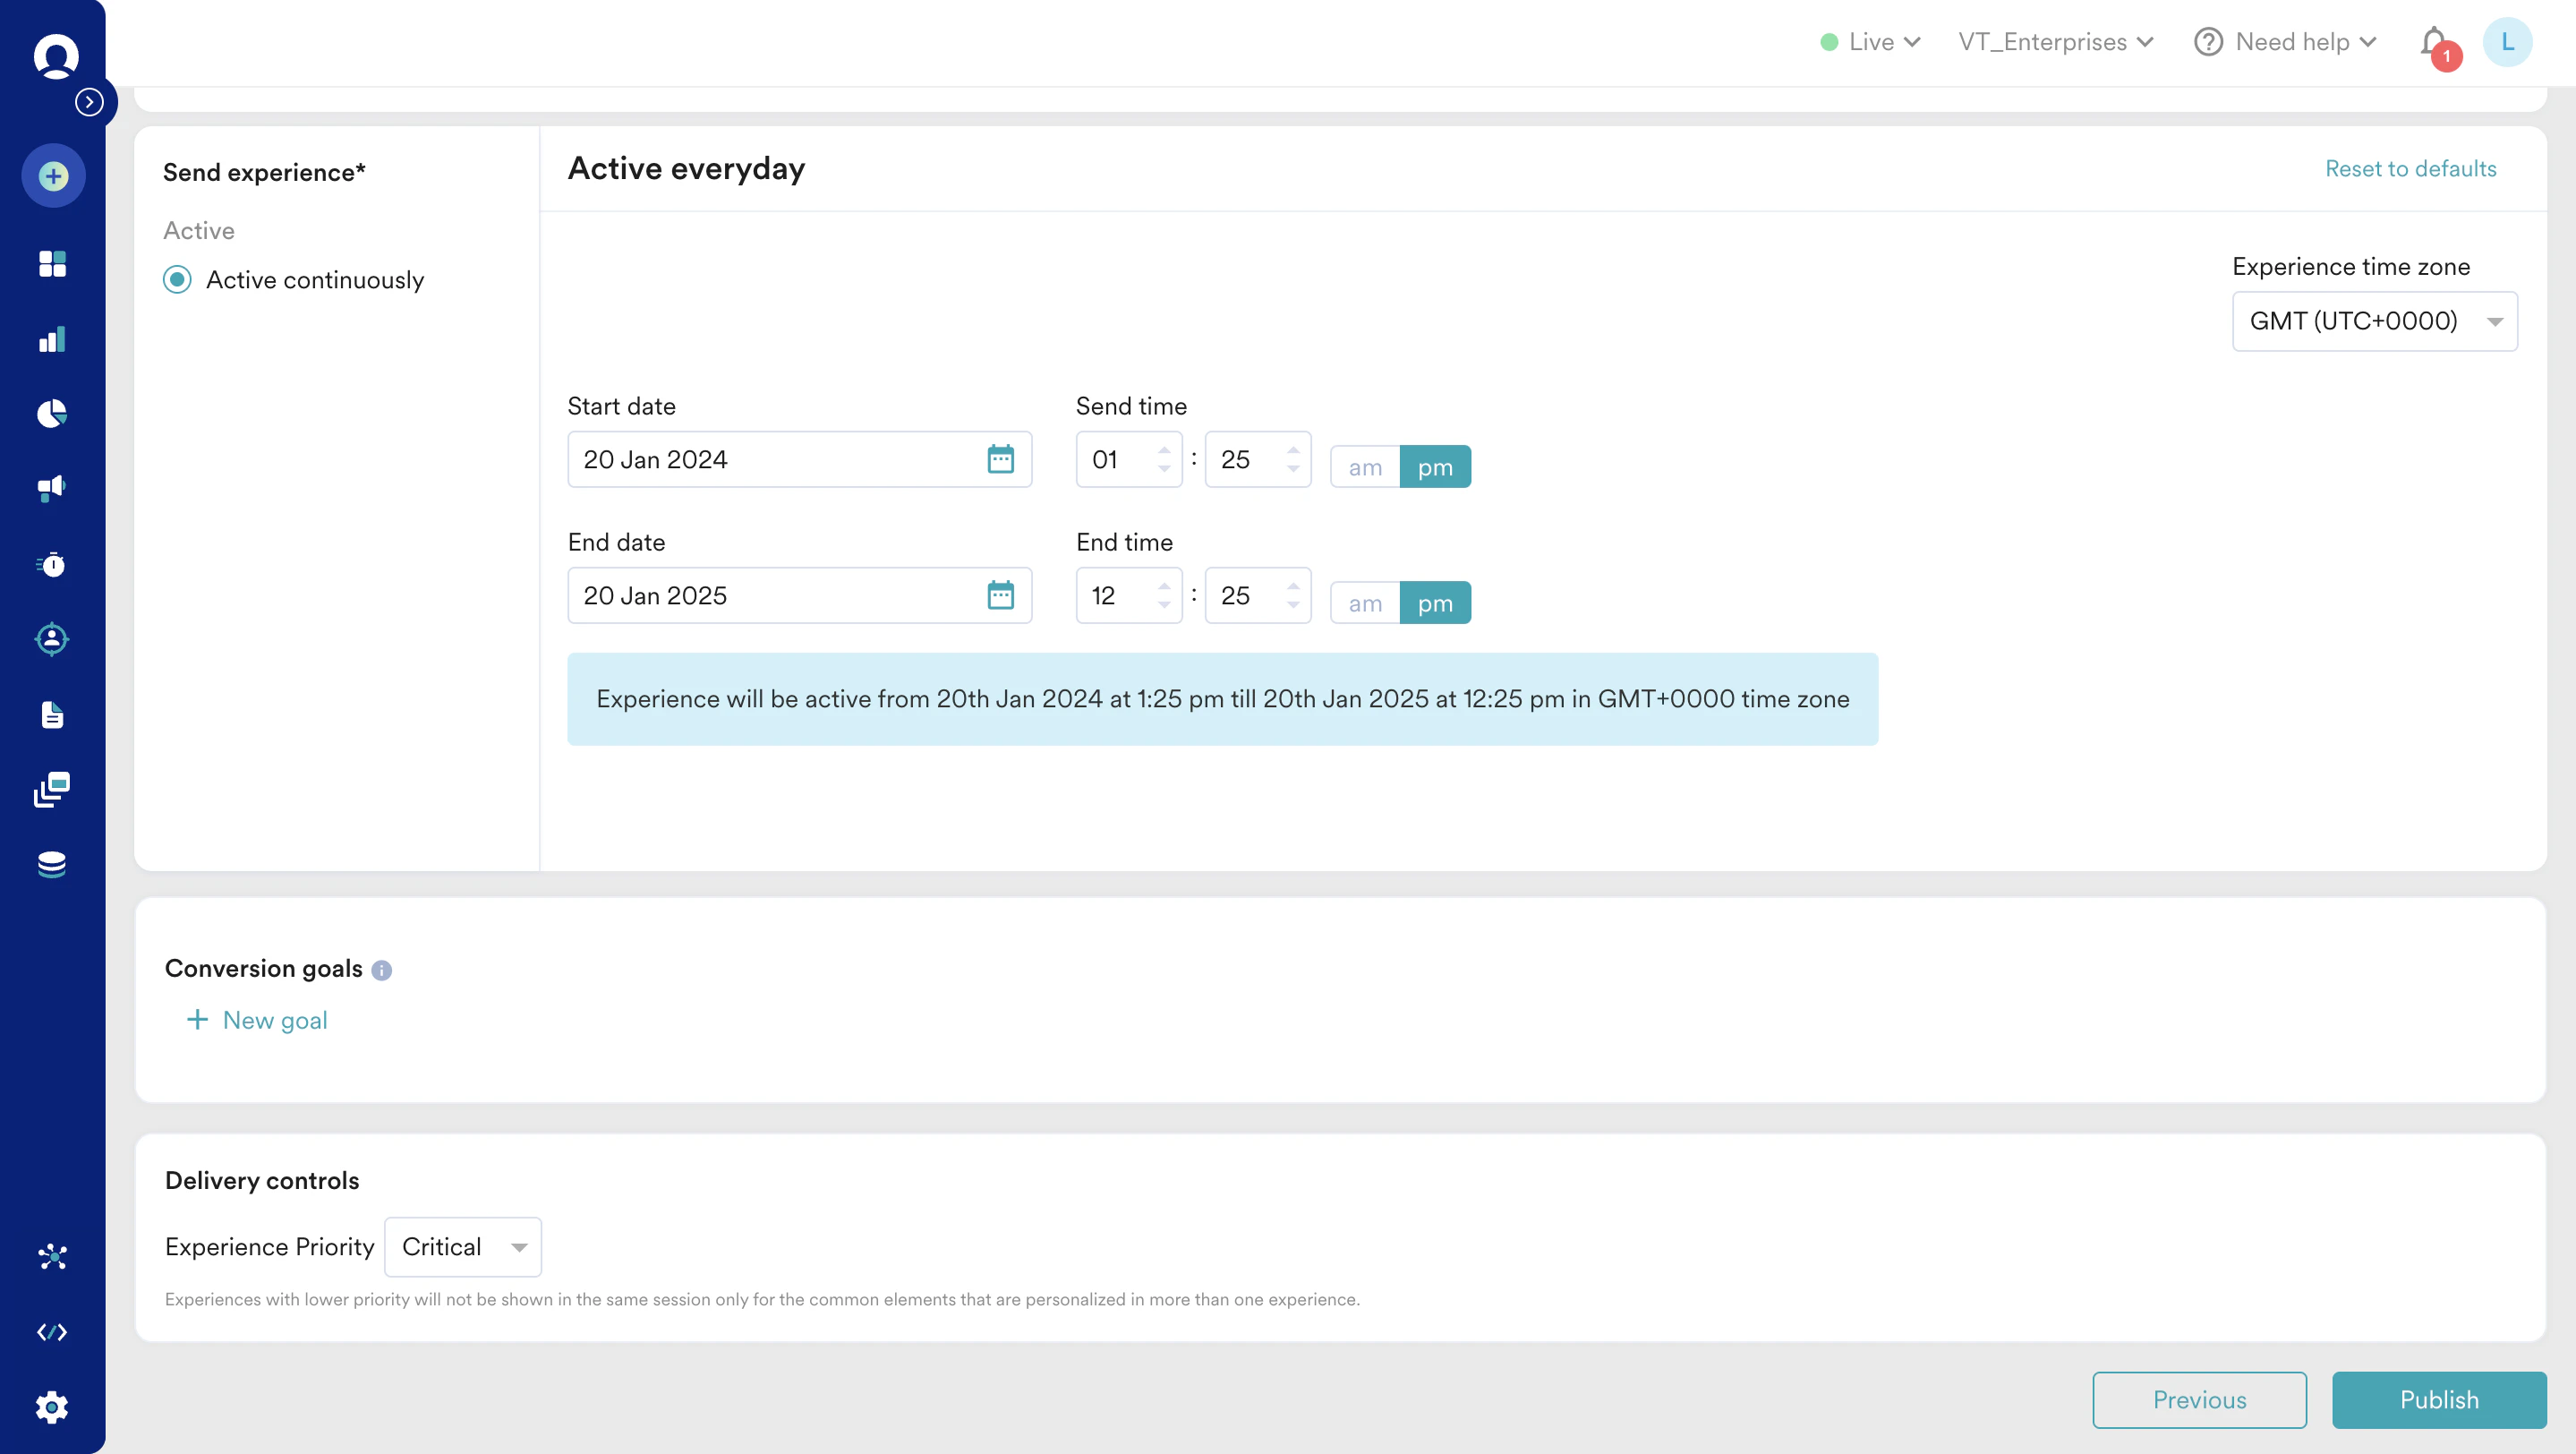 2. In the **Conversion goals** section, define the conversion goal based on your requirements.
3. Under **Delivery controls**, from the **Experience Priority** drop-down, select a priority. For more information, refer to [Create Experience](/user-guide/personalize/client-side-personalization/client-side-personalization/create-client-side-personalization-experience).
4. Click **Publish**.
# Conclusion
In this use case, we used User Affinity and Web Personalization features of MoEngage to personalize an e-commerce website home page for fitness enthusiasts.
Now that we have published the personalized experience, head to the [Analyzing section](/user-guide/personalize/client-side-personalization/client-side-personalization/experience-analytics) to understand how your experience is performing.
2. In the **Conversion goals** section, define the conversion goal based on your requirements.
3. Under **Delivery controls**, from the **Experience Priority** drop-down, select a priority. For more information, refer to [Create Experience](/user-guide/personalize/client-side-personalization/client-side-personalization/create-client-side-personalization-experience).
4. Click **Publish**.
# Conclusion
In this use case, we used User Affinity and Web Personalization features of MoEngage to personalize an e-commerce website home page for fitness enthusiasts.
Now that we have published the personalized experience, head to the [Analyzing section](/user-guide/personalize/client-side-personalization/client-side-personalization/experience-analytics) to understand how your experience is performing.