Documentation Index
Fetch the complete documentation index at: https://moengage-user-guide.mintlify.app/llms.txt
Use this file to discover all available pages before exploring further.
Flow Controls enable the marketers to control the user movement inside the Flow. Following are the flow controls:
Wait for/till
The MoEngage system provides marketers the flexibility to configure the duration for which the user will wait in a specific stage in the flow before taking the next action. Marketers can choose specific time frames such as users moving to the next stage on weekends at specific time slots or on Mondays at specific time frames or choose a rolling time frame such as 30 minutes, 6 hours, 24 hours, and so on.
Such flexibility in choosing time slots to move the users to the next stages helps marketers control the time of delivery of the campaigns thus ensuring better conversion rates and engagement. The following options are available:
To configure wait time, do the following:
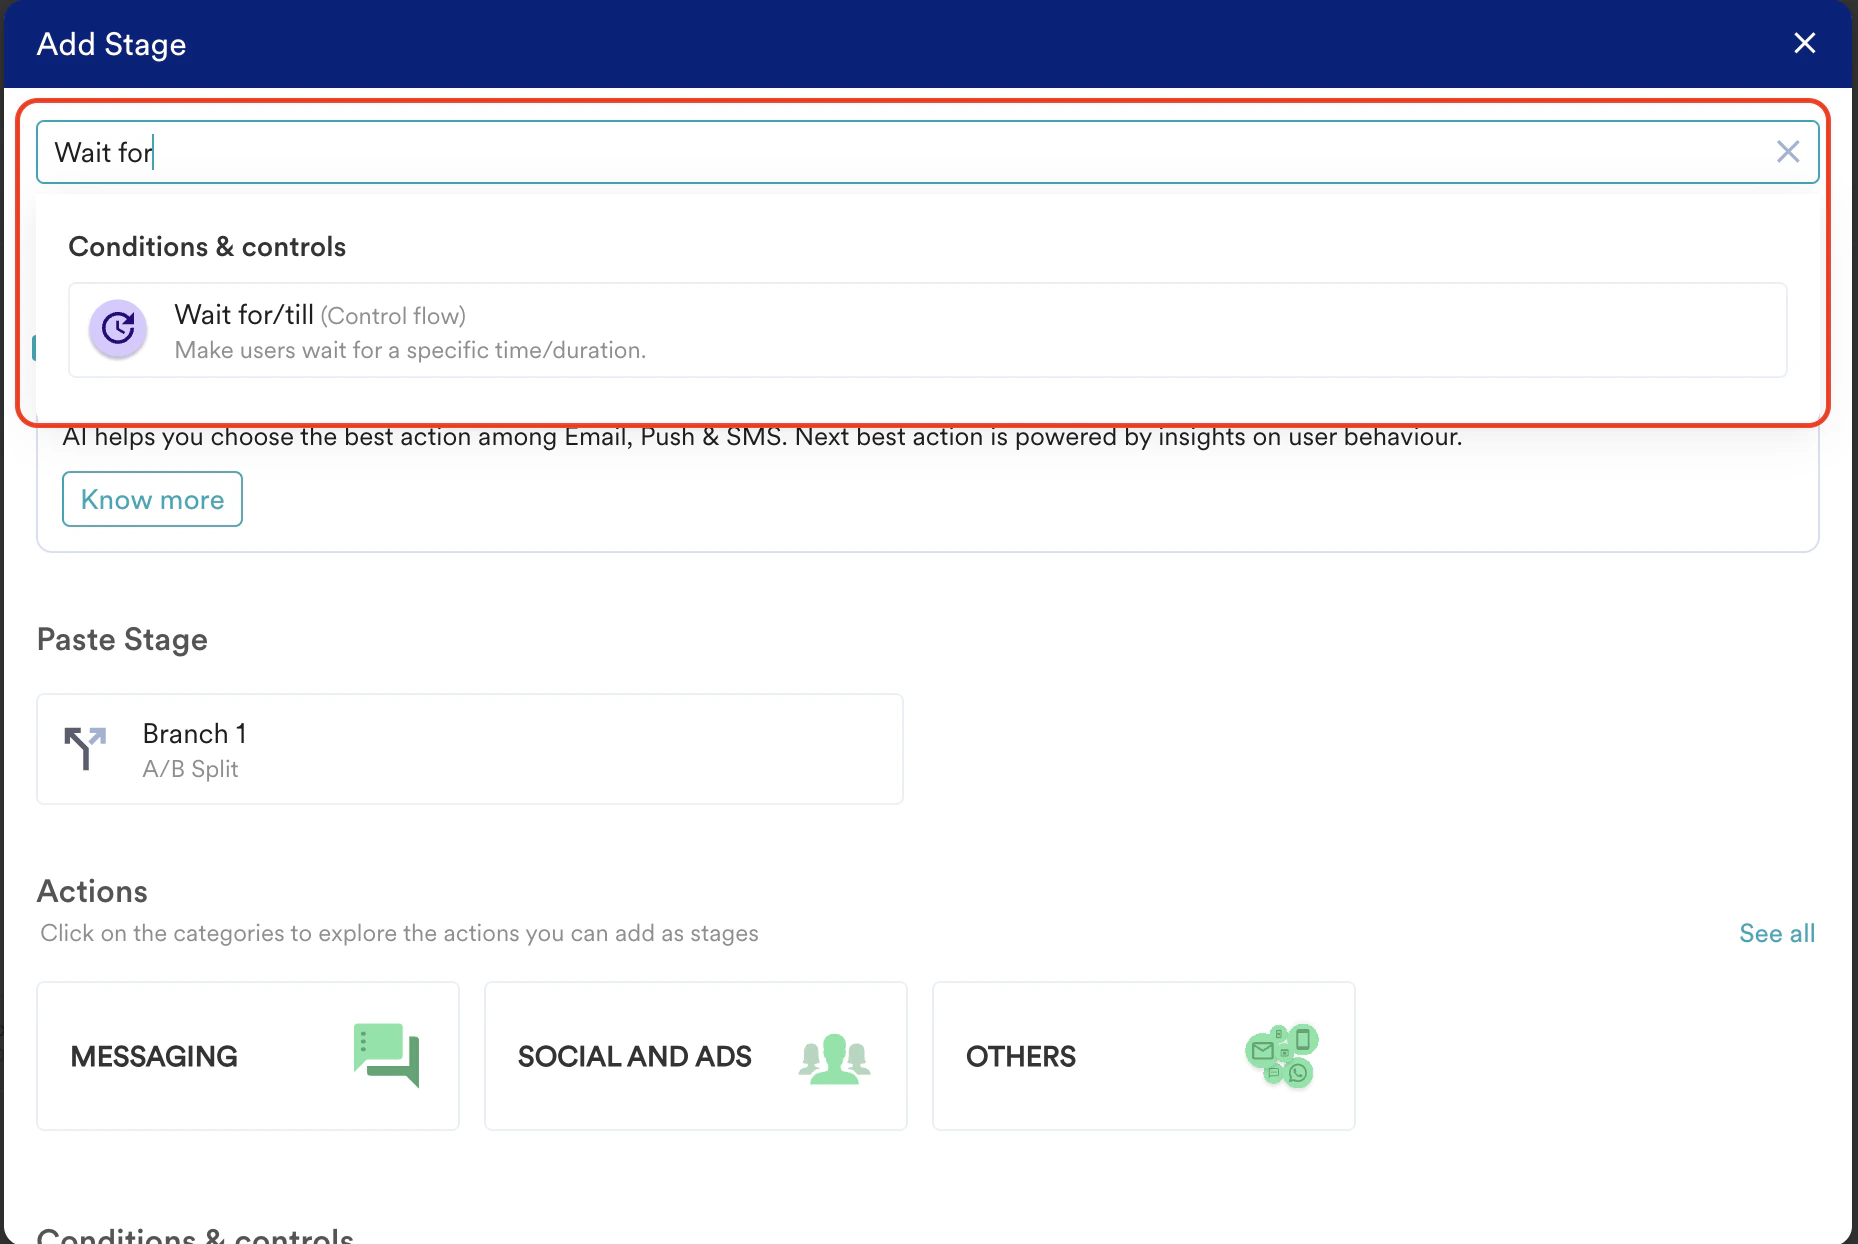
- Click on the plus icon and do one of the following to add the ‘Wait for/till’ control.
- Move to the Conditions & controls tab and scroll down to the Control flow section. Then Click Wait for/till*.
 *
*
- Search for “Wait for/till” in the search bar & select the resulting option.
- Click Control Flow card in the All stages tab and then click Wait for/till.

The five frequently used stages are displayed under the Frequently Used section on the All stages tab. The list of available stages changes dynamically based on your workspace. Click the required stage to add it to the flow.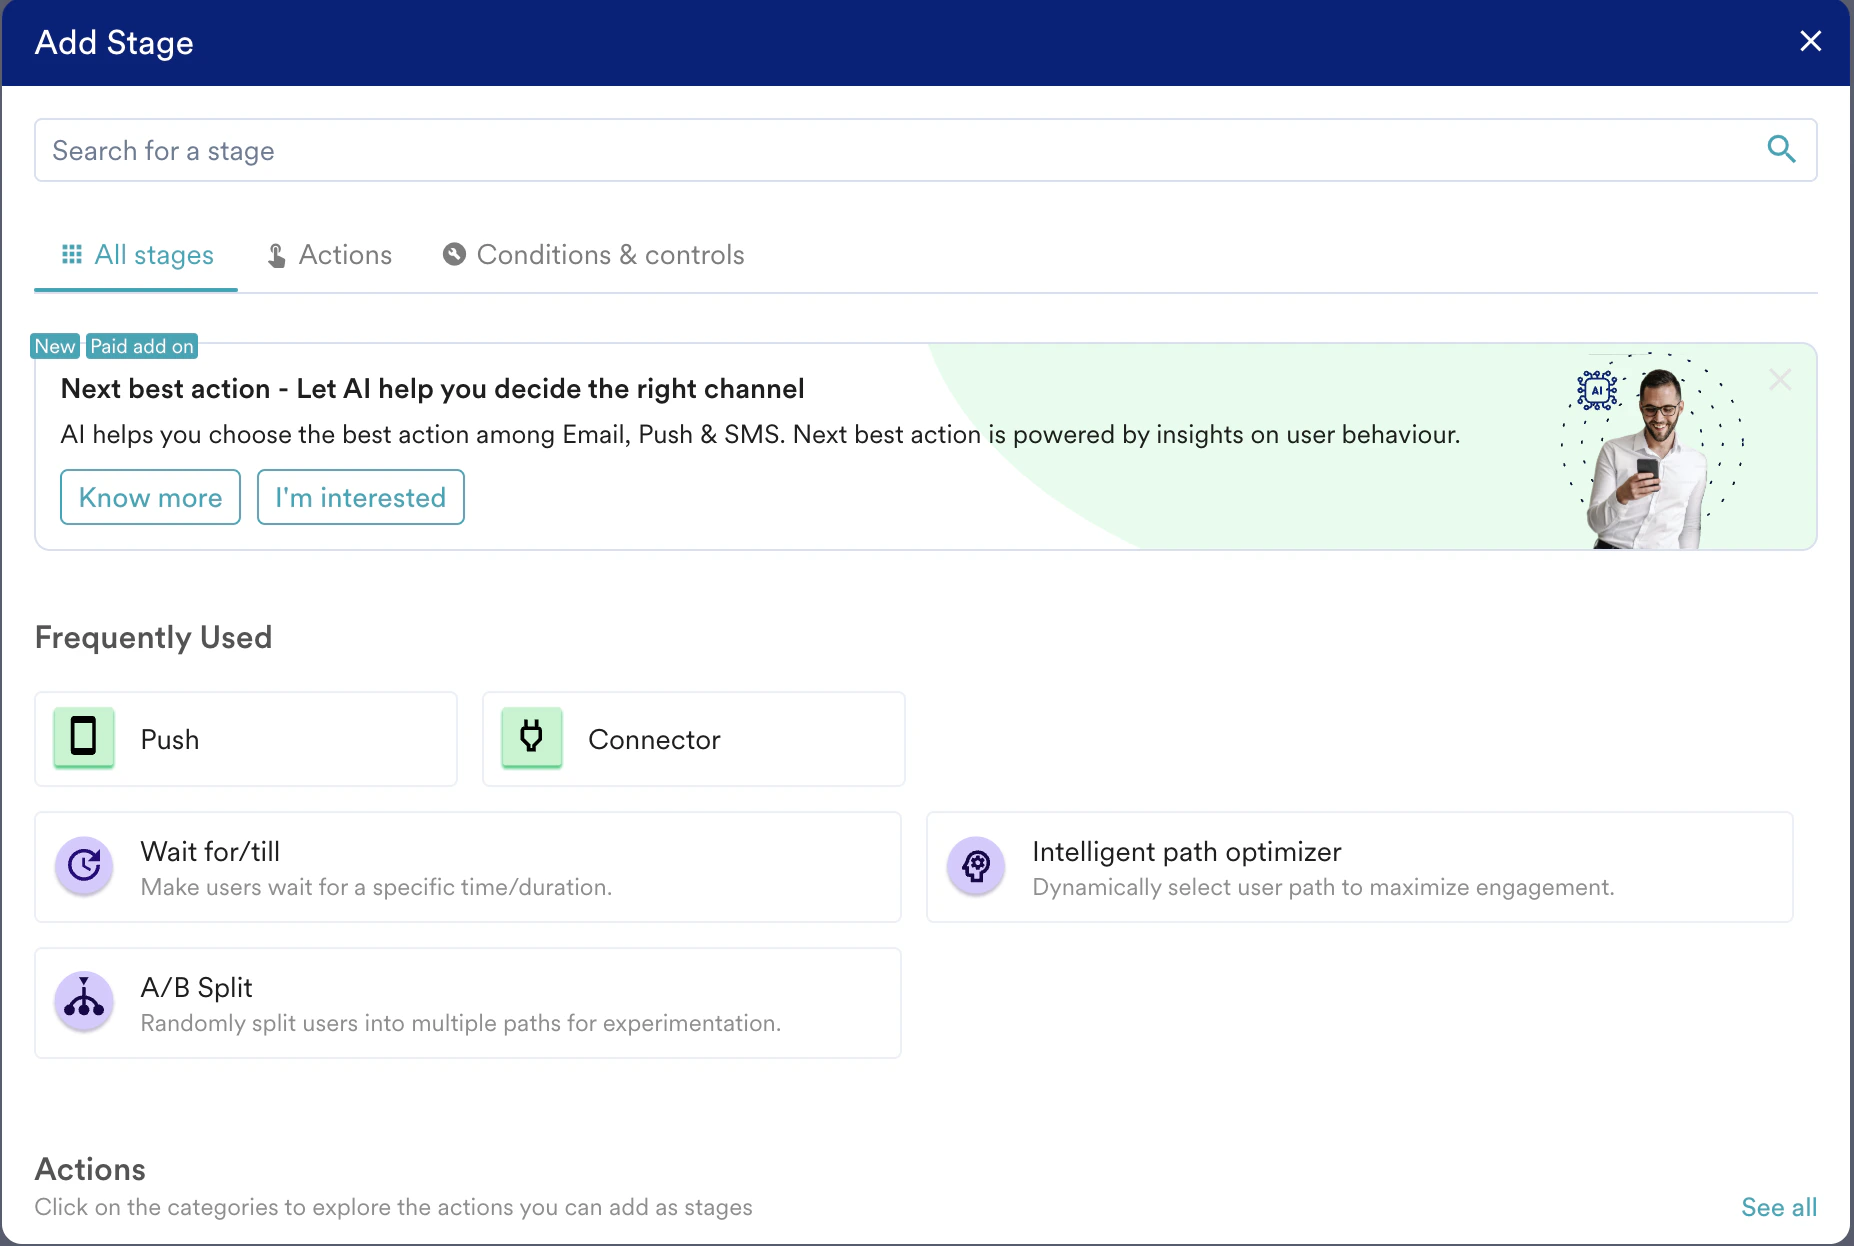
- Click Wait For/Till.
- Click the pen icon to edit the wait till/for time.
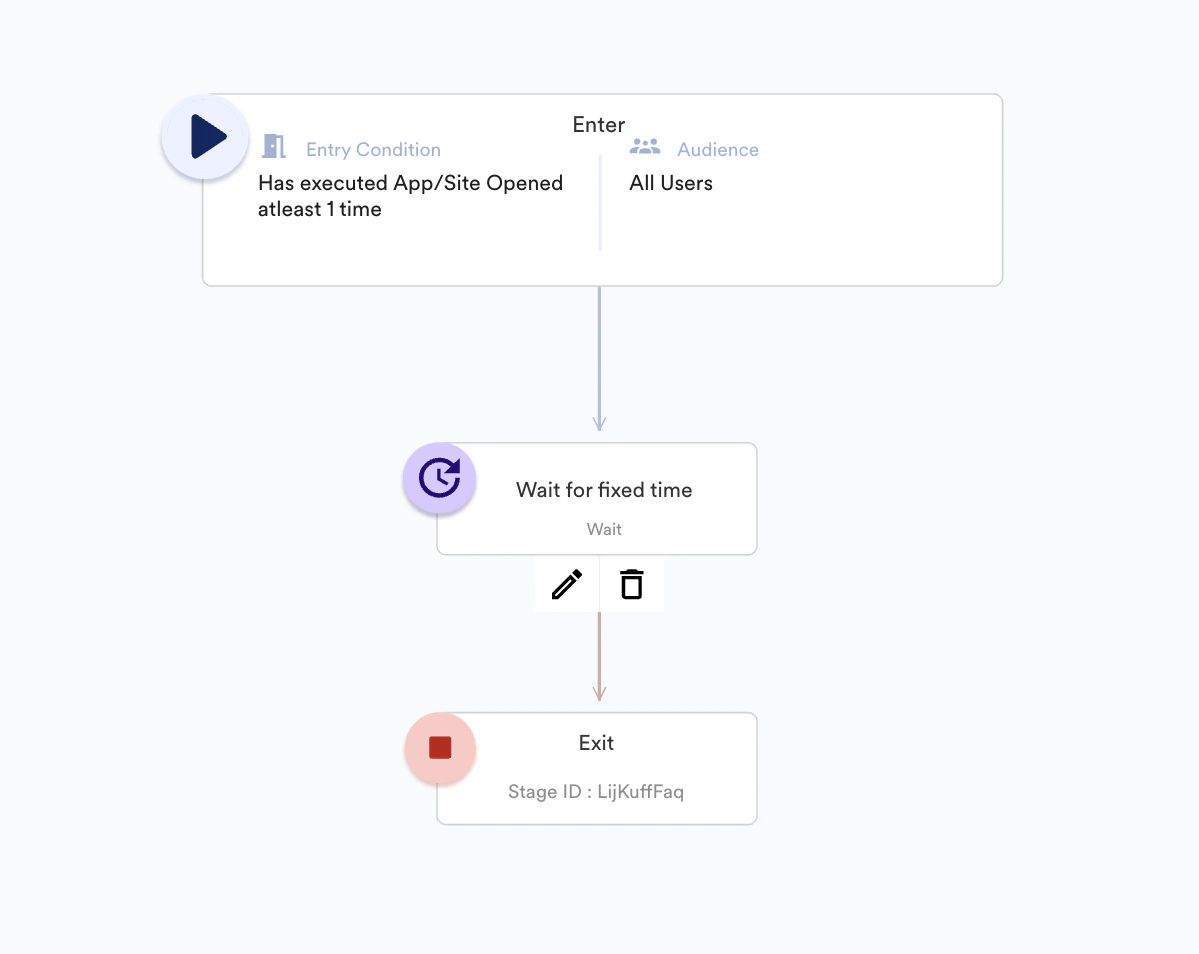
- The following screen pop-ups. Set the desired wait time using the options provided.
Duration
This option can be used to set the duration for which the user will wait in the flow before taking the next action or before moving to the next stage in the flow.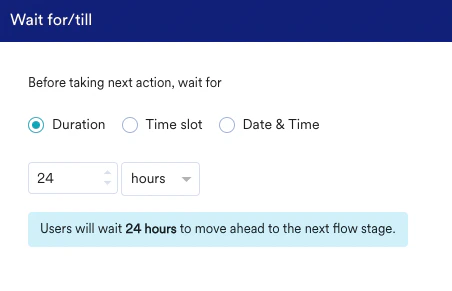 Choosing this option ensures that the user has to wait in the flow for a specific time duration such as an hour, 6 hours, 30 minutes, and so on.
Only after the time interval elapses can the user move to the next stage of the flow.
This is useful in cases when marketers wish to provide some buffer time for the end user to react to the messages or notifications sent.
- Type or use the up and down arrows to set the wait time.
- Select minutes, hours, or days from the drop-down.
- Note: The minimum wait time is five minutes and the maximum wait time is 30 days.
This option allows marketers the flexibility to move users to the next stage of the flow on:
- a specific day of the week such as Monday
- weekdays between the specified time slots
- weekends between the specified time slots
- daily within the specified time slots
Time slot
- The following options are available: Any day, Weekdays, Weekends, and the individual days of the week. Select one of these options.
- The time slots can be selected in the fields adjacent to the dropdown. Choose the specific time interval on the selected day(s) between which the users in the flow will move to the next stage. The various options in Time Slot are shown below.
Any Day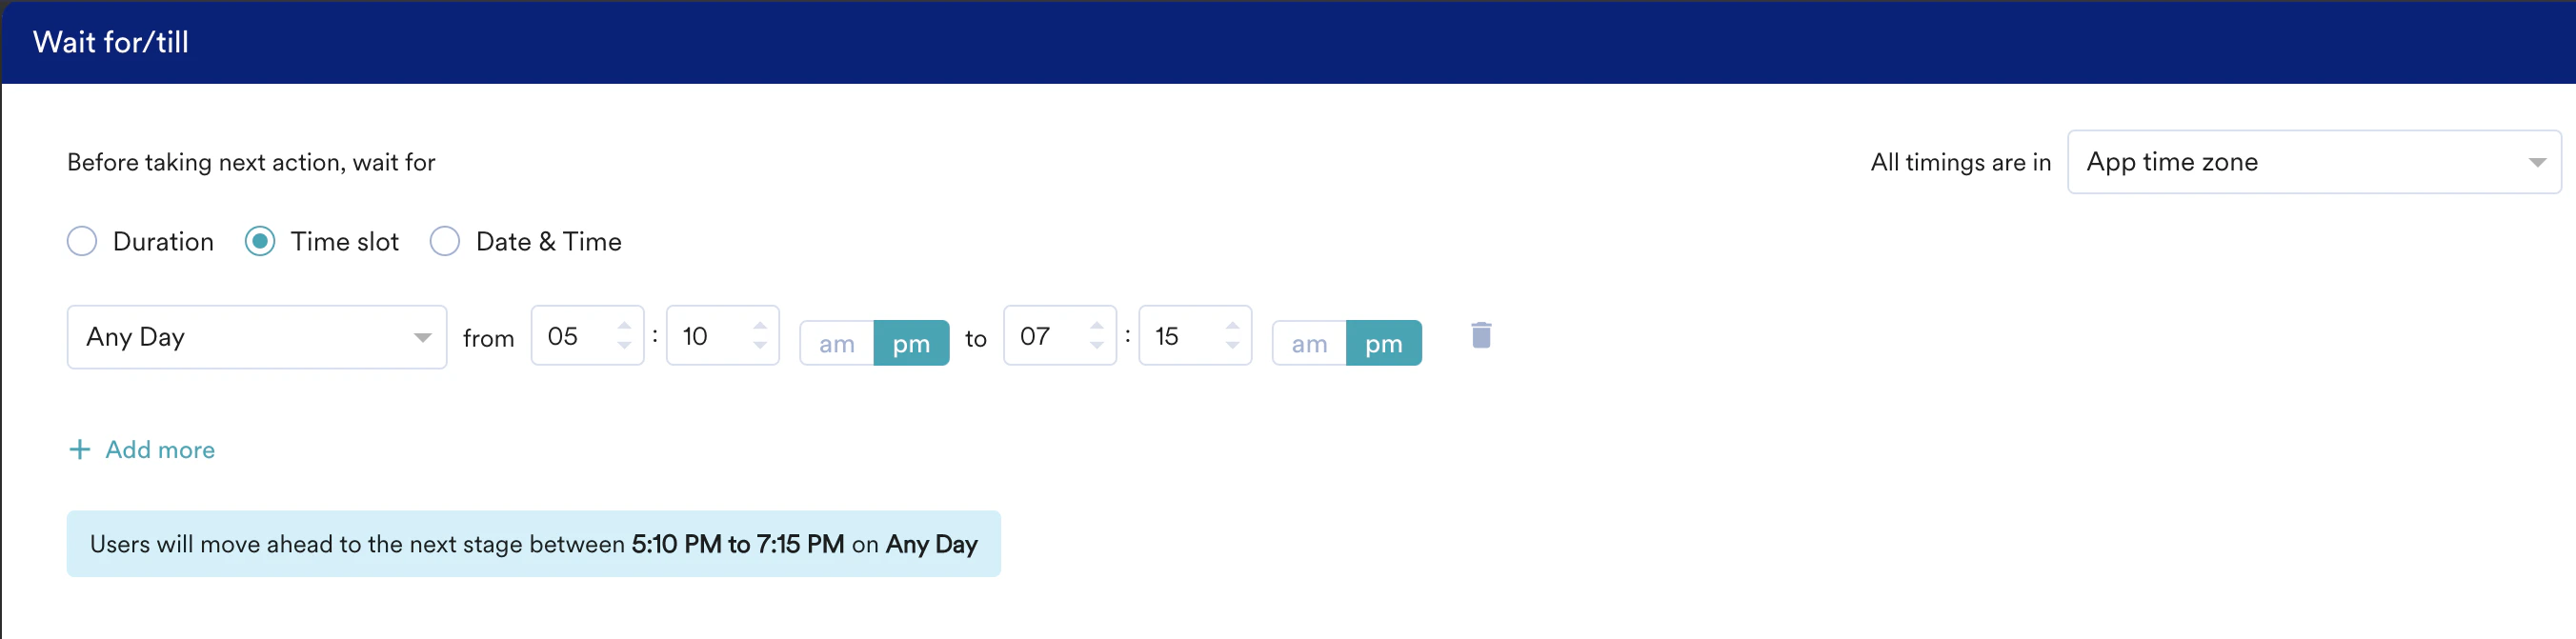
- Choosing ‘Any Day’ and the time frame as between ‘5:10’ pm to ‘7:15’ pm will mean that the users will move to the next stage in the flow from 5:10 pm to 7:15 pm daily.
- If a user enters the flow today at 5 pm, they will move to the next stage today at 5:10 pm while a user entering the flow today at 7.16 pm will move to the next stage of the flow sometime tomorrow during the defined time slot.
Weekdays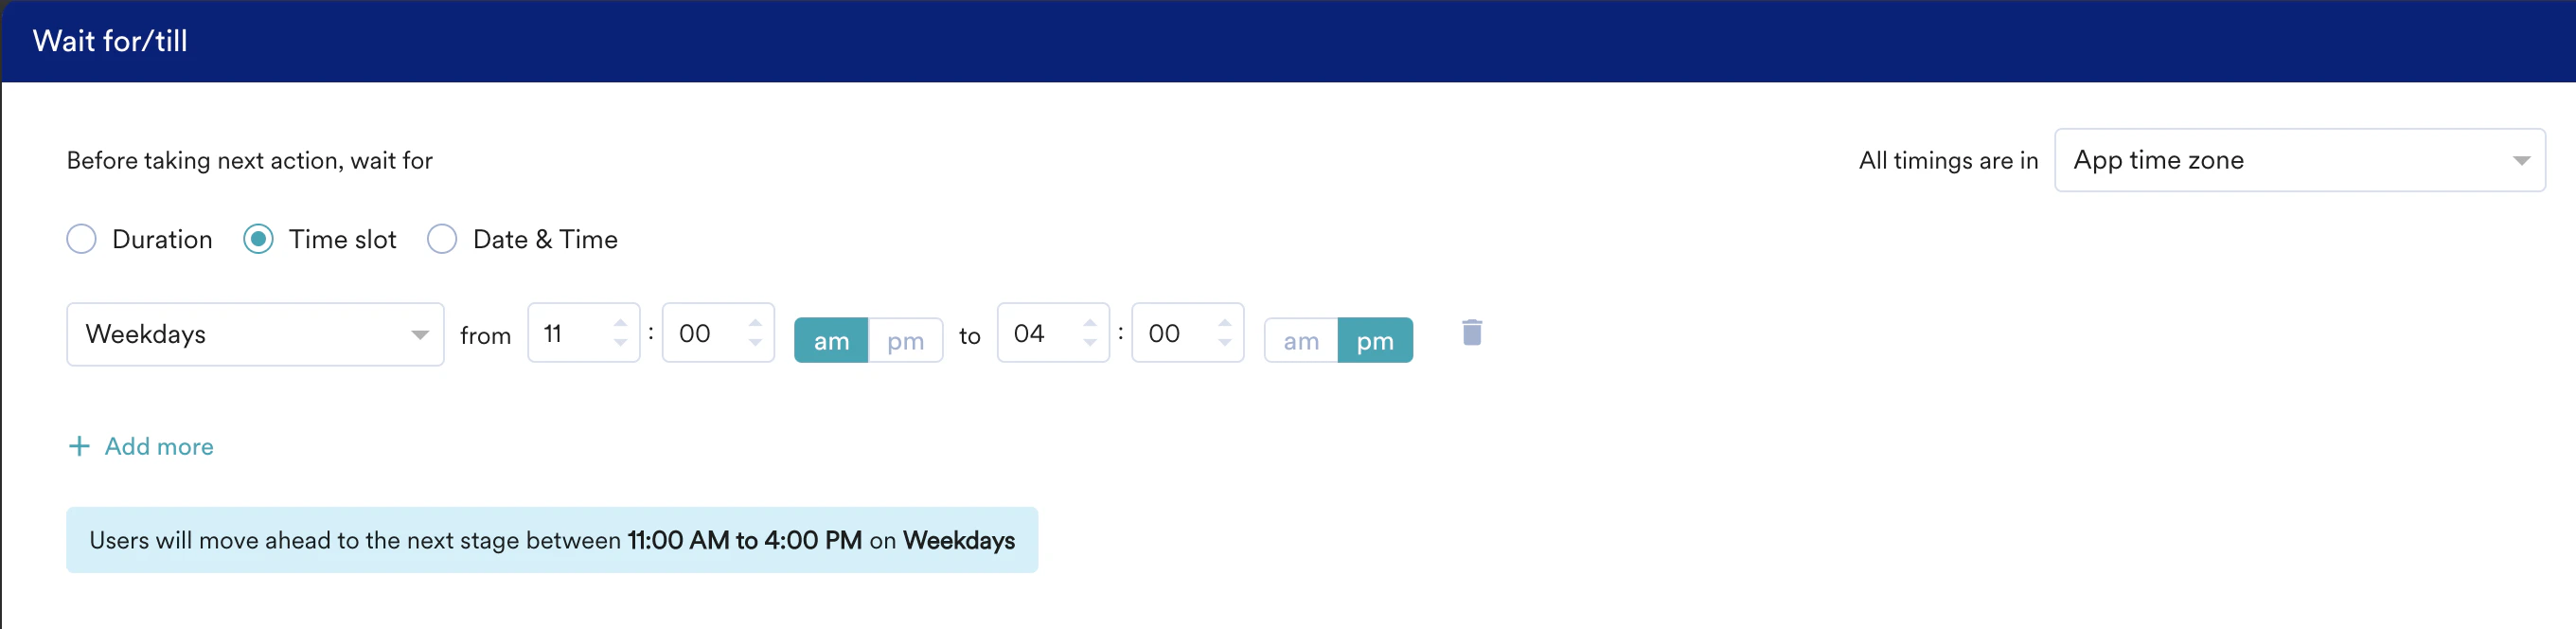
- Select Weekdays and the time frame as between ‘11’ am and ‘4’ pm. This will mean that the users will move to the next stage in the flow from 11 am to 4 pm daily from Monday to Friday.
- If a user enters the flow on a Monday at 5 pm, they will move to the next stage sometime during the time slot on Tuesday.
- Any user entering the flow after 4 pm on Monday to 11 am on Tuesday will move to the next stage sometime during the time slot on Tuesday.
- However, note that any user entering the flow after 4 pm on Friday will wait until the next Monday to move to the next stage.
Weekends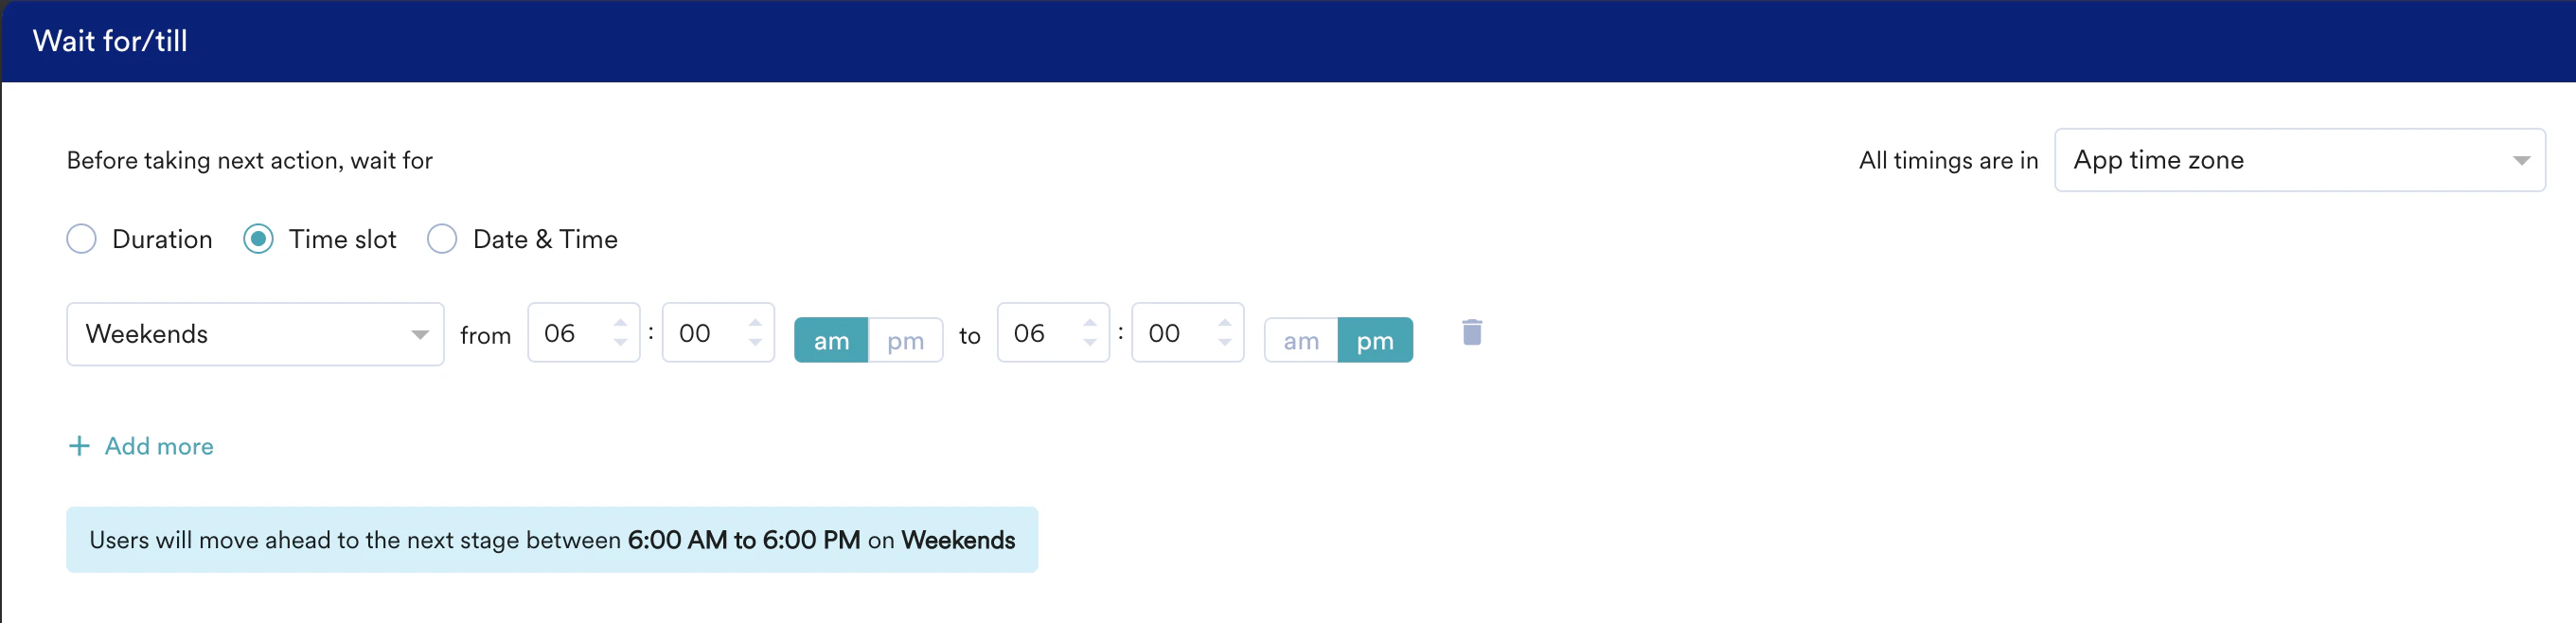
- If weekends are selected, users will move to the next stages only on the time frames specified on Saturday and Sunday. For example, if Weekends is the option selected and the time frame specified is 6 am to 6 pm.
- Users entering the flow on any day of the week until Saturday till 6 am will move to the next stage of the flow sometime during the defined time slot (6:00 am to 6:00 pm) on Saturday.
- Users entering the flow between 6 am to 6 pm on Saturday will move to the next stage immediately and those entering the flow after 6 pm on Saturday will be moving to the next stage of the Flow some time during the mentioned time slot on Sunday.
- Users entering the flow post 6 pm on Sunday will have to wait next Saturday and shall move some time during the mentioned time slot to the next stage.
Day of Week
- Select Tuesday and the time frame as between ‘8’ am and ‘10’ am. This will mean that the users will move to the next stage in the flow from 8 am to 10 am every Tuesday. If a user enters the flow on a Monday at 5 pm, they will move to the next stage sometime during the defined time slot on Tuesday.
- Users entering the flow between 8 am and 10 am on Tuesdays will immediately move to the next stage in the flow.
- Any user entering the flow after 10 am on Tuesday will move to the next stage sometime during the mentioned time slot on the next Tuesday.
Specific Day(s)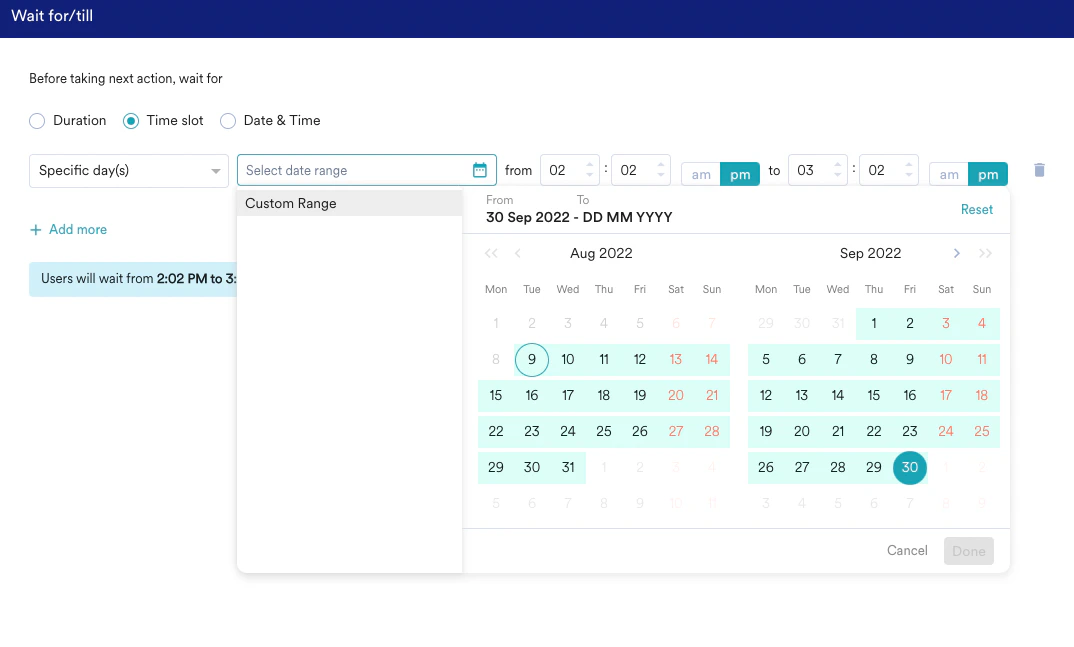
- This option enables marketers to choose a custom date range as shown below. A maximum of 30 days can be chosen for the date range.
- For example, if the time range chosen is 8th Aug 2022 to 10th Aug 2022 and the time range is between 6 am to 6 pm, this would mean that users who are already in the flow till 6 am on the 8th of August 2022 would move to the next stage of the flow after 6 am on 8th Aug 2022.
- Users entering the flow between 8th Aug 6 am to 6 pm would move to the next stages immediately.
- Users entering the flow after 6 pm on the 8th of August to 6 am on the 9th of Aug will move to the next stage sometime during the defined time slot on 9th of August to move to the next stage of the flow.
- Users entering the flow after 6 pm on the 10th of August 2022 would be dropped off the flow as the wait times for the next stages would have elapsed.
This option allows marketers the flexibility to move users to the next stage of the flow only within a specified time frame.
This can be used when there are special deals or offers that are coming up.
If there is a festival sale, the marketer can configure the date and time for the flow based on the time and date of the sale and ensure that the users move to the campaigns for the sales only when they want to notify the user about it (pre-sale window and when the sale is on).Date and Time
This option allows marketers to select the Next Day, Next <Any day of the week>, a specific date, and the time till which the user has to wait before moving to the next stage.Next day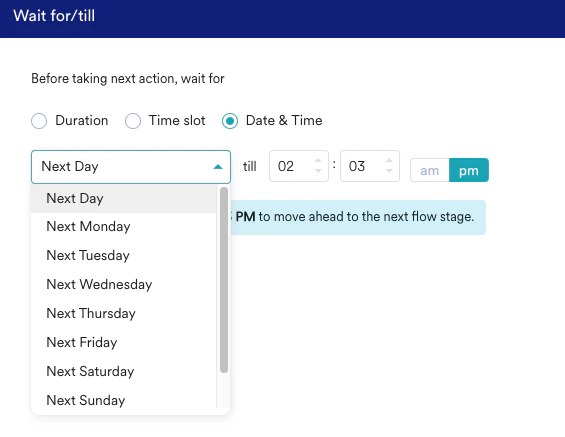
- Select the time period until the next day till which the user will wait to move to the next stage of the flow. For example, choosing the next day till 5 pm will mean that users entering the flow from now until 5 pm tomorrow will have to wait till 5 pm to move to the next stage of the flow.
Next <day of the week>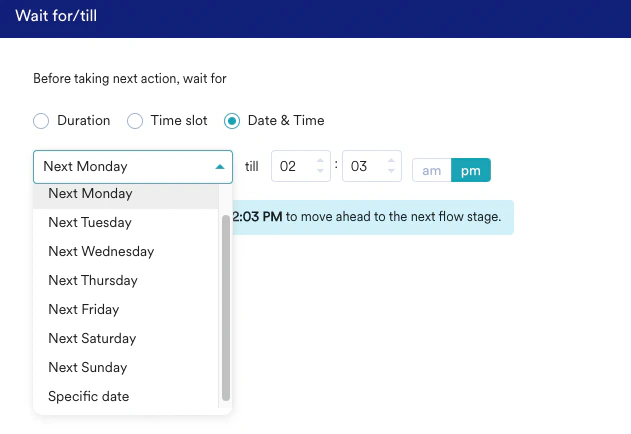
- Select Next
<day of the week> and the time to make users entering/in the flow wait until the next chosen day of the week and the time specified to move to the next stage of the flow.
- For example, if a festival offer or some sale is about to start on Friday at 7 am, marketers can make the users entering the flow wait until say Thursday at 7 pm to move to the next stage of the flow. The next stage of the flow could be sending push campaigns to the user about the sale or deals coming up on Friday.
- Thus, anyone entering the flow until Thursday at 7 pm will wait till 7 pm on Thursday to move to the next stage of the flow.
Specific date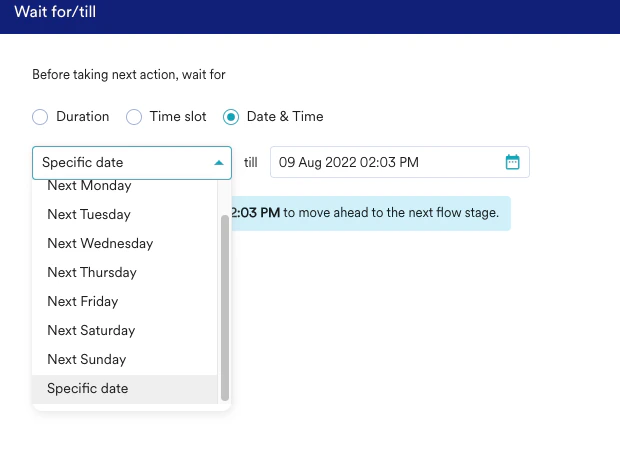
- Choose a specific date and time till which the user will have to wait in the flow before moving to the next stage of the flow. A maximum of 60 days from the current date can be chosen here.
- For example, choosing 8th Aug 2022 till 6 pm will mean that the users will have to wait till 6 pm on the 8th of August 2022 to move to the next stage of the flow.
- Note: Users entering the flow after the specified wait time will be dropped off the flow. Thus, in the example above, any user entering the flow after 6 pm on the 8th of August will be dropped off the flow.
Go To
Send your users to any existing stage in the same Flow using Go To. Adding the Go To stage will delete the flow branch below this stage.
- Click the plus icon and do one of the following to add the Go to stage:
- Move to the Conditions & controls tab and scroll down to the Control flow section. Then Click Goto*.
 *
*
- Search for “Goto” in the search bar & select the resulting option.
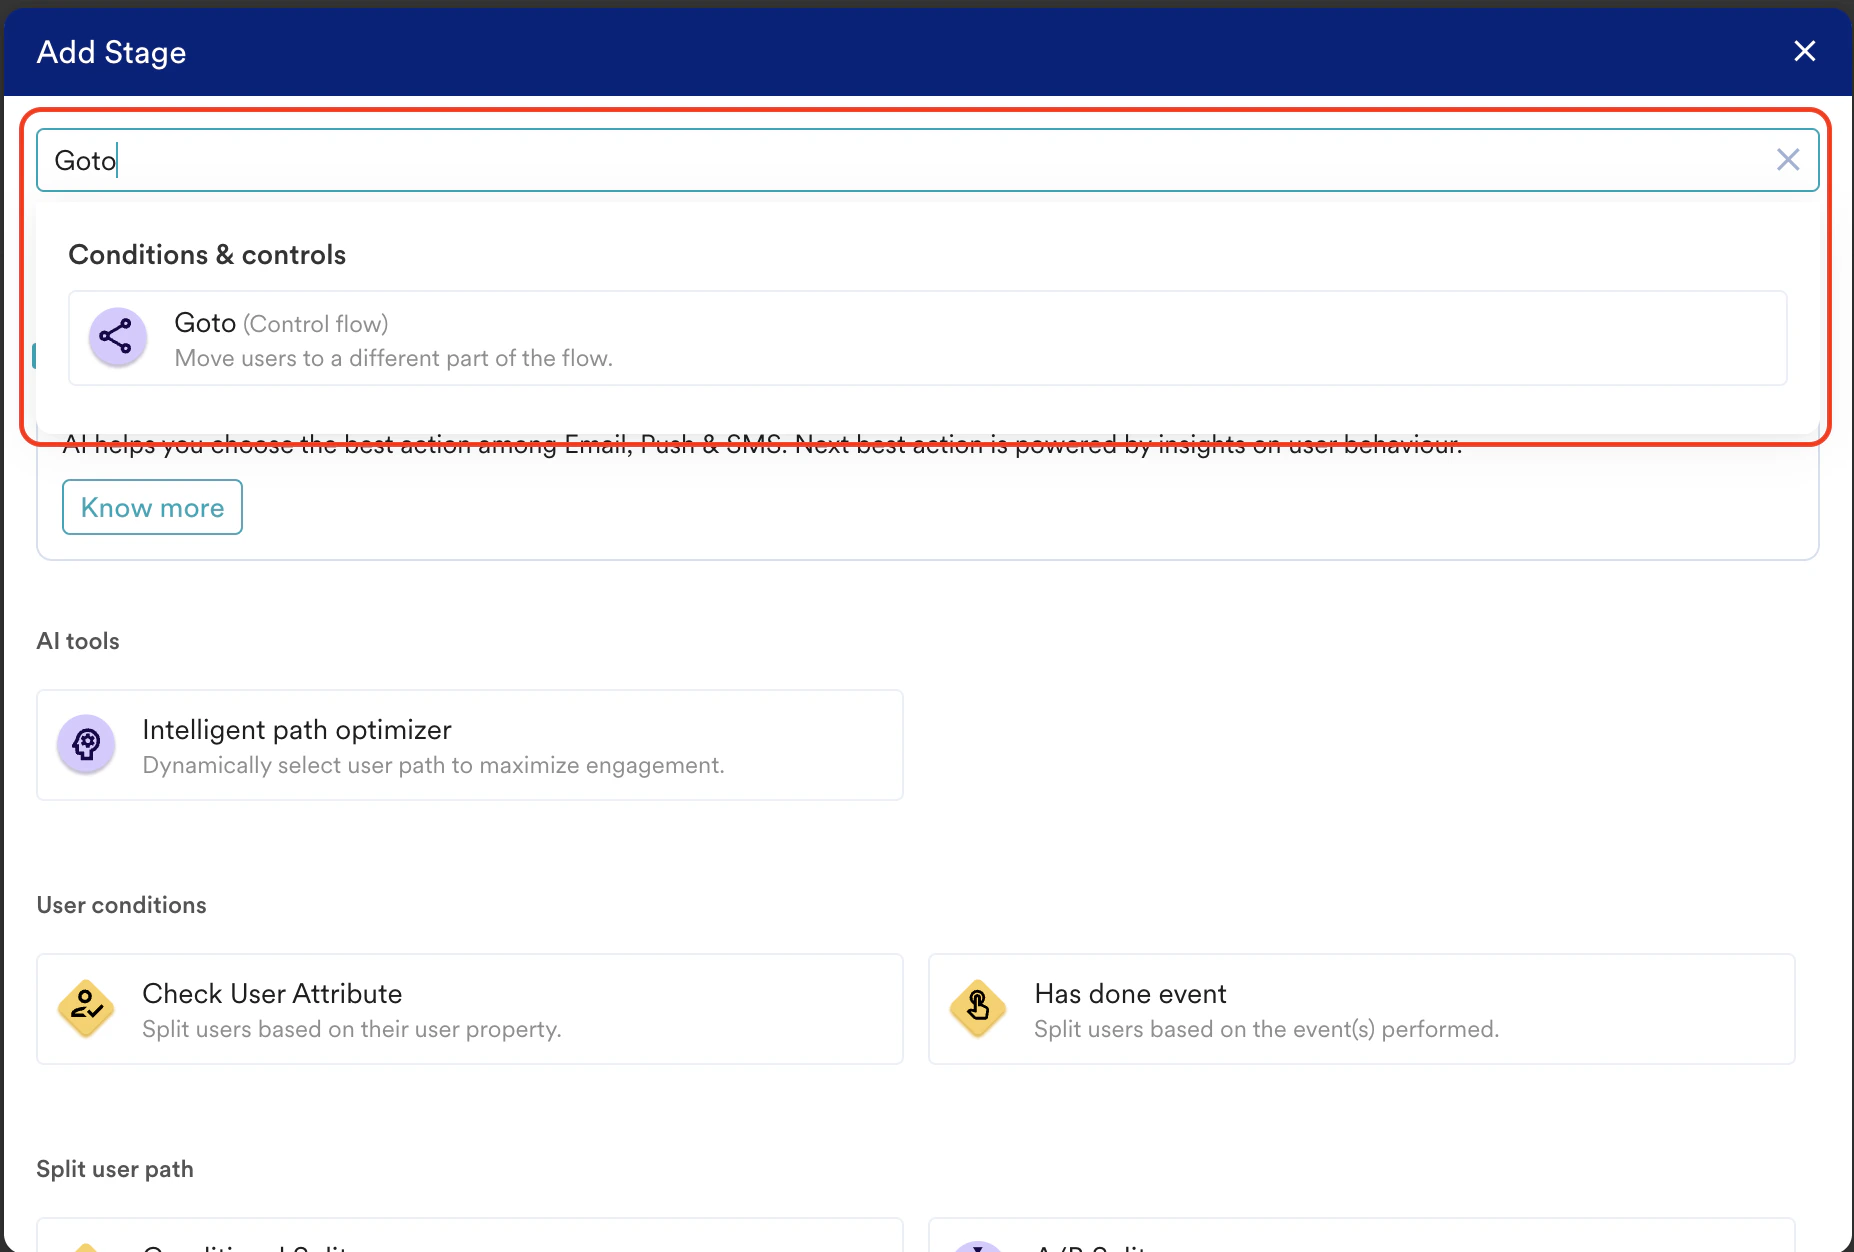
- Click the Control Flow card in the All stages tab and then click Goto.

The five frequently used stages are displayed under the Frequently Used section on the All stages tab. The list of available stages changes dynamically based on your workspace. Click the required stage to add it to the flow.
- Click Go To.
- Click the pen icon to edit.
- Search and select the destination stage on the Goto page.
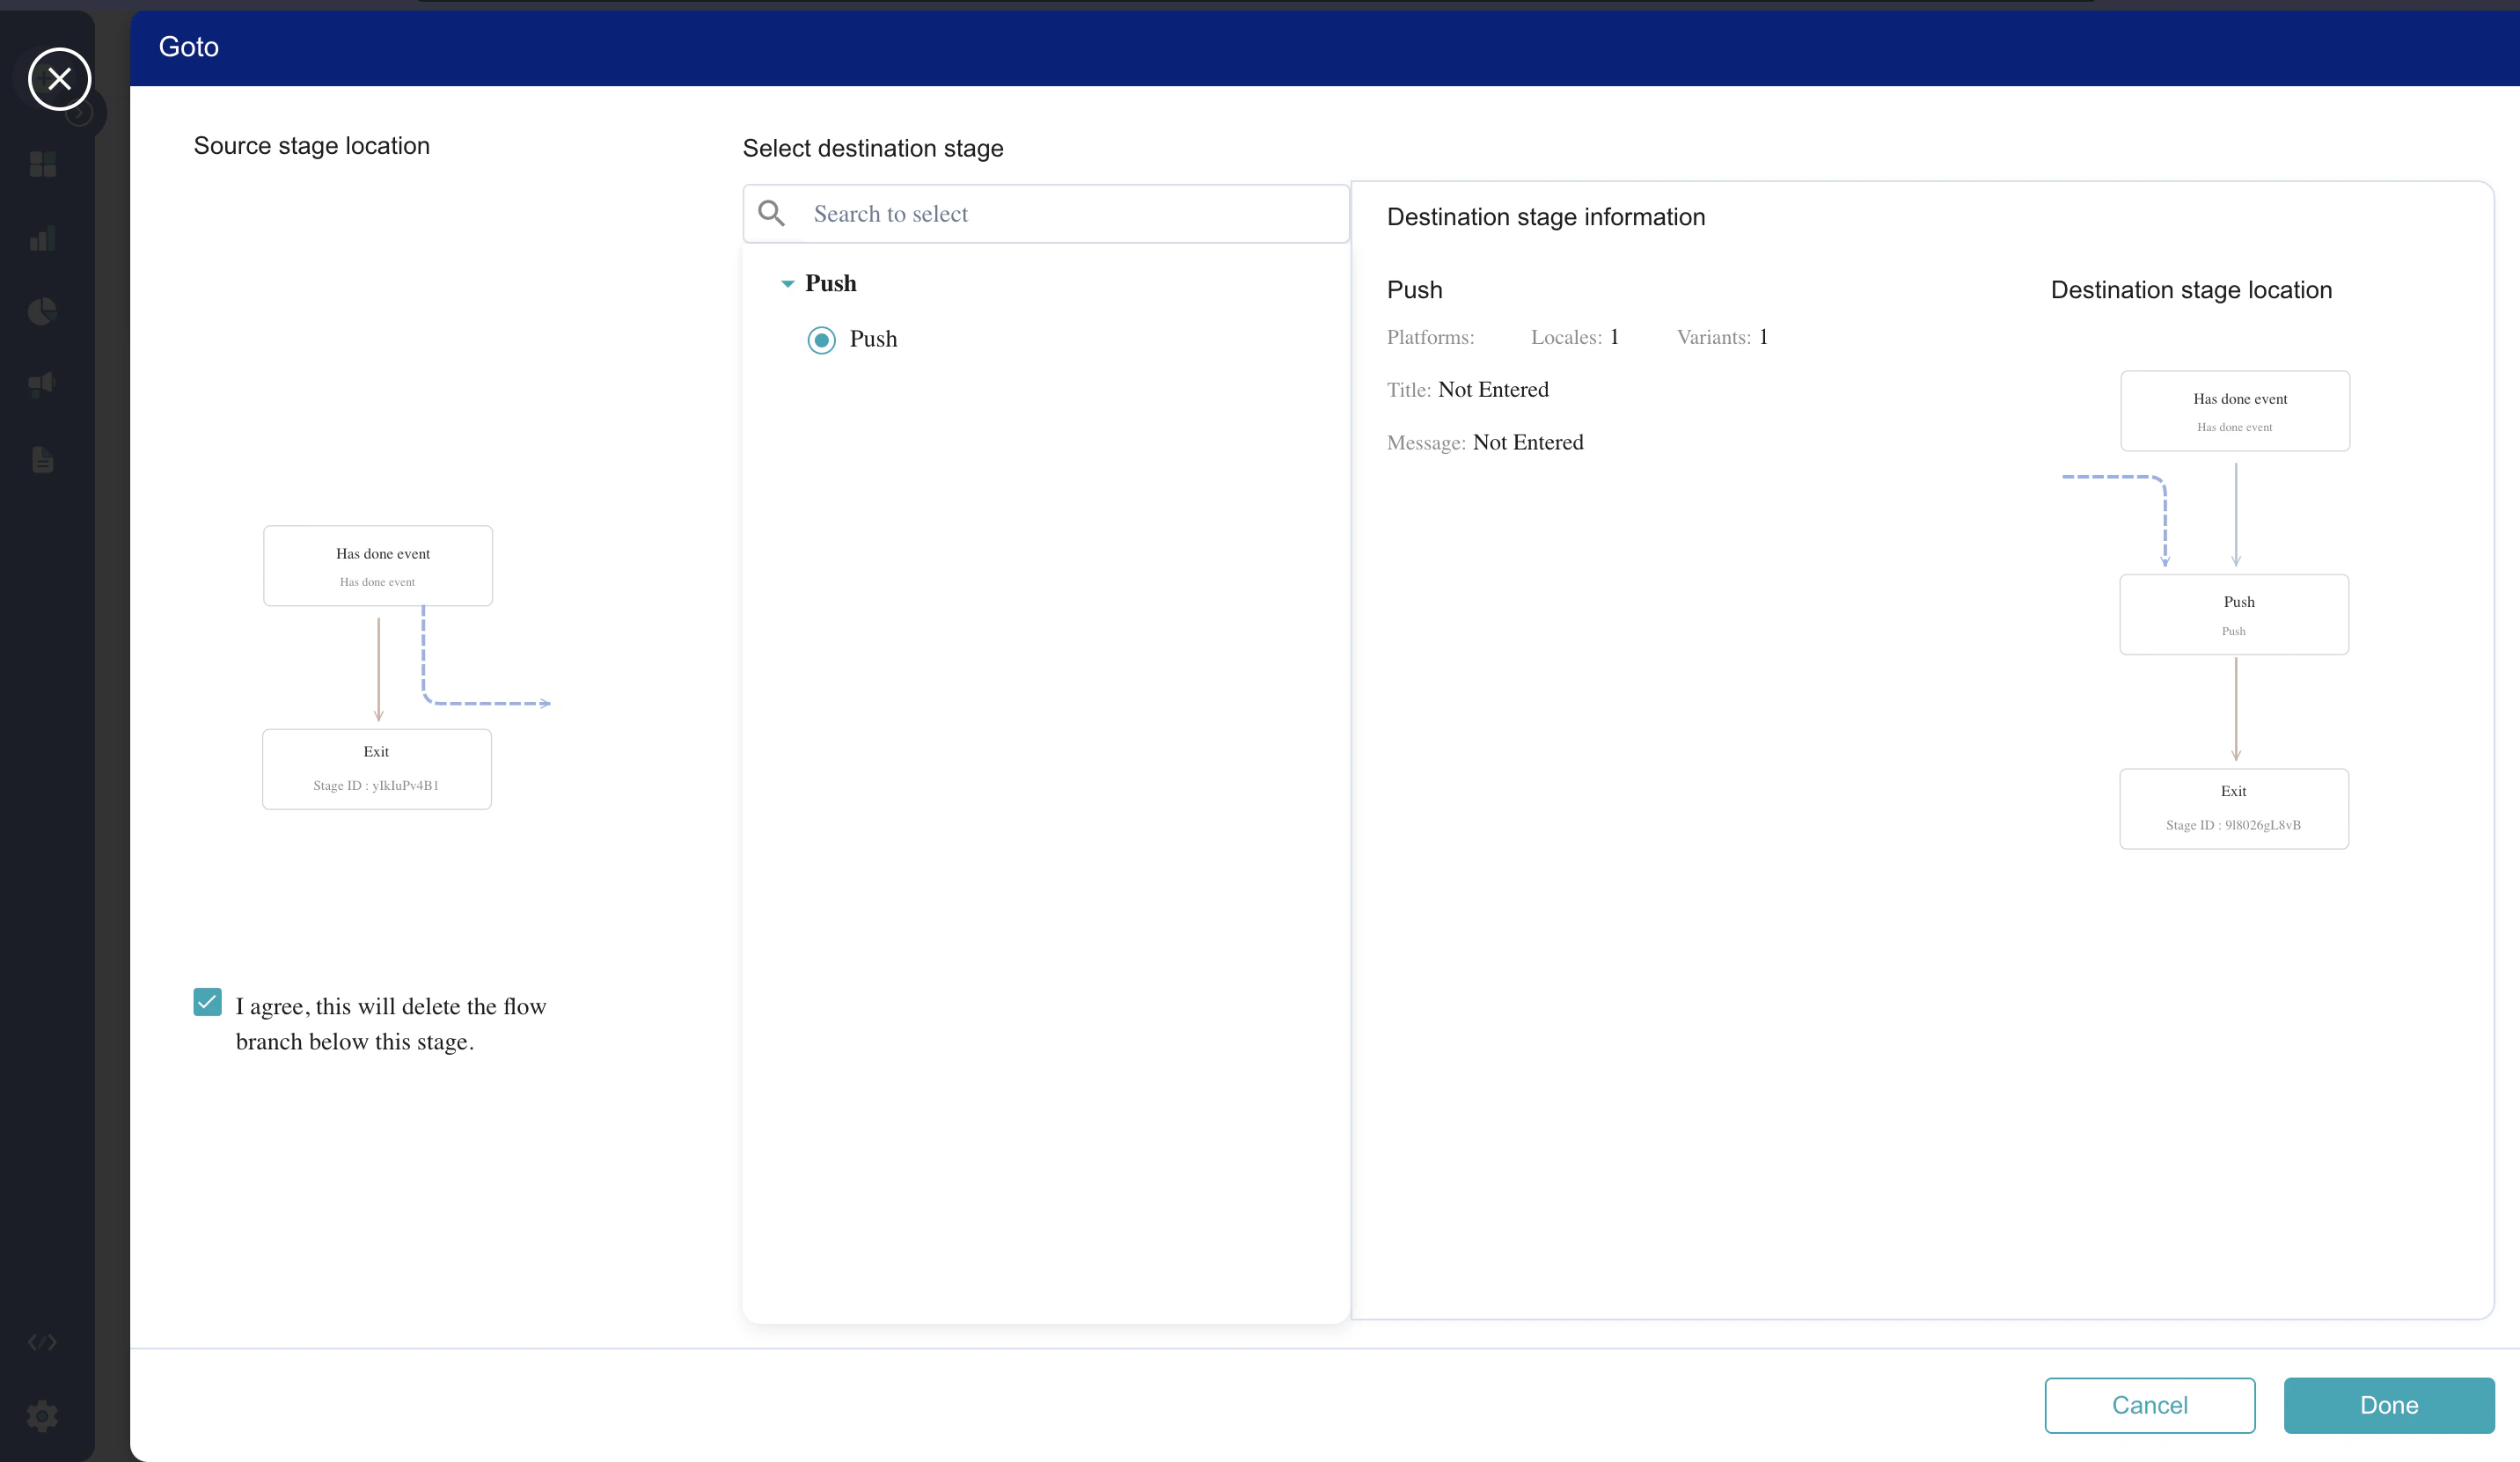
- Click Done to add the action or click Cancel to cancel the action.
Points to remember
- MoEngage Flows does not allow you to add Go-to Block if it results in-to a circular loop to avoid users getting stuck indefinitely.