Documentation Index
Fetch the complete documentation index at: https://moengage-user-guide.mintlify.app/llms.txt
Use this file to discover all available pages before exploring further.
Introduction
A config (or config file) defines each connector in the Connected Channel. While adding a new Connector or making changes to the existing ones, you must upload the config file to ensure the Connector is configured correctly.Sample files
You can download these sample config files to get started:| File Type | Description |
|---|---|
| Boilerplate Code | Use this file to get started for building your Connector. |
| Full Config File | This file contains input types, requests, and responses. |
Config Sections
A config file is divided into the following sections:| Section | Key | Details |
|---|---|---|
| Basic Info | basic_info | It contains basic connector details such as name, description, and type. |
| Input Variables | input_variables | It displays the input fields when you are using the connector. It allows you to set the following fields:
|
| Authentication | auth | It is the Authentication mechanism for your app that includes no auth and basic auth. |
| Request and Response | modules | It constructs the API call that MoEngage makes to the app during campaign execution and provides an outline of the interpretation of the API responses by MoEngage. |
File Format
The following is the file format of the config file: kkkBasic Info
In this section, you must define the name of your Connector and the use case it aims to solve.| Key | Required | Type | Description |
|---|---|---|---|
name | Yes | String | It is your Connector name. It is displayed when you create connections on the App marketplace. |
description | Yes | String | It is a one-line description of the use case solved by your connector. For example, using this Connector, you can send text messages to your Telegram users via the Telegram Bot. |
type | Yes | String | It is your Connected Apps App type. |
Input Variables
Input variables enable the rendering of input fields on the App marketplace. They facilitate the collection of required information necessary to successfully connect MoEngage to your app and effectively execute campaigns through it. To define an Input Variable, you must add the following to yourinput_variables section:
| Key | Required | Type | Valid Values | Description |
|---|---|---|---|---|
visibility_scope | Yes | String |
| It is the location of your Input Variable or can be either of the following:
|
key | Yes | String |
| It is used to access the value of the input variable in the subsequent steps. |
event_export_key | Yes | String |
| The key is sent while exporting your Events from MoEngage to other third-party apps, such as Data Warehouses. |
name | Yes | String | Only alphanumeric [0-9, a to z, A to Z], and_(Underscore),-(hyphen) and spaces | It is the label for your input variable. |
required | Yes | String |
| If the condition is true, this input is marked as mandatory on the UI. |
type | Yes | String |
| It determines what to display on the UI based on the excepted values. |
validations | No | Object | Refer here for the validations. | Use it when you want to restrict the values. You can add regex rules to add frontend validations. |
Visibility Scope
The Input Variables are collected in the following places:- App Marketplace
- Campaign Creation Form (Step 2)
App MarketPlace
Connections to your Channel App are added from the App marketplace, as shown below: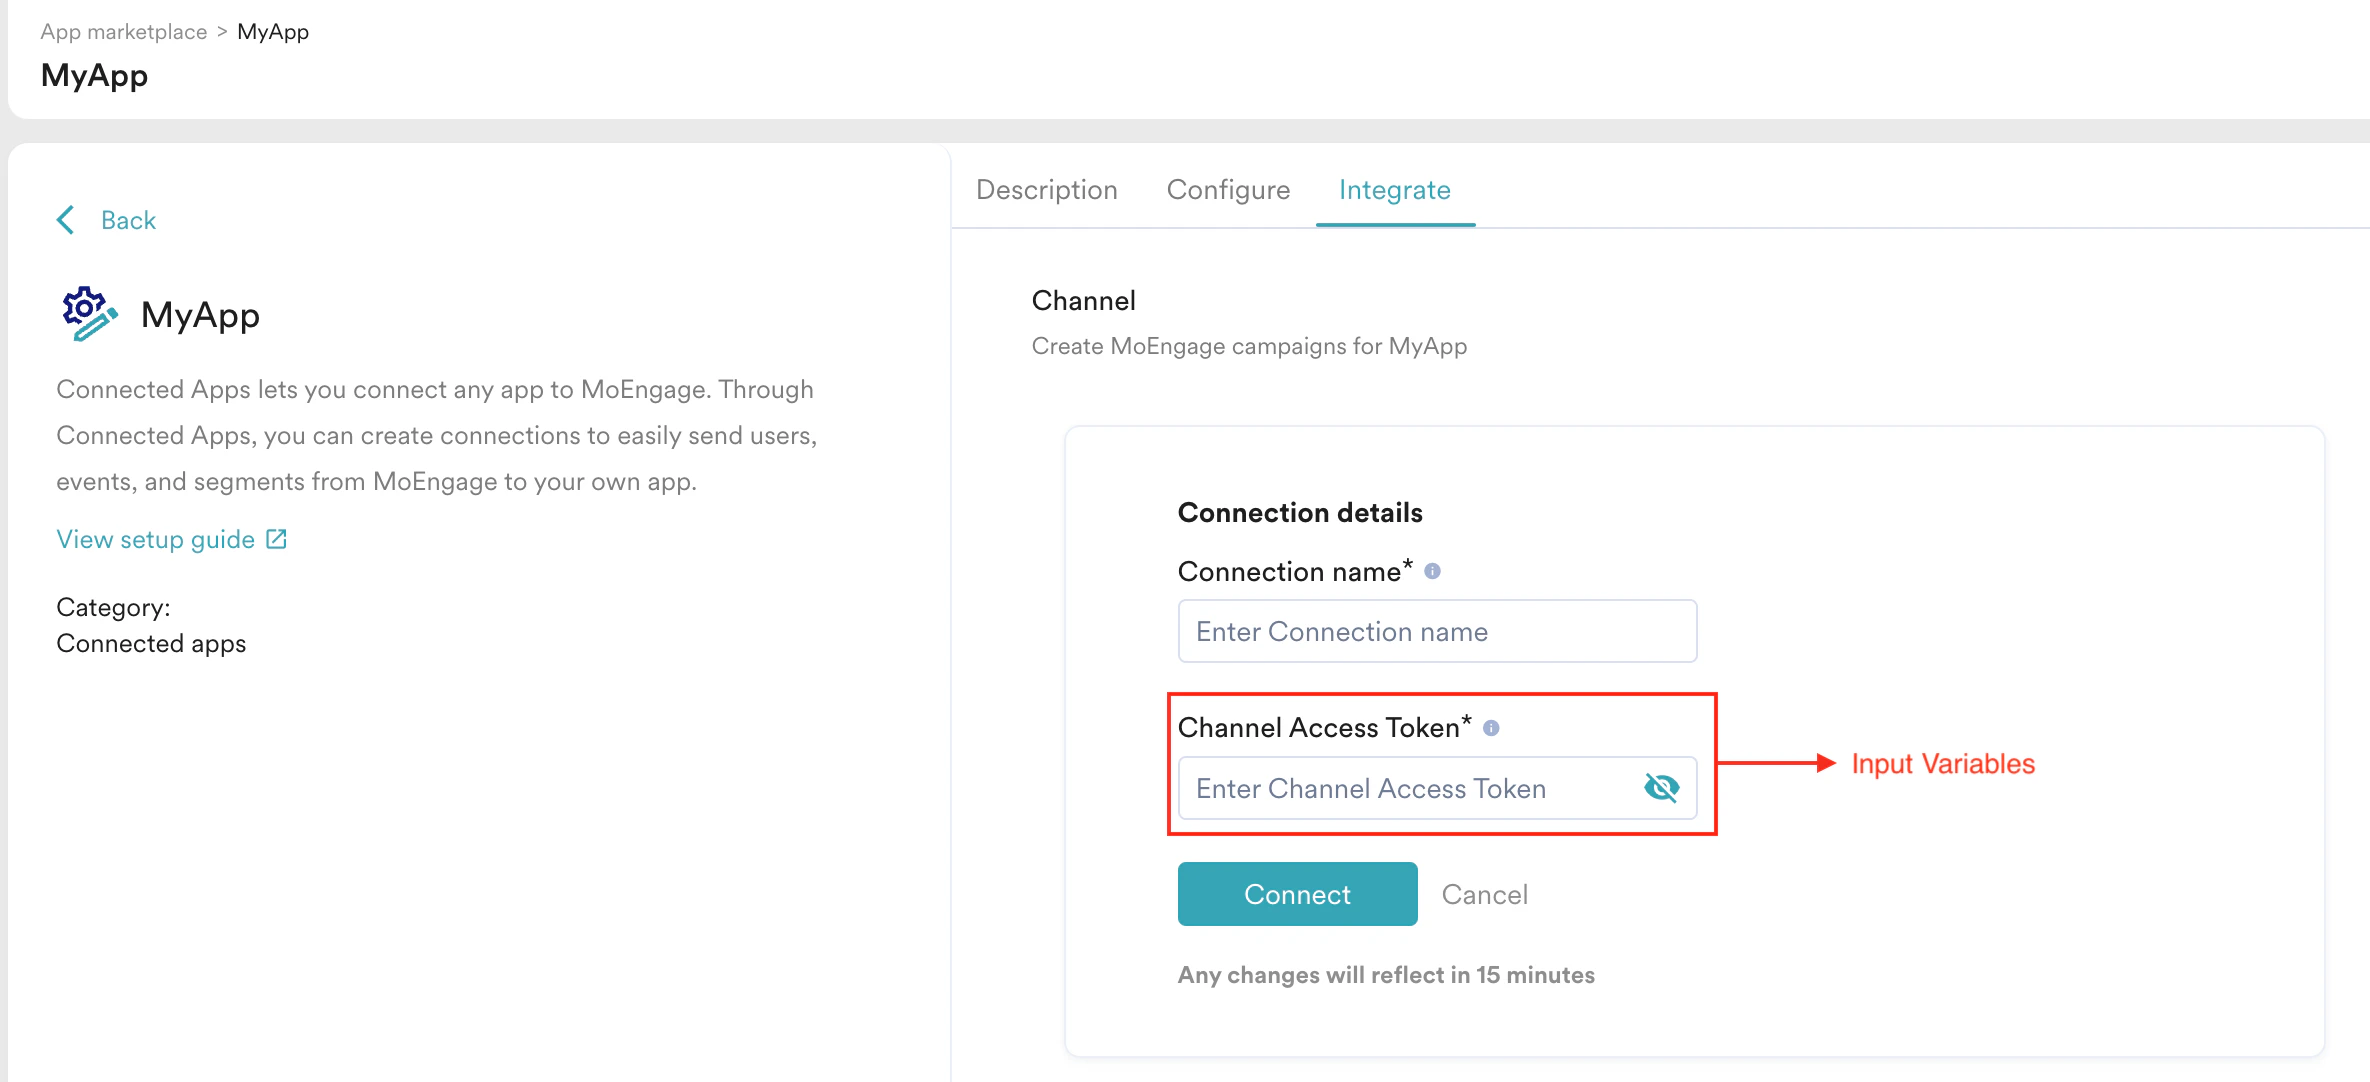
MoEngage displays the Connection name for each Connector in the App marketplace by default. This provides a visual identifier to distinguish the Connections.
Campaign Creation Form (Step 2)
Connections to your Channel app are added from the campaign creation, as shown below: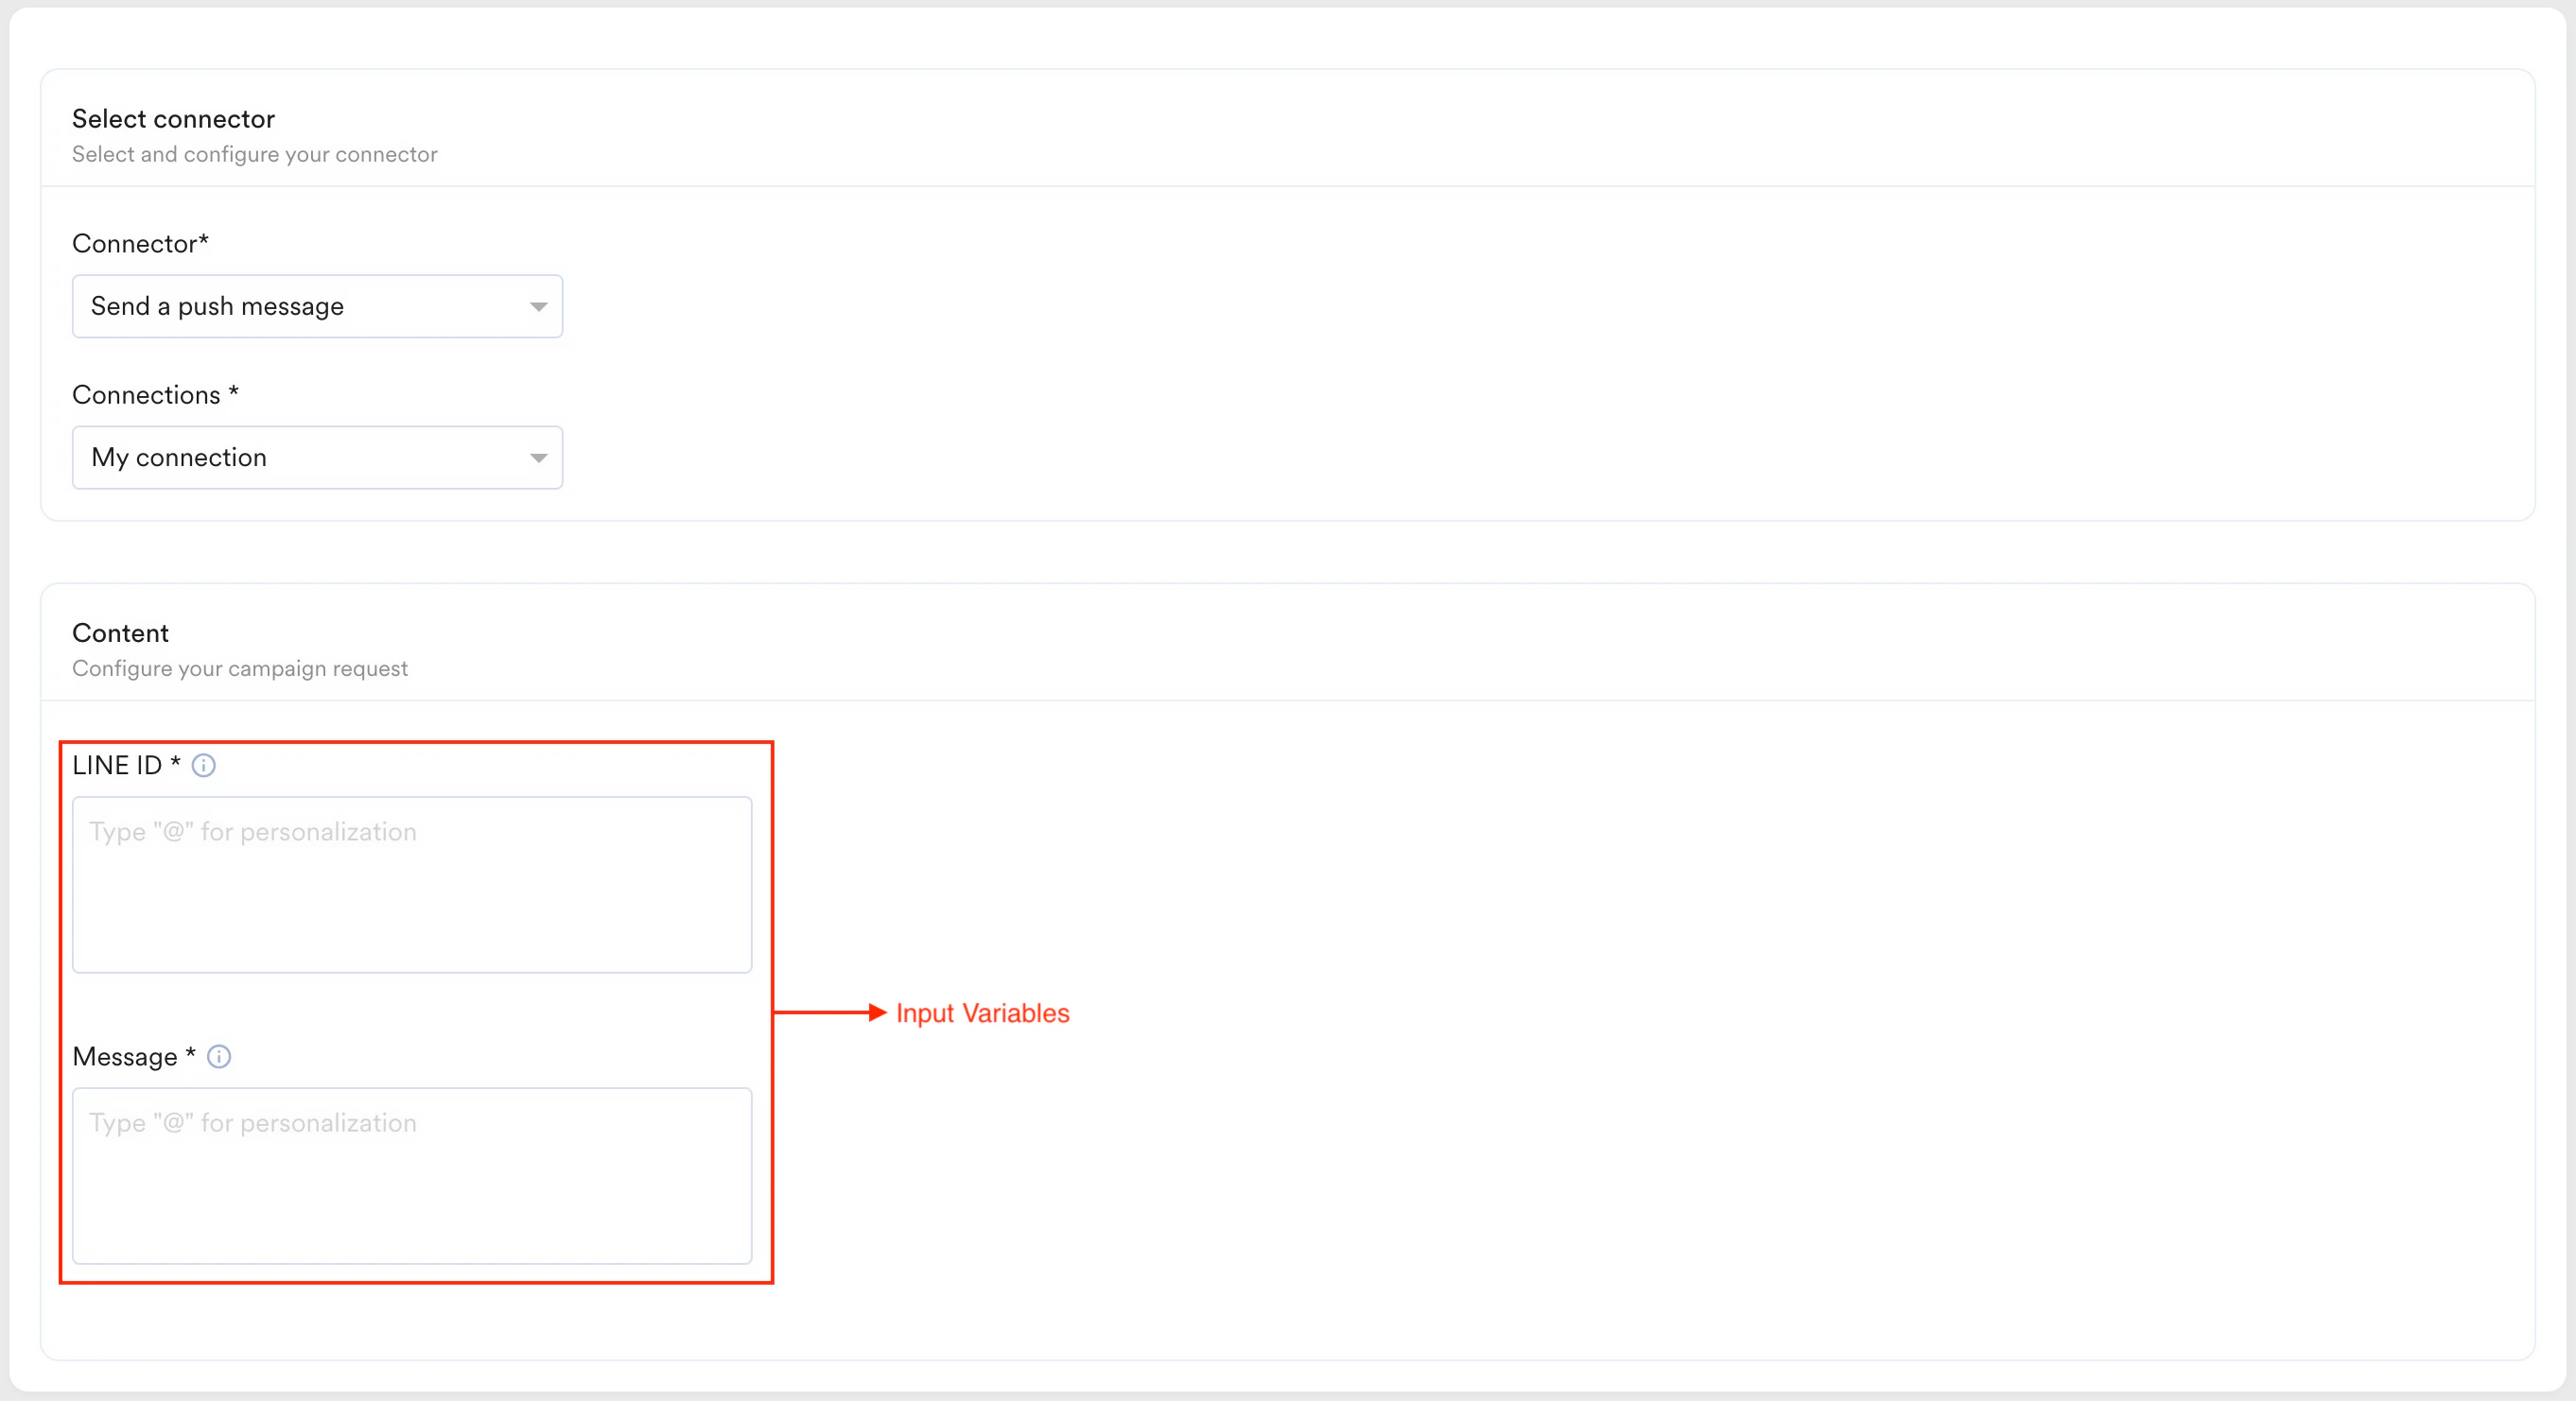
Supported Input Types
All input types are available in the App marketplace and the campaign creation form (Step 2).
Text
This input type allows users to enter any basic text or string value. It is displayed on the UI as a simple single-line text box, making it useful for soliciting short, free-text input, such as usernames or email addresses.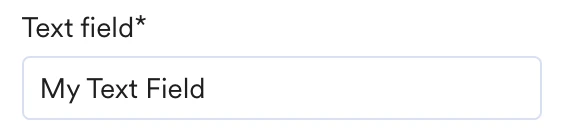
Number
This input type is for numbers. It appears as a text box but only accepts numerical entries. Use it when collecting numeric values, such as age, ID, or quantity.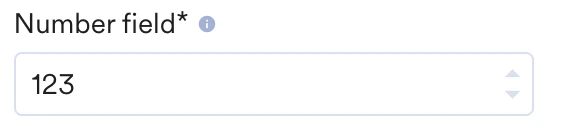
You can use validations to restrict the lower and upper bounds of the numeric input if required.
Boolean
This input type appears as a radio button and allows users to choose between two mandatory possibilities: True or False. It is used when you ask users to enable/disable a feature, agree/disagree, or make any binary choice.
DateTime
This input type is for date and time. It appears as a DateTime picker, allowing users to select a specific date and time. Use it when collecting data about a specific date or time, such as scheduling posts or reminders.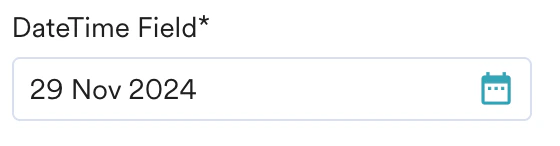
Password
This input type is for password entry. It appears as a text box but masks user input for privacy. It must be used when requesting sensitive information from users, such as login addresses.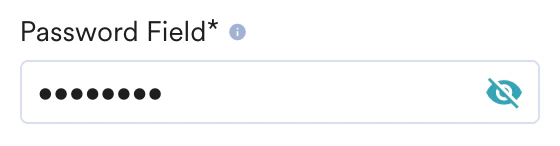
Drop-down List (Single and Multi-Select)
This input type allows users to choose multiple options in multi-select mode. It is recommended when you have a predetermined set of options and prefer to restrict input without allowing free-text entry.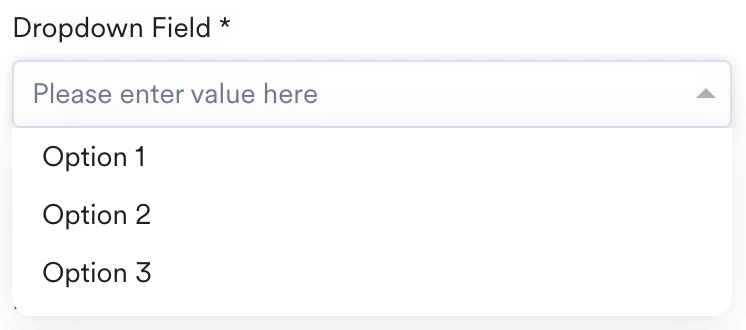
Hash Maps
This input type is used for key-value pair inputs. It appears as two interconnected input boxes for key and value. Use this when you require key-value data, such as settings or configurations.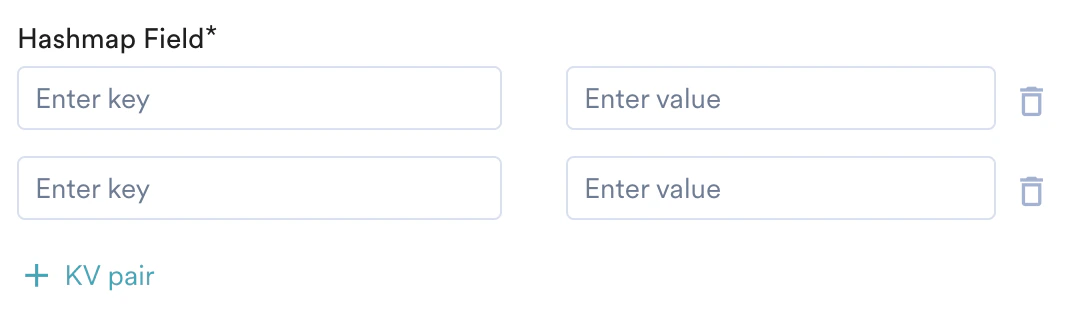
Input Validations
When defining input types that support validation, such as Text and Password, it is necessary to establish predetermined rules for validating the values entered by the user on the UI. You can add validations with the following key inside your input variables: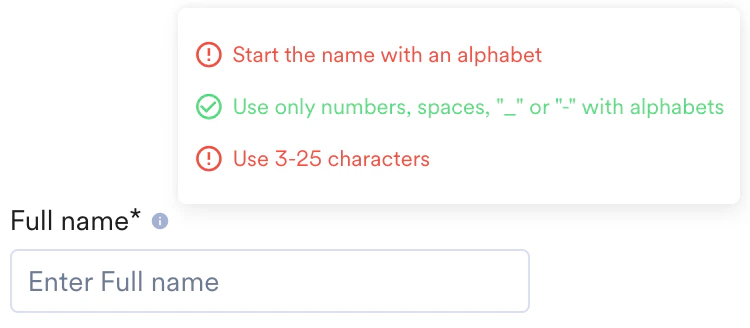
Reference Input Variables
After collecting values for your Input Variables from the user, you can use them in the following sections:- Authentication
- Request and Response
- From the App marketplace:
Username: String - From the Campaign Creation Form (Step 2):
Mobile Number: String
Authentication
In this section, you can define the authentication required for your App. MoEngage enables sending requests to your App, and the Connected Channels support the following built-in authentication types:- No Auth
- Basic Auth
- API Key Auth
- OAuth2
| Key | Required | Type | Description |
|---|---|---|---|
auth_type | Yes | String | It represents the type of authentication you want to use for the Connector. The valid options are
|
auth_info | Yes | Object | It represents the authentication details, which depend on the type of authentication you selected. |
alias | Yes | String | NIL |
No Auth
You can choose No Auth when your App does not need authentication or you have a custom implementation of standard authentication methods. If you select No Auth, MoEngage does not execute any pre-authentication operations on your requests. When using “No Auth,” choose No Auth as the app type. If necessary, you can include custom URL parameters or headers for your API.You must pass an empty object in the
auth_info key, as no additional information is required for this app type.Basic Auth
If your App supports Basic Auth, you can collect the username and password on the App marketplace and pass them as part of your Basic Auth Token for each request. To add Basic Auth, follow the structure:Authorization: Basic QUJDMTIzOjEyM1hZWg==
OAuth2
If your App uses the OAuth2 framework for authorization, you can configure MoEngage to handle the entire flow, including obtaining user consent and managing access and refresh tokens.MoEngage supports the following OAuth2 grant types:
- Authorization Code
- Refresh Token
Special Authentication Variables
MoEngage exposes a few special variables that can be referenced to support the OAuth2 mechanism within your App:| Name | JINJA Reference Code | Description |
|---|---|---|
| Redirect URI | {{AppMarketplaceForm[\"redirect\_uri\"]}} | The Redirect URI is used to redirect the user from your app’s consent page. This is dynamically calculated based on your user’s data center. For up-to-date authorized MoEngage URLs, refer to the table below. |
| State | {{AppMarketplaceForm[\"state\"]}} | An opaque, arbitrary alphanumeric string that MoEngage adds to the initial request. Your app must include this string when redirecting back to MoEngage. |
| Authorization Code | {{AppMarketplaceForm[\"auth\_code\"]}} | This is the authorization code that your app receives after obtaining the user’s consent. |
| Access Token | {{AppMarketplaceForm[\"MOE\_ACCESS\_TOKEN\_DEFAULT\"]}} | This is the Access Token that MoEngage will send in subsequent calls to authorize the user. |
| Refresh Token | {{AppMarketplaceForm[\"refresh\_token\"]}} | This is the Refresh Token used to renew the Access Token when it expires. |
Redirect URI
The Redirect URI will depend on which Data Center your app is added to:
If you want to list your app in all the data centers, you must approve each of the Redirect URIs.
Set up OAuth for your App
To add OAuth2, follow the structure:| Key | Required | Type | Valid Values | Description |
|---|---|---|---|---|
authorization_mapping | Yes | Object | For more information, refer to the sections below for the Object mappings. | Define your app’s authorization request for MoEngage to obtain the user’s consent. |
access_token_mapping | Yes | Object | For more information, refer to the sections below for the Object mappings. | Define the Access Token Request format for your app to collect a valid access token to be used in subsequent calls to MoEngage. |
refresh_token_mapping | Yes | Object | For more information, refer to the sections below for the Object mappings. | Define the Refresh Token Request format for your app with MoEngage to obtain a new valid access token, which will be used for subsequent calls when the previous access token is nearing expiry or has already expired. |
client_id | Yes | String | This is the value of the Client ID. Input variable references are supported here. | The Client ID of your app. If this is the customer’s app, you can collect this value through the App Marketplace input variables. |
client_secret | Yes | String | This is the value of the Client Secret. Input variable references are supported here. | The Client Secret of your app. If this is the customer’s app, you can collect this value through the App Marketplace input variables. |
grant_type | Yes | Array of Strings | This is the list of Grant Types supported by the App:
| The grant types supported by your app. |
Authorization Request
| Key | Required | Type | Valid Values | Description |
|---|---|---|---|---|
| method | Yes | String |
| The HTTP method for the authorization request. |
| headers | Yes | Object | { "header_name": "header_value" } | You can include key-value pairs of custom headers you want to pass in your authorization request. Input variable references are supported here. |
| url | Yes | String | Valid URLs. If JINJA is used, it should be correctly formed. | The consent URL where the user will be redirected to provide their consent. Input variable references are supported here. |
| url_params | Yes | Object | { "url_param": "param_value" } |
|
| body_type | Yes | String | This should be JSON. | The body type of the authorization request. For GET requests, leave this as JSON. |
| auth_code_mapping | Yes | String | The key from the identity provider’s response. | The key that contains the authorization code in the URL parameters of the callback response from the authorization server. Example 1: URL: https://example-app.com/cb?code=AUTH_CODE_HERE&state=1234zyx ”auth_code_mapping”: “code” Example 2: URL: https://example-app.com/cb?my_custom_auth_code=AUTH_CODE_HERE&state=1234zyx ”auth_code_mapping”: “my_custom_auth_code” |
Access Token Request
| Key | Required | Type | Valid Values | Description |
|---|---|---|---|---|
| method | Yes | String |
| The HTTP method for the access token request. |
| headers | Yes | Object | { "header_name": "header_value" } |
|
| url | Yes | String |
| The URL to fetch the access token. Input variable references are supported here. |
| url_params | Yes | Object | { "url_param": "param_value" } |
|
| body_type | Yes | String | FORM (application/x-www-form-urlencoded) JSON (application/json) Usually, this should be FORM. | The body type of the access token request. |
| body | Yes | String | A stringified JSON array for FORM type or a valid stringified JSON for JSON type. A stringified JSON array of key-value pairs for the FORM type or a valid stringified JSON for the JSON type. Example for FORM type: Structure "[{\"name\":\"grant\_type\",\"value\":\"authorization\_code\"},{\"name\":\"code\",\"value\":\"{{AppMarketplaceForm[\"auth\_code\"]}}\"}, {\"name\":\"redirect\_uri\",\"value\":\"{{AppMarketplaceForm[\"redirect\_uri\"]}}\"}, {\"name\":\"client\_id\",\"value\":\"{{AppMarketplaceForm[\"client\_id\"]}}\"}, {\"name\":\"client\_secret\",\"value\":\"{{AppMarketplaceForm[\"client\_secret\"]}}\"}]" For the FORM type, you must pass an array of objects. Each object will have a name and a value key. Example for JSON type: Structure { "grant_type": "authorization_code", "code": "{{AppMarketplaceForm[\"auth\_code\"]}}", "redirect\_uri": "{{AppMarketplaceForm[\"redirect\_uri\"]}}", "client\_id": "{{AppMarketplaceForm[\"client\_id\"]}}", "client\_secret": "{{AppMarketplaceForm[\"client\_secret\"]}}" } | The body of the request to fetch the access token. Input variable references are supported here. |
| response_mapping | Yes | Object | An Object containing the following keys: {"access_token_mapping": ""}{"access_token_expiry_mapping": ""} | Defines how to map the keys in the API response to the access token and its expiry time. Defines how to map the keys in the API response to the access token and its expiry time. Example 1: Response: Structure { "expires_in": 3600, "token_type": "Bearer", "refresh_token": "", "access_token": "" } Mappings: Structure { "code": 200, "message": "success", "data": { "access_token": "", "advertiser_ids": [], "scope": "", "refresh_token": "", "refresh_token_expires_in": 15778800 }, "request_id": "" } Example 2: Response: Structure { "code": 200, "message": "success", "data": { "access_token": "", "advertiser_ids": [], "scope": "", "refresh_token": "", "refresh_token_expires_in": 15778800 }, "request_id": "" } Mappings: Structure "response_mapping": { "access_token_mapping": "data.access_token", "access_token_expiry_mapping": null }, "access_token_expiry_time": 15778800 |
| access_token_expiry_time | Yes | Number | Time in seconds. | A default expiry time for the access token in seconds. This is used as a fallback if the API response does not provide an expiry time. If you have provided a mapping for the access token expiry in the response_mapping section, you can leave this as: {"access_token_expiry_time": null} |
Refresh Token Request
| Key | Required | Type | Valid Values | Description |
|---|---|---|---|---|
| method | Yes | String |
| The HTTP method for the refresh token request. |
| headers | Yes | Object | { "header_name": "header_value" } |
|
| url | Yes | String | Valid URLs. If JINJA is used, it should be correctly formed. | The URL to fetch the refresh token. Input variable references are supported here. |
| url_params | Yes | Object | { "url_param": "param_value" } |
|
| body_type | Yes | String | FORM (application/x-www-form-urlencoded) JSON (application/json) Usually, this should be FORM. | The body type of the refresh token request. |
| body | Yes | String | A stringified JSON array for the FORM type or a valid stringified JSON for the JSON type. Example for the FORM type: JSON {{AppMarketplaceForm[\"MOE\_ACCESS\_TOKEN\_DEFAULT\"]}} JSON "[{\"name\":\"grant\_type\",\"value\":\"refresh\_token\"},{\"name\":\"code\",\"value\":\"{{AppMarketplaceForm[\"auth\_code\"]}}\"}, {\"name\":\"redirect\_uri\",\"value\":\"{{AppMarketplaceForm[\"redirect\_uri\"]}}\"}, {\"name\":\"client\_id\",\"value\":\"{{AppMarketplaceForm[\"client\_id\"]}}\"}, {\"name\":\"client\_secret\",\"value\":\"{{AppMarketplaceForm[\"client\_secret\"]}}\"}]" For the FORM type, you need to pass an array of objects. Each object will have a name and a value key. Example for JSON type: JSON { "grant\_type": "refresh\_token", "code": "{{AppMarketplaceForm[\"auth\_code\"]}}", "redirect\_uri": "{{AppMarketplaceForm[\"redirect\_uri\"]}}", "client\_id": "{{AppMarketplaceForm[\"client\_id\"]}}", "client\_secret": "{{AppMarketplaceForm[\"client\_secret\"]}}" } | The body of the request to refresh the token. Input variable references are supported here. |
| response_mapping | Yes | Object | Object with keys: {"refresh_token_mapping": ""}{"refresh_token_expiry_mapping": ""} | Defines how to map the keys in the API response to the refresh token request and its expiry time. Example 1: Response: JSON { "expires_in": 3600, "token_type": "Bearer", "refresh_token": "", "refresh_token_expires_in": 21600 "access_token": "" } Mappings: JSON "response_mapping": { "refresh_token_mapping": "refresh_token", "refresh_token_expiry_mapping": "refresh_token_expires_in" } Example 2: Response: JSON { "code": 200, "message": "success", "data": { "access_token": "", "advertiser_ids": [], "scope": "", "refresh_token": "", "refresh_token_expires_in": 15778800 }, "request_id": "" } Mappings: JSON "response_mapping": { "refresh_token_mapping": "data.refresh_token", "refresh_token_expiry_mapping": "data.refresh_token_expires_in" }, "refresh_token_expiry_time": null |
| refresh_token_expiry_time | No | Number | Time in seconds. |
|
Request and Response
In this section, you must set up the API requests that MoEngage initiates for each campaign sent. After a request is made from MoEngage, you can set up how the Campaign Stats are calculated based on your API requests’ responses.Campaign Requests
MoEngage attempts to send API requests to your App each time a campaign is sent out.For example, if a campaign is directed to 50 users, MoEngage makes 50 API requests for that campaign. To configure a response, add this to your config:
Request Format
The request format informs MoEngage about the request’s payload.| Key | Required | Type | Valid Options | Description |
|---|---|---|---|---|
method | Yes | String |
| The method defines the request’s API. |
headers | Yes | Object | { "header_name": "header_value" } | You can include key-value pairs of custom headers you want to pass in your API requests. Input variable references are supported here. If you do not have any custom headers to add, you can make this an empty object. |
url | Yes | String |
| It is used to specify the complete endpoint of your API request. Input variable references are supported here. |
url_params | Yes | Object | { "url_param": "param_value" } | You can include key-value pairs of custom headers that you want to pass in your API requests. Input variables’ references are supported here. If you do not have any custom URL parameters to add, you can make this an empty object. |
body_type | Yes | String | JSON | The payload format. |
body | Yes | String | NIL | It is the payload of your API request. Input variables’ references are supported here. |
Response Handling
After making an API request, you can inform MoEngage how to interpret the response. You can also add multiple responses to your request by covering all your responses, such as successes and failures. A response consists of two parts:- Response conditions: Based on the response provided by your API, you can add conditions to its Status Code, Header Values, or even the body payload. When these conditions are fulfilled, you can perform actions in MoEngage.
- Response actions: Actions are operations performed by MoEngage.
Use Cases
There are several use cases for response handling. The following are the types of tracking used for various use cases:- Stats tracking: This displays accurate Success and Failed stats for your campaigns.
- Event tracking: These are trigger events that occur when certain conditions are fulfilled. They can help you to create other journeys for your users.
Add a Response
To add a response, follow the structure:| Key | Required | Type | Valid Options | Description |
|---|---|---|---|---|
body_type | Yes | String | JSON | It specifies the format of the response. Currently, MoEngage supports only JSON responses. |
datetime_format | Yes | String | Valid datetime formats. | If your response returns at least one datetime value, it is recommended that you provide the format of the expected datetime value so that MoEngage can accurately parse it. |
evaluation_criteria | Yes | Object | Refer to the following sections for the evaluation criteria. | The evaluation criteria for the response are as follows:
|
actions | Yes | Object | Refer to the following sections for the actions. | The actions must be performed when the response conditions are fulfilled. The list of supported actions is included below. |
data_type | Yes | String | For Status codes: double For Headers: string For Body:
| This defines the expected data type of the value. |
Response Conditions
Here, you can include multiple conditions for each response, combining both AND and OR operators. If you have prior experience with MoEngage Segmentation, you can leverage that. The following is to add a new condition:| Key | Required | Type | Valid Options | Description |
|---|---|---|---|---|
filter_operator | Yes | String |
| This defines how filters must be applied. It is the logical relation between filters. |
filters | Yes | Array | An array of Filter objects | The specific conditions are defined using an array of filter objects. |
name | Yes | String |
| It defines which part of the response is to be checked. For example, values can be “response_code,” “response_body,” and so on. |
data_type | Yes | String | For Status codes: double For Headers: string For Body:
| This defines the expected data type of the value. |
operator | Yes | String | Refer here for a complete list of accepted values. | It represents the operator to be used for comparison |
value | Required for all operators except ‘exists’ |
| NIL | It is a value to be used for comparison. |
value1 | Required for operator ‘between’ | String Number Boolean | NIL | It is the second value to be used for comparison. In the case of between, it works as follows: value <= attribute_value <= value1 |
negate | Optional | Boolean |
| This field is used to identify which current query is negative. The default value is false. For example, email != ‘test.moe.com’ In this example, the operator is ‘is,’ negate=true, and value=‘test@moe.com’ |
case_sensitive | Optional | Boolean |
| This field indicates whether the string is case-sensitive. To add the case-sensitive condition, choose case_sensitive=true. Then, the default value is false. |
{"ok": true} in the payload:
Response Actions
Here, you can have MoEngage perform actions based on the above-mentioned conditions. Currently, MoEngage supports the Create Event actions.Create Event
These tracks use cases like Messages sent, Users synced, and so on. With this action, you can use MoEngage to trigger an event. Below is the structure to add an Event for your response:- Connected App Campaign Sent
- Connected App Campaign Failed
| Key | Required | Type | Valid Options | Description |
|---|---|---|---|---|
type | Yes | String | CREATE_EVENT | It represents the type of action you want to perform. |
config | Yes | Object | NIL | It represents the required details of the action that you must perform. |
event | Yes | Object | NIL | It is the event that triggered this action. |
event.name | Yes | String | NIL | It is the name of your event. |
event.attributes | Yes | Object-Array | NIL | An array of different key-value pairs of attributes as part of your event. |
event.attributes[].key | Yes | String | NIL | It is the name of the event attribute. This can be a Display Name of the attribute. |
event.attributes[].value | Yes | String | NIL | It is the value of the event attribute. Input variables’ references are supported here. |
| Attribute Name | Description |
|---|---|
| App name | It is the name of your Connected App. |
| Integration type | It is the name of your Channel Connector. |
| Campaign name | It represents the name of the campaign associated with this event. |
| Campaign Id | It is the ID of the campaign associated with this event. |
| Parent Campaign ID | It is tracked when a periodic campaign is run and represents the campaign ID of the parent periodic campaign. Child instances of this parent campaign are re-run on a recurring basis. |
| Version Id | It represents the Version Name to which the journey campaign belongs and is tracked during campaign execution. |
| Version Name | It represents the name of your campaign journey. |
| Campaign Channel | The Campaign Channel is always Connected Apps. |
| Readable Campaign Id | It provides a readable Campaign ID for easy identification. |
| Campaign Type | It represents the type of campaign to which the message belongs. |
| Delivery Type | It represents the Delivery type (one-time, periodic, and so on of the campaign. |
| Campaign Tags | It represents the tags added to the campaign and is tracked in all campaign-related events. |
| Parent Flow Id | It represents the flow ID of the parent journey campaign and is tracked during the campaign’s execution. |
| Parent Flow Name | It represents the flow name of the parent journey campaign and is tracked when the journey campaign is run. |