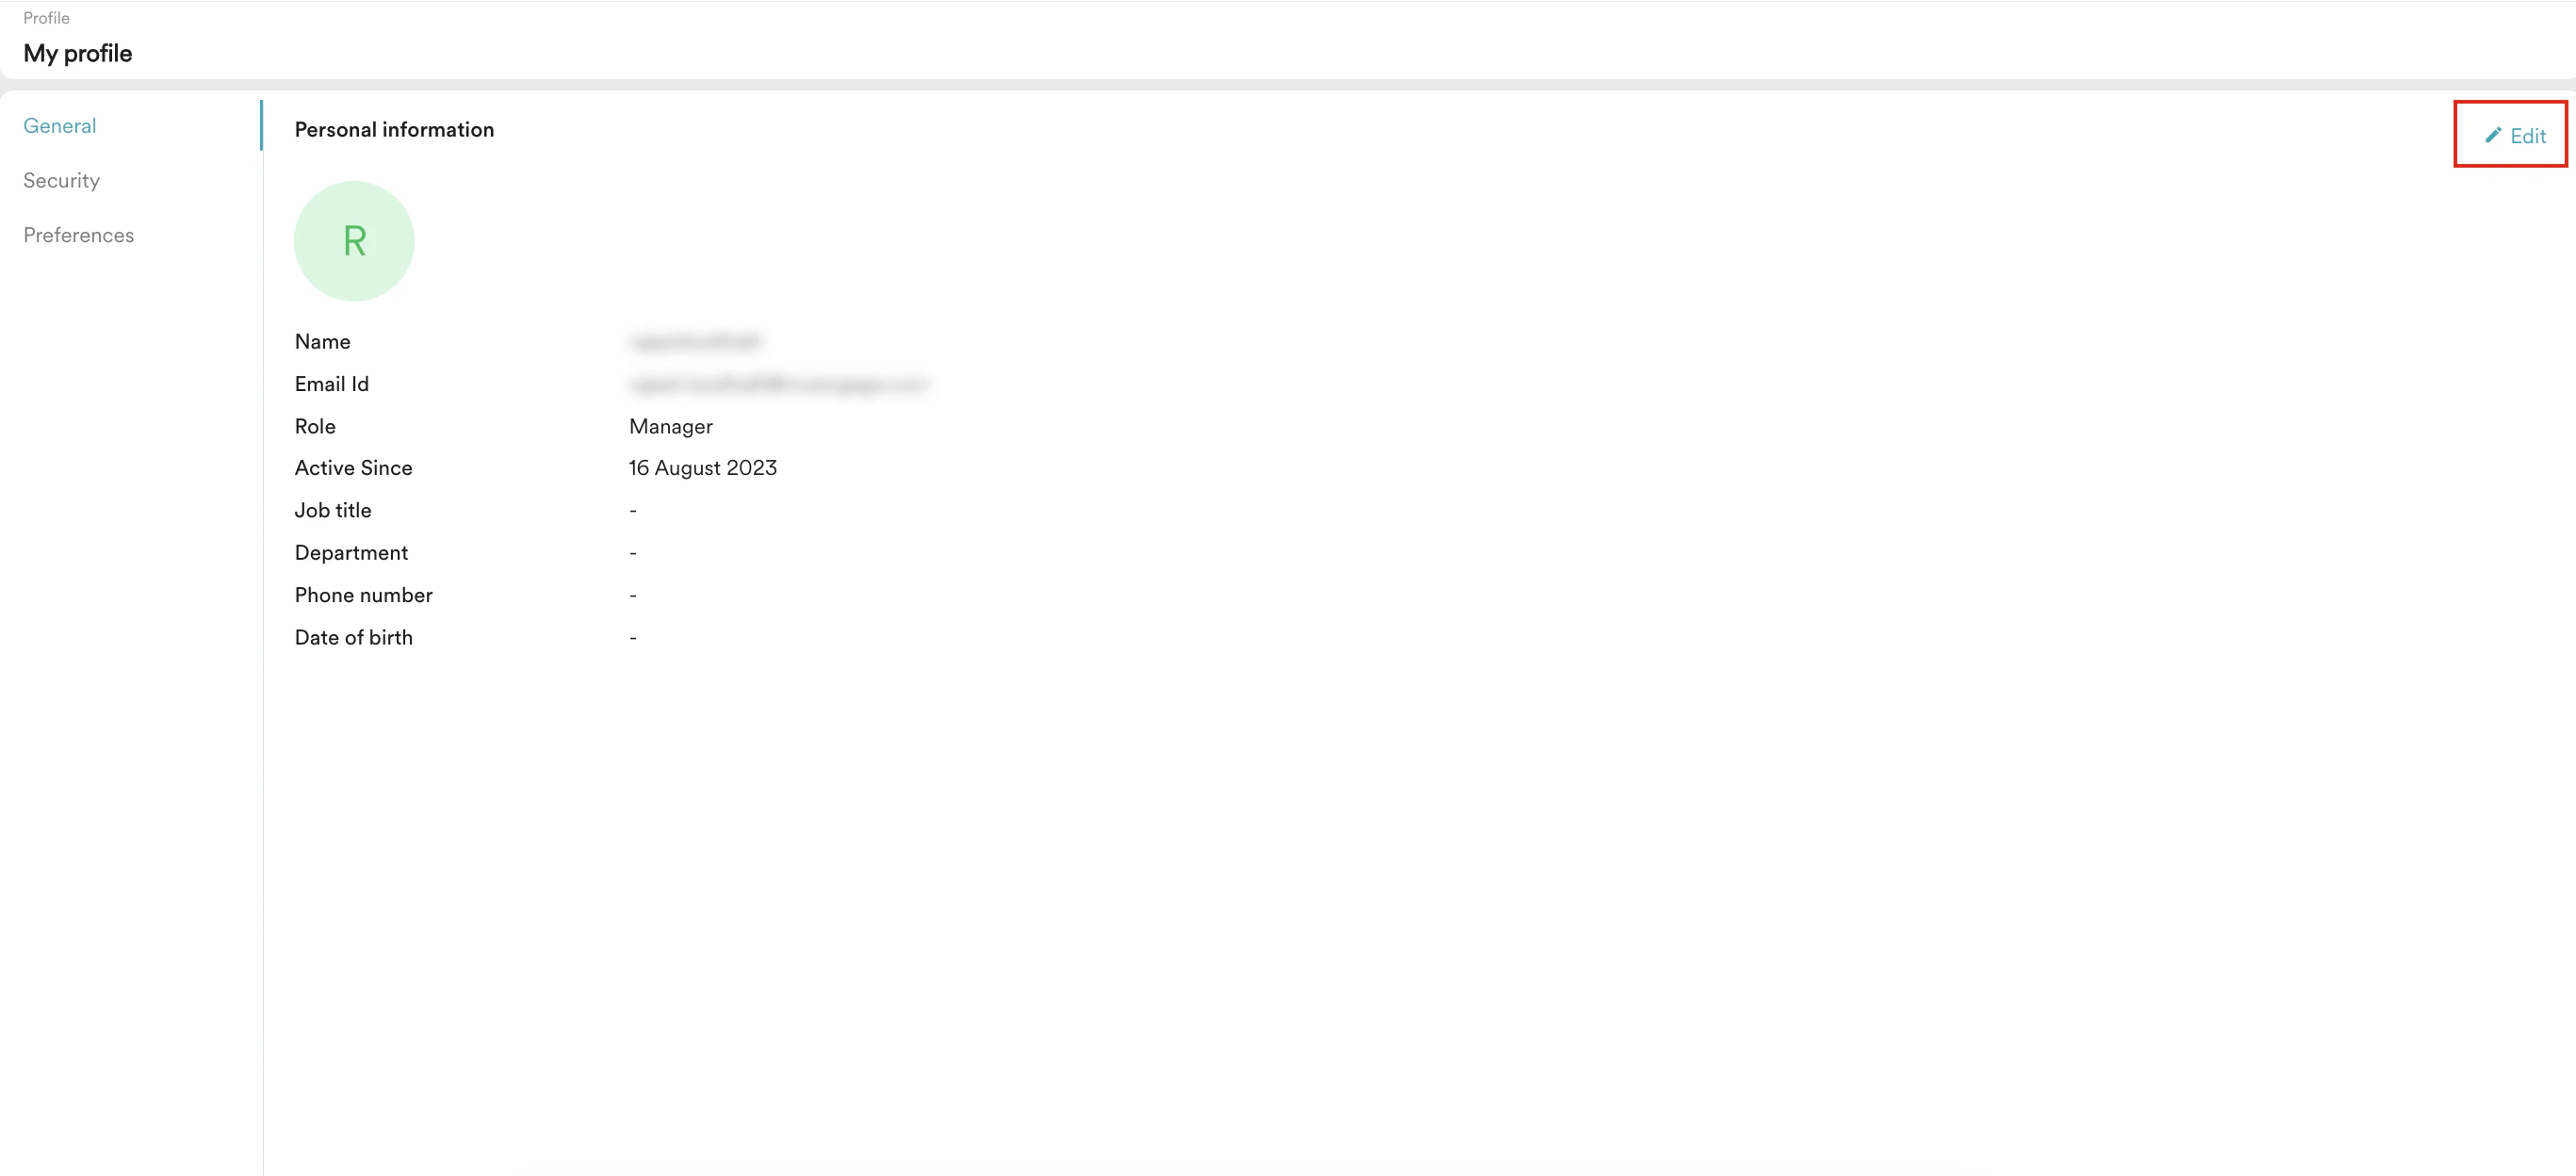
General
Under the General tab, you can edit your personal information for the current workspace.- In the upper-right corner, click your profile icon and then click My Profile.
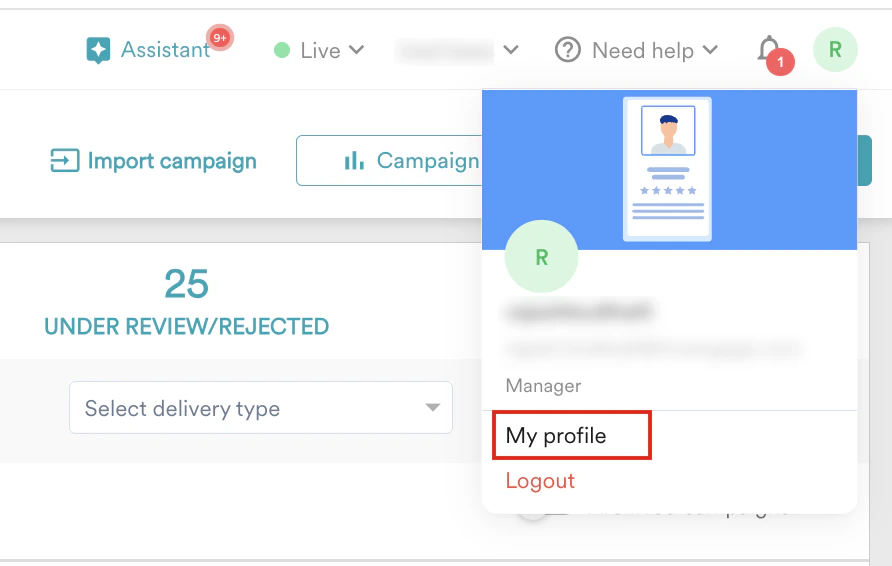
- On the My profile page, the General tab is selected by default.
- Click Edit in the upper-right corner.
- Add your profile picture:
- Hover over your profile icon and click the edit icon.
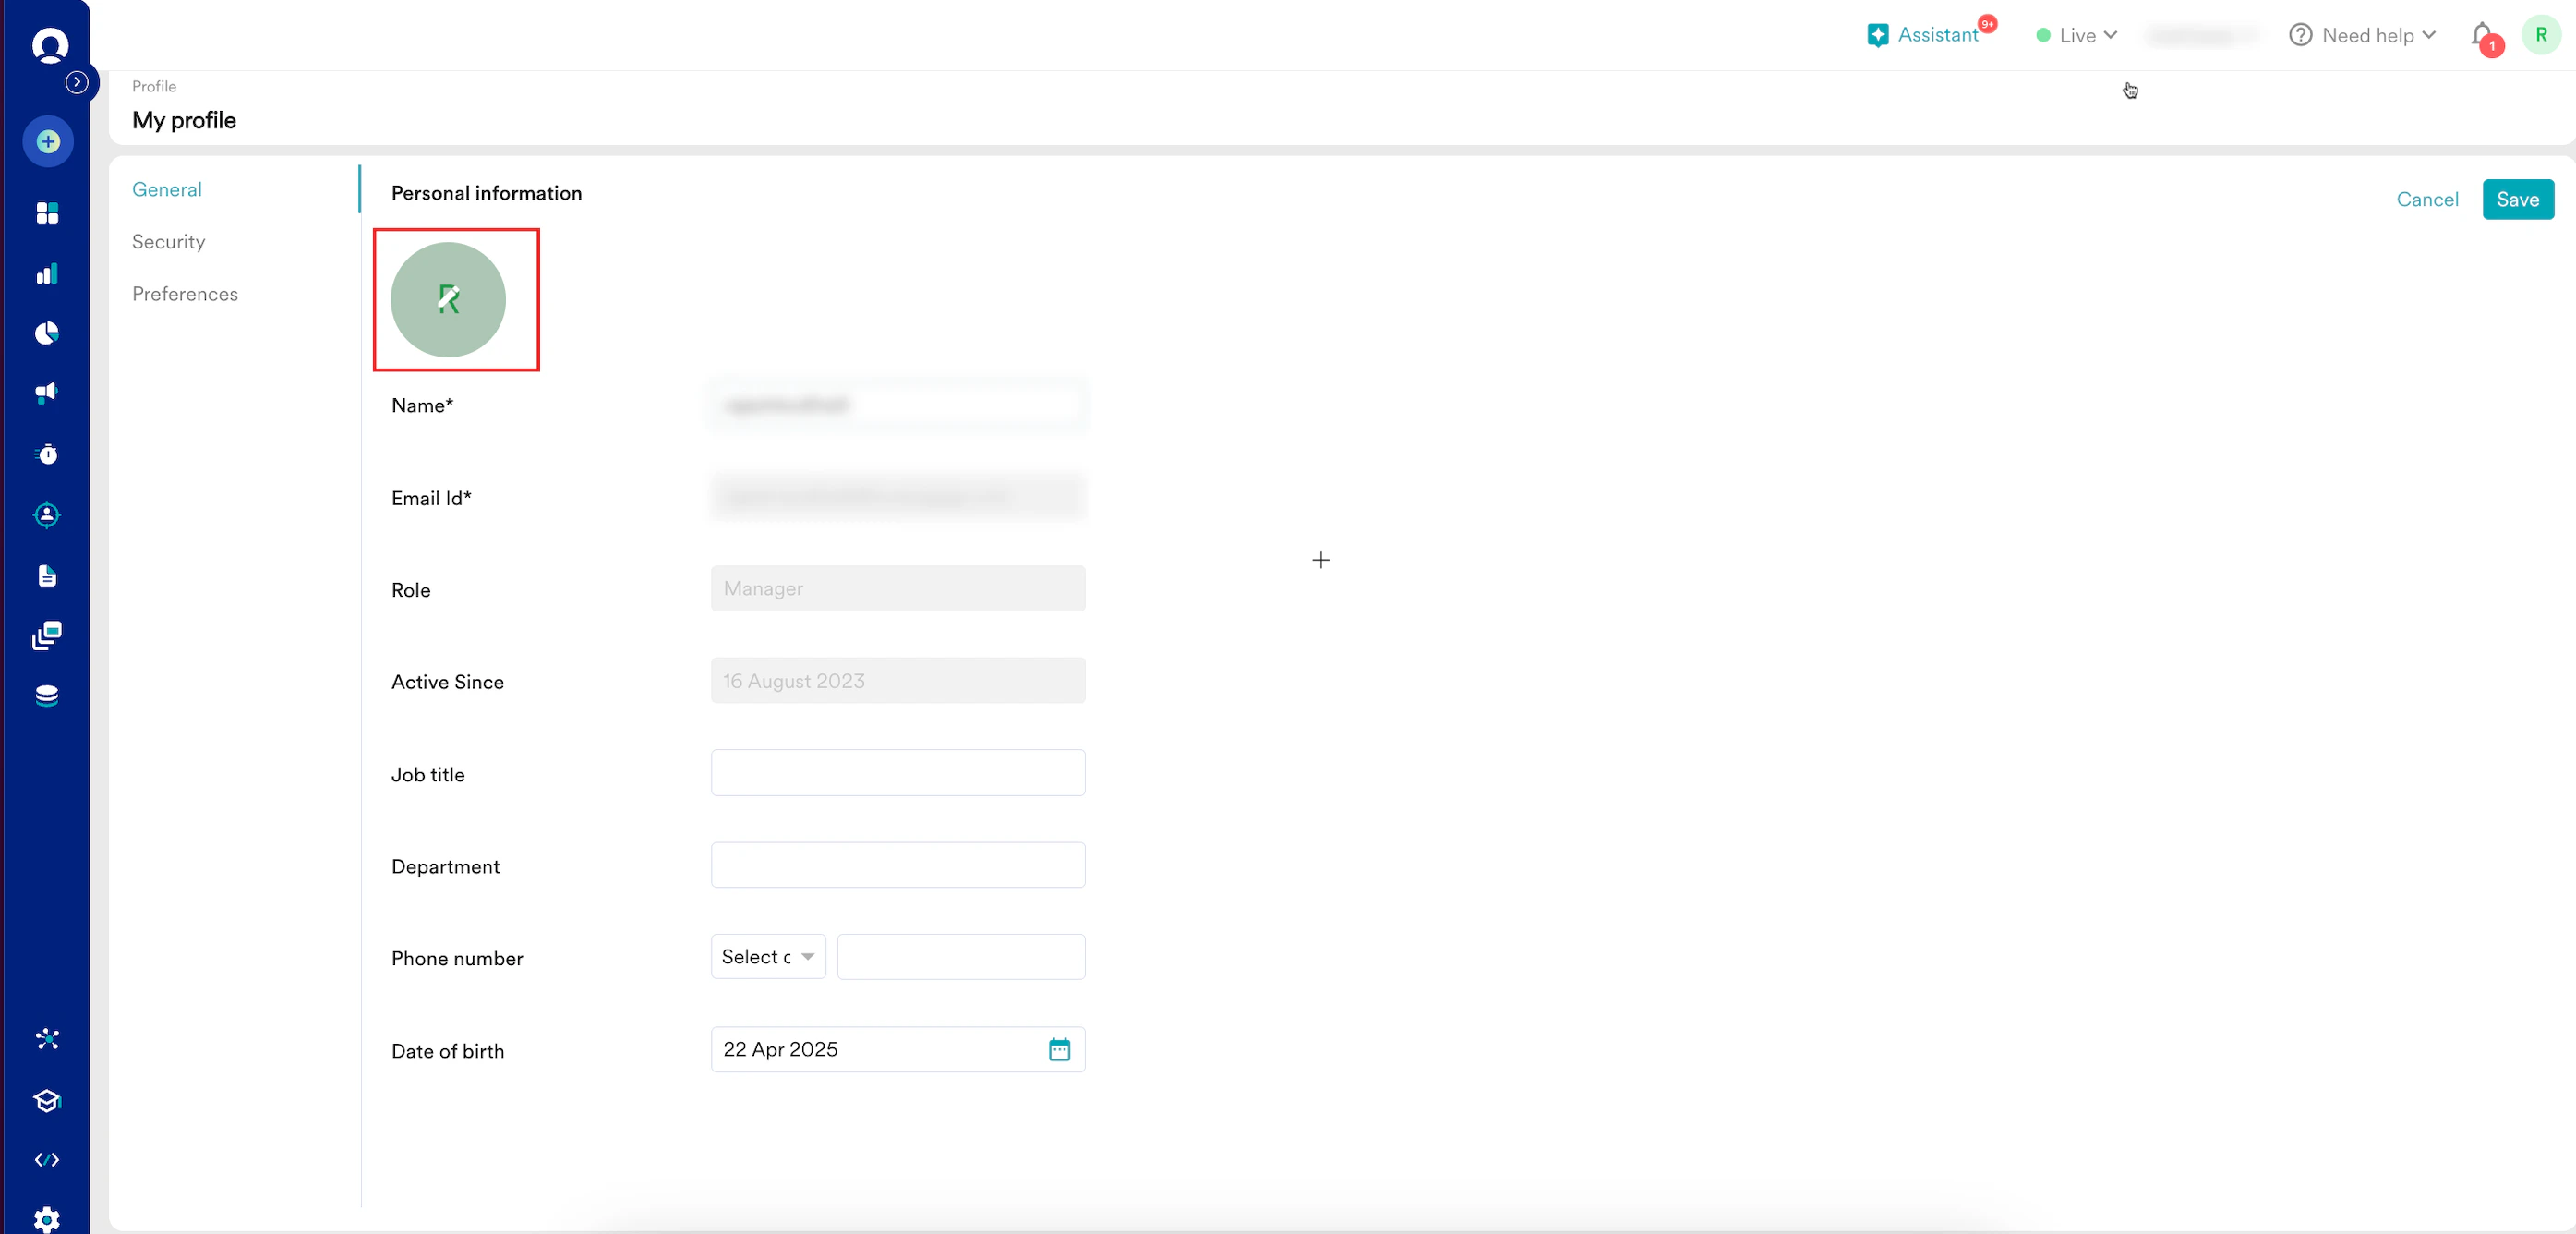
- Click Update.
- Select your profile picture and click Open.
MoEngage supports only the .jpeg, .jpg, and .png files.
- Hover over your profile icon and click the edit icon.
- Edit the following details:
- Click Save. Your personal information is updated.
Security
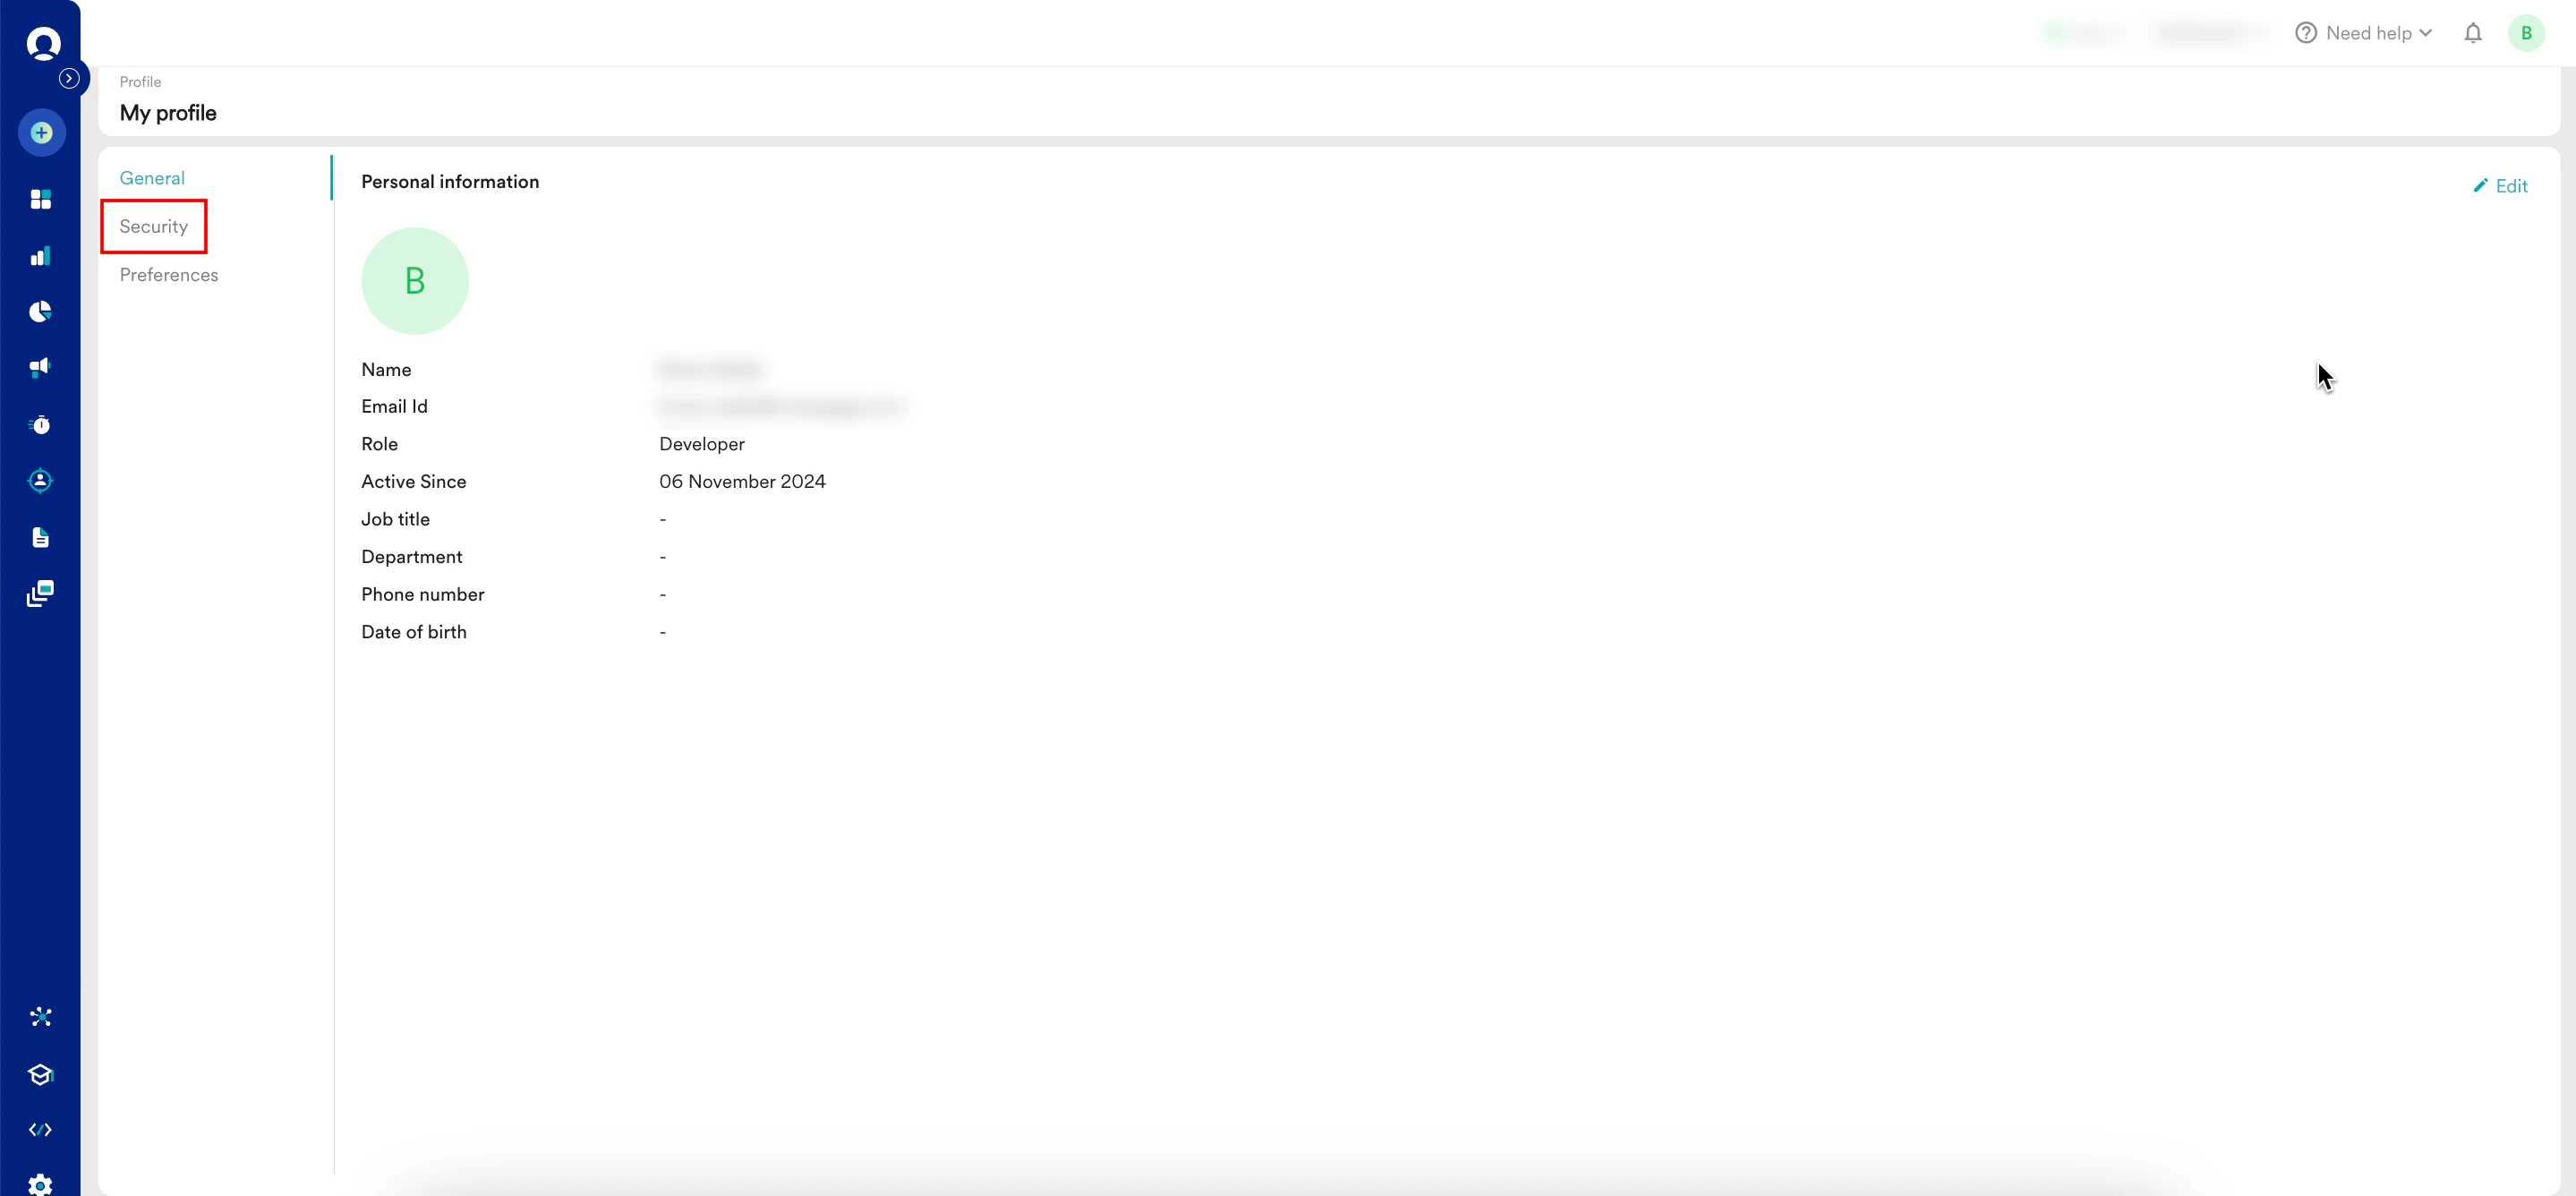
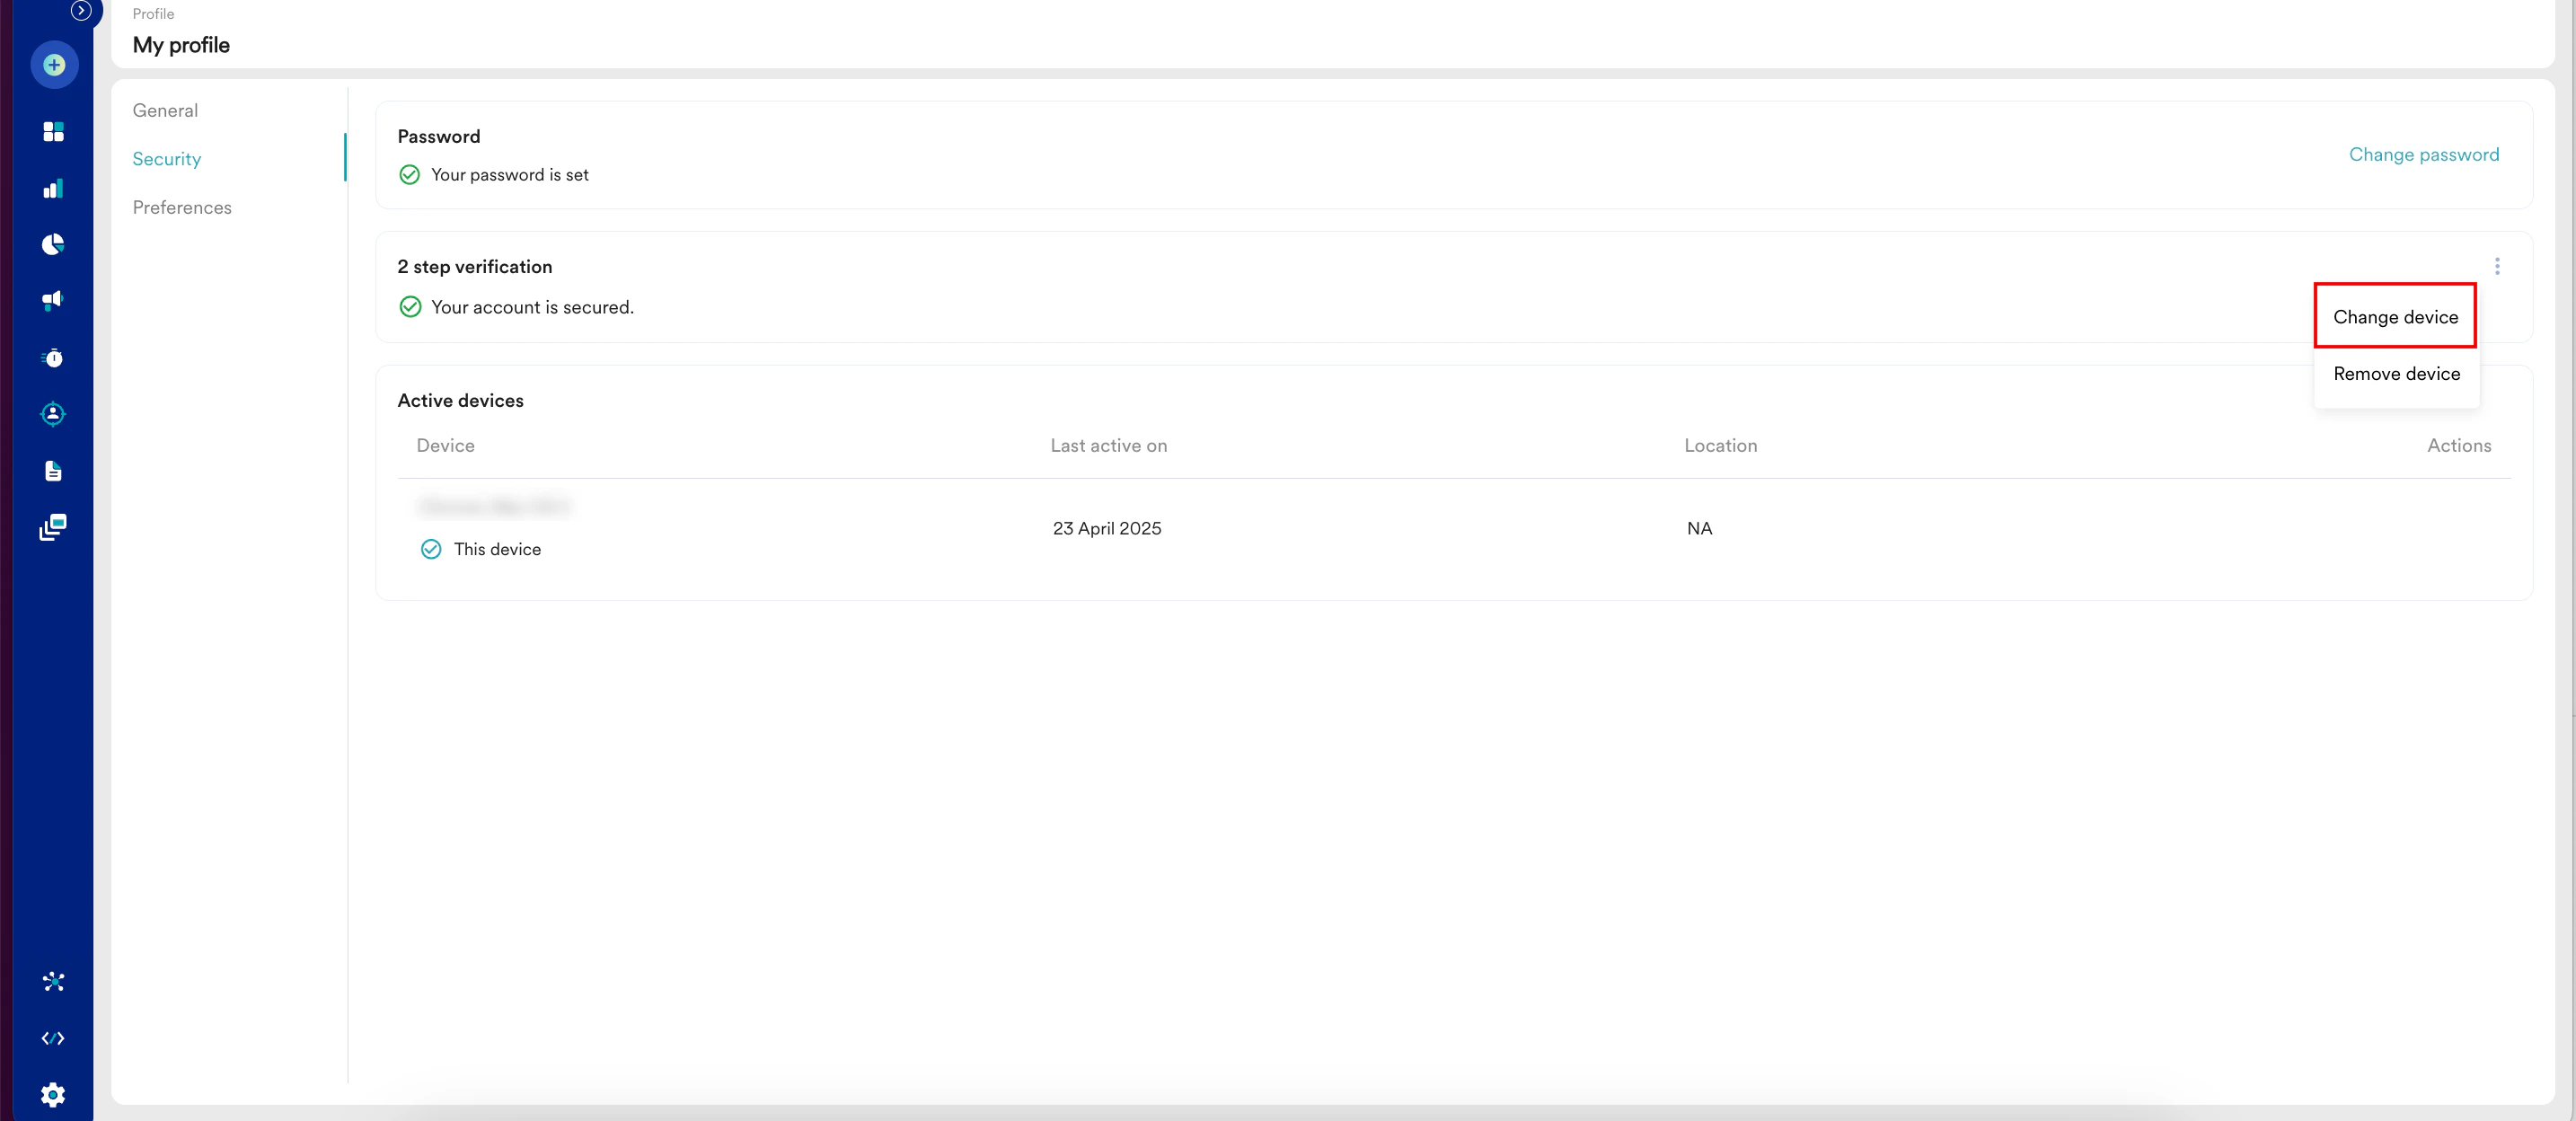
The Security tab provides tools for enhancing security for the current workspace.- In the upper-right corner, click your profile icon and then click My Profile.
- On the My profile page, click Security.
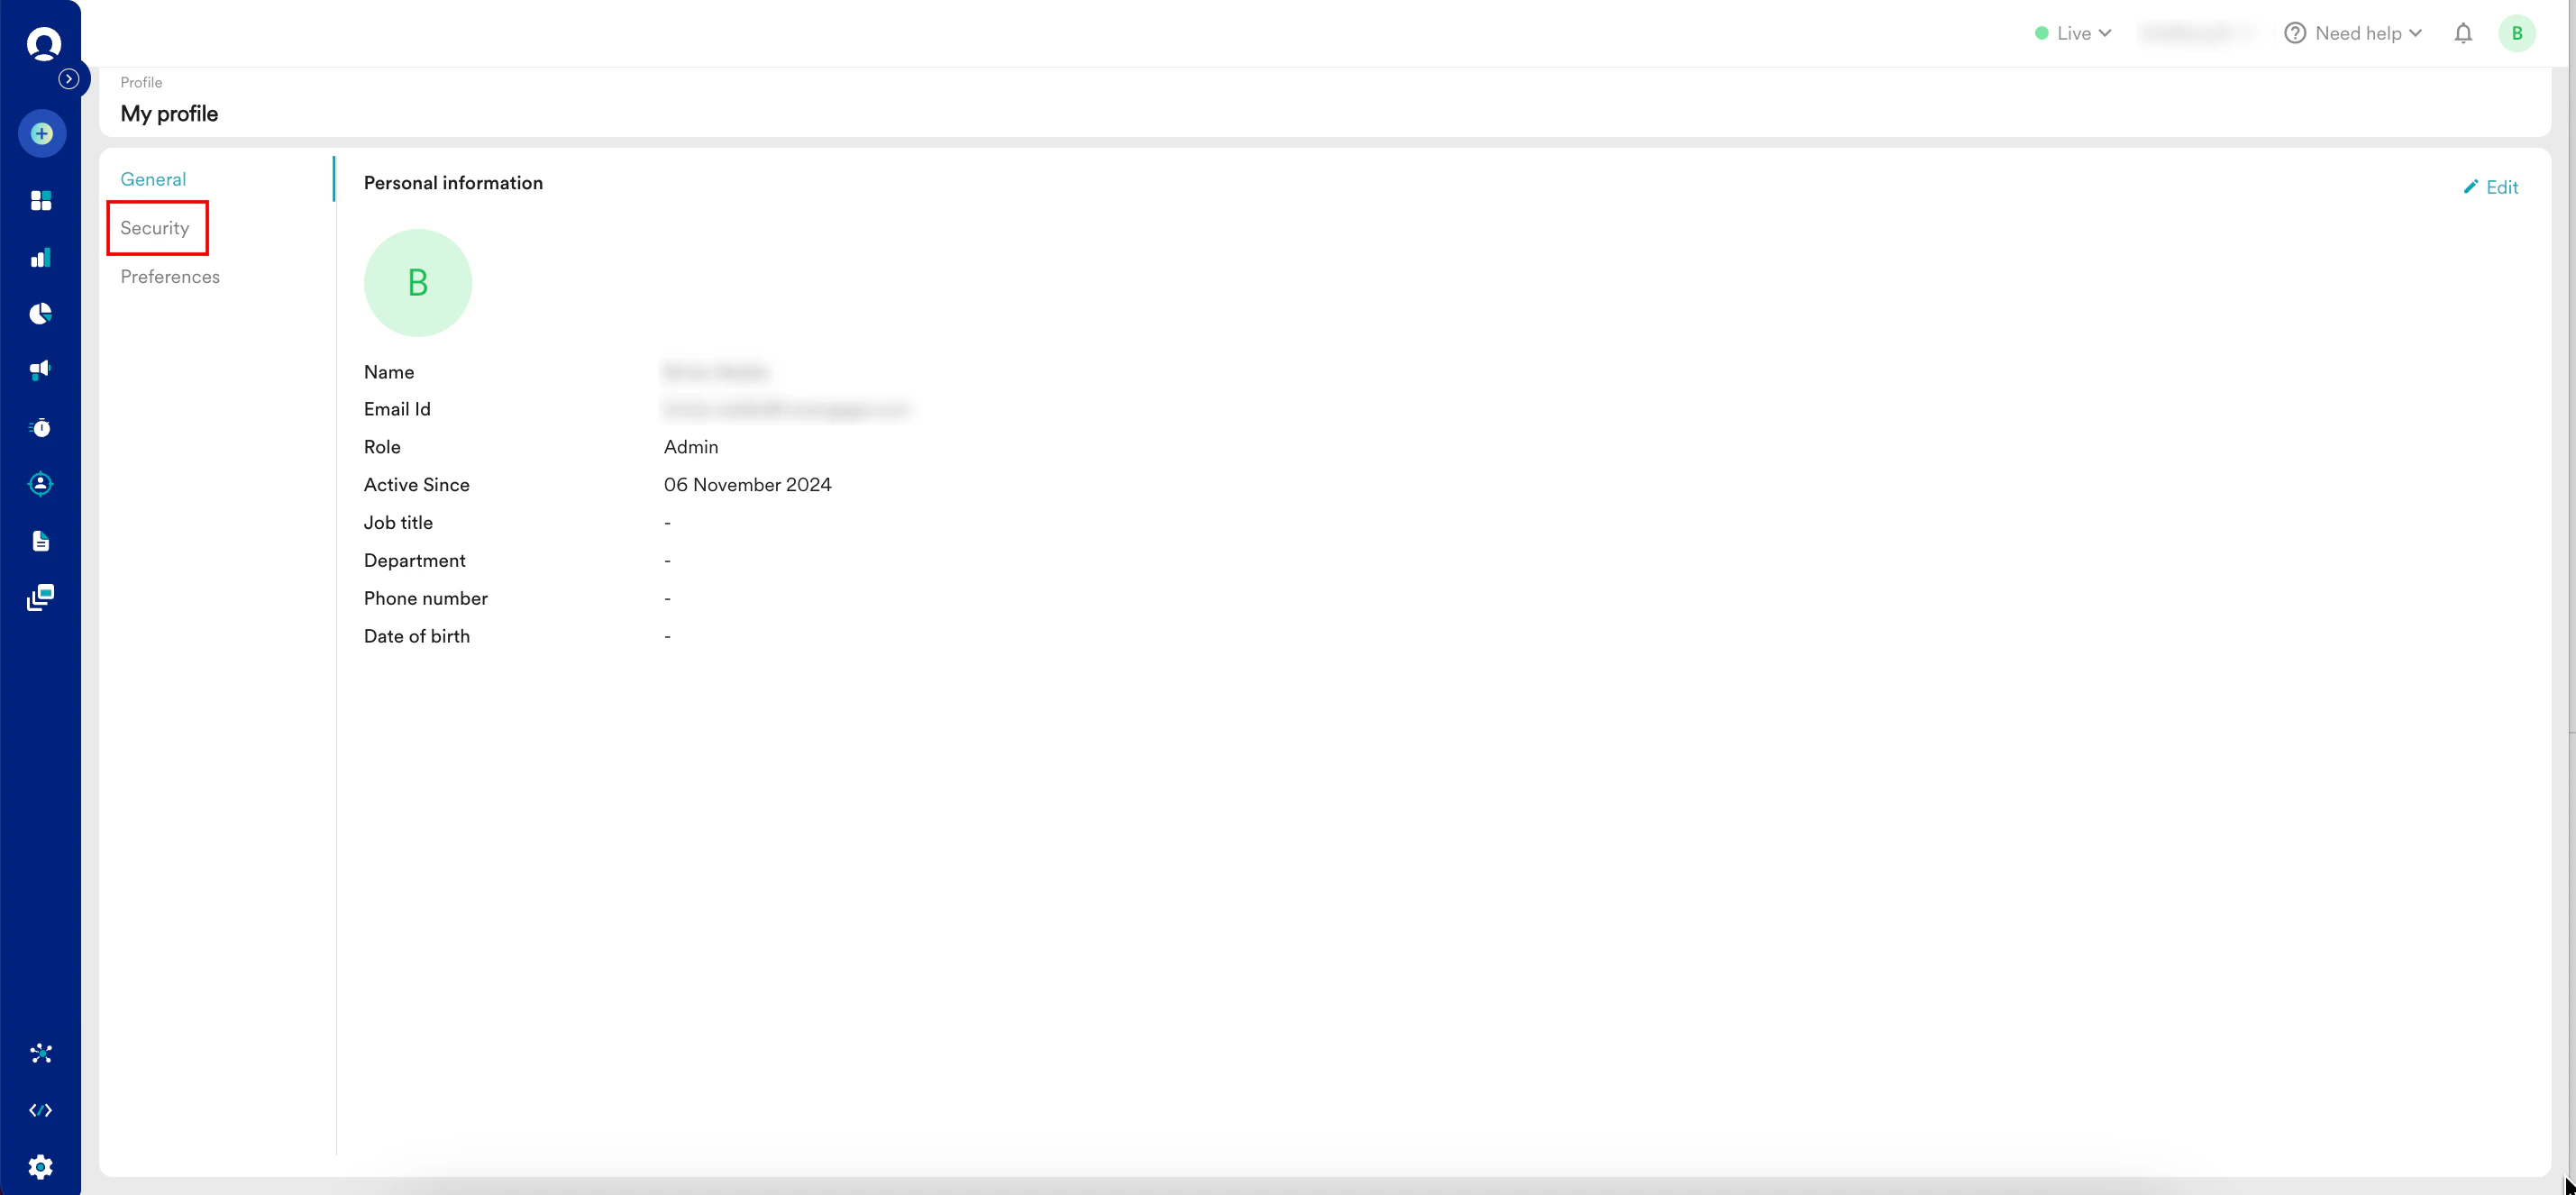
- You can perform the following tasks:
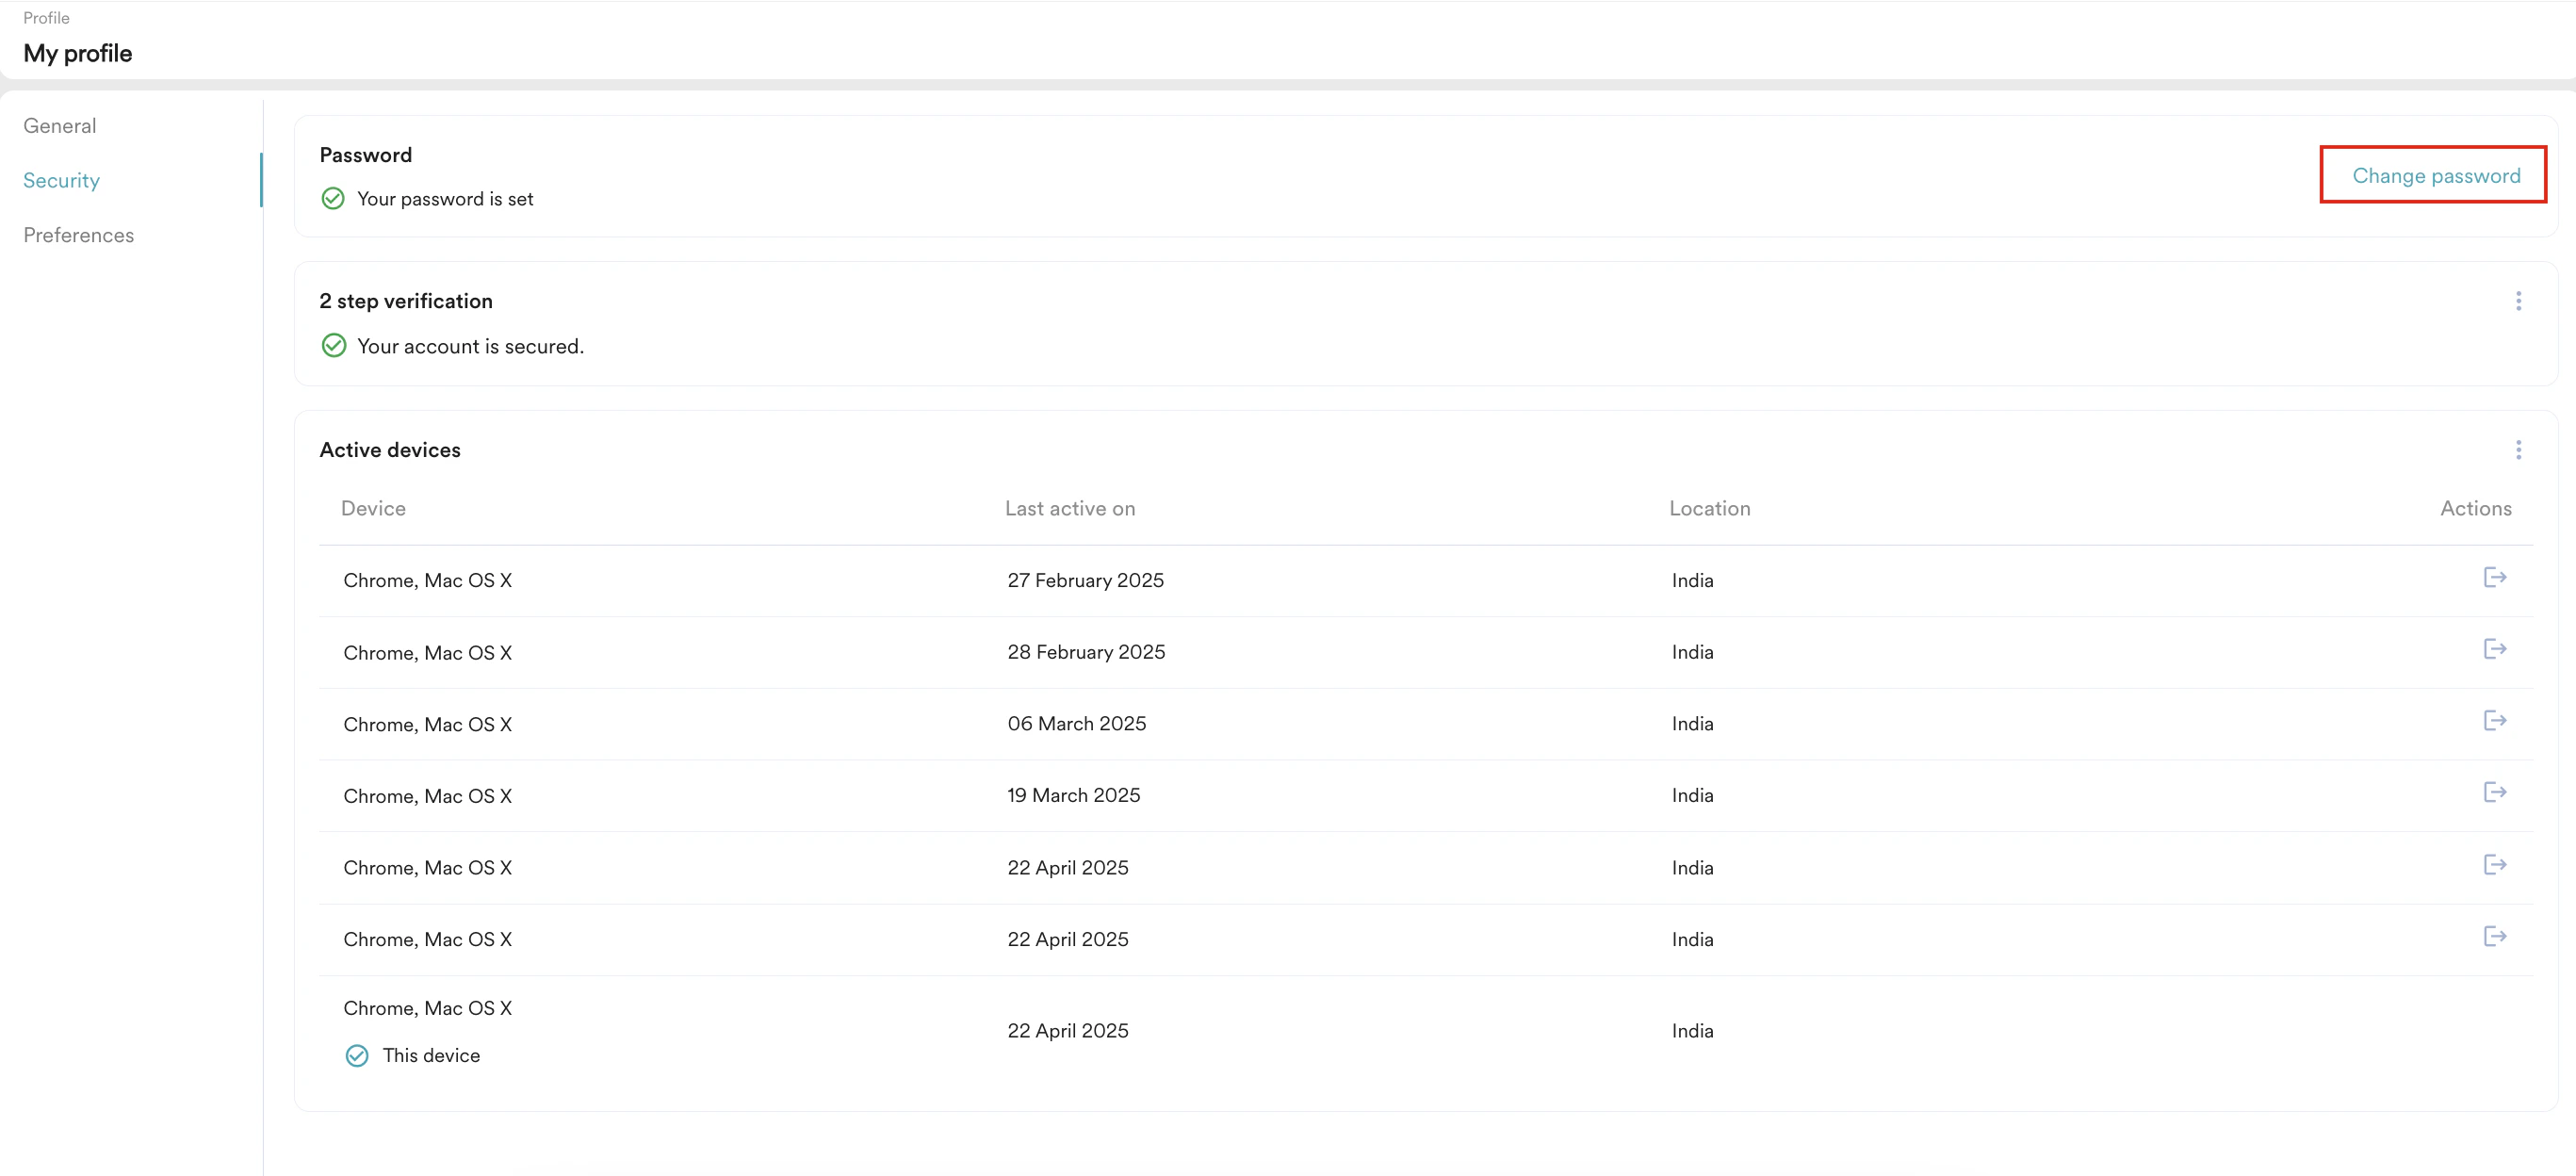
Change Your Password
To change your password, perform the following steps:- On the Security tab, click Change password in the upper-right corner of the Password section.
- Enter the following details:
- Click Save. Your password is updated.
Manage 2-Step Verification
MoEngage allows you to secure your MoEngage account (workspace) with 2-step verification. This helps you reduce the risk of unauthorized access due to compromised passwords. Your Admin can enable it for all users at the account (workspace) level. For more information, refer to 2-Step Verification or Two-Factor Authentication (2FA). However, you can manage it at the user level.Set up 2-Step Verification for Your Workspace
The Setup device option appears when both of the following criteria are met:
- If your Admin has disabled 2-step verification at the account (workspace) level.
- You log in to your account for the first time.
- On the My profile page, click Security.
- Click Setup device adjacent to 2-step verification.
 The Set up your device authentication pop-up window appears.
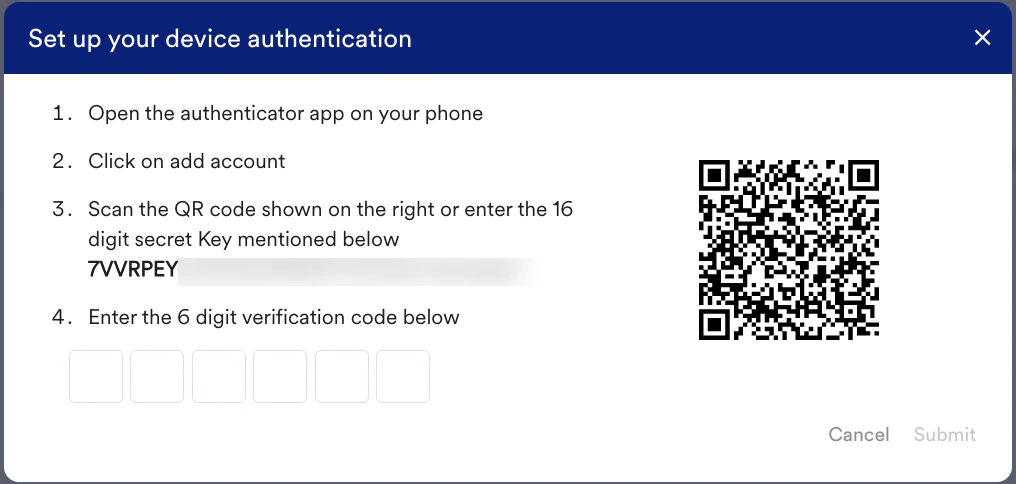
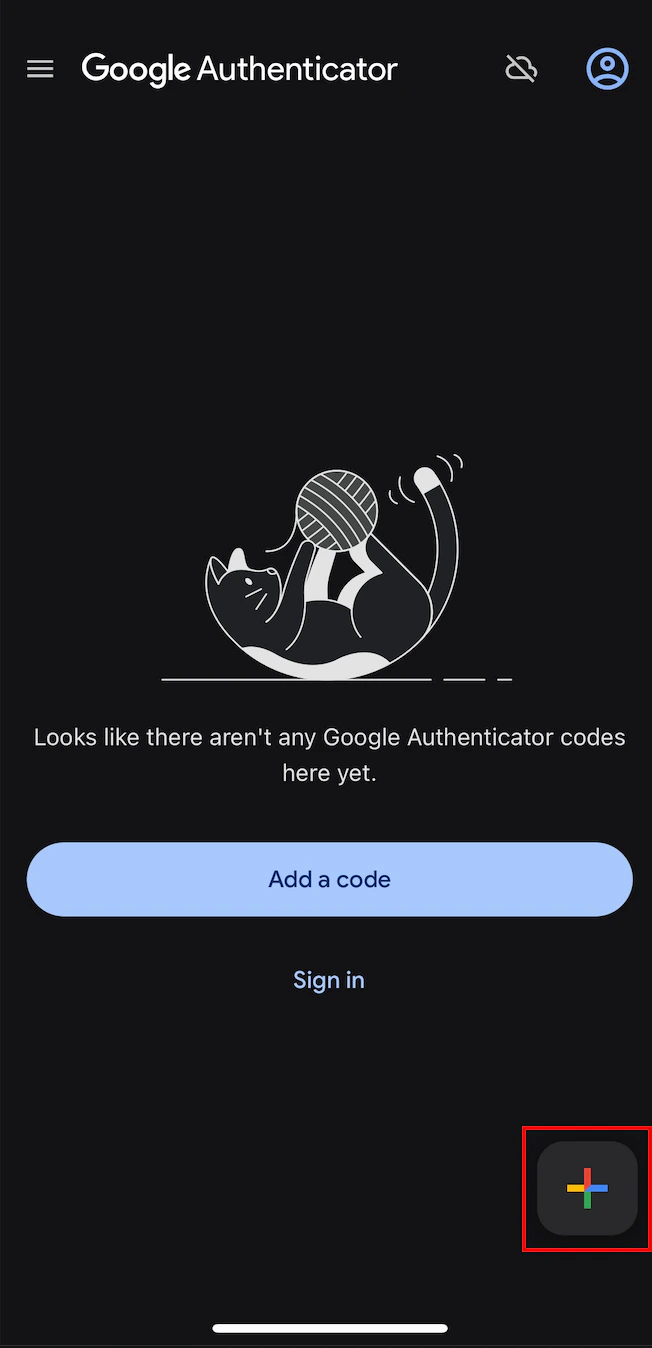
- Open the authenticator app now (for example, Google Authenticator) and tap the + icon.

- Use one of the following authentication options:
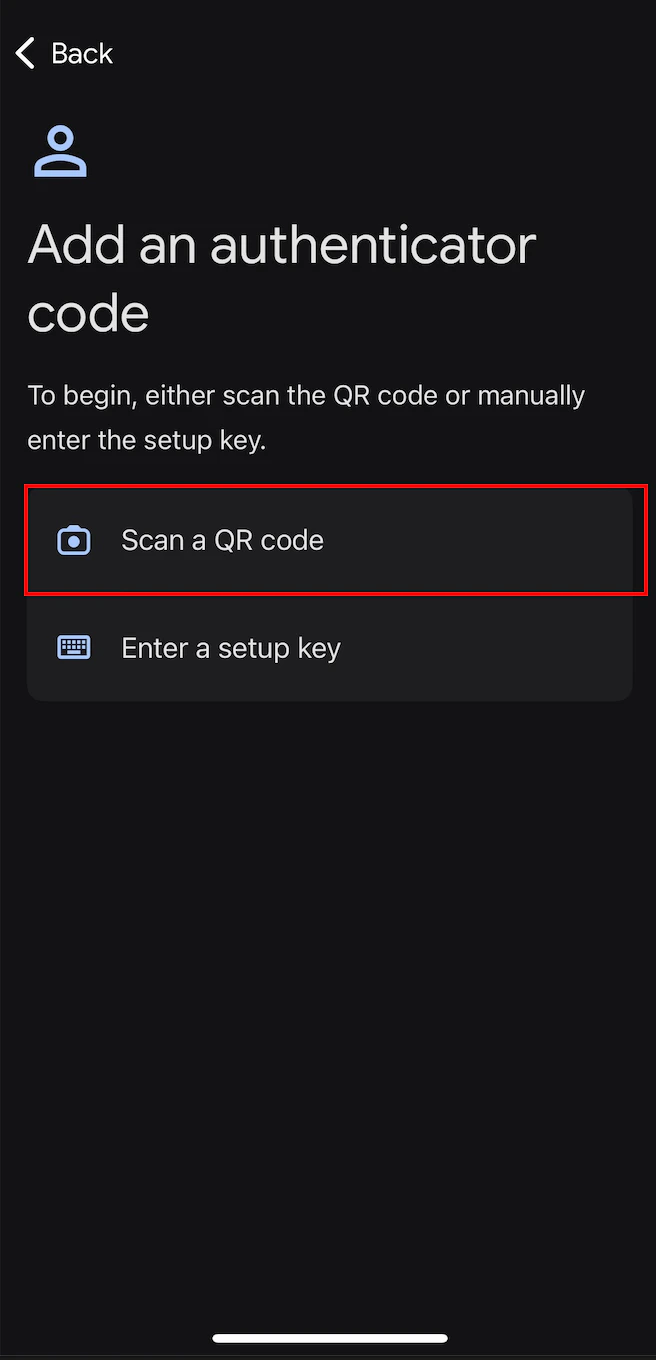
- Using a QR code
- Tap Scan a QR code. The Scan code screen appears.
- Scan the QR code on the Set up your device authentication pop-up window in the MoEngage dashboard. An authentication is added to your device. Your authentication app generates a 6-digit code.
- Tap Scan a QR code. The Scan code screen appears.
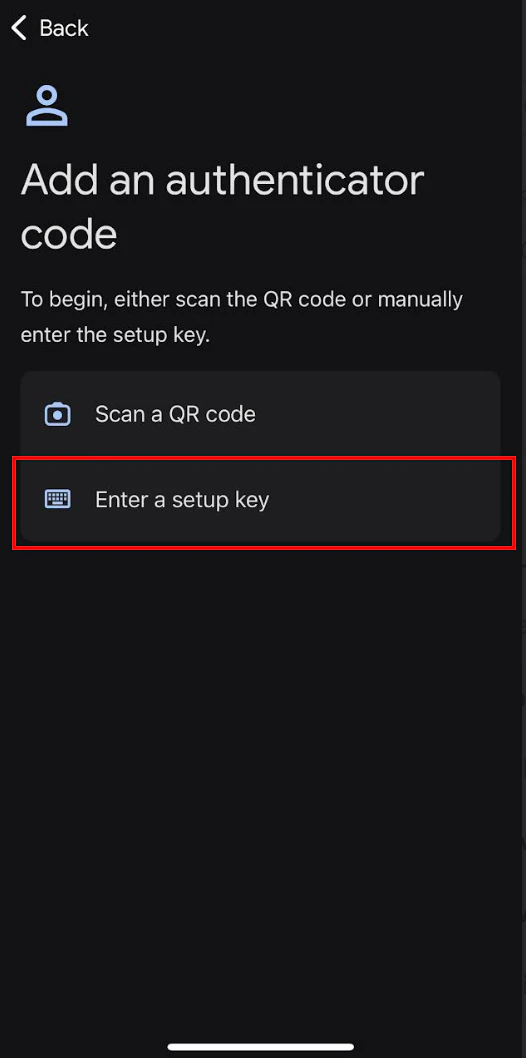
- Using a setup key
- Tap Enter a setup key.
- On the Enter account details screen, enter the following details :
Fields Required Description Account name Optional Type your account name. Your key Yes Type the 32-digit secret key displayed on the Set up your device authentication pop-up window in the MoEngage dashboard. Type of key Optional This is the type of your key. Supported values are: - Time based: The OTP is generated based on the current time.
- Counter based: The OTP is generated based on an incrementing counter.
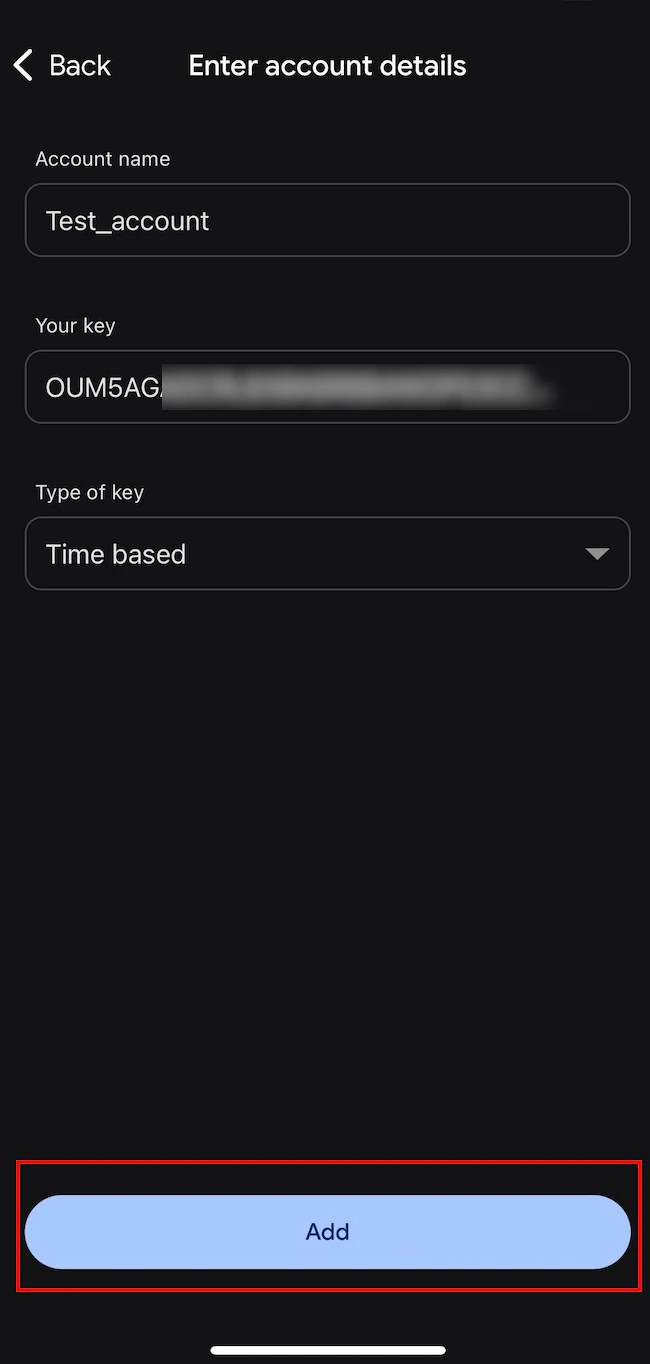
- Tap Add.
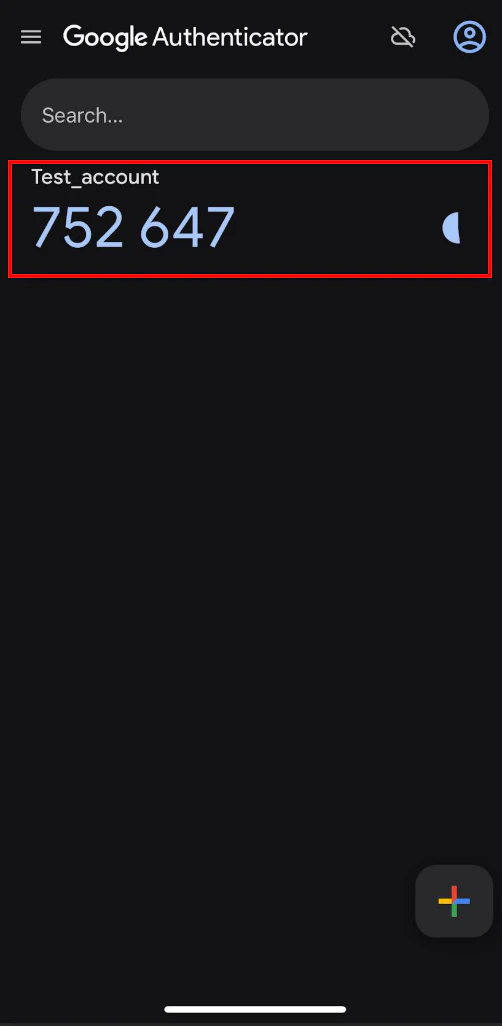
- An authentication is added to your device with the name you entered in the Account name box. Your authentication app generates a 6-digit code.
- Tap Enter a setup key.
- Using a QR code
- In the Enter the 6-digit verification code below box, type the 6-digit authentication code generated by your authentication app.
Each authentication code your authentication app generates is valid only for 30 seconds. After that, your authentication app generates a new code.
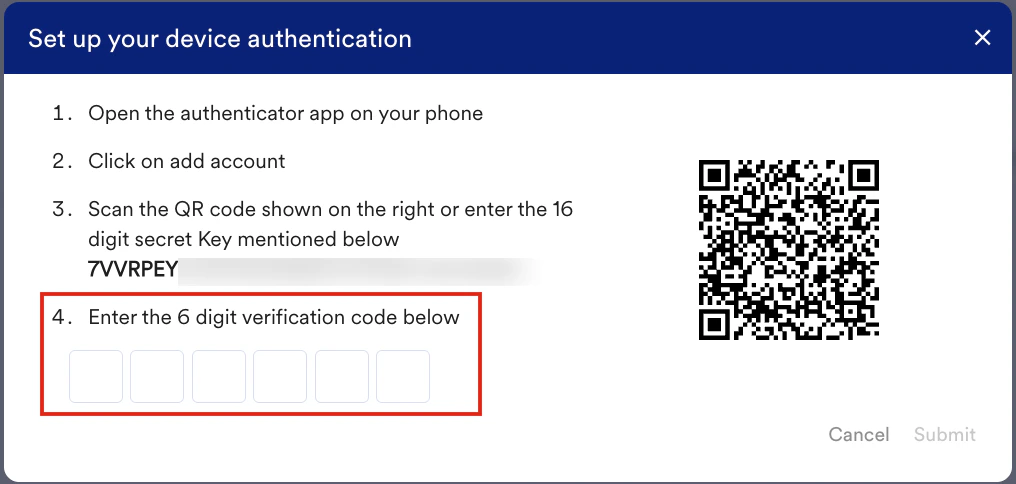
- Click Submit.
You have successfully configured 2-step verification on your device for your MoEngage account.
Enable 2-Step Verification for Your Workspace
The Enable device option appears only if your admin has disabled 2FA at the account (workspace) level and you have not enabled it for your workspace.
- On the My profile page, click Security.
- Click the ellipse icon adjacent to 2 step verification and then click Enable device.
 The Enable device pop-up window appears, prompting you for confirmation to enable 2FA for your workspace.
 - Click Enable.
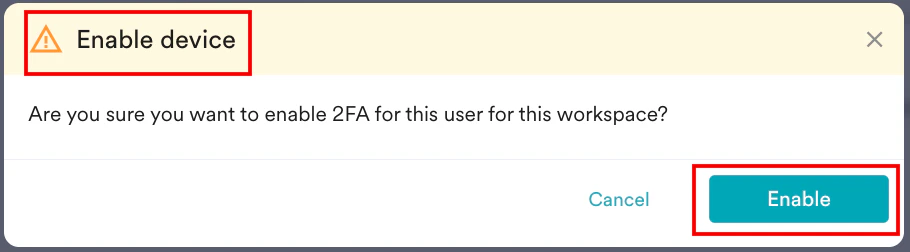
The 2FA is now successfully enabled for your workspace.
Remove 2-Step Verification for the Workspace
The Remove device option is visible only when both of the following criteria are met:
- You have enabled 2FA for your workspace.
- Your admin disables it at the account (workspace) level.
- On the My profile page, click Security.
- Click the ellipse icon adjacent to 2 step verification and then click Remove device.
 The Remove device pop-up window appears, prompting you for confirmation to remove 2FA for your workspace.
 - Click Remove.
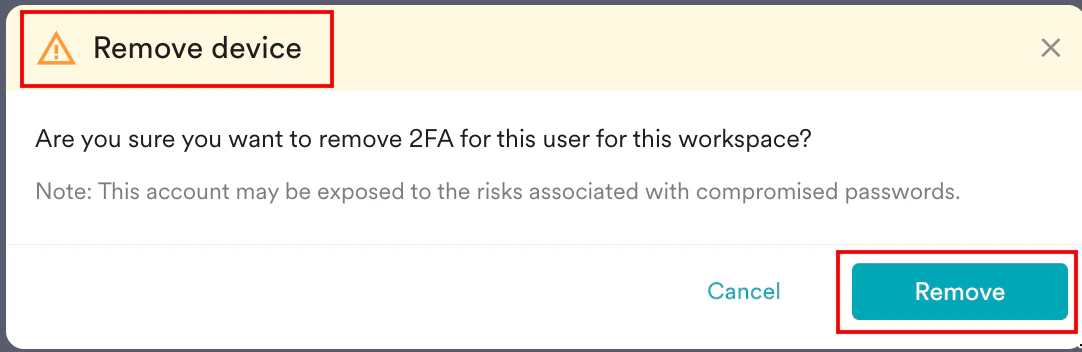
The 2FA is now successfully removed from your workspace.
Change the 2-Step Verification for the Workspace
You may want to set up 2FA for the current workspace on a new device, for example, when you purchase a new phone.The Change device option is visible when you have enabled or disabled 2FA for your workspace.
- On the My profile page, click Security.
- Click the ellipse icon adjacent to 2 step verification and then click Change device.
- The Change device pop-up window appears.
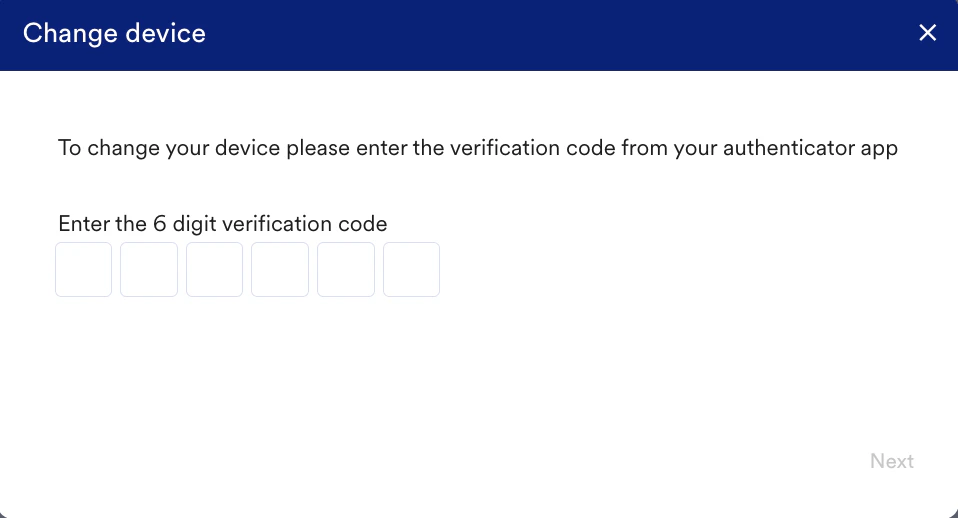
- Enter the 6-digit code generated by your current device’s authenticator app.
- Click Next.
- The Set up your device authentication pop-up window appears.
- From your device’s authenticator app (for example, Google Authenticator):
- Tap the + icon.
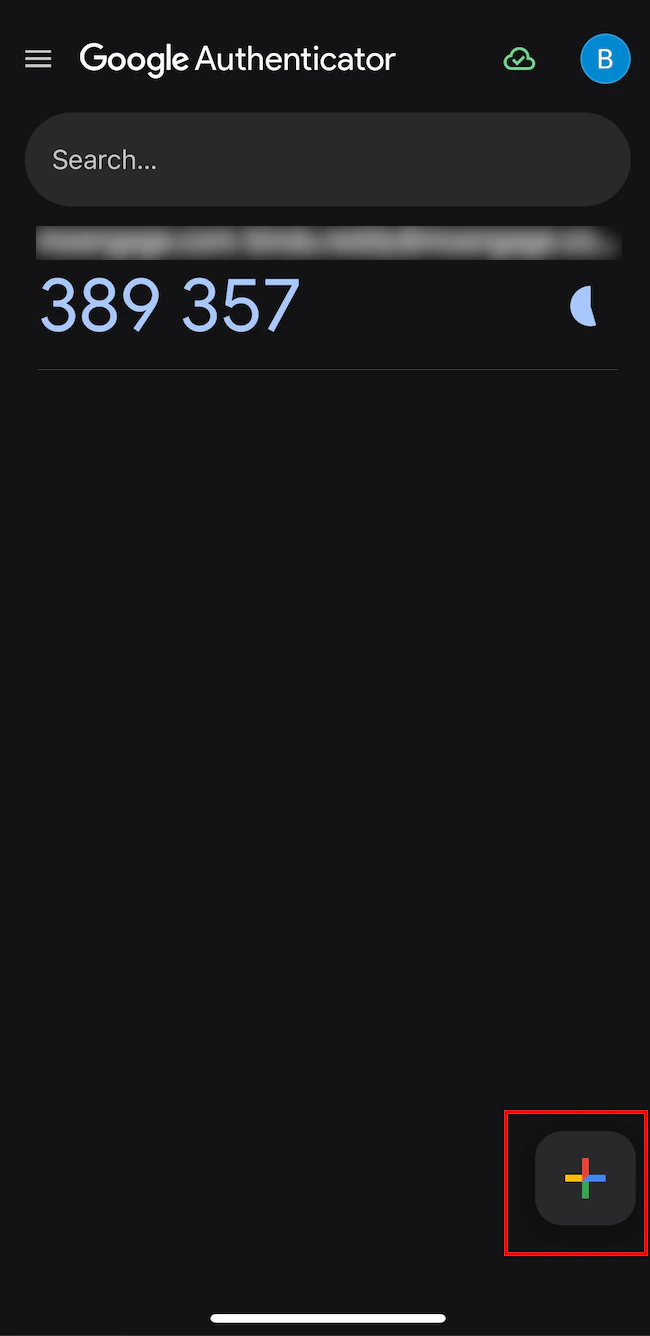
- Use one of the following authentication options:
- Using a QR code
- Tap Scan a QR code. The Scan code screen appears.
- Scan the QR code on the Set your device authentication page. An authentication is added to your device. Your authentication app generates a 6-digit code.
- Tap Scan a QR code. The Scan code screen appears.
- Using a setup key
- Tap Enter a setup key.
- On the Enter account details screen, enter the following details:
Fields Required Description Account name Optional Type your account name. Your key Yes Type the 32-digit secret key displayed on the Set up your device authentication page. Type of key Optional This is the type of your key. Supported values are: - Time based: The OTP is generated based on the current time.
- Counter based: The OTP is generated based on an incrementing counter.
- Tap Add.
- An authentication is added to your device with the name you entered in the Account name box.
Your device receives a new authentication, which appears below the previous authentication.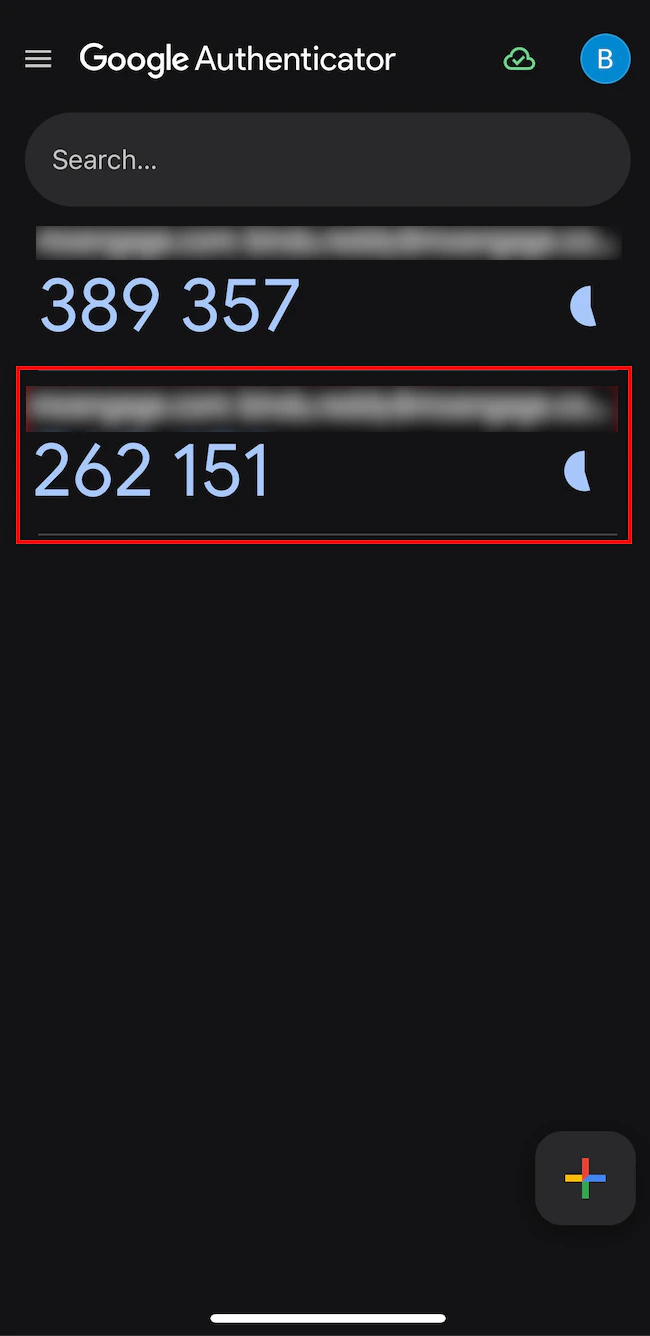
- Tap Enter a setup key.
- Tap the + icon.
- Enter the 6-digit code generated by your authenticator app.
- Click Submit.
Log Out of Your Active Devices
Under Active devices, you can see all the devices you have used to access this workspace. Perform the following steps to log out of a device:- Click the logout icon adjacent to the active device from which you want to log out. Your device is successfully logged out.
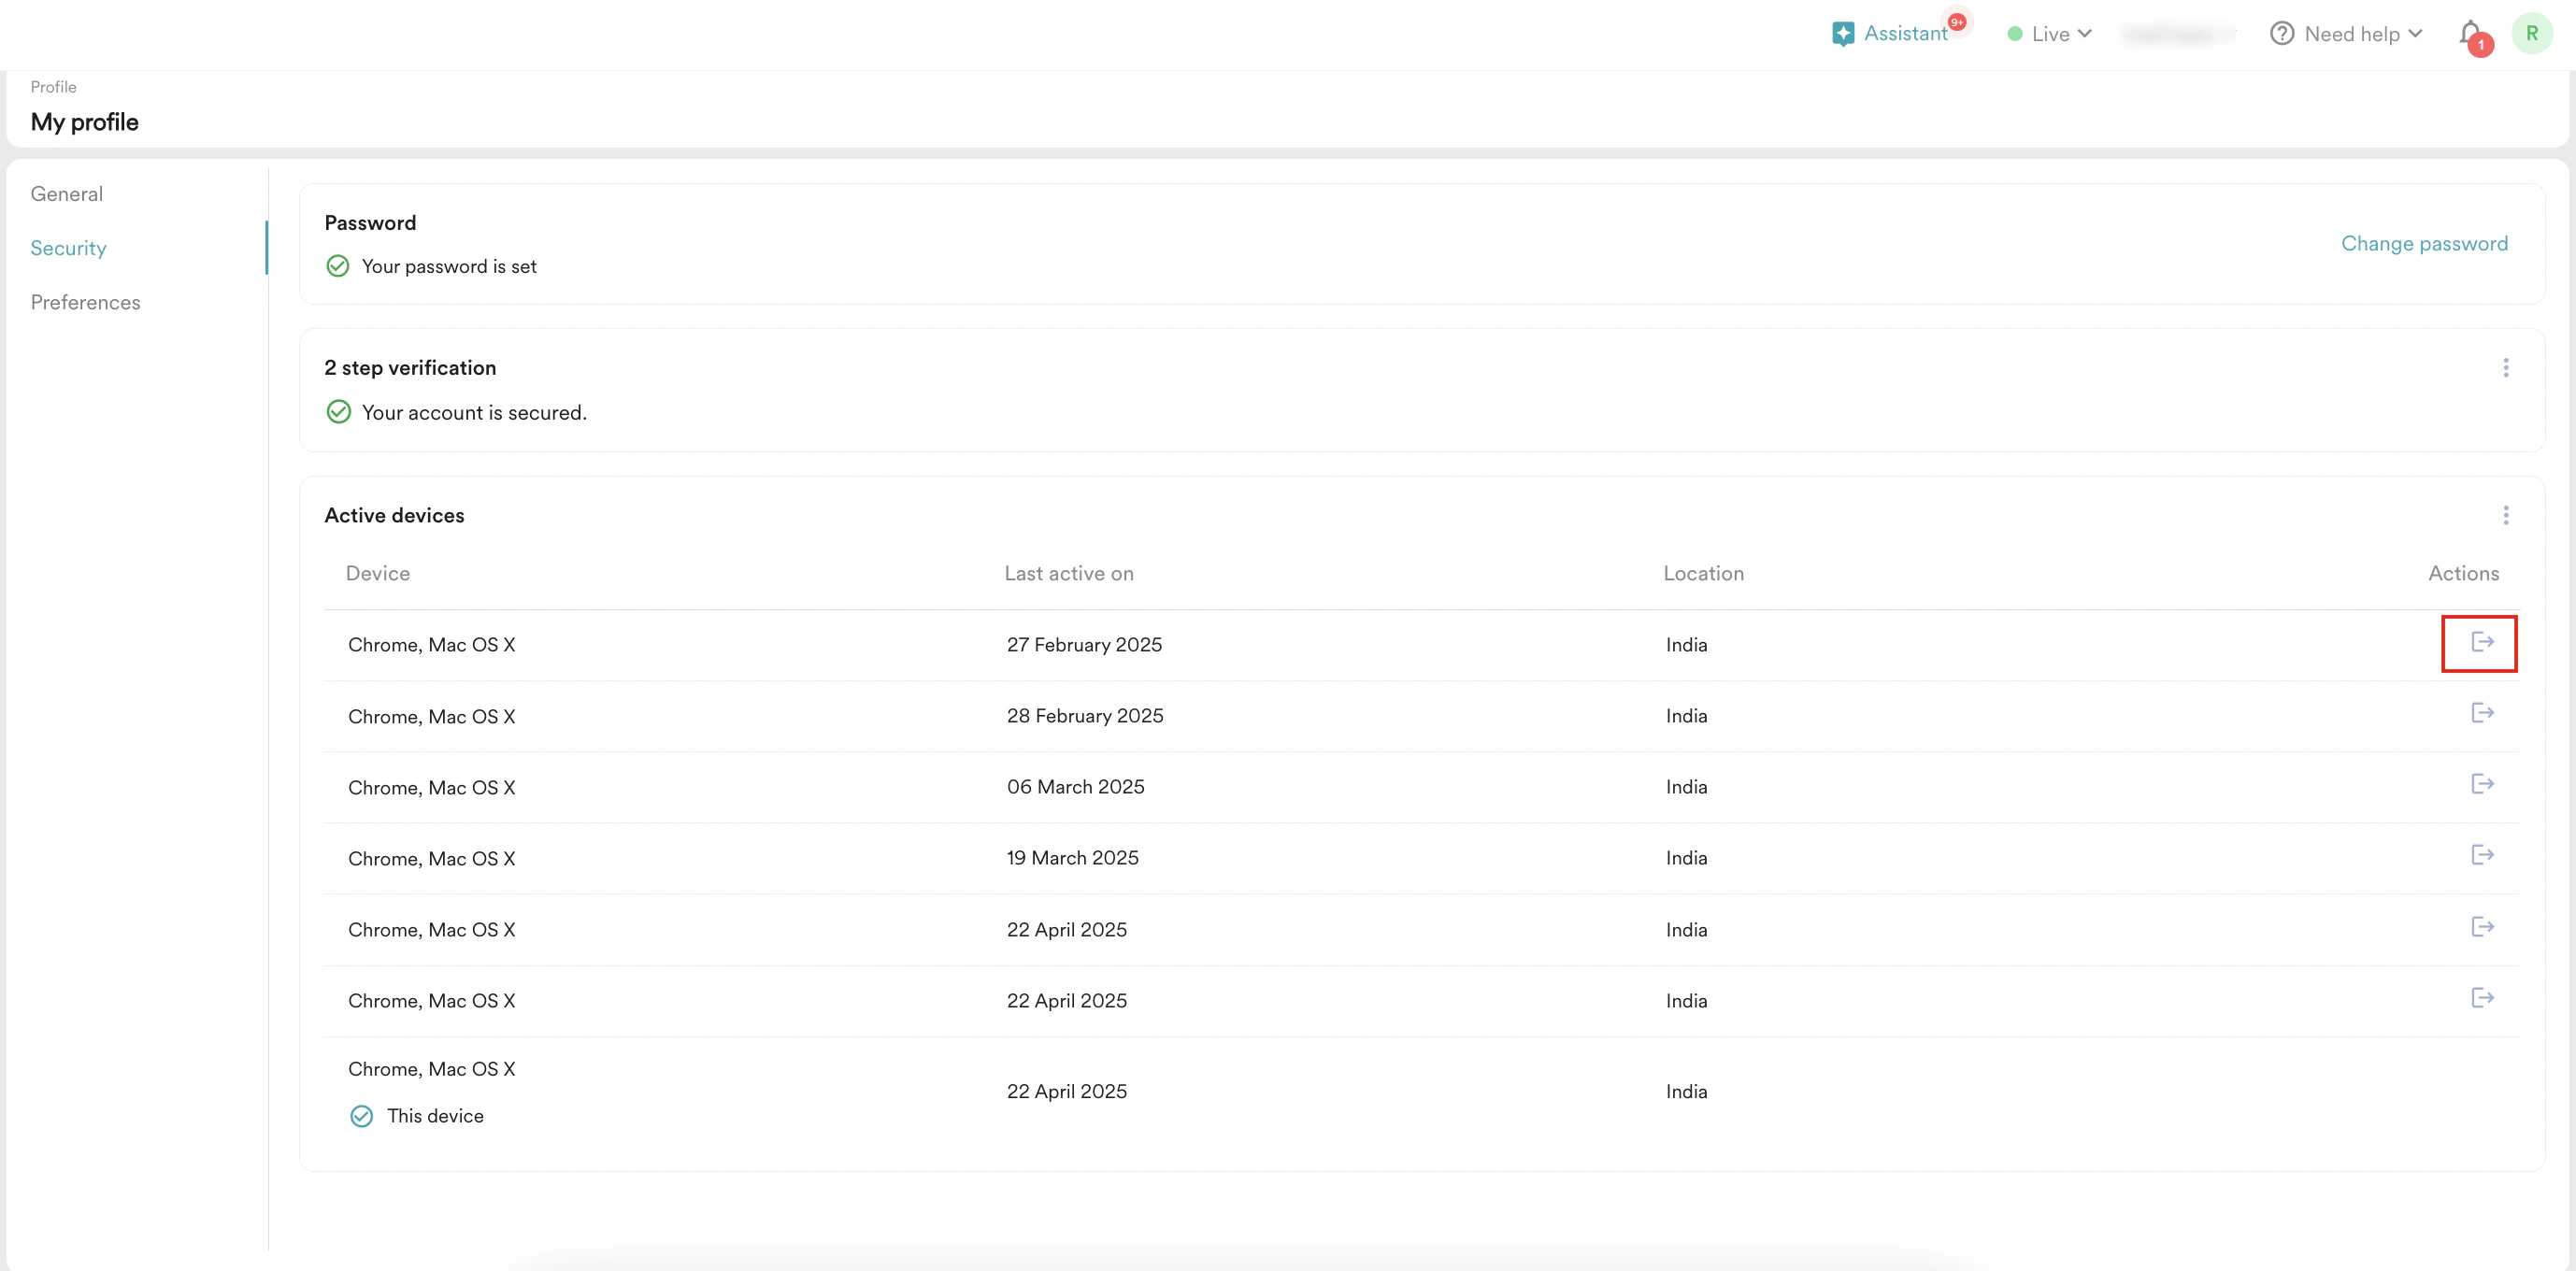
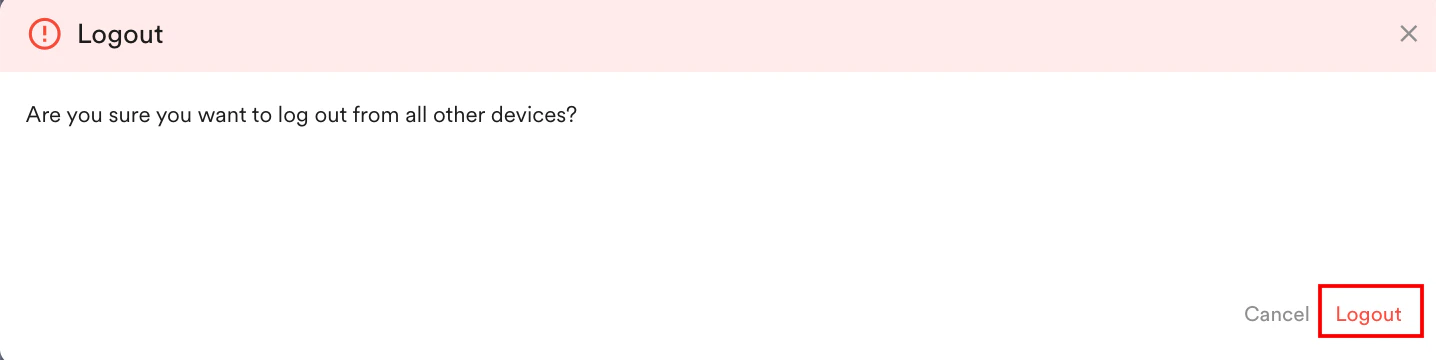
- Click the ellipsis icon and then click Logout of all devices to log out of all your active devices.
 The Logout pop-up window will appear, prompting you to confirm.
 - Click Logout.
Preferences
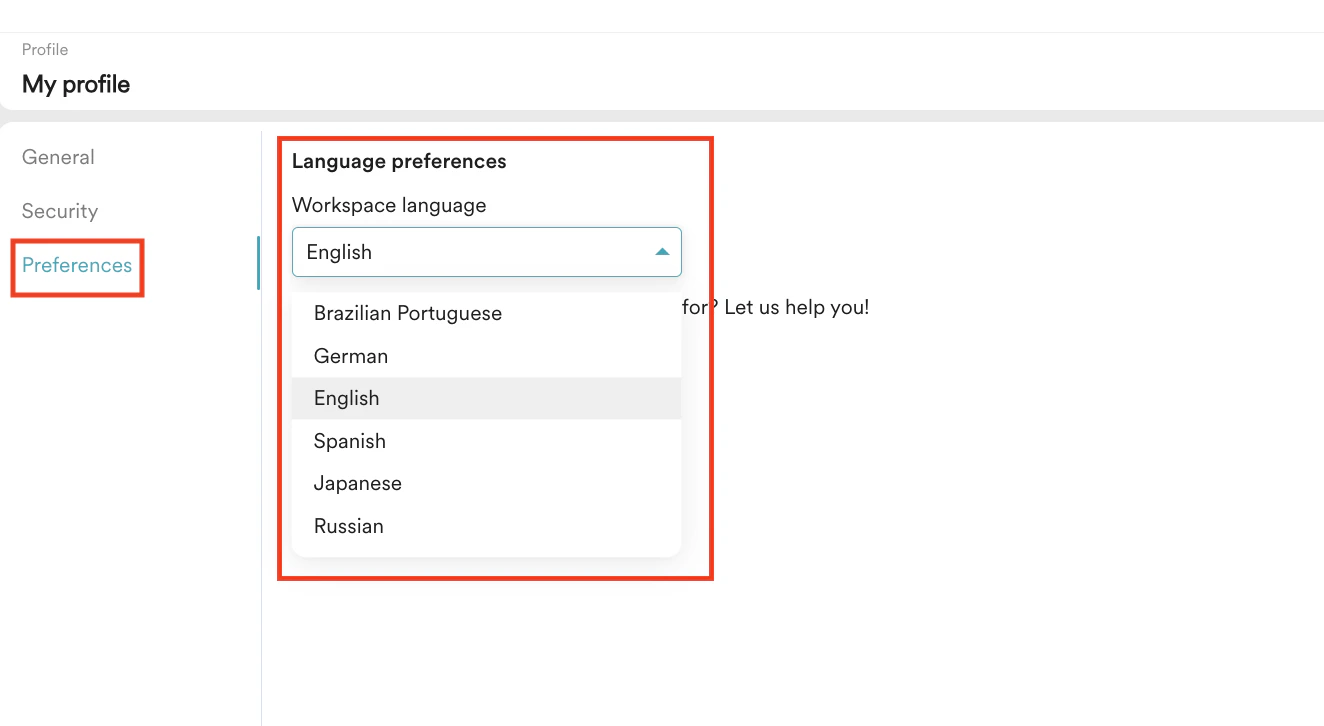
Under the Preferences tab, you can select your preferred language for the MoEngage workspace and suggest new languages for future support.Select Your Workspace Language
Your MoEngage workspace language is set to English by default, but you can change it to any language supported by MoEngage.MoEngage currently supports Japanese.
This is an Early Access feature. To enable it for your account, contact your CSM or raise a support ticket.
- On the My profile page, click the Preferences tab. The Language preferences page appears.
- In the Workspace language list, select your preferred language.
Suggest a Language
You can suggest a language if you do not find your preferred language in the Workspace language list. Perform the following steps to suggest a language:- Click Suggest a language. The Suggest a language dialog box appears.
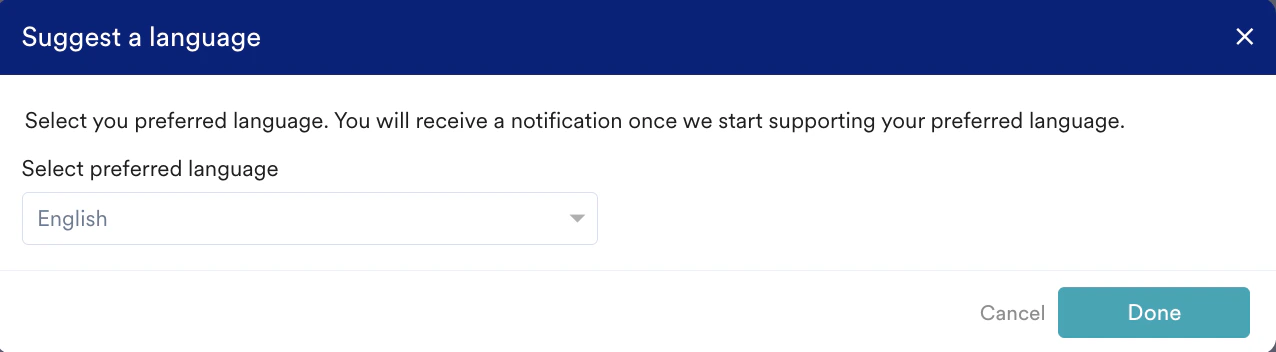
- In the Select preferred language list, select the language you want MoEngage to support.
- Click Done.