Personalize with the Personalization Editor
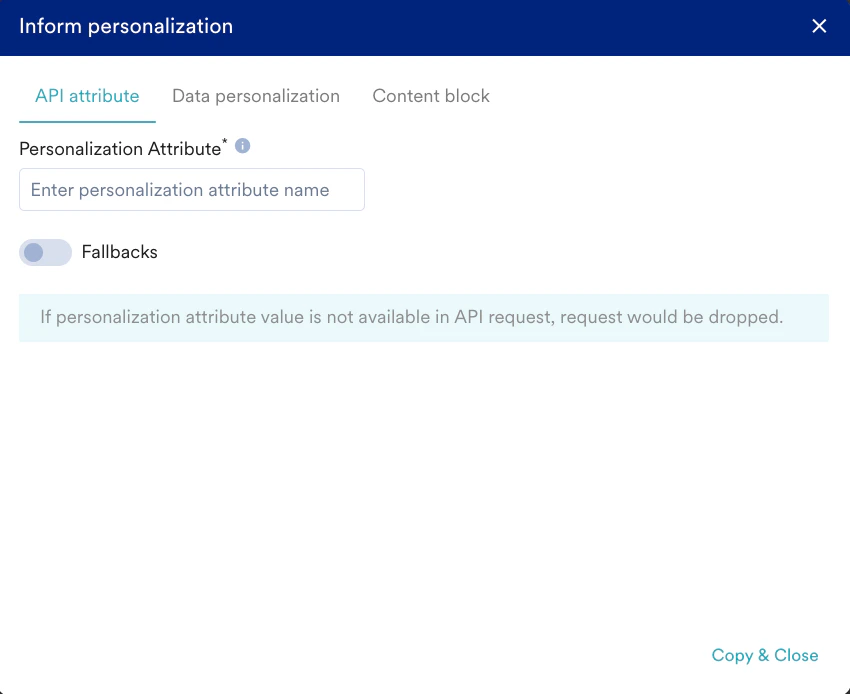
To personalize, do the following:- In Step 2: Content of create alert, click the Text personalization button.

- Add the attribute to be personalized in the Personalisation Attribute field on the screen that pops up.
- You can specify user attributes as fallbacks for the personalized attribute. Note: User Attributes must be enabled in Inform Settings for this option to be available. For more information, refer to User Attribute settings.

- Click Copy & Close to copy the personalized attribute to the clipboard.
- Paste the copied value in the message editor using standard keyboard shortcuts.
The names of the user attribute added for personalization can contain only the following: String characters, a combination of alphabets and numbers, and underscores. For example, the attribute name to be personalized can be username or user_name, or usernmae1, while user name and user name1 are not allowed. If the attribute name were to contain any character other than string characters or underscore or alphanumerics, for example, spaces, only numbers, or special characters, personalization would not work.
- User Attributes as fallbacks
- Without User Attributes
The following flow diagram depicts how personalization works with User Attributes as fallbacks.
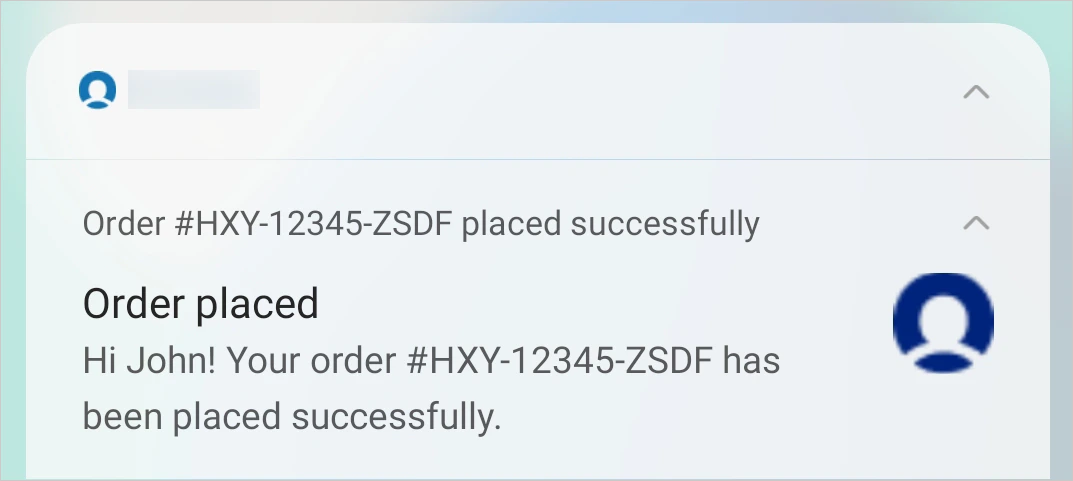
Hi {{username|default("{{UserAttribute['USER_ATTRIBUTE_USER_NAME']|default('user')}}")}}!Your order {{orderid}} has been placed successfully.Happy Shopping!Team MoEngage
Sample Payload with personalization
JSONPersonalized Alert as received by the customer
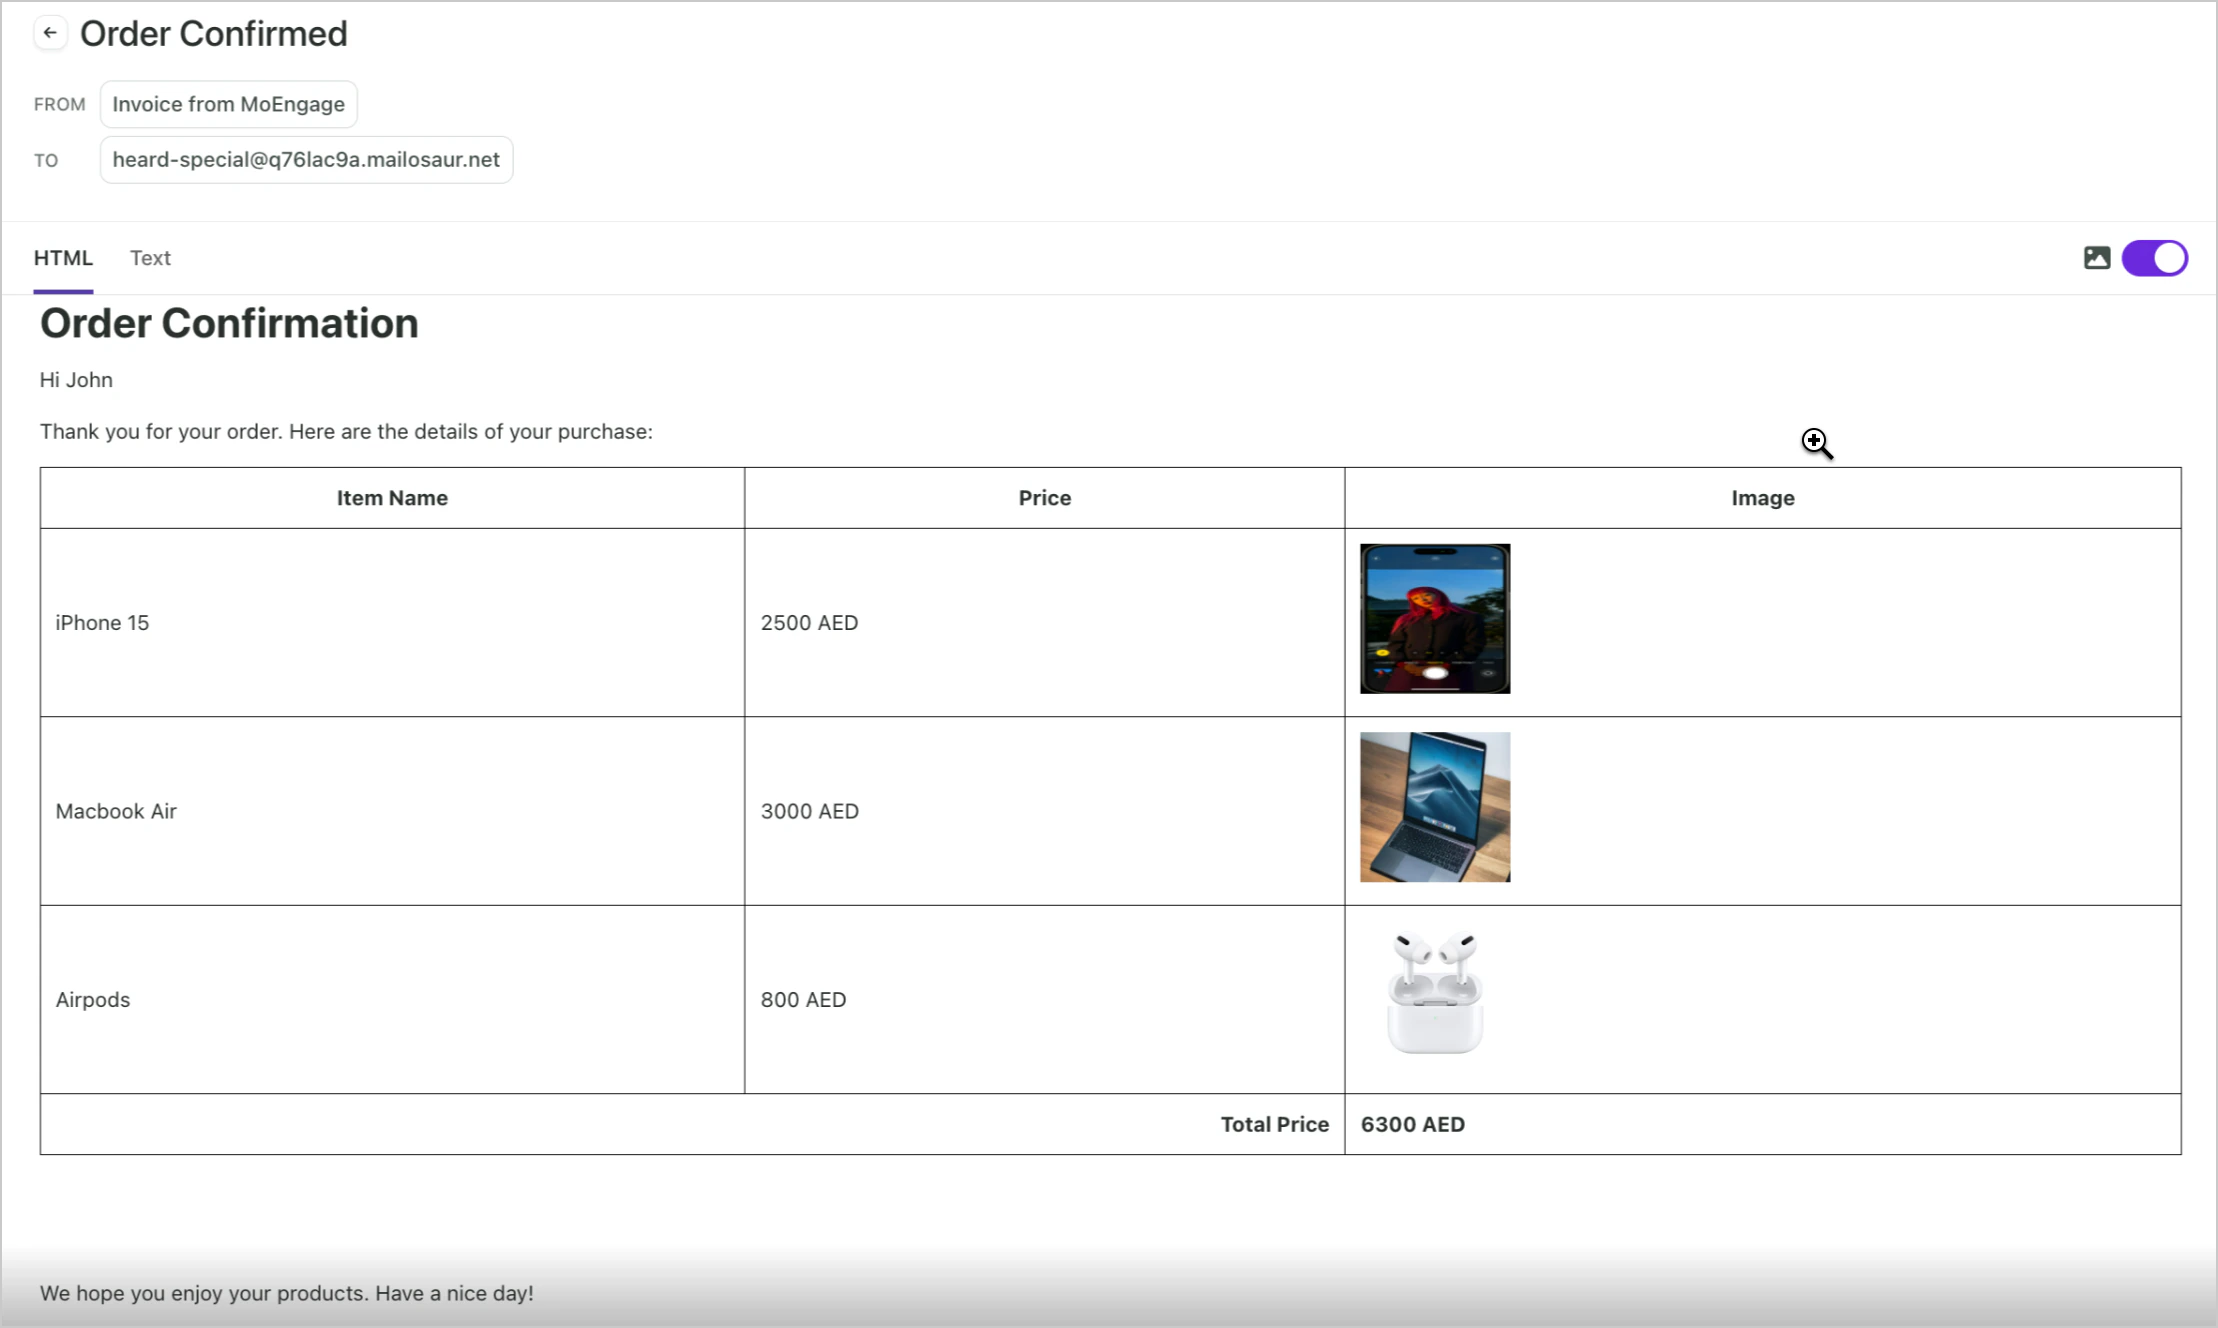
- Alert SMS Received by User
- Alert Email Received by User
- Alert Push Notification Received by User


Personalization Using Content Blocks
Content Blocks are reusable content that can be used in alerts. Personalizing alerts by leveraging the Content Blocks feature enhances user engagement, efficiency, and the overall customer experience. For more information on creating content blocks for alerts, refer to Content Blocks.Adding a Content Block
- To add a content block, click the Text personalization button. The Inform personalization pop-up window is displayed.
- Navigate to the Content block tab.
- Select the desired content block from the Select content block drop-down.

- You can also insert only the content of the content block using the following toggle.
 This means that only the content will be inserted while detaching itself from the existing content block and any future updates will not be reflected.
 - Click Copy & Close to copy the personalized attribute to the clipboard.
- Paste the copied value in the message editor using standard keyboard shortcuts.
Personalize using JINJA
To personalize an alert using JINJA, add the JINJA to the template editor in the content creation step and pass the attributes used in the JINJA in the _personalized_attributes_object in your request payload.Sample Payload with personalization
Sample Email PayloadPersonalized Alert Received by the customer