

If your system requires IP whitelisting, refer here before setting up the Push Campaign.
- Navigate to the MoEngage Dashboard and select Engage -> Campaigns from the left navigation.
- Click
 at the top right corner of the All Campaigns Page.
 - Select Push from the Outbound channels listed.
- Select one of the following campaign delivery types:
- One Time
- Periodic
- Event Triggered
- Business Event Triggered
- Device Triggered
- Location Triggered For more information about delivery types, refer to Delivery Types.
Steps to Create a Push Campaign
There are three steps to creating a push campaign, and they are:- Target users: Define the target audience for the campaign
- Content: Define the content of the push notification to be sent
- Schedule and Goals: Define the campaign’s delivery schedule and goals
Step 1: Target Users
This section defines the audience for your campaign and includes campaign details, audience limits, targeting rules, and platform selection.Campaign Details
The campaign details section contains the following fields:| Team- If your organization has teams enabled, select the Team in the dropdown.For more information, refer to Teams in MoEngage. | |
| Campaign name - Type the name of the campaign to manage and identify the campaign. The campaign name must have at least five characters, and the limit is 256. | 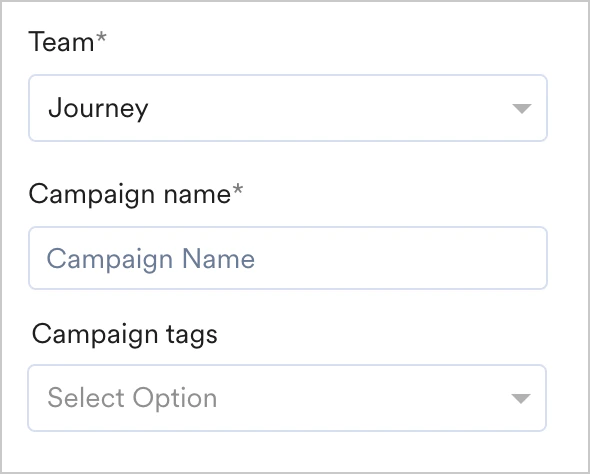 |
| Campaign tags - Select campaign tags from the drop-down list. You can select up to 5 tags. For more information, refer to Campaign Tags. |
Event Triggered Campaigns
Event Triggered Campaigns
Event-triggered campaigns allow you to send personalized notifications triggered by different user action events. For example, you can remind users about the item they added to the cart but have not purchased.For more information on creating such campaigns, refer to Create an Event-Triggered Campaign.
If Portfolio is enabled for your workspace, you can create advanced event-triggered campaigns that are initiated by user actions in one project (brand) to send a message from another project (brand).
Business Event Triggered Campaigns
Business Event Triggered Campaigns
| For business event-triggered campaigns, you can select the business event to be mapped to the campaign using the Select business event dropdown. The dropdown contains all the business events created in your MoEngage account. | 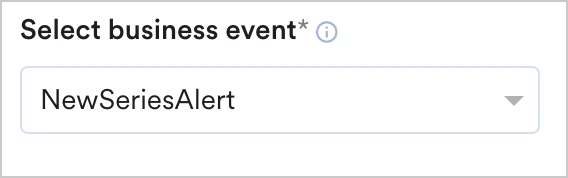 |
- segment by user property - you can map the user property to the business event attribute
- segment by user behavior - you can map the attribute of an event executed by the user to that of the business event attribute
- segment by user affinity- you can map the attribute of an event executed by the user to that of the business event attribute
- The data types of the user attribute or event attribute chosen should match with that of the business event attribute for segmentation to work.
- Show count is disabled for business event-triggered campaigns as business events are modeled to run on dynamic segmentation (based on the values with which the business event is triggered).
Location Triggered Campaigns
Location Triggered Campaigns
Click  . In the Add Geofence popup that opens, do the following:
. In the Add Geofence popup that opens, do the following:- Add the Geofence name.
- Select the trigger criteria from the user action drop-down to trigger the push message on entry/exit/stay inside the geo-fence. The following options are available:
- User enters the Geofence - A message will be triggered when the user enters the defined perimeter.
- User exits the Geofence - A message will be triggered when the user exits the defined perimeter
- Dwell based (user stays in Geofence) - A message will be triggered when a user enters and stays inside the defined perimeter for X mins. Please note that this type of trigger is supported only for Android. If your customers receive many alerts when driving briefly past your geofences, dwell-based fences are very effective in reducing this spam.
- Specify the Geofence by searching for the location. The Latitude and Longitude are auto-populated in this case. Alternatively, you can provide the following information to specify the geofence:
- Latitude
- Longitude
- Radius (in meters)- Enter an appropriate radius parameter for the geo-fence to be triggered. For example, if a geofence of 7 km is set around Foley Sq in New York, the push notification will be triggered based on the criteria chosen (entry/exit/dwell).
- Click Done to add the geofence. You can add multiple geo-fences with separate messages and locations for each. Remove a geofence by clicking the “x” sign in the geo-fence list.
AB variation/Locales is not supported in Location-triggered and API triggered campaigns.
Campaign Audience Limit
This feature empowers you to control campaign reach and expenditure by capping the number of users who receive it based on engagement metrics like sends, impressions, and conversions. It allows you to set total, daily, or instance-level limits to campaigns. For more information, refer to Campaign Audience Limit.Target Audience
This section contains segmentation filters that help you choose the target audience for your campaign. The following options are available:- All Users
- Filter by User Property
- Filter by User Behavior
- Filter by User Affinity
- Filter by Custom Segment
This filter option allows you to send the campaign to all the app users. When you use this option, you cannot add multiple filters.
If you have the Portfolio feature enabled, you can create user segments by combining user data and behavior from different apps and websites (Projects) within your workspace. For more information, refer to Segmentation in a Multi-Project Portfolio.
- Create and combine multiple user property rules, user activity rules, and custom Segment rules to create a complex user segment using this option.
- Click + Filter.
- Click AND or OR.
- Select the attribute or event and define the filter conditions.
- Exclude Users- Check the Exclude Users checkbox to define the filter criteria for users to be excluded from the campaign.
- Send campaign to the users opted out in preference management -Check this option to include users opted out in preference management for the campaign. For more information, refer to Preference Management.
- Reset Filters - Click this option to reset the segmentation filters.
- Show Count- Click Show Count to display the total number of users who are currently in the configured segment.
Target Platforms
This section lets you choose the target platforms for your campaign. The following options are available:| Android - Select this option to send campaigns only to Android devices. When this is selected, you get the following option: Send this campaign using Push Amp+. For more information refer to, Push Amp+ and Delivery Impact. | 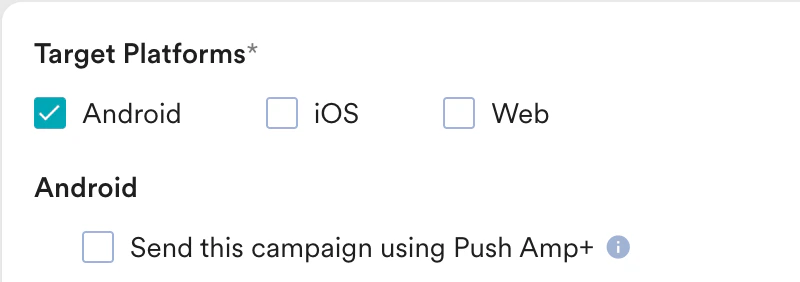 |
| iOS - Select this option to send campaigns only to iOS devices. When this is selected, you get the following options: Send this campaign to all eligible devices Exclude provisional push devices Send this campaign to only provisional push enabled devices. For more information refer to iOS Push Permission and Reachability. | 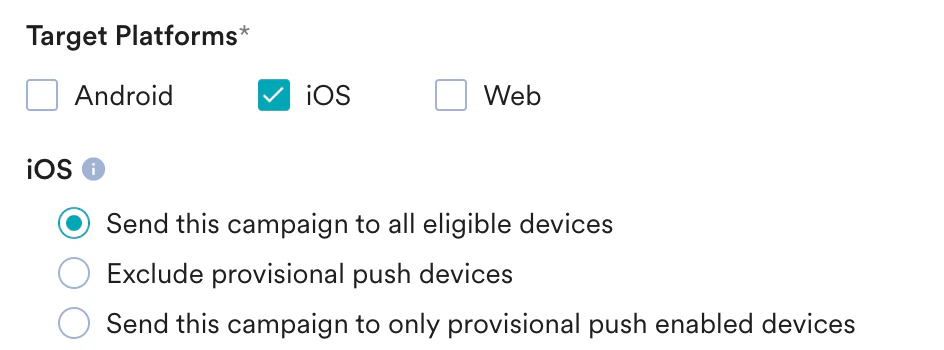 |
| Web - Select this option to send a Web Push campaign. This option is available only for One Time and Periodic Push campaigns. For more information, refer to Web Push Campaigns. | 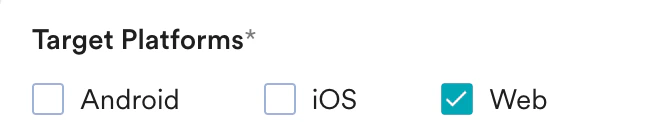 |
| Send to Originating Device - Upon selecting the checkbox, the system sends the push notification only to the device where the event that triggers the campaign occurs. This option is available only for event-triggered campaigns. For example: A user logs into an e-commerce site from three devices: Web, Android 1, and Android 2. If the Add to Cart event occurs on Android 1, the notification goes only to Android 1. Note: If the device where the event occurs isn’t the user’s primary device, and the Last Active Device checkbox is also selected for the campaign, the notification doesn’t get delivered. | 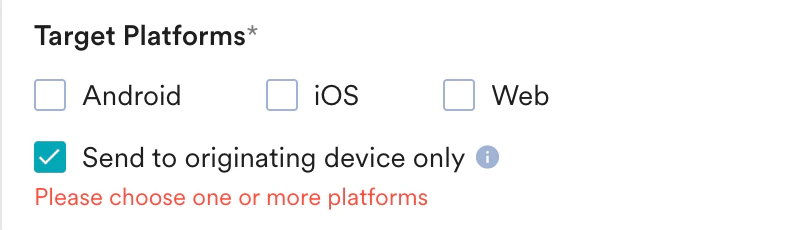 |
| Send only to a platform where IF events triggered - This option is available only for Event Triggered campaigns. Select this checkbox to send the campaign only to devices that share the same platform (e.g., Android, iOS) as the device where the event was triggered. For example, if a user has two Android devices and one iOS device and triggers the event on one of the Android devices, the campaign will be sent to both of their Android devices but not to their iOS device. | 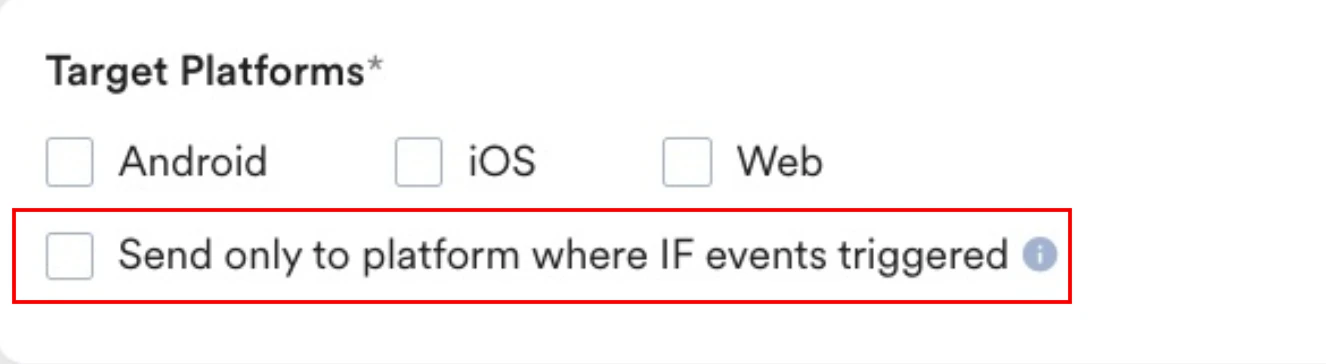 |
Control Groups
This section contains information about control groups for the campaign. To exclude users in the control groups, do the following:- Enable the Global control group toggle to exclude the users in the control group from the campaign’s target segment.
- Enable the Campaign control group to exclude a fixed percentage of users in the campaign from the campaign’s target segment. Specify the percentage of users to be excluded from the campaign in the box below the toggle. Note: This option is not available for location and device triggered campaigns.
Step 2: Define Content
This section contains various templates that you can choose from to define the content of the push notification. Select one of the templates and follow the steps described in Push Templates. MoEngage recommends that you verify your push message displayed in the preview and then click next to set the schedule and goals of the campaign.Adding UTM Parameters
Adding UTM Parameters
If the UTM parameters are enabled in the general settings, the UTM parameters toggle for the current push campaign is turned on. For more information, refer to Setting Up General UTM Parameters at Account Level.You can set UTM parameters for campaigns individually. The changes you make in the UTM parameters for a campaign override the general settings. The changes are applicable only to the specific campaign you are creating or editing, and they do not impact the general settings. For more information, refer to Adding UTM Parameters to Campaigns.
Test campaign (Optional)
Test campaign (Optional)
Test campaigns enable previewing the campaign on a test device to ensure that your notification is conveyed in the manner that you desire.You can test the campaign you created by selecting any of the following options and providing the value for the attribute chosen for your test user.
- Unique ID
- Email ID
- Mobile Number
- Google Advertising identifier
- iOS Identifier for advertising
- Device Push Token
- Custom Segment
Step 3: Scheduling and Goals
This section contains the following:- Delivery Schedule - Choose when the campaign should be delivered to your users and the periodicity of delivery.
- Pre-compute audience - this is an optional configuration for time-sensitive campaigns.
- Conversion Goals - Choose the conversion goals and revenue metrics to be tracked for the campaign.
- Delivery Controls - Choose the advanced delivery control options such as throttling, frequency capping, and expiration settings for the notification.
Delivery Schedule
One Time
One Time
- As soon as possible
- At specific date and time
Send the campaign immediately to the target users.
Periodic
Periodic
- At fixed time
- Send in user time zone
- Best time for user (Merlin AI)
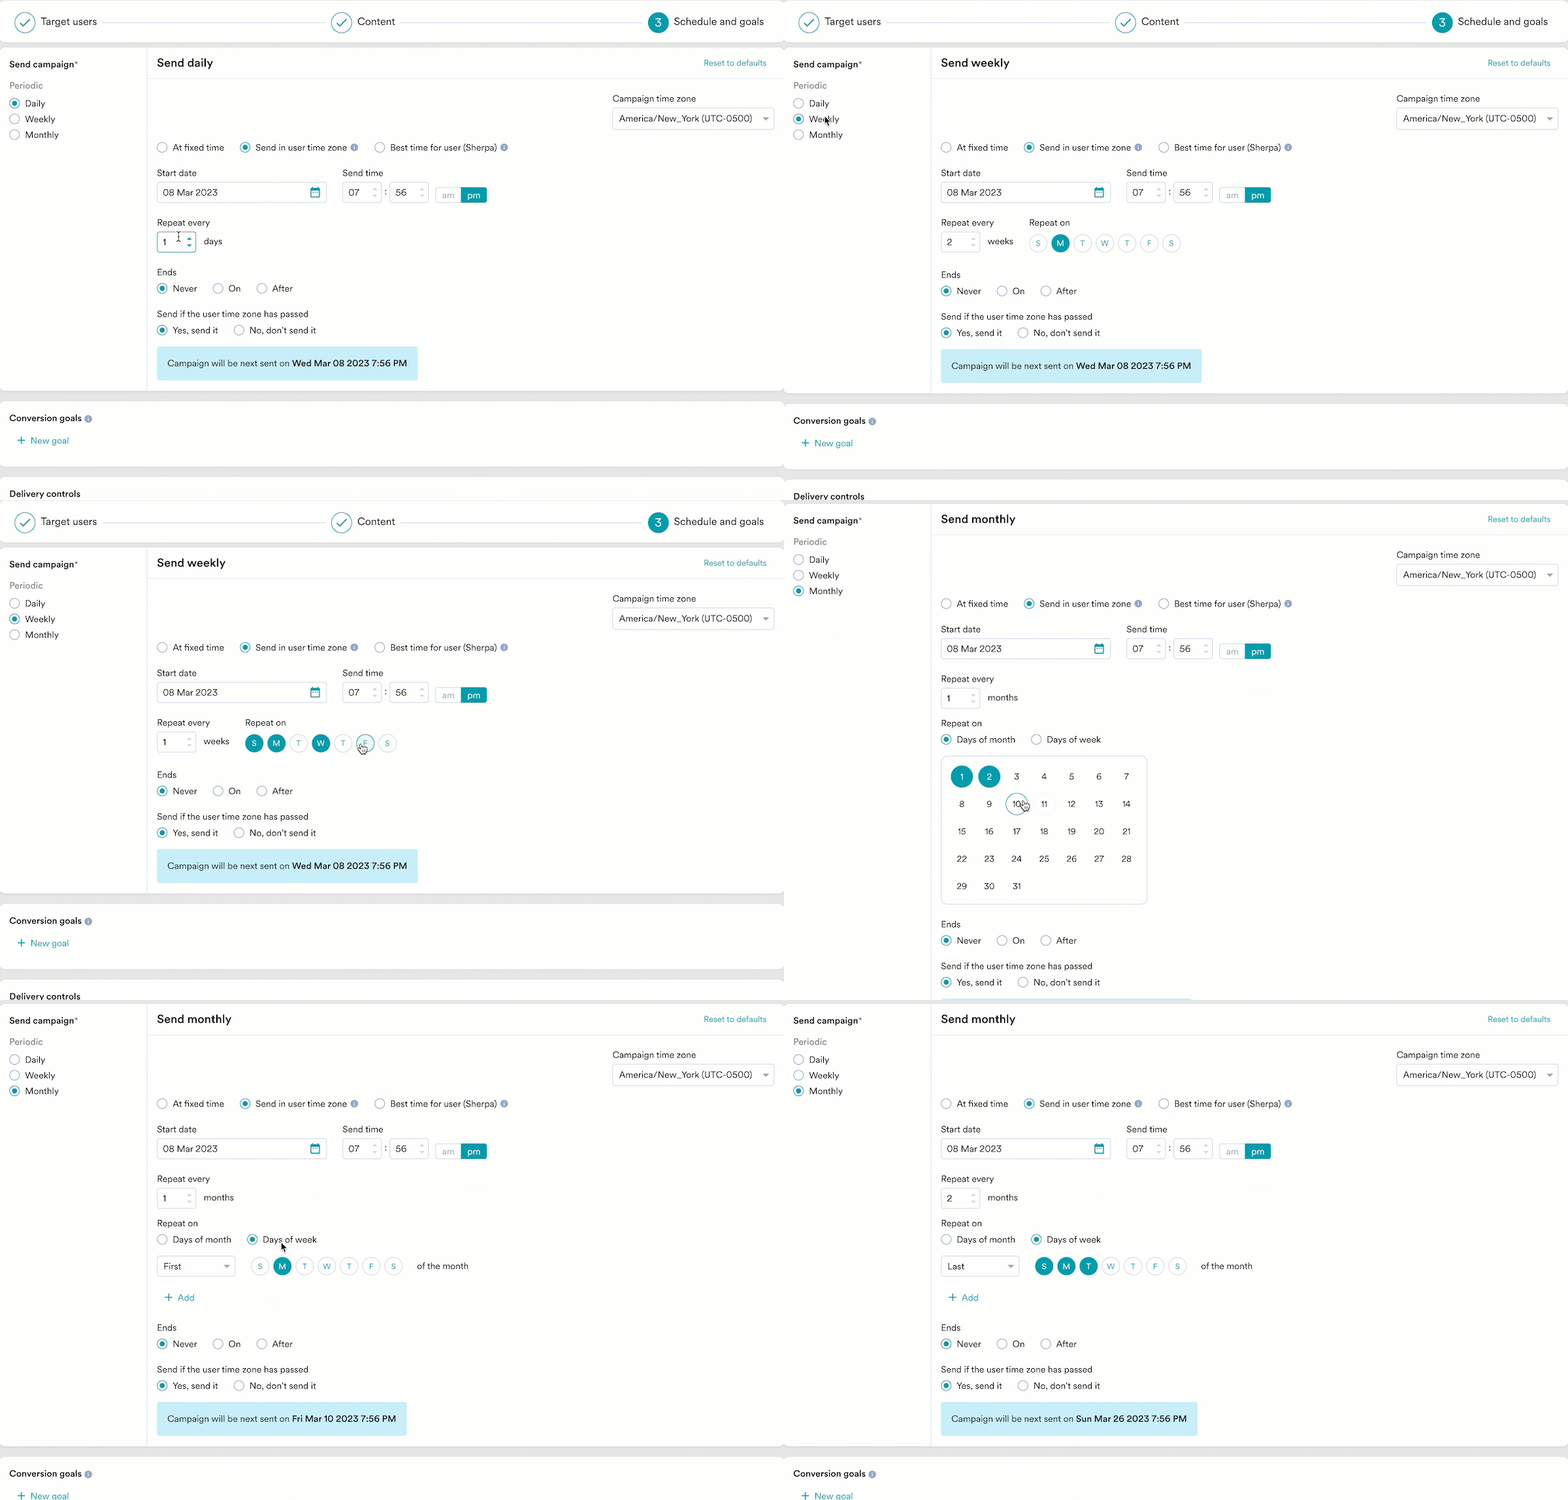
Choose this option to send the campaign on a specified date and time. The following fields are available in this section:
- Campaign time zone: The timezone in which the campaign should be sent.
- Start date: The date on which the campaign should be sent.
- Send time: The time at which the campaign should be sent. Select am or pm depending on the time of day.
-
Periodic: The periodicity of the campaign. You have the following options: Daily, Weekly, and Monthly.
-
Ends: The date on which the campaign ends. The following options are available:
- Never: The campaign is scheduled to run daily.
- On: The campaign ends on the date specified in the End Date field.
- After: The campaign ends after the number of occurrences specified in the occurrences field.
Event Triggered
Event Triggered
Click Active continuously under Send campaign and do the following:
When will event triggered campaigns be sent?The campaign will be sent only when:
- The event property/attribute being used to create these types of triggers (like the flight_time example) is in a valid date-time format. If it is not in a date-time format, the string should have data in one of the supported formats. If the selected attributes do not contain data in any of these formats, the campaign won’t be sent to your users.
- The date/time value from the attribute is greater than the time at which the trigger condition is fulfilled.
- The date/time value from the attribute is less than 30 Days + the time at which the trigger condition is fulfilled. For example, if your trigger condition is fulfilled at date D, your notification will be sent only when the attribute value is less than D+30.
- The intelligent delay optimization (With Delay) does not work for campaigns sent on relative timing.
Business Event Triggered
Business Event Triggered
Click Active continuously under Send campaign and do the following:
When will business event-triggered campaigns be sent?The campaign will be sent only when:
- The data type(s) of the user attribute(s) or event attribute(s) mapped to the data type(s) of the business event’s attribute(s) match.
- The attribute(s) used in segmentation are passed in the trigger request for the business event.
- The intelligent delay optimization (With Delay) does not work for campaigns sent on relative timing.
Device Triggered
Device Triggered
Click Active continuously under Send campaign and do the following:
Location Triggered
Location Triggered
Location campaigns are started as soon as the campaign is created and are triggered when a user satisfies the location/radius criteria. The campaign’s frequency can be limited by setting an upper cap on the number of times to display the message in a defined time interval.Location triggered campaigns have the option to include time-bounds. The following options are available for Time bound for Geofences:
- Limited -The user will get a notification only between specified time intervals for a time zone. Multiple time bounds can be entered here (for example, cover both evening and morning times).
- Always - The user will get notification irrespective of the specified time intervals.
Pre compute Audience
This option lets you pre-compute the target audience for time-sensitive campaigns with complex segments and unusually high volumes and ensure that campaigns are sent faster and at exactly the scheduled time to the target users, without even a few seconds of delay. For more information, refer to Pre-Compute Segments and send Push at the right time.Conversion Goals
You can add conversion goals to track the business metrics for your campaigns. You can track up to five conversion goals. You can choose any app event as a conversion goal activity and set more than one conversion goal. The first goal will be treated as a primary goal. For example, if you want to track the number of customers who’ve purchased an iPhone after your campaign was sent. (Event - purchase event, Product - iPhone). Your conversion goal set-up might look similar to the image shown below with the following details:- Goal Name - iPhonePurchase
- App Event you wish to track-Made Purchase
- Event Attribute/Property- product is event attribute/property
- Value of Event Attribute/Property - iPhone
- How many users have viewed the product page?
- How many of them added that product to the cart?
- How many of them made a successful order?
Tracking Revenue Performance (Optional)
Tracking Revenue Performance (Optional)
| With MoEngage, you can track the revenue generated by your campaigns. For example, you can track the revenue generated by your product after sending a communication. To track revenue performance, enable the Revenue performance toggle for the conversion goal for which you want to track the revenue. In the example here, to track revenue for orderSuccessful events, you must enable the Revenue performance toggle. | 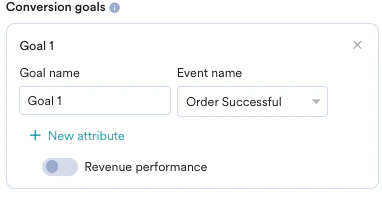 |
| After choosing the goal, you can select the numeric attribute that captures the order’s total monetary value. In this example, cartValue contains the total order value. You can choose the currency in which your monetary value is being reported. | 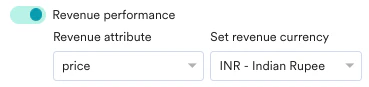 |
| Set Attribution window: You can set an attribution window (a time period or window that is calculated since the user has received/clicked the campaign, for which you want to attribute the conversion goals to a specific campaign). By default, it is set for 36 hours, while the maximum attribution window can be set up to 10 days. In the example below, the attribution window is set to 36 hours. |  |
Delivery Controls
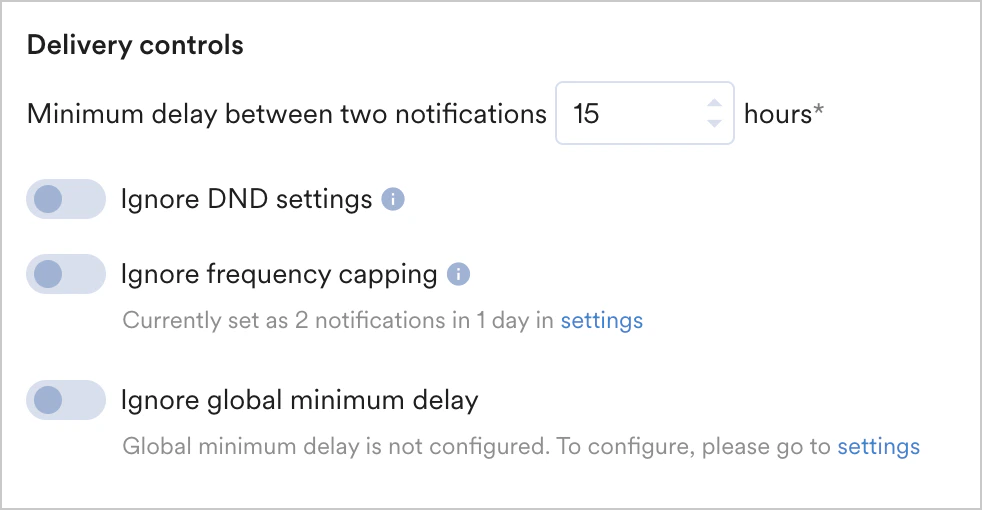
- Delivery Controls for All Campaigns
- Delivery Controls for Triggered Campaigns
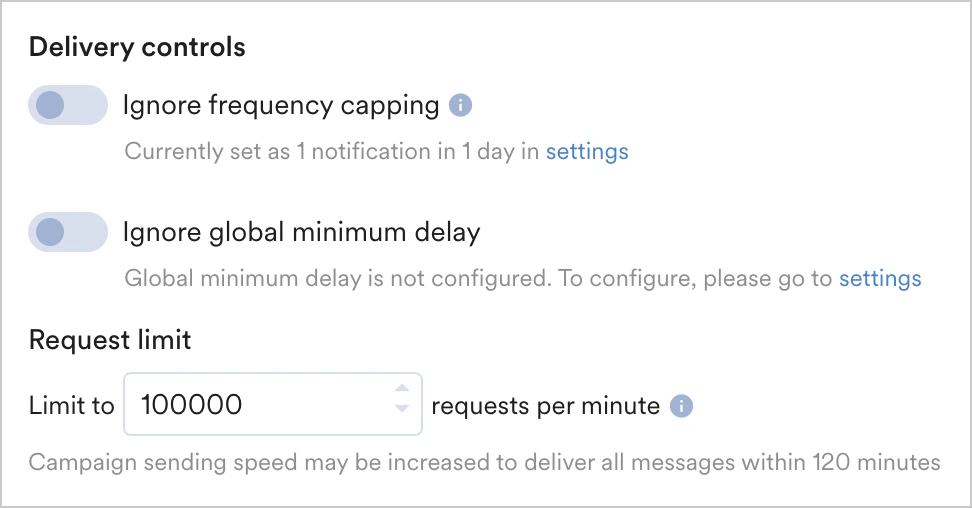
This section contains the following options:
- Ignore frequency capping - Enable this toggle to ignore the frequency capping settings. For more information, refer to Frequency Capping.
- Ignore global minimum delay - Enable this toggle to ignore the settings for the minimum delay set for Push notifications.
- Throttle -Set the throttling for Push notifications. For more information, refer to Push Throttling.
- Ignore DND settings-Enable this toggle to ignore the DND settings. For more information, refer to Do Not Disturb. For One-Time and Periodic push campaigns, the Ignore DND settings toggle is displayed when the Campaign Queueing feature is enabled.
- Enable message queuing- Enable this toggle to automatically queue messages that are blocked by Frequency Capping or Minimum Delay. For more information, refer to Message Queuing.
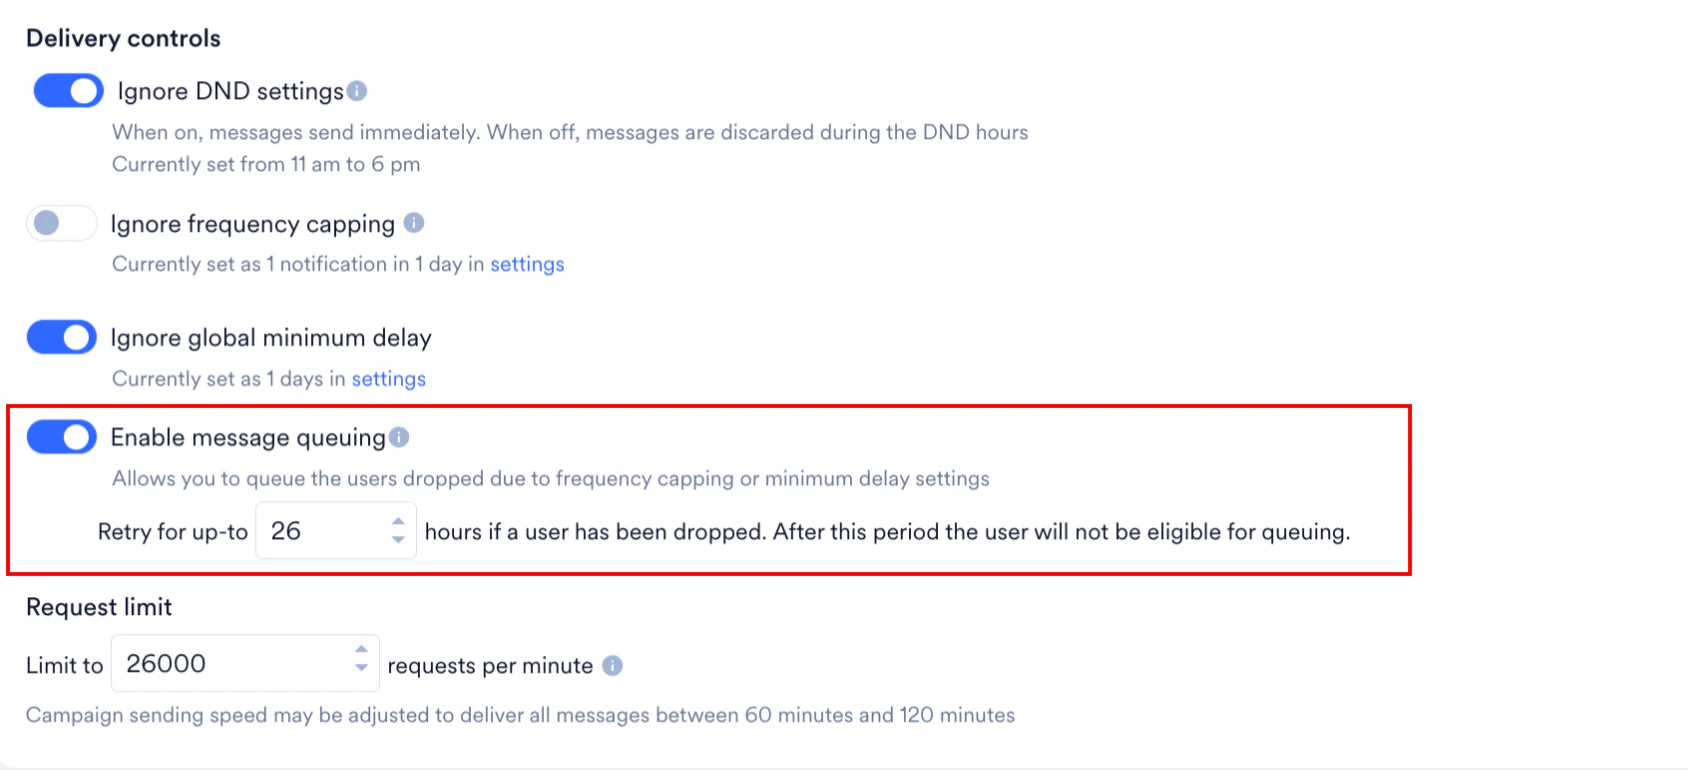
The Message Queueing feature is an Early Access feature. To enable it for your account, contact your MoEngage Customer Success Manager (CSM) or the Support team.
With the reduction in the default FCM API rate limits to 600,000 RPM, we are changing the maximum allowed throttle speed for Push notifications to 500,000 RPM to ensure a single campaign does not breach the project limit. This change will apply to new and existing campaigns. You may still see drops because of multiple campaigns being triggered together. For more information, refer to Changes in Sending Speed with Private Key Configuration.
Advanced Settings
The following options are available in this section:| Expiration Settings - let you specify an expiry value for the push notification. This section contains information about when to stop sending push notifications (after a specific time duration mentioned) for the iOS and Android platforms. | 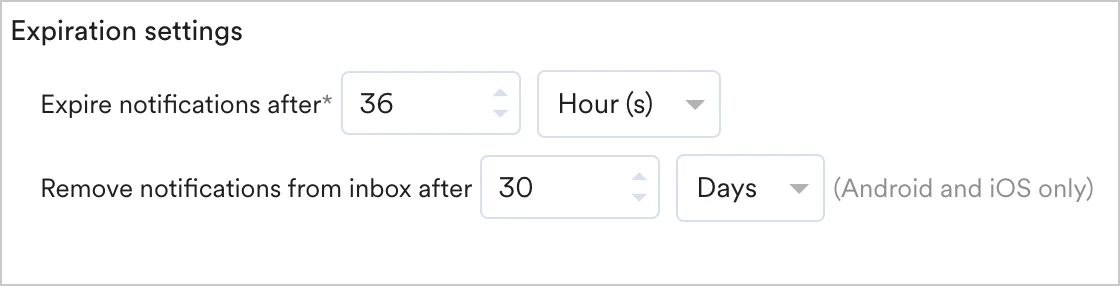 |
- Expire notifications after - This field specifies how long push notification services store a message for delivery before discarding it if undelivered. Push services (FCM/APNS) retry sending the message until the Expire notifications after duration (in minutes) expires. After this period, delivery attempts stop. The default value is 36 hours and applies to Android and APNS push notifications.
- Remove notifications from inbox after - If you use the Notification Center (Inbox) feature of the MoEngage SDK, you can specify the duration after which the notification should be removed from the Inbox. The duration can be set in days or hours. By default, the value will be set to 30 days.
MoEngage sends the configured Expire Notifications After value to the respective delivery partner (such as FCM, APNS, or Web Push services). However, these services may not honor this value in all cases. In some campaigns, FCM has delivered notifications beyond the expiry time for approximately 0.1%–0.5% of users, and APNS for up to 0.1%.
Priority — Choose this option for time-critical notifications. The following options are available:
| 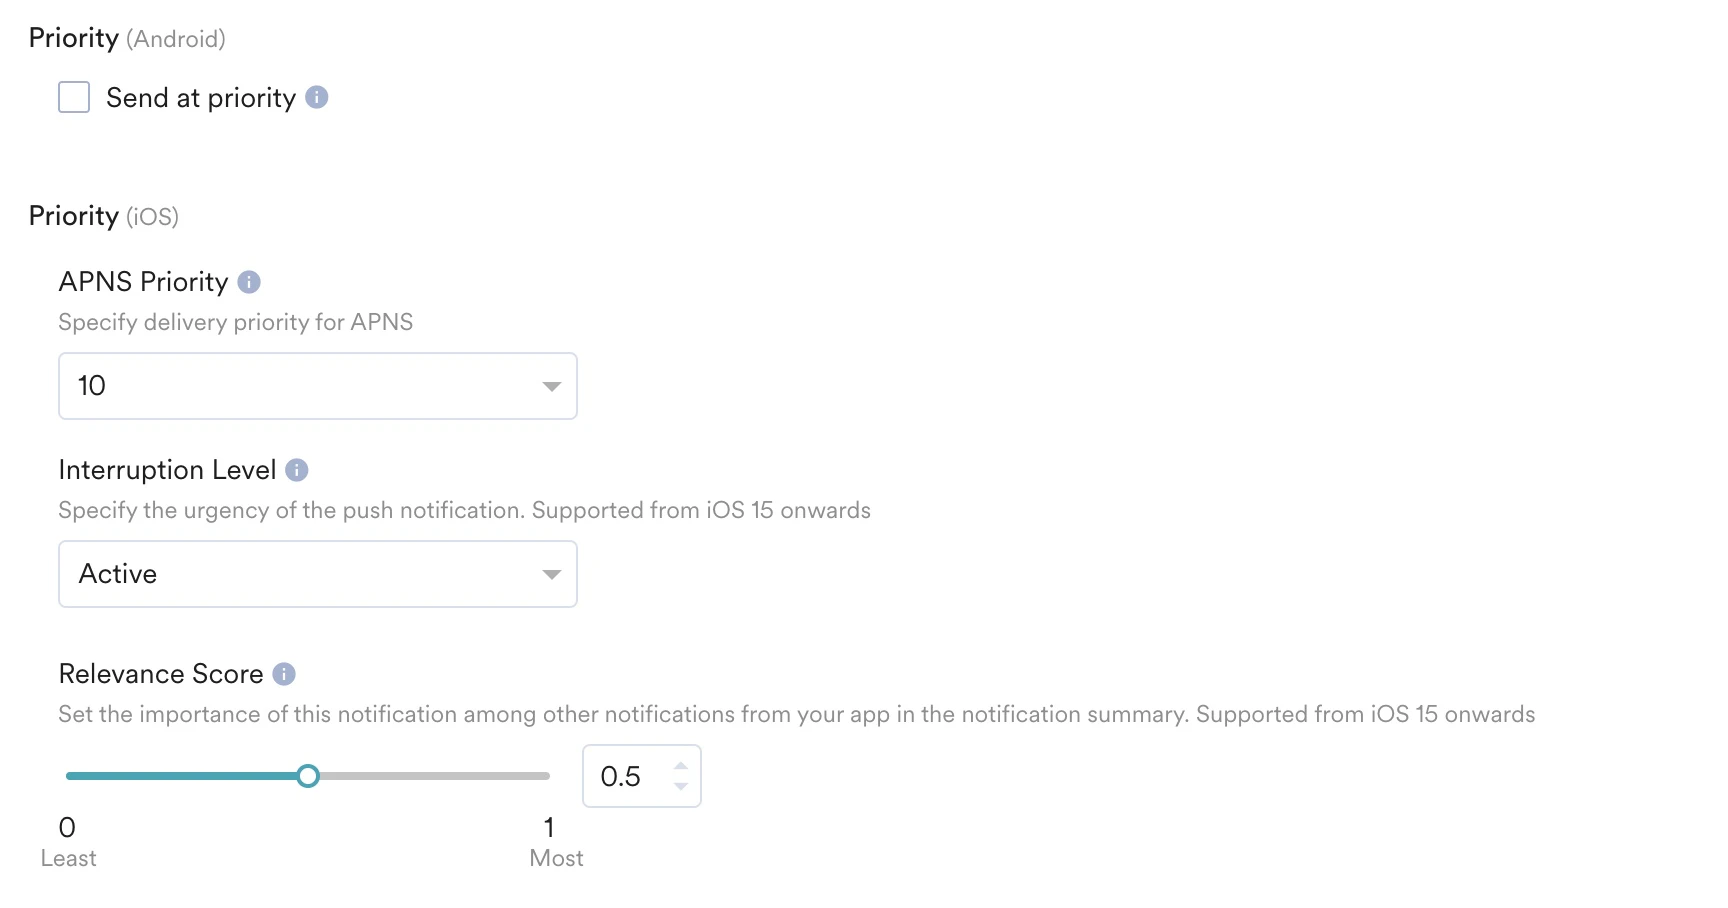 |
APNS stores only one notification per bundle ID and selects it non-deterministically when multiple notifications are sent to the same bundle ID. Note that the delivery depends on the APNS and is not controlled by MoEngage. In case of multiple undelivered notifications, typically, the notification with the highest priority gets delivered when the device returns online. For more information, see APNS documentation.While you have the option to set your notification priorities based on your requirements, we recommend keeping the value at ‘10’ (default) to ensure immediate delivery, unless there is a specific strategic need to prioritize the delivery of certain categories of notifications differently. For instance, if there is a need to deliver transactional notifications and it is observed that promotional notifications are hampering the delivery of transactional notifications, the marketer may choose to reduce the priority of the promotional campaigns to improve the chances of transactional notifications getting delivered.

- Send campaign to opted out users (Background push notifications do not need explicit push permissions): Enable this checkbox to reach users who have manually opted out of push notifications. Because Background Updates are silent and do not require explicit push permissions, they can be delivered to these users for app state management or background syncing.
- The “Target Audience” count displayed in Step 1 may be lower than your final “Sent” count, as opted-out users are added dynamically during the delivery phase.
Background updates on iOS are sent with Low APNS Priority. According to Apple’s documentation, these are “best-effort” deliveries and may be dropped if the device is in a “killed” state, has a low battery, or if the user has disabled Background App Refresh in their device settings.
| Last Active device - Select the Last Active device checkbox to send this push campaign only to the latest active device of the target user. For more information, refer to Primary Device Per User. | 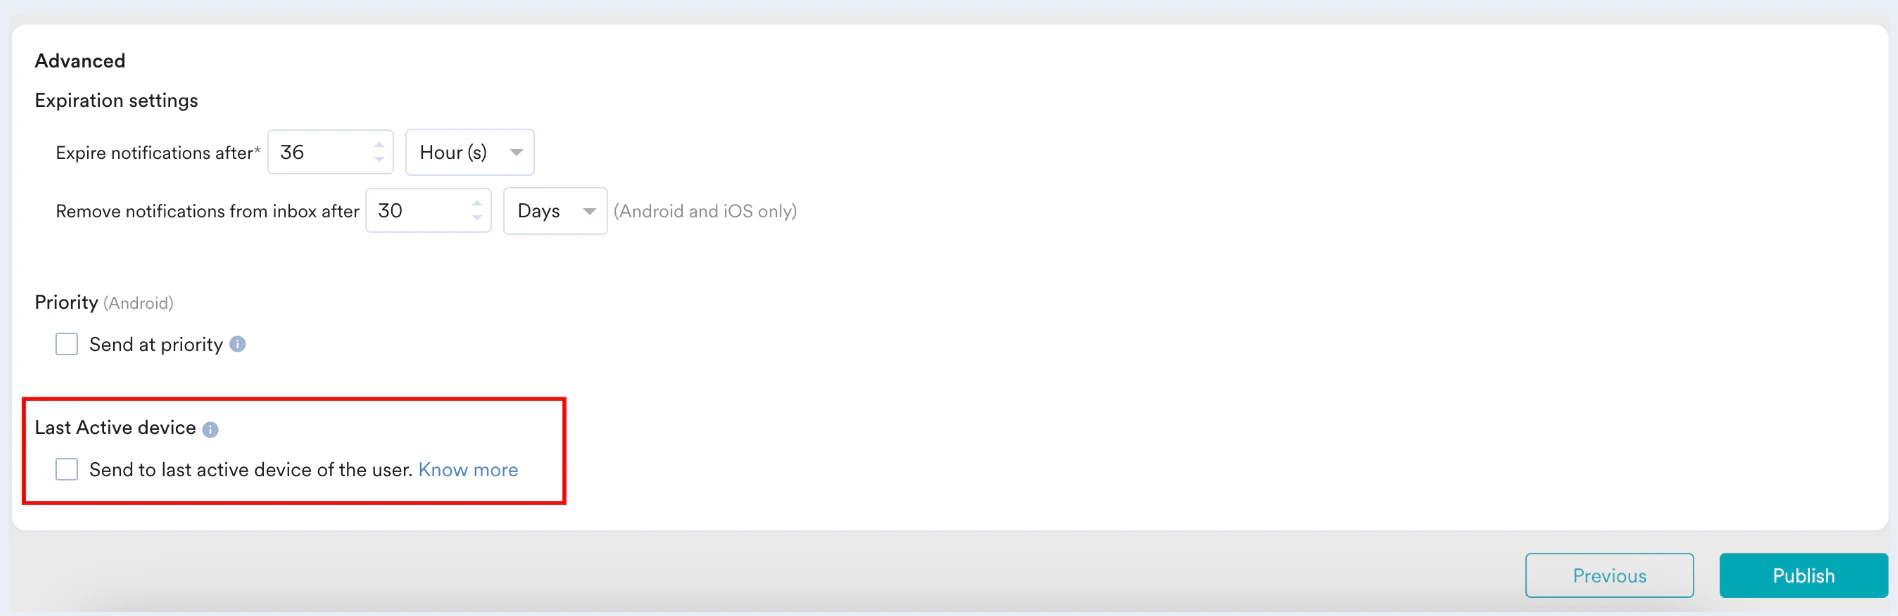 |
The Last Active device feature is an Early Access feature. To enable it for your account, contact your MoEngage Customer Success Manager (CSM) or the Support team.