Introduction
Sending flight status updates is crucial because it lets passengers stay informed about any changes to their flight schedule, such as delays or cancellations, or gate changes. By providing timely updates, airline businesses can also manage passenger expectations and maintain operational efficiency. This improves customer experience, brand reputation, and reliability.Advantages of sending flight status updates
- For passengers:
- Improved travel planning: Knowing the status of their flight allows passengers to adjust their plans and avoid unnecessary stress or inconvenience, especially if they have connecting flights or other arrangements.
- Real-time updates: Flight status updates provide passengers with timely information about changes to their flight schedule, enabling them to make informed decisions and take appropriate action.
- Reduced anxiety: By staying informed, passengers can reduce anxiety and uncertainty associated with potential flight disruptions.
- For airlines and travel companies:
- Enhanced customer service: Providing timely and accurate flight status updates demonstrates a commitment to customer service and helps build trust and loyalty.
- Operational efficiency: Airlines can use flight status updates to manage their operations more efficiently, such as adjusting staffing levels or coordinating with ground crews.
- Reduced disputes: By proactively communicating changes to passengers, airlines can reduce the likelihood of disputes and complaints.
- Create a business event
- Create a Push campaign
- Trigger the campaign by triggering the business event
Expected Result
Users receive a push notification on their phones with their flight status update: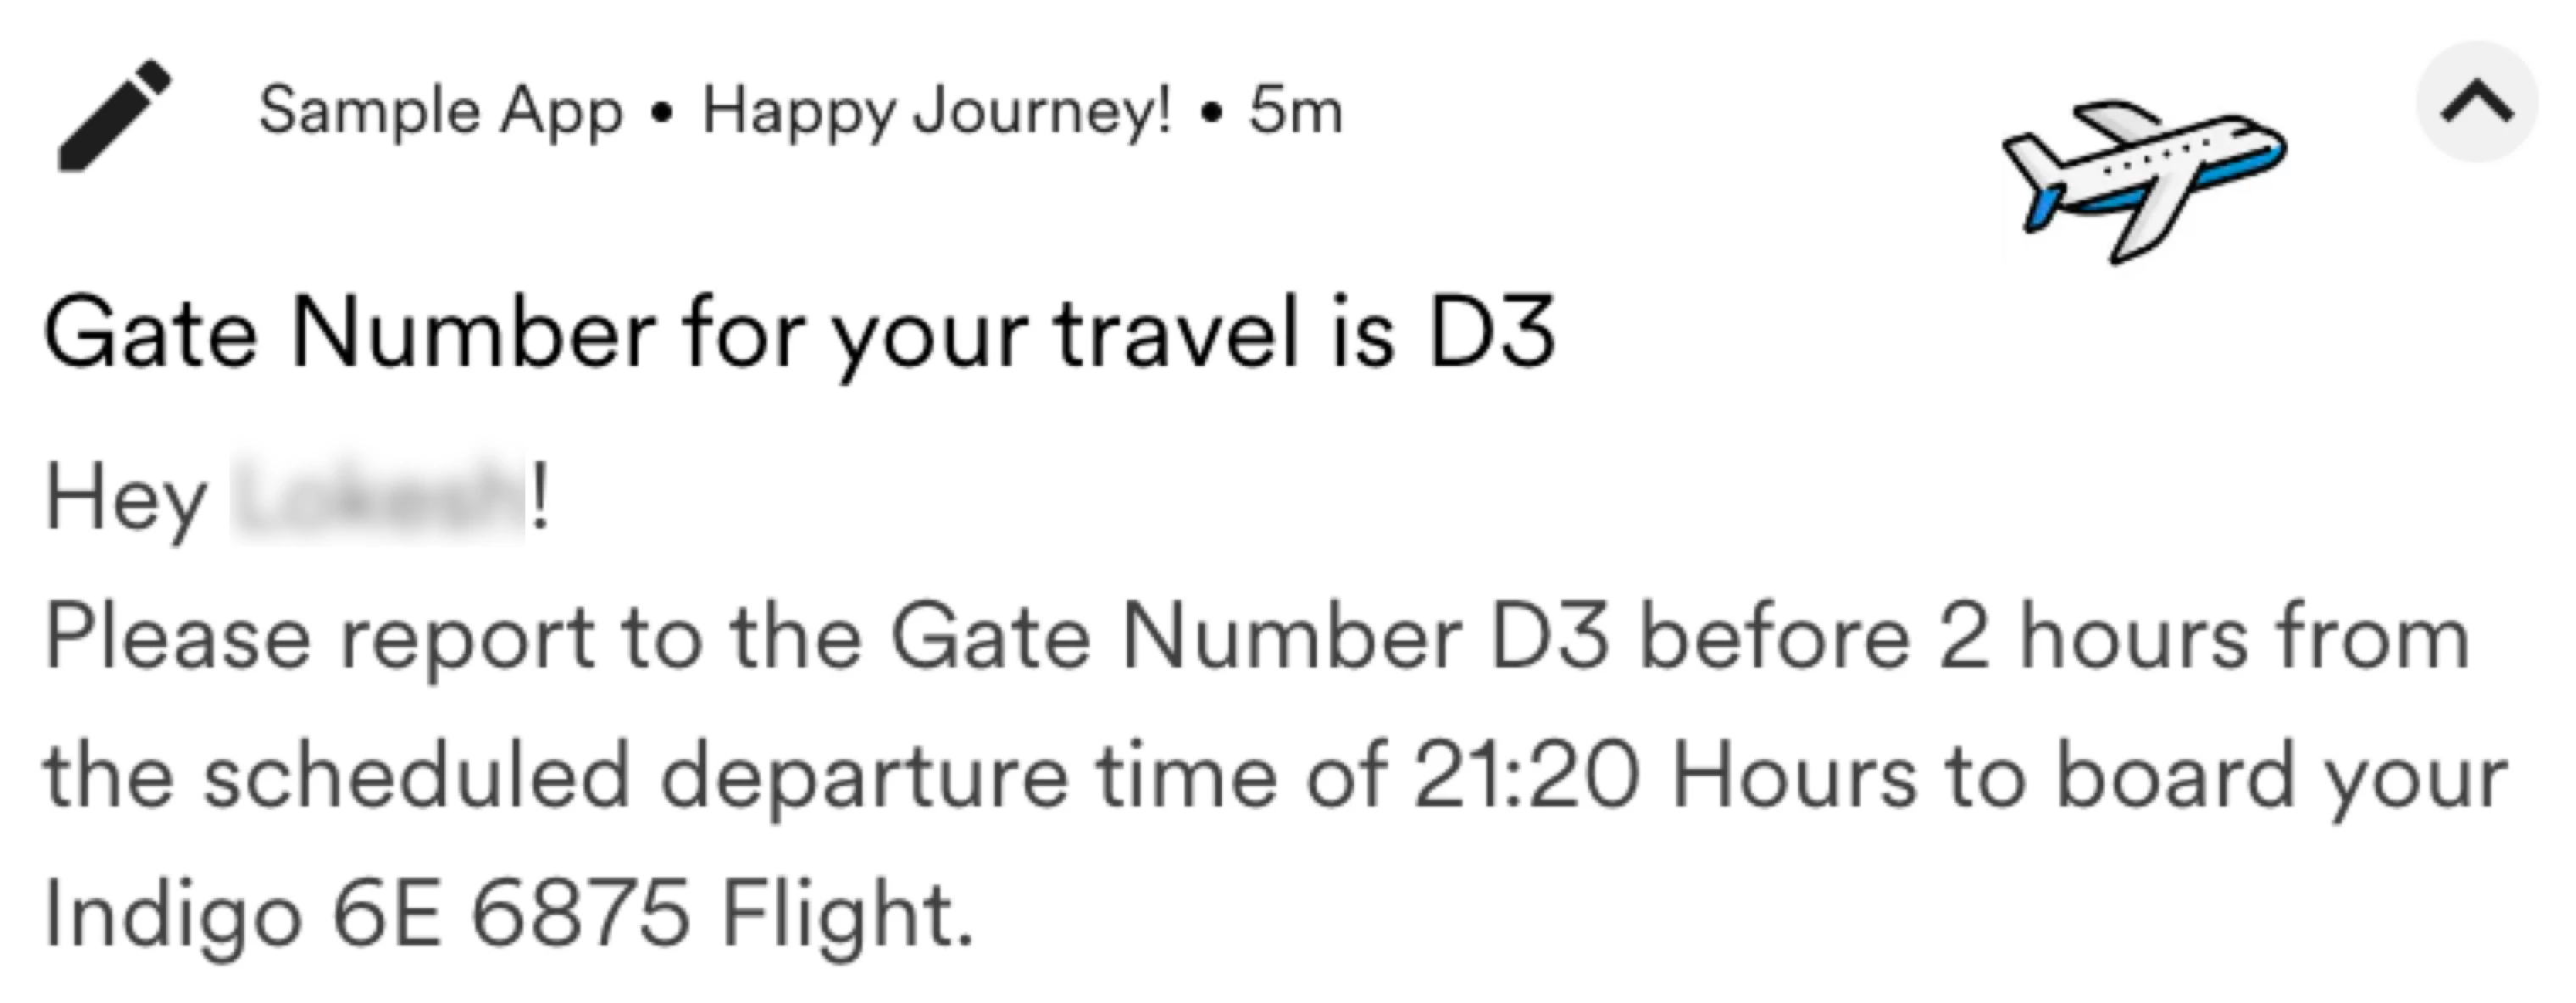
Step 1: Create the Business Event
In this section, we will create a Business Event for your account. We can use the MoEngage Business Event public API. For our example, the following information is a part of the Business Event:- Event name: Flight_Status_Updates
- Attributes of the event and their data type:
- Flight Name: string
- Departure Time: date
- Gate Number: string
- Departure City: string
- Destination City: string
- Write the information above in the JSON format and send it to MoEngage through Postman:
- Use the information above in the JSON format and make the API call with authorization information for the right data center your workspace belongs to. For more information, refer to Create Business Event API.
After the API call is made and the event is created successfully, MoEngage sends the following response: - To verify if the event is successfully added:
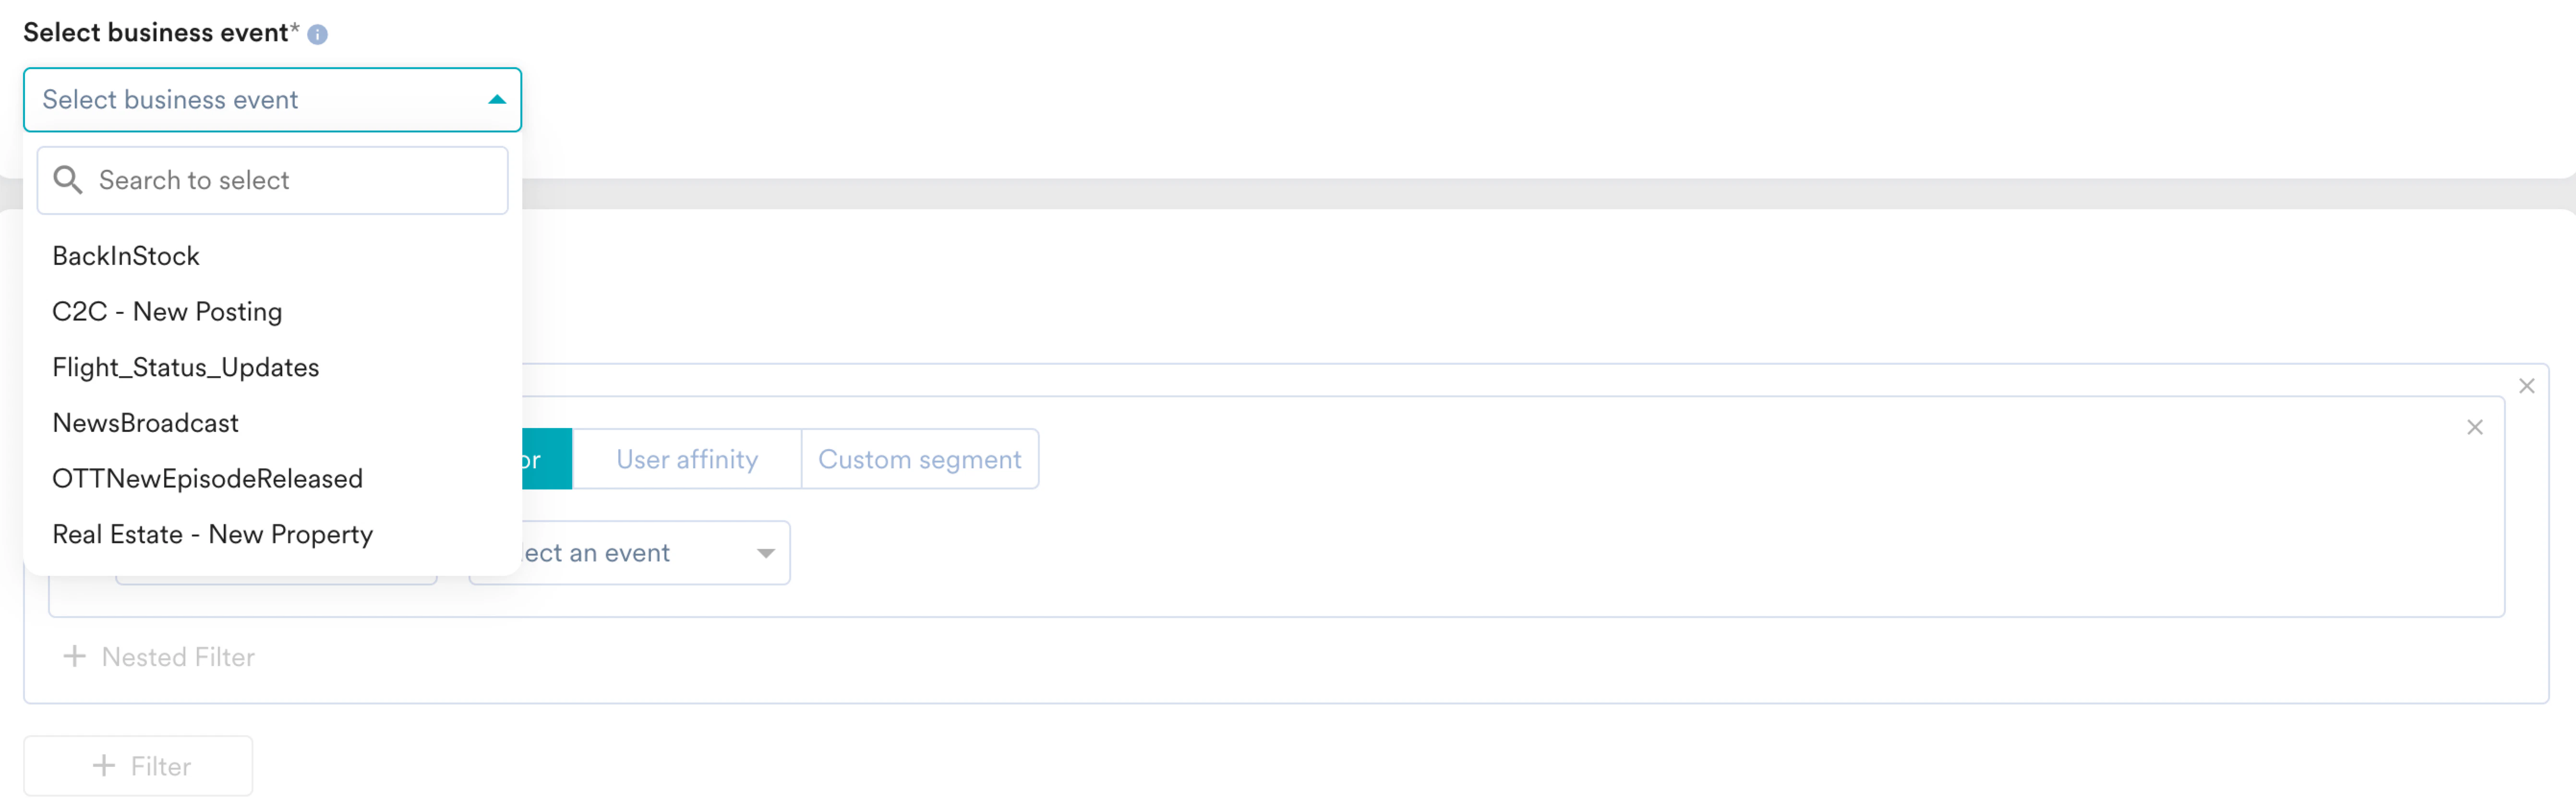
- In the MoEngage dashboard, go to any Business Event Triggered campaign.
- In the Select business event list, you can check for your event. You can see the Flight_Status_Updates event.
Step 2: Create a Push Campaign
In this section, we will create a business event-triggered Push campaign to inform our users who are traveling today about the gate number and remind them to arrive 2 hours before the scheduled departure.Step 2.1: Target Users
- On the left navigation menu in the MoEngage dashboard, click Engage, and then click Campaigns.
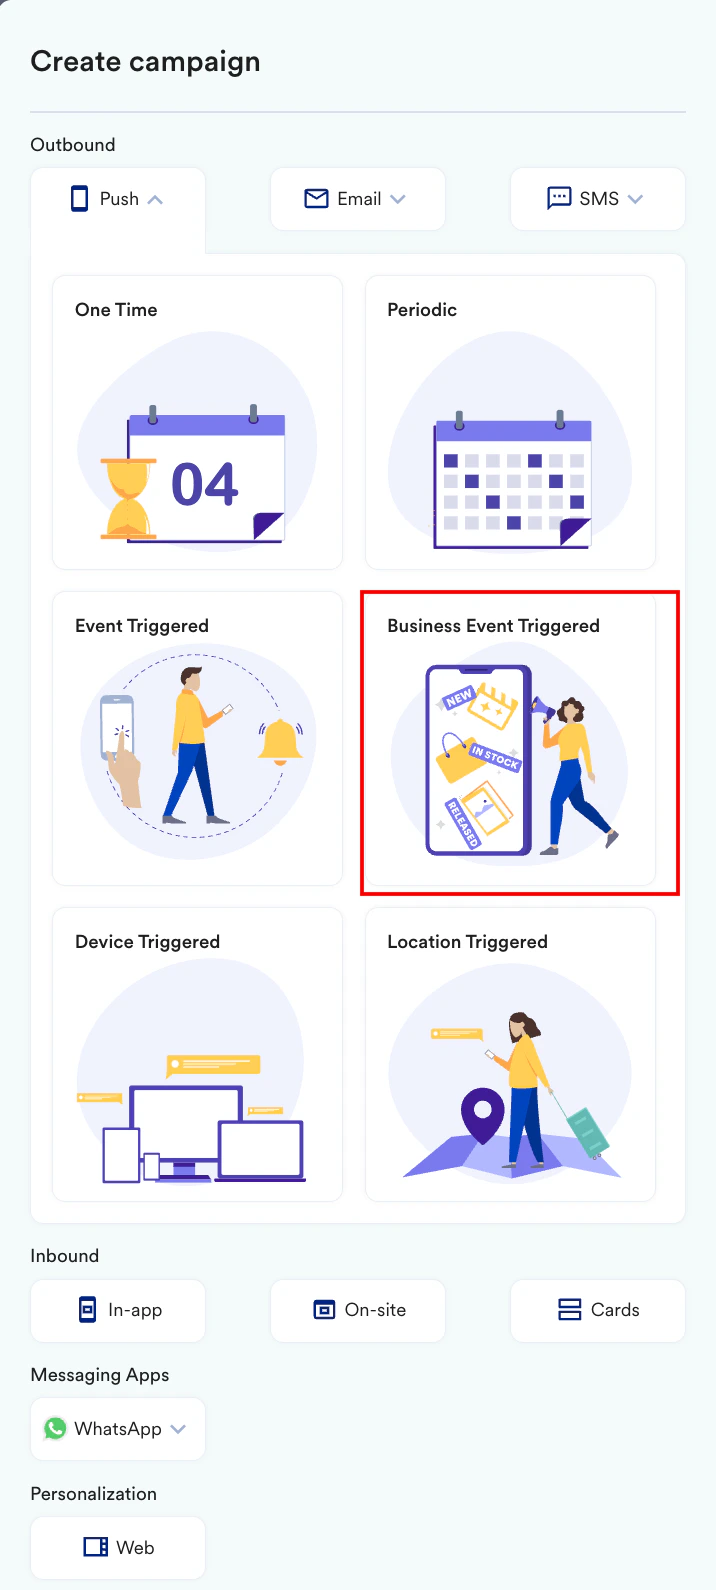
- On the All campaigns page, click + Create campaign.
- Under Outbound, click Push > Business Event Triggered.
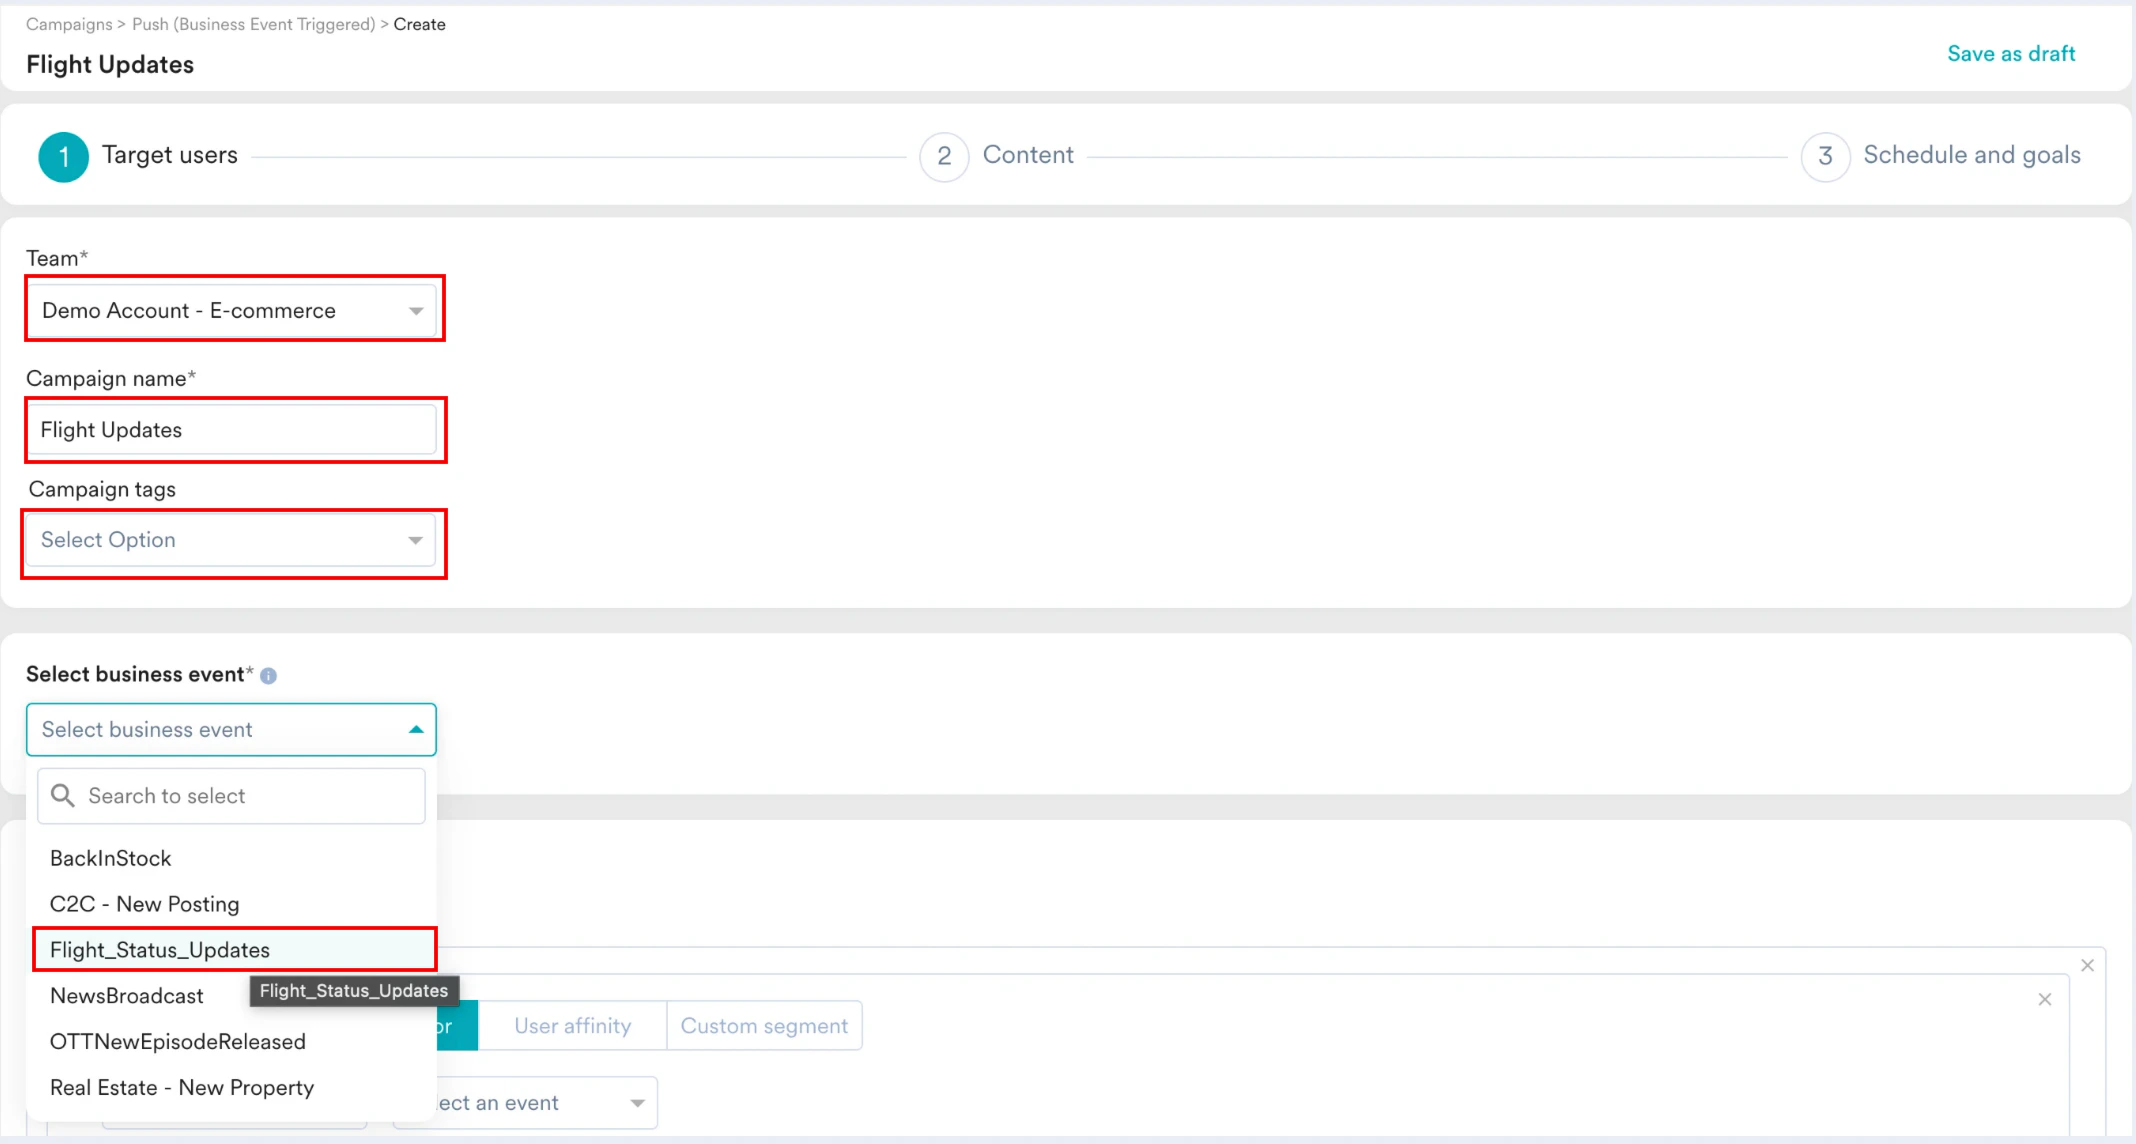
 You are taken to the first step, Target users, of defining your campaign.
 - Define your campaign with a name and tags. Enter the following details:
- Team: Select a team if your organization has teams enabled for your account. For more information, refer to Teams in MoEngage.
- Campaign name: Enter a name for the campaign. For example, Flight Updates.
- Campaign tags: Select the required campaign tags.
- In the Select business event drop-down list, select the Flight_Status_Updates event.
- In the Target audience section, define users who are related to the Business Event that would be generated alone. So, for this example, the target audience can be as shown below:
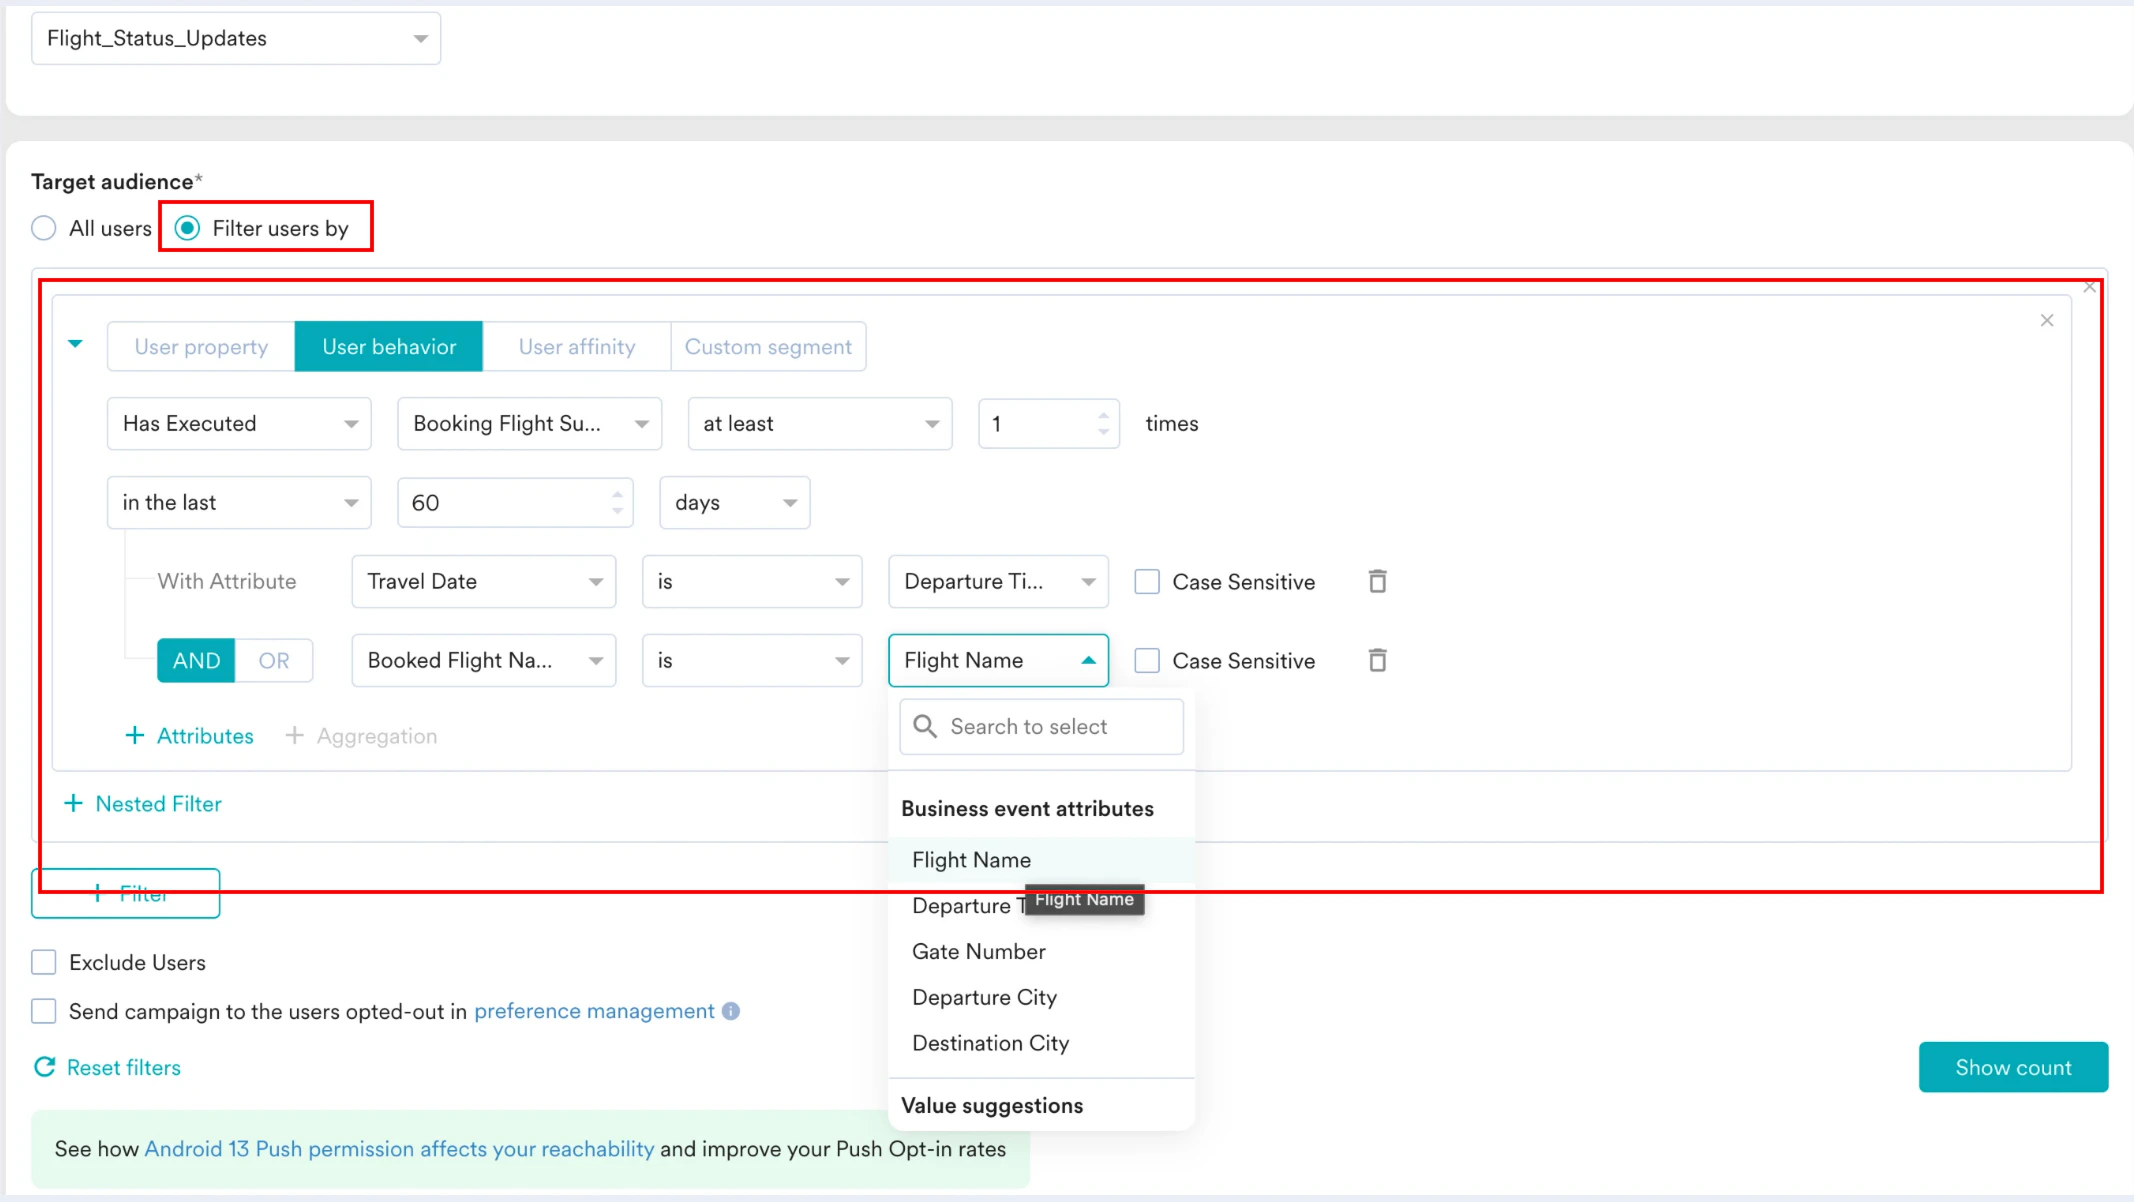 We are trying to query for the list of users who have booked a flight in the last 60 days, with their Travel Date equal to Departure Time (coming through the Business Event) and their Booked Flight name equal to Flight Name (coming through the Business Event).
 - In the Target Platforms section, select Android.

- Click Next to move to the second step, Content, where you can define the content for your Push campaign.
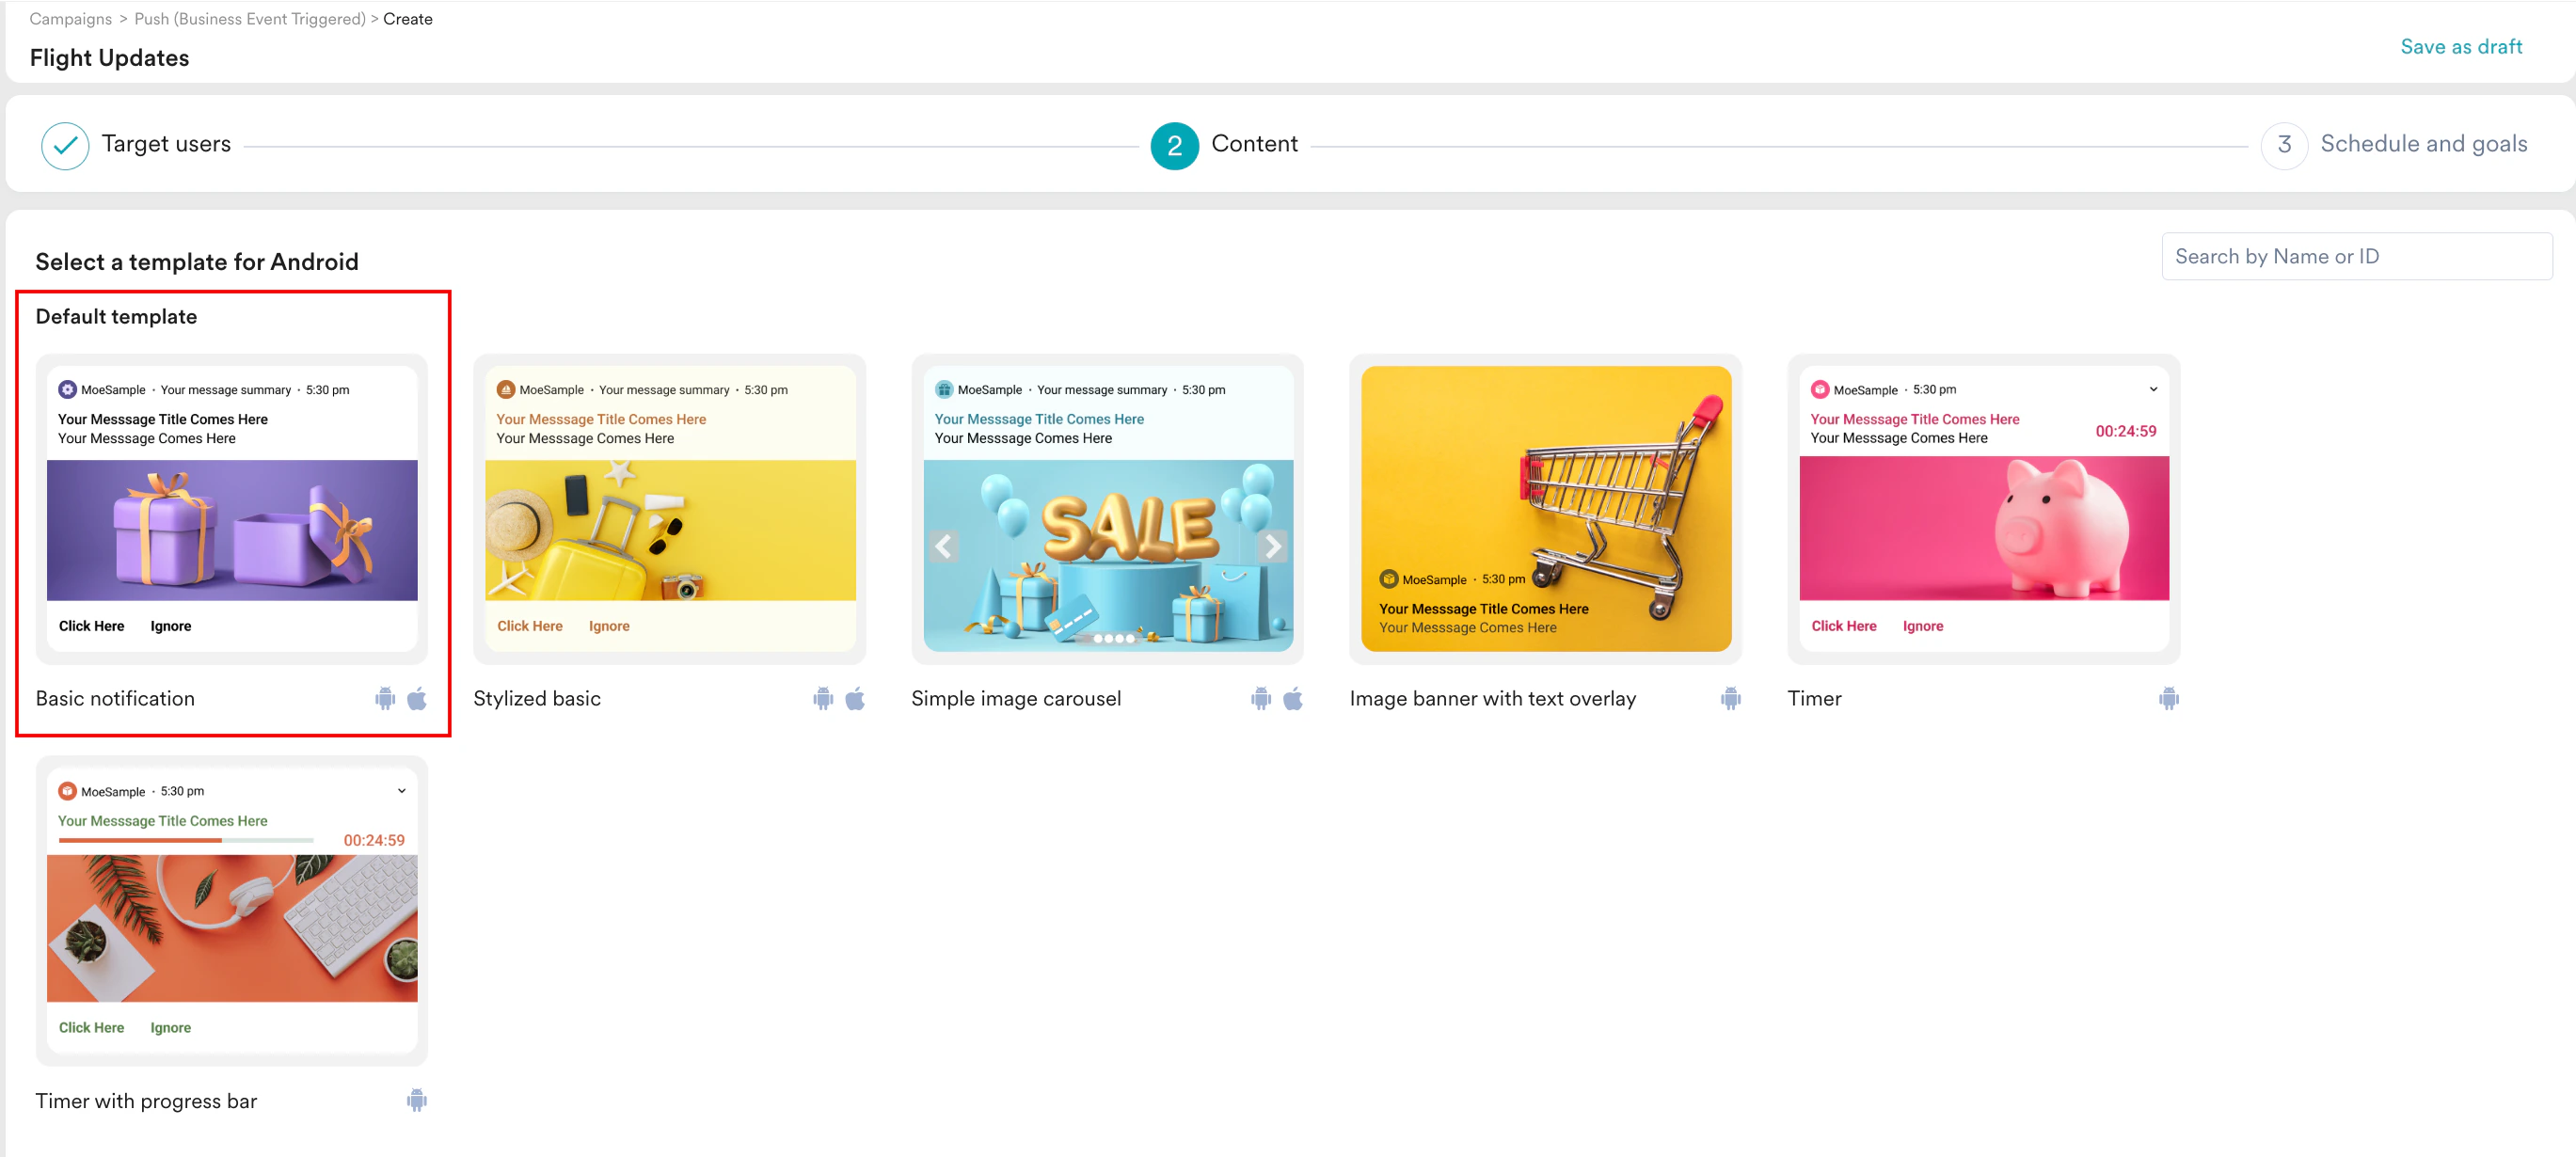
Step 2.2: Content
- Select the template that you would like to use. For example, select Basic notification.
- Enter the required content for the campaign. We can manually enter a title, message, and summary or generate it using Merlin AI. For more information, refer to Generate Push Messages with Merlin AI.
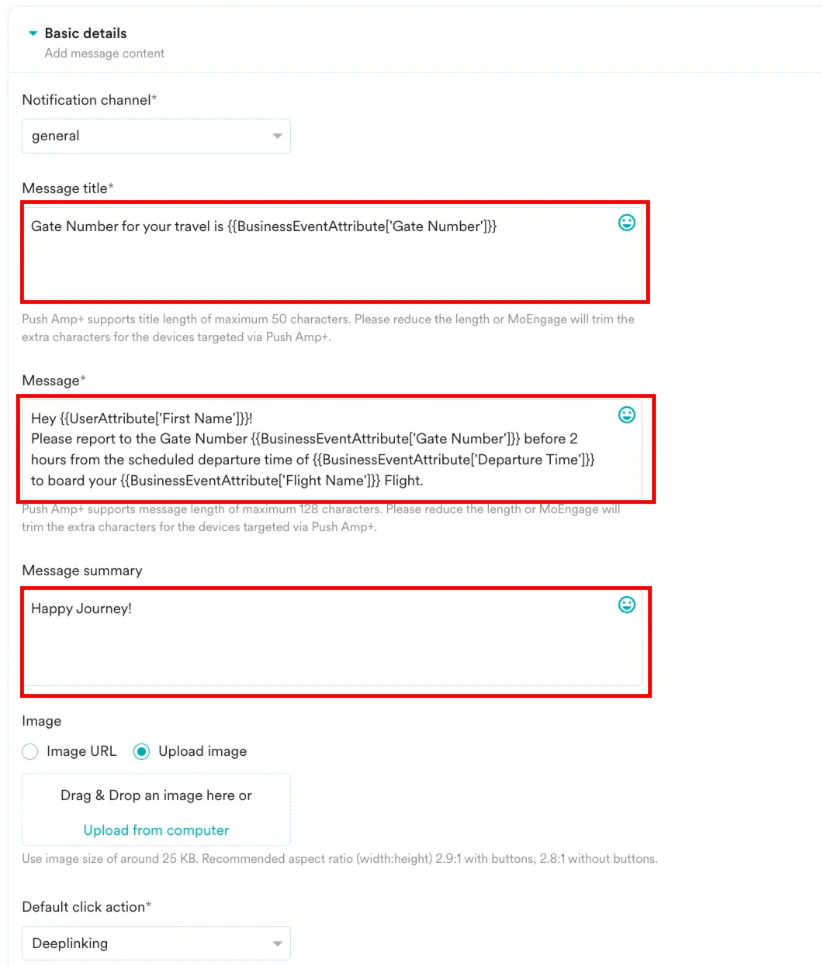
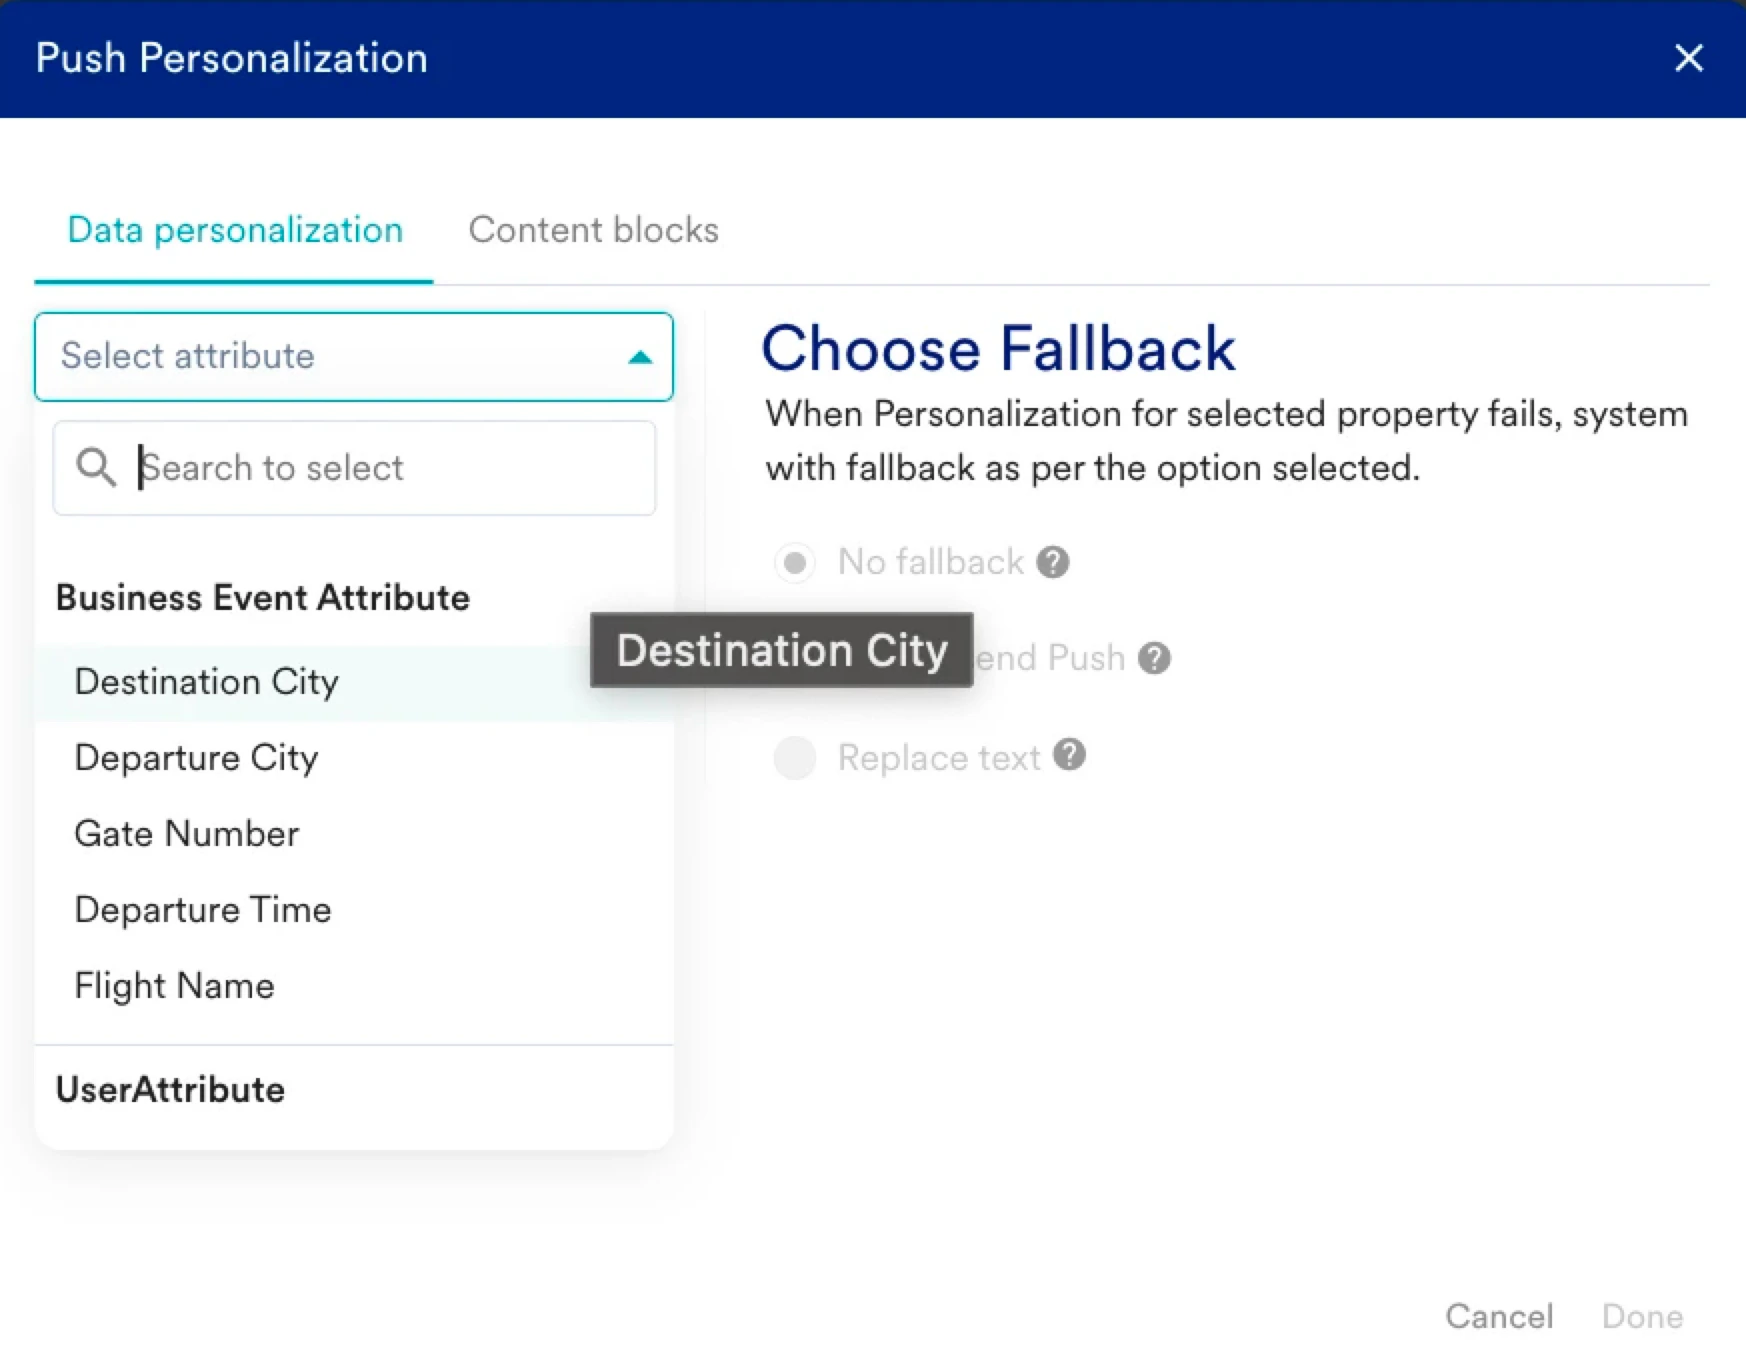
- Add personalization to the message using information such as the user’s name. Such personalization makes the message more contextual and makes the users feel connected. To do the same:
- Type @.
- On the Push Personalization dialog box, find relevant attributes from a user’s business event or user property.
- Use the deep link option to direct users to a page in your App or website where they can check their ticket details.
- In the Default click action list, select Deeplinking.
- In the URL field, mention the relevant URL.
- Click Next to move to the third step, Schedule and goals, where you can define your campaign’s schedule and goals.
Step 2.3: Schedule and Goals
- Define when to start and end this campaign and the conversion goal based on your requirements.
- Change the deliverability settings based on your requirements. For more information, refer to Create Push Campaigns.
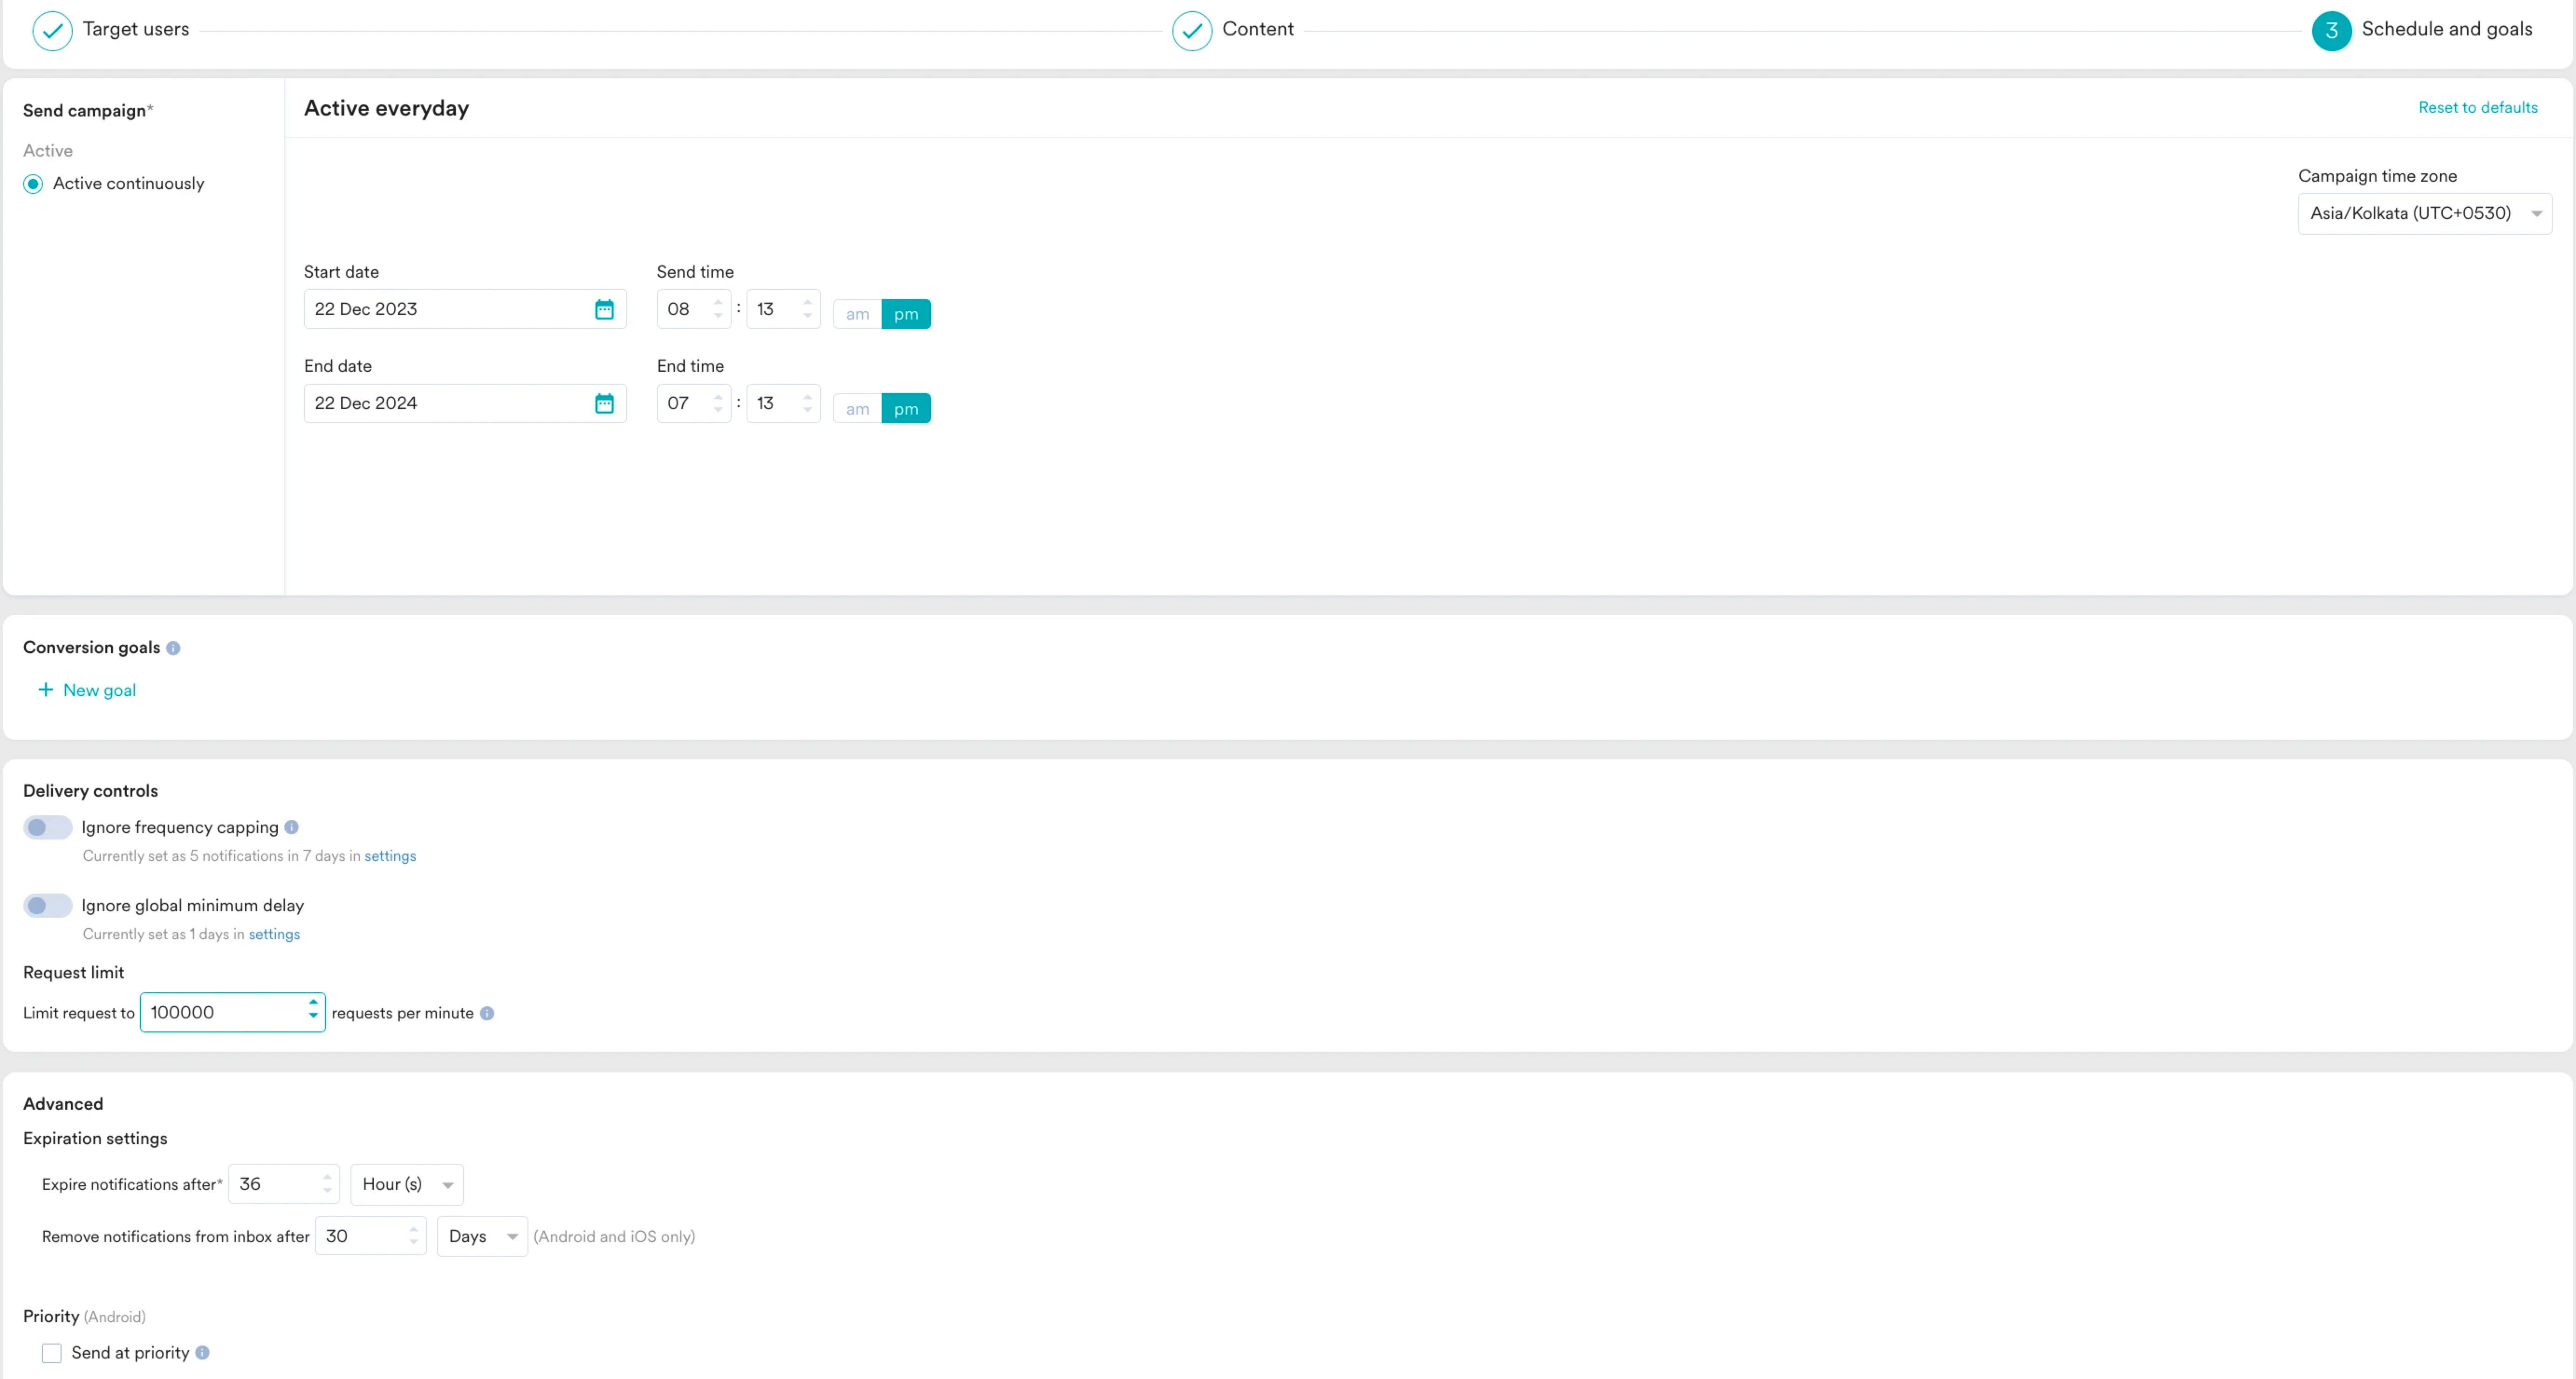
- Click Publish.