Introduction
Weather is a universal factor influencing consumer decisions, from what they wear to where they go and what they buy. Sending weather-based contextual messages is effective because weather significantly impacts consumer behavior and purchase intent. This allows marketers to deliver more relevant and personalized messages, ultimately driving higher engagement and conversions. As a marketer, you can automate the process of notifying users about weather updates. This helps you eliminate the need to manually send campaigns each time the weather changes.Advantages of sending weather-based contextual messages
- Increased relevance and personalization: By tailoring messages to current weather conditions, you can create a more personalized and relevant experience for consumers.
- Improved campaign effectiveness: By understanding how weather influences consumer behavior, you can optimize your campaigns to resonate with consumers’ needs and desires at the right time.
- Enhanced customer experience: Weather-based messaging can enhance the customer experience by providing timely and relevant information, such as weather-related discounts or product recommendations.
- Data-driven insights: Weather data provides real-time insights into consumer behavior and purchase intent, allowing you to make data-driven decisions and optimize your campaigns for maximum impact.
- Examples of weather-based messaging:
- Travel industry: Airlines can use weather targeting to promote travel to warmer destinations during cold weather or offer discounts to customers in areas experiencing inclement weather.
- Retail: Retailers can promote seasonal products or weather-related items, such as umbrellas or sunscreen, based on the current weather conditions.
- Food and beverage: Restaurants and beverage companies can use weather-based messaging to promote drinks or meals that are appropriate for the weather, such as hot drinks in cold weather or iced beverages in hot weather.
- Create a business event
- Create an Email campaign
- Trigger the campaign by triggering the business event
Expected Result
The user receives an email notification about the current weather in their city and gets some offers on products relevant to that weather condition.
Step 1: Create a Business Event
In this section, we will create a Business Event for your account, which will help create an event template to capture all the required details. We can use the MoEngage Business Event public API. After setting up the event, we can use this event format to notify whenever there are extreme weather conditions in the city. For our example, the following information is a part of the business event:- Event name: WeatherUpdate1
- Attributes of the event and their data type:
- City: string
- Current Weather: string
- Suggested tool: string
- Write the information above in the JSON format and send it to MoEngage through Postman or any other tool you choose. Refer to this Business Events API documentation for more details. JSON
- Make the API call. After the event is created successfully, MoEngage will send the following response:
- JSON
- To verify if the event was successfully added:
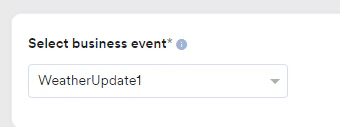
- In the MoEngage dashboard, go to a Business Event Triggered Email campaign.
- In the Select Business Event list, you can check for your event. You can see the WeatherUpdate1 event listed there.
Step 2: Create an Email Campaign
In this section, let’s create weather-based alerts through business event-triggered email notifications.Step 2.1: Target Users
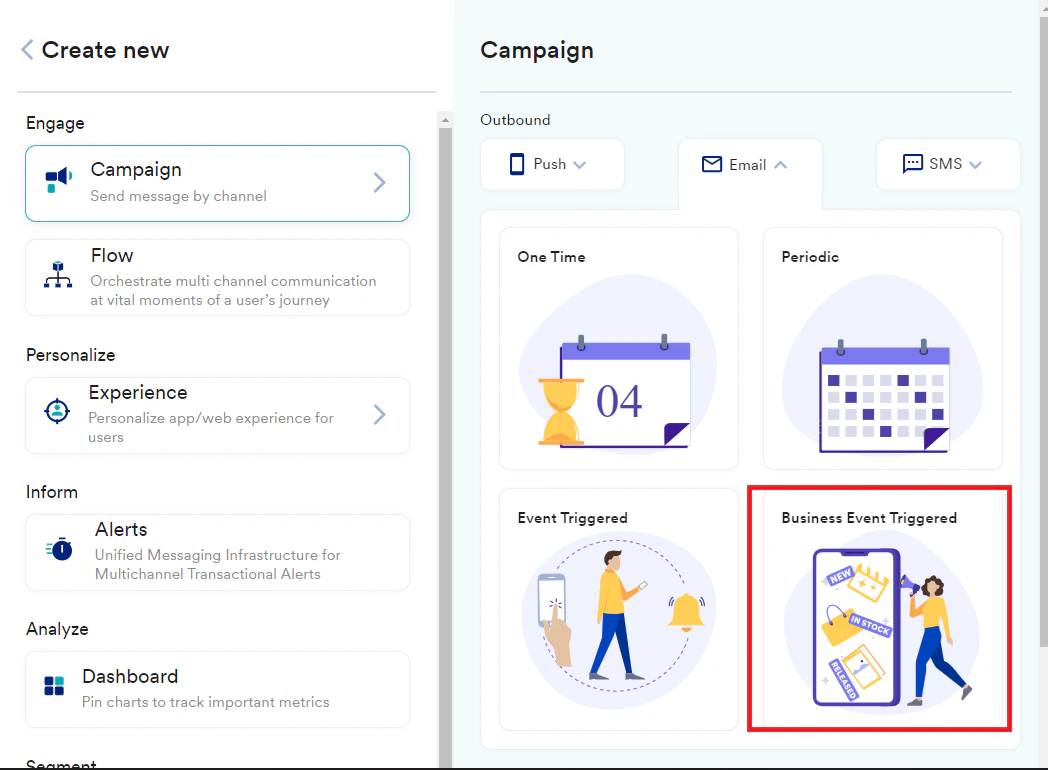
- Navigate to the sidebar on the left and click Engage > Campaigns and click + Create campaign or click + Create new > Campaign.
- Under Outbound, select Email > Business Event Triggered.
You are taken to the first step, Target users, of defining your campaign.
- Enter the following details:
- Team: Select a team if your organization has teams enabled for your account. For more information, refer to Teams in MoEngage.
- Campaign Name: Enter a name for the campaign. For example, Weather-Based Contextual Comm.
- Campaign Content Type: Select Promotional/Marketing.
- Subscription Categories: Select a category. For example, select Last_Hour_Discount. This will help you target only those users who have opted in to receive communication about a specific category.
- User attribute with email address: Select Email (Standard).
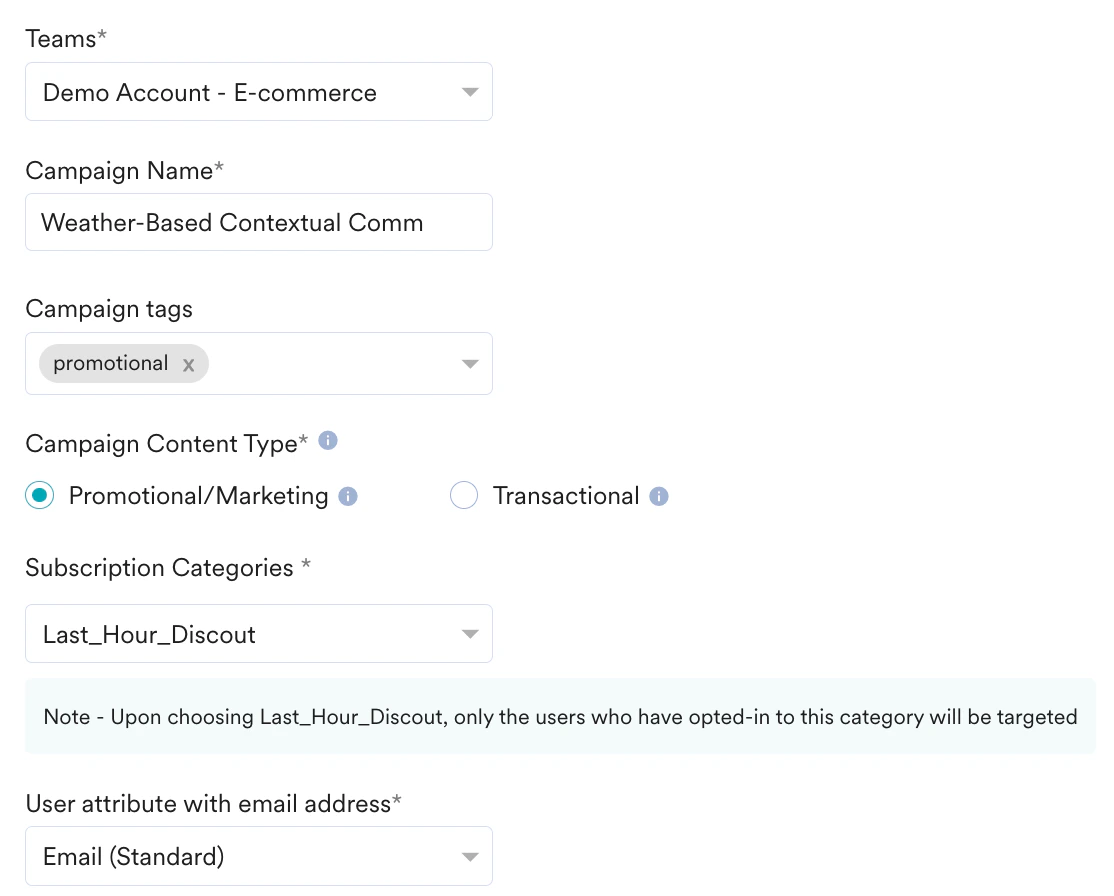
- From the Select business event list, select the WeatherUpdate1 event.

- In the Target Audience section, click the User property tab.
- Select the user attribute City and map it with the Business Event Attribute City. So whenever in the business event API, the value in the event attribute matches the same of the user’s city, all those matched users will receive the email communication.
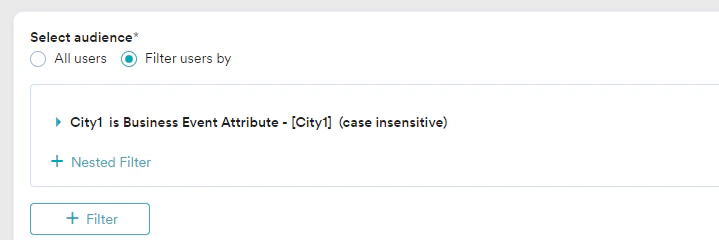
The business event attributes are now available in the drop-down lists. The event attribute City can now have a dynamic value each time the business event is triggered, with the value for City automatically substituted in the segmentation query. - Click Next to move to the second step, Content, where you can define the content for your Email campaign.
Step 2.2: Content
- Select the template that you would like to use. For our example, lets use a blank HTML template on the Custom HTML editor tab.
- Add the following details:
- Subject
- Preview Text
- Sender Name
- From email address
- Reply-to email address
- In the Template editor section, enter the content of the email message.

The content for such communications must have the values picked from the business event’s attributes, which can be done similarly to any other personalization. - Personalize the message by including information such as the user’s name. This makes the message more contextual and helps users feel more connected. To do this:
- Enter “@.” The Email Personalization pop-up will be displayed.
- Select the information from the business event or the user attributes.
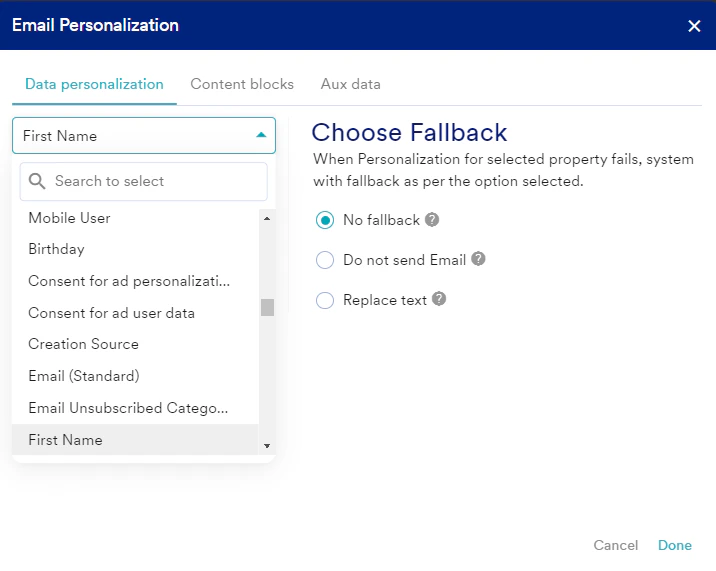
- Click Done.
- Click Next to move to the third step, Schedule and goals, where you can define your campaign’s schedule and goals.
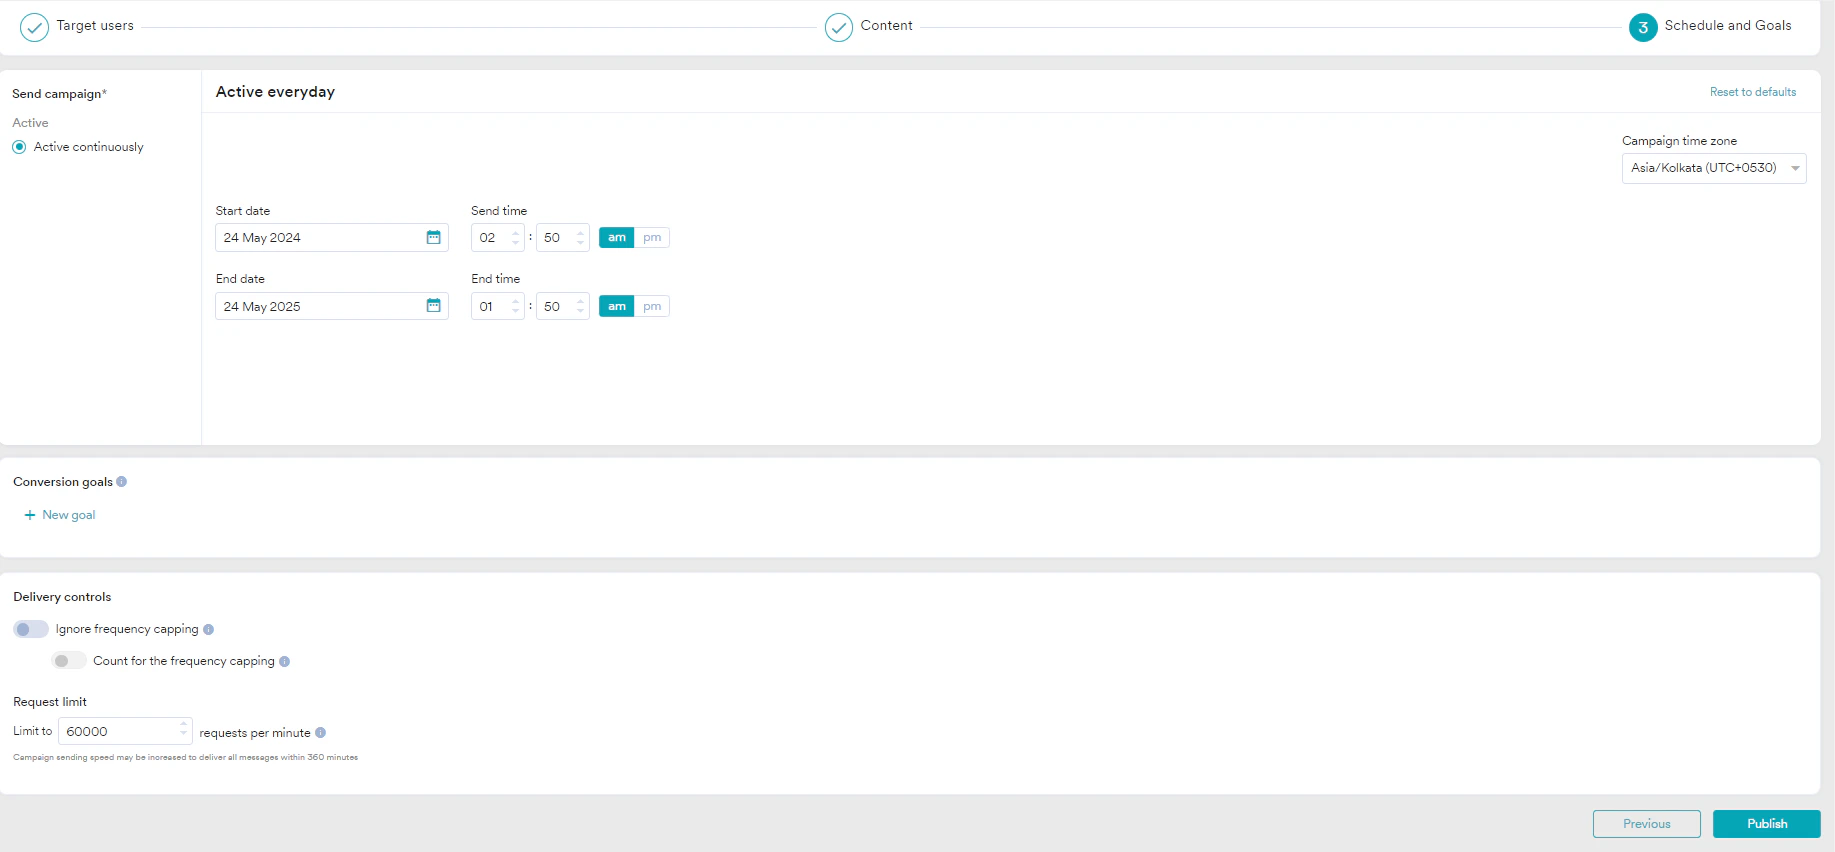
Step 2.3: Schedule and Goals
- Define when to start and end this campaign and the conversion goal based on your requirements.
- Change the deliverability settings based on your requirements. For more information, refer to Create Email Campaigns.
- Click Publish.
Step 3: Trigger Campaign by Triggering Business Events
We are now ready to start triggering the communications. When there is a weather update for the city, the campaign can be initiated using the Trigger Business Event trigger. Based on your business requirements, you can decide when to pass this event to MoEngage. Here is a payload example: JSONConclusion
In this use case, we created weather updates through email notifications. We used business events in MoEngage to achieve this. The logic for triggering this event lies on your side. For instance, whenever there is a weather update for the city, they can create a business event for it, which will be used to trigger the campaign.